

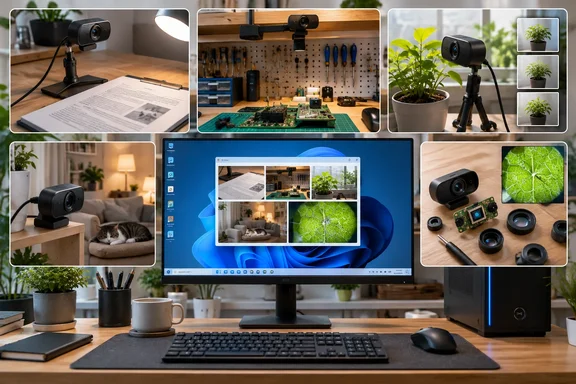
1. Document camera or quick scanner
Mount the webcam above a flat surface, put a receipt, shipping label or handwritten note under it, and capture it. Windows already has the software. Microsoft's support page is not what I'm citing here, so I'll attribute plainly: Microsoft's documentation for the Windows Camera app says it can take photos and video, scan QR codes and barcodes, and scan documents and whiteboards when a supported camera is attached.
The catch is "supported." Microsoft says that if the Document button doesn't appear in the Camera app, your camera doesn't support document scanning. The same rule applies to the Whiteboard button.
Basic procedure, per Microsoft's description:
- Plug in the webcam and open the Camera app.
- If you have more than one camera, use the Change camera icon at the top right to pick the webcam.
- Select Document on the right-hand side, if it's offered.
- Place the page so it is in focus, then select the capture button, which reads Take document.
- Open the thumbnail in the bottom right corner to review the scan. Crop or zoom as needed.
If the Document button is missing, a plain photo capture still works. You can then crop it yourself. Treat this as a convenient option, not a flatbed replacement. White says as much: it won't beat a dedicated scanner, and a phone can do the same job. Her suggestion to run OCR afterward is reasonable, but OCR isn't built into the Camera app's scanning flow as far as Microsoft's page shows. Pick a separate tool for that step.
2. Overhead workbench camera
Point the webcam straight down at your desk or bench and you get an extra angle. That helps with PC builds, soldering, crafts and anything where your main camera misses what your hands are doing.
OBS Studio is the obvious tool. Its documentation describes the Video Capture Device source as the way to add webcams and capture cards. On Windows, the device driver must support DirectShow output. OBS says all major webcams and capture cards do. To add one, you add the source, open its properties and choose the device from the Device drop-down.
The OBS properties list also includes useful settings for a cheap webcam:
- Resolution and FPS selection. If the device doesn't support your chosen values, the source shows nothing.
- A "Deactivate when not showing" option that frees resources when the source isn't in the current scene.
- A vertical flip option, which helps if you mount the camera upside down.
White's practical advice is to buy a desk lamp, because many webcams struggle with shadows and dim spaces. I'd agree. Lighting usually matters more than resolution for this job.
3. Cheap time-lapse camera
A webcam tethered to a PC doesn't have a battery to worry about. Point it at a window, a 3D printer or a plant, and save one frame every few seconds or minutes instead of hours of near-identical video.
White names FFmpeg and OBS for this. OBS can record continuously, and you speed the video up afterward. FFmpeg can capture on a schedule. FFmpeg's own device documentation covers Windows DirectShow capture and shows the command for listing devices. I could not confirm a single official interval-capture command from that page, so treat the following as a community example. A 2014 walkthrough by Luke Miller describes a Windows approach. It uses the dshow input and a low output frame rate, so 0.5 gives one image every two seconds, and 0.1 gives one every ten. Miller's example also uses a -t duration in seconds, and he warns that this is the run time, not the number of images. That detail trips people up.
A sensible workflow:
- List your devices with FFmpeg's DirectShow device listing.
- Check your camera's supported sizes and frame rates.
- Preview the image first. Miller notes you can't watch a live view while the capture runs.
- Capture numbered still images at your chosen interval.
- Assemble the stills into a video, setting the playback frame rate.
Miller's article is old and written for Windows 7 and later. Check your FFmpeg build's current options before relying on his exact flags. White's tip to lock focus and exposure, if your webcam allows it, is sound. Auto-adjustment makes time-lapses flicker. Not every webcam exposes those controls.
4. Basic monitoring camera
White recommends Agent DVR, and its vendor, iSpyConnect, confirms the basics. It supports USB cameras alongside IP and ONVIF devices and RTSP streams, and it runs on Windows 10 and later as well as macOS, Linux, Docker and Raspberry Pi 4 and up. Motion detection is among its core features.
There is a licensing detail to know. iSpyConnect says the software is free for private local use. Business use, remote access, cloud storage, push notifications and mobile apps require a subscription from $7.95 a month. That is the vendor's figure as listed on its About page, and prices can change. White's "costs exactly $0" holds for local, private use. Remote viewing may not be free.
Be realistic about the hardware. White notes that webcams have no weather resistance and no onboard storage. My own cautions, from general experience and not from any of these sources:
- If the PC sleeps or reboots, recording stops.
- Footage lives on your PC's drive, so secure it.
- Only point it at spaces you have the right to monitor.
- This is a stopgap for a desk, a shelf or a doorway inside your home. It's not a dependable security system.
5. DIY digital microscope
This is the riskiest project and White's favorite. Her description is that you open the webcam, take out the lens and reinstall it reversed. That changes the optics enough to focus on tiny objects at very close range. She warns that it doesn't work on every webcam, and that you might ruin the camera.
There is real evidence that the idea works on specific hardware. The OpenFlexure community's microscope build uses a Logitech C270 webcam. Its instructions reverse the wide-angle lens and separate it from the camera, which they say makes a decent objective. They report a field of view of about 1000 × 560 μm, comparable to a 20x objective. That build also relies on 3D-printed parts and screws recovered from the C270 teardown. It is a structured assembly, not "unscrew and flip." The instructions also tell you to work out which side of the lens used to face the sensor, and to avoid over-torquing screws.
So the lesson is mixed. The concept is sound, but your results will depend on the model, the mount and the spacing between lens and specimen. Don't expect lab-grade imaging. Pick a webcam you don't mind sacrificing.
Quick comparison
| Project | Main software | Effort | Key limitation |
|---|---|---|---|
| Document camera | Windows Camera app | Low | Document mode only appears on supported cameras |
| Workbench view | OBS Studio | Low | Image quality depends on lighting and camera |
| Time-lapse | FFmpeg or OBS | Medium | Focus and exposure control varies by webcam |
| Monitoring | Agent DVR | Medium | No weatherproofing or onboard storage; remote features need a subscription |
| Microscope | Hands and screwdrivers | High | Works on some webcams only; risk of damage |
The takeaway
None of these projects need a good camera, which is the real appeal. A mediocre webcam is fine for an overhead angle, a slow time-lapse or a doorway motion alert. Start with the document scan, since it takes a minute and tells you whether your camera supports Windows' document mode. Leave the microscope for a weekend when you have a spare camera and some patience. Keep in mind that the build instructions I found are for one specific webcam model.
References
- 5 weird things you can do with a spare webcam (aside from making video calls) How-To Geek · 2026-10-06T18:30:14+00:00
- Assembly Instructions build.openflexure.org
- About Agent DVR - iSpyConnect ispyconnect.com