

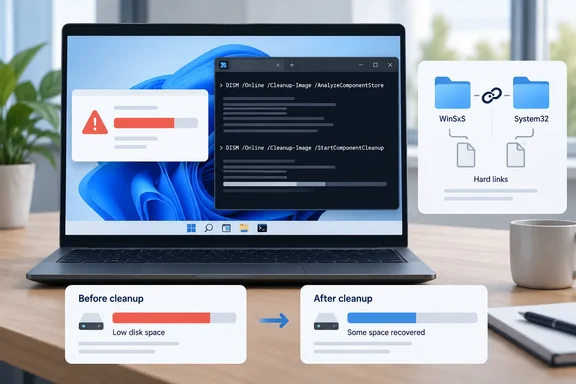
Pankil Shah, writing for MakeUseOf, says he ran a single built-in DISM command and his WinSxS component store dropped by about 10GB. That figure is his own before-and-after result. Microsoft doesn't publish an expected saving for this command. The procedure itself is real, documented and supported. Two details in the usual retellings need correcting, so here's what the command does, what it costs you, and how to tell whether it's worth running at all.
What WinSxS actually is
WinSxS is short for "Windows side-by-side." It's the Windows Component Store, and Windows uses it to service itself. Microsoft's documentation lists the jobs it supports:
- Installing new component versions through Windows Update
- Turning Windows features on and off
- Adding roles or features through Server Manager
- Moving a system between Windows editions
- Recovering from corruption or boot failures
- Uninstalling problem updates
- Running programs that use side-by-side assemblies
Microsoft says the store first appeared in Windows XP for side-by-side assemblies. Starting with Windows Vista, it was expanded to track and service every component of the operating system.
Shah describes the growth like this: updates don't simply overwrite old files, so earlier versions of components build up over time. He says the folder can easily reach 15–20GB, and his own was showing 22–24GB, close to 5% of his drive.
Section summary: WinSxS is what Windows uses to update, repair and roll itself back. Never delete it by hand. Microsoft warns that deleting files from WinSxS, or the whole folder, can leave a PC unable to boot or unable to update.
Why the folder looks bigger than it is
This is the part most "free up space" guides skip. Microsoft's short answer to "why is WinSxS so large?" is that it usually isn't as large as it looks. Size calculations count Windows binaries that are actually stored elsewhere on the system.
The reason is hard links. Many files in WinSxS are the same files you'll find in places like System32. Both locations point to the same data on disk. File Explorer doesn't account for hard links when it adds up a folder, so it counts that shared data as if it belonged to WinSxS alone.
Microsoft's own sample output makes the point. Explorer reports the store at 4.98GB. Of that, 4.38GB is shared with Windows, and the real overhead is only about 507MB. Explorer's number for your PC tells you very little about how much space you can get back. Shah notes the same caveat, which is why he checks with DISM first.
Step 1: Measure the real size
Open Windows Terminal, PowerShell or Command Prompt as administrator and run:
DISM /Online /Cleanup-Image /AnalyzeComponentStore
This only produces a report. It doesn't clean anything. Here's how to read it:
| DISM output line | What it tells you |
|---|---|
| Windows Explorer Reported Size | The inflated figure that ignores hard links |
| Actual Size of Component Store | Accounts for hard links, but still includes files shared with Windows |
| Shared with Windows | Files Windows needs to run. You can't reclaim this |
| Backups and Disabled Features | Older component versions and feature payloads (overhead) |
| Cache and Temporary Data | Servicing scratch data (overhead) |
| Number of Reclaimable Packages | Superseded packages that cleanup can remove |
| Component Store Cleanup Recommended | Whether Windows thinks cleanup will help |
According to Microsoft, you estimate the real overhead by adding Backups and Disabled Features to Cache and Temporary Data. If the report says cleanup isn't recommended and there are zero reclaimable packages, expect little or nothing back. The report also shows the date of the last completed cleanup, which tells you whether Windows' own maintenance has been running.
Step 2: Run the standard cleanup
If cleanup is recommended, run this from the same elevated window:
DISM /Online /Cleanup-Image /StartComponentCleanup
Microsoft says running this on Windows 10 or later gives similar results to the StartComponentCleanup task in Task Scheduler, except that previous versions of updated components are deleted immediately (without a 30-day grace period) and there is no 1-hour timeout.
It can take a while, so let it finish. Then run the AnalyzeComponentStore command again and compare the before and after numbers. That's how Shah measured his 10GB. As he points out, your result depends on how many updates have built up and how large they were.
A correction on rollback
MakeUseOf says the standard cleanup removes all older update files except the most recent, so you keep one version to roll back to. Microsoft's documentation doesn't promise that. It says this command deletes previous versions of updated components immediately, and it doesn't describe keeping exactly one prior version. Some third-party guides go the other way: admin365 describes it as removing components "typically those superseded more than 30 days ago", but that conflicts with Microsoft's own wording.
The safe reading is that the standard cleanup trims your rollback options. It is not the irreversible option, though. That's /ResetBase.
Step 3 (optional, and permanent): /ResetBase
DISM /Online /Cleanup-Image /StartComponentCleanup /ResetBase
MakeUseOf treats this as an "aggressive" extra step, and Shah himself doesn't recommend it. The consequence is bigger than it sounds. Once this command completes, none of your existing update packages can be uninstalled, although future update packages can still be removed. If last week's cumulative update broke your Wi-Fi driver, uninstalling it is no longer an option.
admin365 also warns that running it while Windows updates are still pending removes the ability to roll those back, so install every available update first and make sure the system is stable. A recent backup or system image is a sensible safety net before you run it.
Section summary: Run the standard cleanup if you're short on space and your current updates are behaving. Keep /ResetBase for machines that have been stable for a while, or for small VMs and images where every gigabyte counts.
The scheduled task, and why it sometimes falls behind
Windows already cleans the store on its own. The task is in Task Scheduler at Task Scheduler Library > Microsoft > Windows > Servicing > StartComponentCleanup. Microsoft documents two limits:
- When it runs automatically, it waits at least 30 days after an updated component is installed before removing older versions.
- It has a one-hour timeout, so it may not finish the job.
WindowsForum's earlier coverage noted that the task waits for long idle periods, so it can keep getting deferred on PCs that are always in use or shut down when idle. You can start it yourself from Task Scheduler by selecting it and clicking Run, or from an elevated prompt:
schtasks.exe /Run /TN "\Microsoft\Windows\Servicing\StartComponentCleanup"
Microsoft also strongly recommends not disabling component cleanup. Turning it off lets old update files pile up indefinitely.
Another supported route: Disk Cleanup
If you'd rather not use the command line, Microsoft says Disk Cleanup's update cleanup option also reduces the size of the component store. Run Disk Cleanup as administrator, choose "Clean up system files," and tick "Windows Update Cleanup."
Common sticking points
- "Access denied" or error 740: you didn't open the terminal as administrator. Right-click Terminal or PowerShell and choose "Run as administrator."
- The progress bar seems frozen: DISM often pauses at certain percentages. Give it time. Both commands can take anywhere from minutes to an hour depending on hardware and the number of updates.
- You got almost nothing back: check the analysis again. If it showed zero reclaimable packages, Windows had probably already cleaned up.
- Explorer still shows a big folder: that's the hard-link effect. Use DISM's "Actual Size" and overhead figures, not Explorer's.
Is it worth it?
Shah's own conclusion is measured. He calls the command low risk and useful when you need breathing room right away, not a magic trick. If storage isn't a problem, he says, let Windows handle WinSxS. That's sensible. Running the standard cleanup on a 1TB drive with plenty of free space mostly gives up rollback options you might want later.
On a 128GB or 256GB machine, where a feature update can fail for lack of space, this is one of the safest ways to recover gigabytes, because it uses Windows' own servicing tools instead of a third-party "cleaner." For more space, MakeUseOf also suggests disabling hibernation, System Restore and Delivery Optimization, and capping the page file. Shah says those changes freed close to 65GB on his PC. Each one has its own trade-off, though, and they're worth weighing one at a time.
In short: analyze first, clean if Windows recommends it, measure again, and only run /ResetBase once your current updates have been stable for a while.
References
- This one Windows command freed up 10GB of space I didn’t know I had MakeUseOf · 2026-10-07T10:30:15+00:00
- Clean Up WinSxS with DISM on Windows 11 admin365.blog
- Analyze and Clean Up Component Store (WinSxS folder) in Windows 11 elevenforum.com