

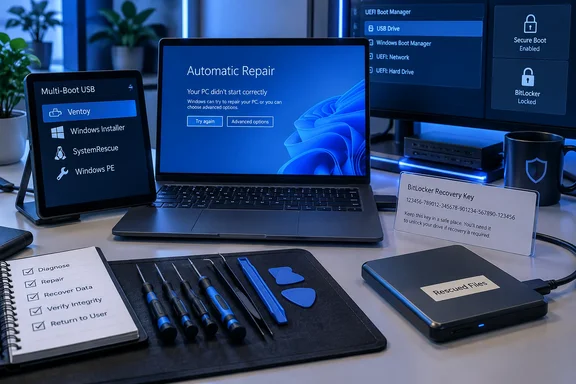
How-To Geek’s guide recommends building a multi-boot stick with Ventoy and loading it with images such as Hiren’s BootCD PE, Ubuntu, and SystemRescue. That basic approach is sound. Ventoy writes its boot components to the drive, then lets users copy compatible ISO files onto the main data partition instead of erasing and rebuilding the USB for every new tool.
Microsoft’s own recovery guidance makes clear why a generic rescue stick should sit alongside, rather than replace, Windows recovery media. Windows Recovery Environment can uninstall updates, run Startup Repair, restore a previous state, reset Windows, or reinstall it. But Microsoft’s Recovery Drive is intended for the device on which it was created, while manufacturer recovery images can include device-specific drivers and factory software absent from a generic Windows installer.
The practical conclusion is straightforward: build a multi-boot USB for access and diagnosis, keep an official Windows installer for reinstallation, and protect your data separately before attempting repairs.
The rescue USB needs a defined job
The first job is getting control of a machine that will not boot normally. A Linux live environment such as SystemRescue can mount internal disks, inspect partitions, copy data to external storage, and run filesystem or drive-focused tools. A Windows PE-based environment can be more familiar for Windows technicians and can help with driver-heavy systems, command-line work, and accessing NTFS volumes.
Microsoft describes Windows PE as a small operating system for deployment and recovery, including recovery of data from unbootable devices. It is intentionally limited, temporary, and not meant to be a desktop operating system. That is exactly the point: boot outside the damaged Windows installation so the operating system’s startup failure, broken update, or corrupted configuration is no longer preventing basic access to the disk.
A rescue USB does not guarantee access to files. On a modern Windows 11 laptop, the internal drive may be protected by BitLocker device encryption. Booting a Linux image or a Windows PE toolkit does not bypass encryption; the volume still needs the correct recovery key or valid credentials. Microsoft warns that BitLocker recovery information is sensitive and recommends managing it through trusted channels such as Microsoft Entra ID, Active Directory, or an organization’s help desk where applicable.
For a home PC, the recovery key should be recorded before trouble starts and stored separately from the computer. For an IT department, escrow and retrieval procedures matter as much as the USB itself. A technician who can boot a dead laptop but cannot unlock its encrypted SSD has diagnosed the problem, not recovered the data.
Build around Windows media, not around a bag of utilities
The most dependable image to include is the official Windows installation ISO matching the architecture and release family used in your environment. Microsoft’s download page provides Windows 11 installation media for x64 systems and separately provides Arm64 media. Those are not interchangeable. A rescue kit made only with x64 images will not reinstall Windows on an Arm-based PC.
A Windows installer is more valuable than a generic “repair everything” collection because it supplies a known route back to a supported installation. Microsoft recommends trying the least destructive recovery options first: uninstall a recent update, use System Restore, try Startup Repair, or use Reset this PC where appropriate. Reinstalling Windows from installation media is the escalation path when those measures fail—and it can erase the device depending on the route chosen.
A sensible multi-boot selection is small and deliberate:
- Keep an official Windows 11 installation image for the systems you support, plus the appropriate manufacturer recovery image when a particular laptop line depends on vendor drivers or factory provisioning.
- Keep SystemRescue for disk access, file copying, partition inspection, and storage-oriented recovery work.
- Keep one Windows PE-based support environment only if its provenance is clear and its tools solve a specific need in your workflow.
- Keep a Linux desktop ISO only if you have tested it for Wi-Fi, external storage, and display compatibility on the hardware you expect to encounter.
This is where the original “perfect rescue USB” idea becomes less universal. Hiren’s BootCD PE may be convenient for someone familiar with its Windows-like interface, but its official site describes the current PE release as a fan-developed project, not Microsoft’s recovery environment. That does not make it unusable; it means administrators should treat it as third-party recovery software, download it only from its recognized project source, and test it before making it part of a support standard.
Avoid loading password-reset or credential-bypass tools simply because they appear in a popular toolkit. On a personal device, they can complicate an already fragile recovery effort. On a work device, they can violate access-control rules, disrupt forensic evidence, and create a serious auditing problem. Restore legitimate access through the account owner, Microsoft account recovery, domain administration, or the organization’s documented recovery process.
Ventoy is convenient, but Secure Boot changes the trust model
Ventoy earns its popularity because the initial install turns a USB device into a boot menu that can launch ISO, WIM, IMG, VHD, and related image formats stored as normal files. Updating or replacing an ISO does not require rewriting the entire USB drive with Rufus or another imaging tool. That makes it practical for a rotating collection of Windows installers, rescue systems, and hardware tools.
The convenience comes with a security decision that should not be skipped. Ventoy’s own Secure Boot documentation says its default policy can permit EFI files to boot without verification after its Secure Boot mechanism is enabled. The project also documents cases where users may need to enroll a key on a target computer, and in some firmware configurations may need to enable acceptance of the Microsoft third-party UEFI certificate authority.
That is not the same as saying Ventoy is inherently unsafe. It does mean a support USB becomes a security-sensitive asset. If it is stolen, casually shared, or altered by an untrusted party, it should no longer be treated as a known-good recovery tool. A drive capable of booting arbitrary environments can be enormously useful to an administrator and enormously risky in the wrong hands.
The best practice is to preserve Secure Boot where possible, use only images obtained directly from their publishers, and test the boot process on representative hardware before an outage. Do not make “disable Secure Boot” the default answer to a boot problem. If a device will not start the rescue USB with Secure Boot enabled, confirm whether the issue is the firmware, the Ventoy configuration, or the selected image before weakening the machine’s boot protections.
Microsoft’s own Windows media remains the lowest-friction option for Windows recovery because it is designed to work with the platform’s expected UEFI and Secure Boot model. Ventoy is the flexible technician’s layer on top, not a reason to abandon the official path.
The missing half of the plan is somewhere to copy data
The weakest point in many rescue-drive guides is that they focus on booting but forget the destination for rescued files. A single USB stick used both as a boot environment and as an emergency destination is a poor plan. It may not have enough free capacity, it may fail during a large copy, and writing to it can complicate preservation of the recovery environment.
Use a separate external SSD or another known-good drive for extraction. Before changing partitions, resetting Windows, running a repair utility, or attempting a reinstall, copy the user profile’s documents and other irreplaceable data if the storage device is still readable. If the drive is failing mechanically or producing read errors, repeated exploratory scans can make the situation worse; prioritize copying essential files and consider a sector-aware imaging approach or professional recovery for valuable data.
Microsoft also makes an important distinction often lost in emergency repairs: a recovery drive does not include personal files. Neither does a Windows installer. Windows Backup, File History, OneDrive synchronization, offline backups, and organization-managed backup products exist because a rescue USB can only help with data that is still present and readable on the local drive.
A rescue device is therefore an access tool, not a backup strategy. It reduces downtime and may enable data extraction; it does not make hardware failure harmless.
Test the kit while every PC still works
The final and most important step is a rehearsal. Make the USB, then boot it on at least one UEFI Windows 11 machine with Secure Boot enabled. Confirm that the firmware boot menu sees it, Ventoy displays the images expected, the Windows installer starts, and SystemRescue can see an attached external SSD. If the kit includes network-dependent tools, verify Wi-Fi or Ethernet access as well.
Record what you tested: the PC model, whether Secure Boot stayed enabled, whether BitLocker was present, which boot-menu key worked, and which images started successfully. A printed note in the kit is often more useful during an incident than another utility ISO.
For organizations, keep the media versioned and maintained. Microsoft recommends recreating a Windows Recovery Drive periodically so it includes current improvements and updates. The same principle applies to a multi-boot kit: replace obsolete installers, remove images nobody uses, verify downloaded files where publishers provide hashes, and retire flash drives that show intermittent behavior.
The rescue USB worth carrying is not the one with the most ISO files. It is the one that has been tested on your hardware, contains legitimate media for the systems you support, and is paired with a separate backup destination and accessible BitLocker recovery information.
Update: Rescuezilla adds a practical pre-repair imaging option (September 23, 2026)
XDA Developers recommends adding Rescuezilla to a recovery USB as a GUI-based option for creating a full disk image or cloning a failing Windows drive before attempting repairs. That adds an important middle ground between copying individual files and making destructive changes: admins can preserve a restorable snapshot if storage remains readable.
According to XDA Developers, Rescuezilla images are compatible with Clonezilla, while SystemRescue’s ddrescue remains better suited to drives with read errors because it can prioritize recoverable sectors rather than repeatedly stalling on bad ones. In practice, users should image or clone to a separate external drive—not free space on the boot USB—before running repairs that write to the internal disk.
References
- How to set up a perfect “rescue USB” that can save any PC How-To Geek · 2026-09-19T19:30:13+00:00
- I built a recovery USB that can fix a Windows PC even when Windows won't boot XDA · 2026-09-23T14:30:17+00:00