

Manual RAM overclocking remains one of the few PC tuning projects that can produce measurable gains without buying new hardware, but it is also one of the easiest ways to create subtle instability if it is approached as a race for the biggest DDR5 number. The sensible goal in 2026 is not simply to turn a DDR5-6000 kit into DDR5-7200. It is to find a repeatable, error-free balance of transfer rate, timings, voltage, temperatures, and memory-controller behavior that benefits the workloads a Windows PC actually runs.
That distinction matters. DDR5 pricing has been unusually volatile, and high-quality 32GB kits are no longer the throwaway upgrade they were during earlier sale-heavy periods. A carefully validated manual tune can therefore be a practical way to extend the value of an existing kit. However, the claim that every user can extract another 5–10% of real-world performance should be treated carefully: the benefit depends heavily on the CPU, motherboard topology, memory ICs, game engine, graphics card bottleneck, and whether the system is running an AMD or Intel platform.
The safest way to overclock RAM is methodical: establish a stable XMP or EXPO baseline, alter one setting at a time, test thoroughly, and keep a written record of every change. Anything less may produce a PC that appears stable until a game crashes, a Windows update fails, a compressed archive corrupts, or a critical work file is written incorrectly.
A DDR5 memory overclock changes one or more of four variables:
Manual tuning begins after XMP or EXPO. It means deciding whether the kit can run faster than its advertised profile, whether its timings can be tightened, or whether a better latency-performance balance can be found at the same frequency.
Intel describes XMP as a preset memory-overclocking profile containing tested speed, timing, and voltage settings. AMD’s EXPO serves a similar purpose on Socket AM5 systems, with profiles intended for Ryzen memory behavior. Both are forms of overclocking, not guaranteed JEDEC operation.
That has an important practical consequence: a retail memory rating is not a universal promise. A DDR5-6000 EXPO kit may work perfectly in one AM5 PC but need BIOS updates, different training behavior, or less aggressive settings in another. The RAM modules are only one part of the memory subsystem; the CPU’s integrated memory controller and the motherboard’s trace layout matter just as much.
In some games and latency-sensitive workloads, memory tuning can improve frame consistency, 1% lows, decompression performance, and CPU-limited results. The effect is often more visible at 1080p or in simulation-heavy, strategy, esports, and open-world titles where the processor is already the limiting factor.
The gains tend to be smaller when:
For Intel systems, DDR5-6400, DDR5-7200, and higher can be realistic depending on the generation, motherboard, DIMM count, and CPU sample. But high transfer rates alone do not guarantee lower real-world latency. A slightly lower frequency with tighter timings can sometimes outperform an eye-catching MT/s result, especially in applications with frequent small memory accesses.
That does not mean enabling EXPO will damage a well-configured PC. It means users should not assume that a profile is equivalent to JEDEC stock operation or that every component maker will treat it as fully guaranteed.
Higher SoC voltage can help a difficult memory-controller overclock, but it also adds heat and can introduce risk if handled carelessly. Start with motherboard defaults or a conservative, board-vendor-recommended setting. Only adjust it if testing points to a genuine memory-controller limitation, and avoid using generic “safe voltage” figures as a substitute for your motherboard manual, CPU guidance, and temperature monitoring.
DDR5-6000 runs with a memory clock of 3000 MHz, not 6000 MHz. In many successful AM5 configurations, the memory controller clock and memory clock run in a favorable synchronized relationship while FCLK remains lower. Treat automatic fabric behavior with respect unless you fully understand the ratios exposed by your BIOS.
For best DDR5 overclocking results:
In BIOS, load the appropriate profile, save changes, and boot normally. Then verify the active memory data rate using a reliable utility such as HWiNFO64, CPU-Z, or the BIOS hardware monitor.
Windows PowerShell can provide useful module information:
Do not rely exclusively on
Run a short memory test at this stage. If XMP or EXPO itself is unstable, manual overclocking is not the next step. Update firmware, check module seating, verify DIMM slots, and troubleshoot the stock profile first.
This is especially important on AM5, where firmware revisions can substantially affect DDR5 training behavior, boot time, EXPO compatibility, and high-frequency stability. Intel boards can also benefit from memory-compatibility fixes and updated microcode.
After flashing a BIOS:
SPD-reading utilities and motherboard BIOS pages can sometimes reveal the module manufacturer and IC information. This can help when comparing settings with other users, but it should never become a reason to copy someone else’s voltages blindly.
The same SKU can change components between manufacturing runs. Silicon variance applies to DIMMs, CPUs, and motherboards alike.
For example:
After changing frequency, leave timings unchanged initially only if the BIOS permits it and the system can POST. If it fails to boot, revert to the previous speed or loosen the primary timings modestly before considering voltage changes.
A kit rated at
Use a controlled approach:
The correct rule is simple: use the lowest voltage that passes comprehensive stability testing.
Do not increase multiple rails at once. If VDD, VDDQ, and SoC voltage all rise together, a successful boot tells you almost nothing about which change helped. It also makes heat and long-term reliability harder to judge.
For a reliable process:
A 10-minute benchmark run is useful for finding obviously bad settings, but it cannot prove long-term stability. Memory errors are often intermittent, temperature-dependent, or triggered only by certain access patterns.
A stronger validation plan combines several tools:
A reasonable daily-driver target is:
If DDR5-6400 requires substantially more voltage, longer training, looser timings, and repeated recovery boots than DDR5-6200, the lower setting may be the better overclock. A stable, low-maintenance profile is more valuable than a screenshot-worthy result that occasionally corrupts a download or fails during a Windows update.
Create a simple table:
The log turns tuning into evidence rather than memory.
Use PowerShell to inspect recent entries:
Do not assume every WHEA event is caused by RAM. PCIe devices, CPU tuning, graphics hardware, and firmware can also contribute. But a clean system that begins producing WHEA warnings immediately after memory changes should be treated as unstable until proven otherwise.
The correct response is usually to revert the last adjustment, not to keep adding voltage randomly.
Modern motherboards may attempt several training cycles, then revert to safe settings. If the system remains stuck:
Temporarily disabling C-states can help isolate the cause, but it should not be treated as the permanent first fix. A properly stable daily profile should ideally survive ordinary idle behavior with normal power-management features enabled.
It becomes concerning when paired with:
The more realistic risks are:
An unstable RAM overclock can imitate almost any Windows problem: blue screens, browser tab crashes, game shader-compilation failures, driver installation errors, random reboots, or corrupted downloads. The longer a marginal profile remains in use, the more difficult the eventual diagnosis becomes.
A strong result might be:
That distinction matters. DDR5 pricing has been unusually volatile, and high-quality 32GB kits are no longer the throwaway upgrade they were during earlier sale-heavy periods. A carefully validated manual tune can therefore be a practical way to extend the value of an existing kit. However, the claim that every user can extract another 5–10% of real-world performance should be treated carefully: the benefit depends heavily on the CPU, motherboard topology, memory ICs, game engine, graphics card bottleneck, and whether the system is running an AMD or Intel platform.
The safest way to overclock RAM is methodical: establish a stable XMP or EXPO baseline, alter one setting at a time, test thoroughly, and keep a written record of every change. Anything less may produce a PC that appears stable until a game crashes, a Windows update fails, a compressed archive corrupts, or a critical work file is written incorrectly.
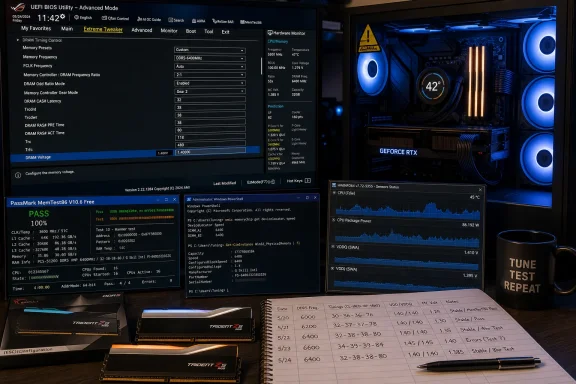 Overview: What RAM Overclocking Actually Means
A DDR5 memory overclock changes one or more of four variables:- Memory data rate, measured in MT/s, such as DDR5-6000, DDR5-6400, or DDR5-7200.
- Primary timings, commonly written as
tCL-tRCD-tRP-tRAS. - Secondary and tertiary timings, including values such as
tRFC,tREFI,tRRD,tFAW, andtWR. - Voltage, including DRAM VDD, DRAM VDDQ, and platform-side memory-controller rails.
Manual tuning begins after XMP or EXPO. It means deciding whether the kit can run faster than its advertised profile, whether its timings can be tightened, or whether a better latency-performance balance can be found at the same frequency.
Intel describes XMP as a preset memory-overclocking profile containing tested speed, timing, and voltage settings. AMD’s EXPO serves a similar purpose on Socket AM5 systems, with profiles intended for Ryzen memory behavior. Both are forms of overclocking, not guaranteed JEDEC operation.
That has an important practical consequence: a retail memory rating is not a universal promise. A DDR5-6000 EXPO kit may work perfectly in one AM5 PC but need BIOS updates, different training behavior, or less aggressive settings in another. The RAM modules are only one part of the memory subsystem; the CPU’s integrated memory controller and the motherboard’s trace layout matter just as much.
Why Manual DDR5 Tuning Still Has Value
The best reason to manually overclock RAM is not bragging rights. It is optimization.In some games and latency-sensitive workloads, memory tuning can improve frame consistency, 1% lows, decompression performance, and CPU-limited results. The effect is often more visible at 1080p or in simulation-heavy, strategy, esports, and open-world titles where the processor is already the limiting factor.
The gains tend to be smaller when:
- The GPU is fully saturated at a high resolution.
- The application is insensitive to memory latency.
- The system already uses a large CPU cache, including AMD X3D processors.
- The starting kit is already highly binned and aggressively tuned.
- The memory controller cannot hold higher clocks without switching to a less favorable ratio.
For Intel systems, DDR5-6400, DDR5-7200, and higher can be realistic depending on the generation, motherboard, DIMM count, and CPU sample. But high transfer rates alone do not guarantee lower real-world latency. A slightly lower frequency with tighter timings can sometimes outperform an eye-catching MT/s result, especially in applications with frequent small memory accesses.
Important Corrections Before Changing BIOS Settings
The popular version of RAM overclocking advice often contains a few oversimplifications. Correcting them before entering the BIOS can prevent expensive mistakes.XMP and EXPO Are Not “Free” Warranty-Safe Modes
Memory vendors validate XMP and EXPO profiles, but CPU manufacturers still classify these settings as overclocking. AMD explicitly warns that operating memory outside published specifications, including through EXPO, may void applicable product warranties and may carry risks including instability, data loss, or corruption.That does not mean enabling EXPO will damage a well-configured PC. It means users should not assume that a profile is equivalent to JEDEC stock operation or that every component maker will treat it as fully guaranteed.
There Are No “Memory Drivers” to Update
Windows does not use a conventional “memory driver” that improves DDR5 stability. The updates that matter are:- Motherboard BIOS/UEFI firmware
- AMD AGESA firmware updates
- Intel microcode and motherboard BIOS updates
- Chipset drivers
- Windows updates, where applicable
Do Not Raise SoC Voltage by Default
Older overclocking advice sometimes recommends increasing AMD SoC voltage whenever memory frequency rises. That is too blunt for modern AM5 systems.Higher SoC voltage can help a difficult memory-controller overclock, but it also adds heat and can introduce risk if handled carelessly. Start with motherboard defaults or a conservative, board-vendor-recommended setting. Only adjust it if testing points to a genuine memory-controller limitation, and avoid using generic “safe voltage” figures as a substitute for your motherboard manual, CPU guidance, and temperature monitoring.
AMD’s Key Ratio Is Not Simply FCLK Equals DDR5 Speed
On AM5, discussions of “1:1” frequently get muddled. The crucial relationship for many Ryzen systems is often UCLK:MCLK, rather than trying to force Infinity Fabric Clock to match the raw DDR5 transfer rate.DDR5-6000 runs with a memory clock of 3000 MHz, not 6000 MHz. In many successful AM5 configurations, the memory controller clock and memory clock run in a favorable synchronized relationship while FCLK remains lower. Treat automatic fabric behavior with respect unless you fully understand the ratios exposed by your BIOS.
Four DIMMs Are Harder Than Two
A 2x16GB or 2x32GB matched kit is generally easier to tune than four separate modules. More DIMMs increase electrical load, complicate training, and often reduce the frequency ceiling.For best DDR5 overclocking results:
- Use a single matched kit, bought together.
- Install two sticks in the board’s recommended slots, usually A2 and B2.
- Avoid mixing capacities, brands, speeds, or production batches.
- Check the motherboard’s memory QVL before purchasing a high-speed kit.
The 10-Step RAM Overclocking Method
The hands-on portion can fit into roughly 90 minutes if the system cooperates. Full validation does not. Stable daily-use RAM overclocking requires several hours of testing, often overnight.1. Establish a Stable XMP or EXPO Baseline
Before attempting manual tuning, enable the kit’s advertised XMP or EXPO profile and confirm that Windows can run it without errors.In BIOS, load the appropriate profile, save changes, and boot normally. Then verify the active memory data rate using a reliable utility such as HWiNFO64, CPU-Z, or the BIOS hardware monitor.
Windows PowerShell can provide useful module information:
Code:
Get-CimInstance -ClassName Win32_PhysicalMemory |
Select-Object BankLabel, Manufacturer, PartNumber, Speed, ConfiguredClockSpeed,
@{Name='CapacityGB';Expression={$_.Capacity / 1GB}} |
Format-Table -AutoSizeConfiguredClockSpeed, however. Windows Management Instrumentation can report memory data inconsistently on some systems. Confirm the result with a hardware monitoring utility.Run a short memory test at this stage. If XMP or EXPO itself is unstable, manual overclocking is not the next step. Update firmware, check module seating, verify DIMM slots, and troubleshoot the stock profile first.
2. Update BIOS and Chipset Software
Install the latest stable BIOS version from the motherboard manufacturer before beginning serious tuning.This is especially important on AM5, where firmware revisions can substantially affect DDR5 training behavior, boot time, EXPO compatibility, and high-frequency stability. Intel boards can also benefit from memory-compatibility fixes and updated microcode.
After flashing a BIOS:
- Load optimized defaults.
- Re-enable XMP or EXPO.
- Confirm the rated profile still works.
- Re-test the baseline before restoring any old manual settings.
3. Record Every Baseline Setting
Before editing memory parameters, take BIOS screenshots or write down:- Frequency
- Primary timings
- DRAM VDD
- DRAM VDDQ
- VPP
- AMD SoC or Intel memory-controller-related voltages
- UCLK, MCLK, and FCLK values where visible
- Command rate and memory training settings
- BIOS version
4. Identify the Memory Kit and ICs
The advertised kit speed does not reveal everything about its overclocking potential. Two DDR5-6000 CL30 kits may use different DRAM ICs, different PMIC behavior, or different PCB designs.SPD-reading utilities and motherboard BIOS pages can sometimes reveal the module manufacturer and IC information. This can help when comparing settings with other users, but it should never become a reason to copy someone else’s voltages blindly.
The same SKU can change components between manufacturing runs. Silicon variance applies to DIMMs, CPUs, and motherboards alike.
5. Raise Frequency One Step at a Time
Start from the stable XMP or EXPO profile, then increase memory speed by the smallest available increment. Many boards offer steps of 200 MT/s.For example:
- DDR5-6000 to DDR5-6200
- DDR5-6200 to DDR5-6400
- DDR5-6400 to DDR5-6600
After changing frequency, leave timings unchanged initially only if the BIOS permits it and the system can POST. If it fails to boot, revert to the previous speed or loosen the primary timings modestly before considering voltage changes.
6. Tune the Primary Timings
The most visible DDR5 timing group is:tCL - tRCD - tRP - tRASA kit rated at
30-38-38-96 at DDR5-6000 might require something like 32-40-40-96 or looser values when moved to DDR5-6400. There is no universal conversion table because every kit behaves differently.Use a controlled approach:
- Change one primary timing.
- Boot Windows.
- Run a quick stress test.
- Record the outcome.
- Move to the next value only after the previous change is understood.
7. Adjust Voltages Conservatively
DDR5 exposes several voltage settings, but not all should be treated equally.- VDD supplies core DRAM operating voltage.
- VDDQ affects memory I/O signaling.
- VPP is usually best left at its default setting for ordinary daily overclocking.
- SoC, VDDIO_MEM, VCCSA, or related settings affect the CPU-side memory controller depending on platform.
The correct rule is simple: use the lowest voltage that passes comprehensive stability testing.
Do not increase multiple rails at once. If VDD, VDDQ, and SoC voltage all rise together, a successful boot tells you almost nothing about which change helped. It also makes heat and long-term reliability harder to judge.
8. Tune Secondary Timings Only After the Core Profile Is Stable
Secondary timing adjustments can deliver meaningful improvements, but they are not beginner-friendly. Values such astRFC, tREFI, tRRD_S, tRRD_L, tFAW, and tWR can affect latency and bandwidth without changing the headline frequency.tRFC is often one of the most significant settings because it governs refresh recovery behavior. Tightening it too aggressively may not crash Windows immediately. Instead, it can cause rare errors after long gaming sessions, idle periods, or memory-heavy file operations.For a reliable process:
- Stabilize frequency first.
- Stabilize primary timings second.
- Tune one secondary timing at a time.
- Run at least a focused test after every change.
- Return to the previous known-good setting at the first sign of errors.
9. Run Real Stability Tests, Not Just a Quick Benchmark
A successful Windows boot is not a successful RAM overclock.A 10-minute benchmark run is useful for finding obviously bad settings, but it cannot prove long-term stability. Memory errors are often intermittent, temperature-dependent, or triggered only by certain access patterns.
A stronger validation plan combines several tools:
- TestMem5 with a demanding configuration for quick error discovery.
- OCCT or Karhu RAM Test for extended Windows-based stress testing.
- MemTest86 from a bootable USB drive for standalone, operating-system-independent testing.
- A few hours of normal workloads, including games, compression, rendering, or compilation.
A reasonable daily-driver target is:
- A clean short test after each BIOS change.
- Several hours of extended stress testing once a candidate profile is found.
- At least one full standalone MemTest86 pass.
- No crashes, no application errors, and no correctable hardware errors during normal use.
10. Log Results and Stop at the Stable Sweet Spot
The final step is the one enthusiasts often skip: knowing when to stop.If DDR5-6400 requires substantially more voltage, longer training, looser timings, and repeated recovery boots than DDR5-6200, the lower setting may be the better overclock. A stable, low-maintenance profile is more valuable than a screenshot-worthy result that occasionally corrupts a download or fails during a Windows update.
Create a simple table:
| Frequency | Timings | VDD/VDDQ | Controller Voltage | Test Result | Notes |
|---|---|---|---|---|---|
| DDR5-6000 | 30-38-38-96 | 1.35V | Auto | Pass | EXPO baseline |
| DDR5-6200 | 30-38-38-96 | 1.36V | Auto | Pass | Stable quick test |
| DDR5-6400 | 32-40-40-96 | 1.40V | Adjusted | Pass | Needs overnight validation |
| DDR5-6600 | 34-42-42-100 | 1.42V | Adjusted | Fail | WHEA errors |
Monitoring Windows for Hidden Instability
Windows can sometimes record warning signs before a blue screen appears. The Windows Hardware Error Architecture, or WHEA, may log corrected hardware errors linked to marginal CPU, memory-controller, or RAM behavior.Use PowerShell to inspect recent entries:
Code:
Get-WinEvent -FilterHashtable @{
 LogName='System'
 ProviderName='Microsoft-Windows-WHEA-Logger'
} -MaxEvents 20 |
Select-Object TimeCreated, Id, Message |
Format-ListThe correct response is usually to revert the last adjustment, not to keep adding voltage randomly.
Common RAM Overclocking Failures
The PC Will Not POST
A failed POST usually means frequency or timings are too aggressive.Modern motherboards may attempt several training cycles, then revert to safe settings. If the system remains stuck:
- Shut down the PC.
- Use the motherboard’s Clear CMOS button, jumper, or battery-removal method.
- Boot with default settings.
- Restore the saved baseline profile.
- Retry with one less aggressive change.
Windows Boots but Games Crash
Game crashes can expose instability that synthetic tests miss. If a game consistently crashes after memory tuning:- Check Windows Event Viewer and WHEA logs.
- Run a standalone MemTest86 pass.
- Loosen
tRFCor the primary timings slightly. - Revert the last voltage adjustment.
- Test the GPU and CPU separately before blaming memory alone.
The System Is Stable Under Load but Reboots While Idle
Idle crashes may involve aggressive timings, unstable voltage transitions, CPU C-states, or motherboard power-saving behavior.Temporarily disabling C-states can help isolate the cause, but it should not be treated as the permanent first fix. A properly stable daily profile should ideally survive ordinary idle behavior with normal power-management features enabled.
Boot Times Become Much Longer
DDR5 memory training can take longer after frequency or timing changes, particularly on AM5. A slower cold boot is not automatically a problem.It becomes concerning when paired with:
- Multiple failed training attempts
- Automatic BIOS recovery
- Inconsistent boot success
- Lost BIOS settings
- Windows instability
The Risks That Matter More Than Hardware Damage
The popular question is whether RAM overclocking will “kill” a memory kit. With moderate settings, adequate airflow, and careful voltage control, sudden module failure is not the main risk.The more realistic risks are:
- Silent data corruption
- Application crashes
- Broken archives or installers
- Game instability
- Failed Windows updates
- File-system errors after hard resets
- Time lost troubleshooting unrelated symptoms
An unstable RAM overclock can imitate almost any Windows problem: blue screens, browser tab crashes, game shader-compilation failures, driver installation errors, random reboots, or corrupted downloads. The longer a marginal profile remains in use, the more difficult the eventual diagnosis becomes.
The Best Daily DDR5 Overclock Is Usually Not the Maximum One
For most Windows enthusiasts, the best manual RAM overclock is not the highest frequency their motherboard can POST. It is the profile that offers a meaningful improvement over XMP or EXPO while retaining fast boots, reasonable thermals, low voltage, and repeatable stability.A strong result might be:
- DDR5-6000 with tighter timings than the kit’s EXPO profile.
- DDR5-6200 or DDR5-6400 with modest timing relaxation.
- A lower-frequency profile with improved latency and better real-world frame consistency.
- A profile that remains stable after BIOS updates, cold boots, sleep cycles, Windows updates, and long gaming sessions.
References
- Primary source: tech-insider.org
Published: 2026-07-23T16:17:25+00:00
How to Overclock RAM: 10 Steps, 90 Min [2026]
How to overclock RAM in 2026: BIOS steps, timings, and voltages for DDR5/DDR4, beyond XMP and EXPO, plus stability testing and troubleshooting.tech-insider.org - Referenced source: amd.com
AMD EXPO™ Technology for AMD Ryzen™ Processors for Socket AM5
AMD Extended Profiles for Overclocking (AMD EXPO™) allows user-friendly memory-overclocking support, and accelerated power to achieve best gaming performance.www.amd.com - Referenced source: memtest86.com
PassMark MemTest86 - Memory Diagnostic Tool - Technical Information
MemTest86 is a memory test for x86 and ARM computers.www.memtest86.com