Use Windows 10/11 Steps Recorder to Capture Click-by-Click Proof for IT Support
Difficulty: Beginner | Time Required: 10 minutesWhen something breaks on your PC, describing it to IT support can be frustrating: “I clicked the thing, then it errored…” isn’t very helpful. Fortunately, Windows includes a built-in tool called Steps Recorder (also known by its old name Problem Steps Recorder,
psr.exe) that can record your clicks and keystroke actions step-by-step, take automatic screenshots, and package everything into a single file you can send to support.This is perfect for capturing reproducible proof of an issue—without installing extra software or recording a full video.
What it captures: Clicks, basic typed input context, window titles, and screenshots of each step.
What it does not capture: Full-motion video, mouse movement trails, or secure fields like passwords.
Prerequisites
Quick walkthrough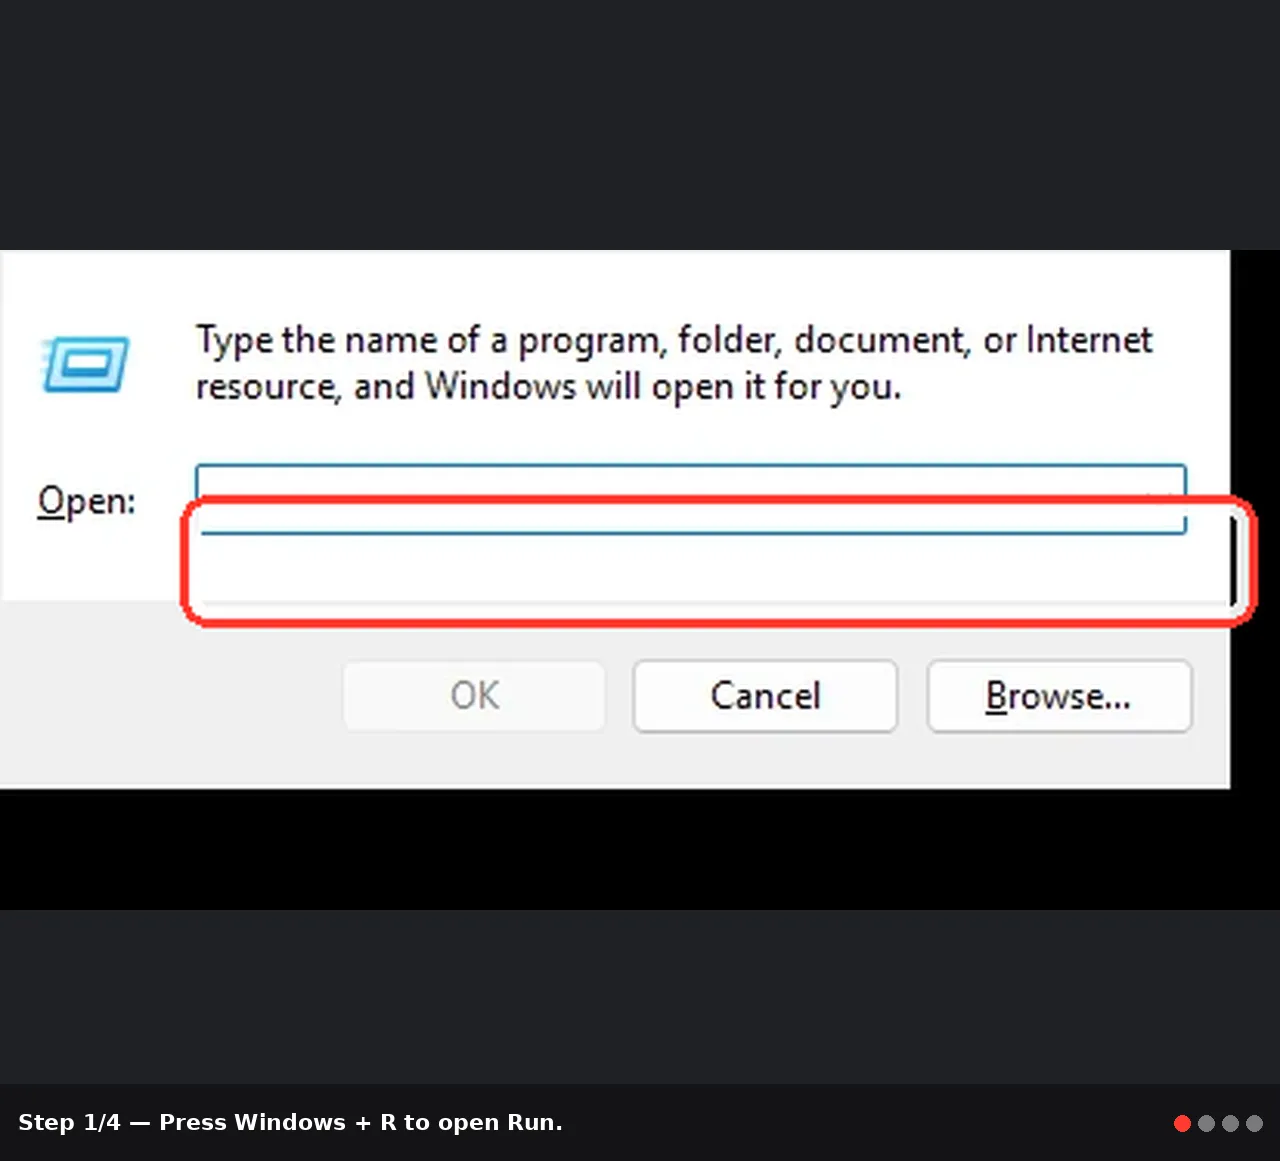
- A Windows 10 or Windows 11 PC
- Permission to run built-in Windows tools (standard user is usually fine)
- A safe place to save the recording (Desktop/Documents)
- A way to share the file with IT (email, ticket portal upload, OneDrive, etc.)
Windows version note: Steps Recorder exists in Windows 10 and Windows 11, but on some Windows 11 builds it may be less visible in Search. You can always launch it by runningpsr.
Step-by-step: Record the problem with Steps Recorder
1) Open Steps Recorder
- Press Windows + R to open Run.
- Type
psr. - Press Enter.
Alternatively:
- Press Start and search for Steps Recorder or Problem Steps Recorder (availability varies by Windows 11 version/build).
2) (Recommended) Configure settings before you record
- In the Steps Recorder bar, click the down arrow (or Help ▾) to expand options.
- Click Settings.
- Output location:
Choose a folder if you want it to always prompt/save to a specific place. Leaving it blank will prompt you at the end. - Enable screen capture: Yes (recommended)
This is what makes the report so useful for IT. - Number of recent screen captures to store:
Default is often 25. If your issue takes more steps, set it to 50 or 100. - Click OK.
Tip: If you expect a longer workflow, increase the capture limit first. Otherwise, the earliest steps may be dropped once the maximum is reached.
3) Start recording
- Click Start Record.
- Reproduce the problem exactly as it happens:
- Click the same buttons/menus
- Open the same app
- Follow the same order
Warning (privacy): Steps Recorder may capture sensitive info displayed on screen (email content, customer data, internal URLs, etc.). Close unrelated windows first and avoid opening confidential items unless necessary.
4) Add helpful notes during recording (highly recommended)
If something important happens that a screenshot won’t fully explain (e.g., “the window freezes for 30 seconds”), add a note:- Click Add Comment on the Steps Recorder bar.
- Your screen will dim and a highlight box appears.
- Drag to select the area you want to reference.
- Type a clear note, such as:
- “After clicking Sign in, nothing happens for ~20 seconds”
- “This error appears only on Wi‑Fi, not Ethernet”
- Click OK to continue recording.
Tip: Use comments to capture context IT will ask for anyway: exact timing, what you expected, and what happened instead.
5) Stop recording and save the report
- When the issue has been reproduced, click Stop Record.
- Steps Recorder will open a preview window showing the steps.
- Click Save.
- Choose a location (Desktop is fine) and name the file something descriptive, for example:
Outlook_Search_Error_Feb2026.zip - Click Save.
Note: If you click the dropdown next to Save, some versions allow Save As options. The most common output is still a ZIP containing the report.
6) Send it to IT support (the right way)
- Attach/upload the saved .zip file to your IT ticket or email.
- In the message, include:
- Your Windows version (Windows 10/11, and if possible the build)
- The name/version of the app involved
- Whether it happens every time or intermittently
- Any recent changes (updates, new VPN, password reset, new printer, etc.)
- Press Windows + R
- Type
winver - Press Enter
- Copy the version/build info into your ticket
Tips, best practices, and troubleshooting
Tips for better “proof” recordings
- Close clutter first: Shut down unrelated apps/windows to avoid capturing irrelevant or sensitive info.
- Be deliberate: Pause briefly after each click so screenshots clearly show the result.
- Use comments strategically: Especially for delays, missing buttons, or “nothing happens” moments.
- Reproduce once cleanly: A short, clean recording is easier for IT than a long, messy one.
Common issues and fixes
“I can’t find Steps Recorder in Windows 11 Search.”
- Use Windows + R →
psr→ Enter. This works on most systems where the tool is present.
“It didn’t capture all my steps.”
- Increase the Number of recent screen captures in Settings (e.g., 50–100).
- Keep the session focused and restart recording if you go off track.
“I’m worried it captured private data.”
- Review before sending:
- After you click Stop Record, scroll through the preview.
- If you see something sensitive, don’t send it.
- Record again after closing/redacting sensitive items (or contact IT and explain you need a secure method).
Warning: Don’t open password managers, MFA prompts, HR/payroll pages, or customer records while recording unless your organization explicitly approves it.
“My password got recorded!”
- Steps Recorder typically avoids recording typed content in secure fields, but it can still capture what’s visible on screen (like an account name or a partially revealed field). Always review the report before sharing.
“IT says they can’t open the file.”
- Confirm you sent the .zip produced by Steps Recorder (not a screenshot of the preview).
- Ask them to extract the ZIP and open the included .mht/.mhtml file in Microsoft Edge/Internet Explorer-mode (if required by policy) or another compatible viewer.
Conclusion: Why Steps Recorder is worth using
Steps Recorder is one of the fastest ways to give IT support exactly what they need: reproducible steps, screenshots, and your notes—packaged in one file. It saves time on back-and-forth messages, reduces misunderstandings, and often leads to a quicker fix.Key Takeaways:
- Steps Recorder (
psr) is a built-in Windows 10/11 tool for click-by-click documentation with screenshots. - Use Settings to increase the capture limit and keep screenshots enabled.
- Add Comments to explain delays, expectations, and unusual behavior.
- Always review the report for sensitive information before sending it to IT.
This tutorial was generated to help WindowsForum.com users get the most out of their Windows experience.
Last edited: