
The important correction is that this is not a general-purpose backup and it is not a guaranteed lift-and-shift of every old PC. A physical-to-virtual conversion preserves the disk contents and much of the installed state; it does not preserve the original motherboard, firmware, GPU, peripherals, drivers, activation state, or security posture. Treat the result as a recoverable historical workstation—useful for accessing an old program or retrieving its settings—not as a seamless replacement for the retired machine.
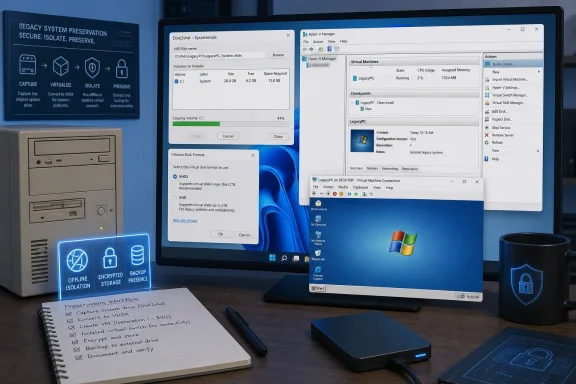 Disk2vhd captures a disk state, not the PC itself
Microsoft’s Sysinternals documentation confirms the core of MakeUseOf’s method: Disk2vhd uses Windows’ Volume Snapshot capability to create a consistent, point-in-time copy while Windows remains online. It also preserves disk partition information and creates a virtual disk for each physical disk containing the selected volumes. That is why selecting only C: can be a mistake on modern UEFI PCs: the EFI System Partition and Windows Recovery partition may be on the same source disk and may be needed for a bootable result.
Disk2vhd’s live-capture capability makes it appealing for a one-off migration, but it does not remove the usual rules of imaging. The VHD or VHDX should be written to a different physical disk whenever possible. Microsoft says the tool can write to a volume that is itself being converted, but performance is better on another disk—and a capture stored on the disk that fails is not much of a preservation plan.
The other critical limitation is BitLocker. Microsoft explicitly says Disk2vhd does not convert volumes with BitLocker enabled. The MakeUseOf advice to decrypt first is correct, but it has a consequence worth spelling out: decrypting an old system drive creates a period in which the disk’s contents are no longer protected at rest. If the machine contains company documents, browser profiles, saved credentials, or regulated data, make the capture to secured storage and re-enable encryption only after deciding whether the original hardware will be retained, wiped, or decommissioned.
There is a less obvious trap in Microsoft’s Disk2vhd documentation. Do not attach the newly created virtual disk in Disk Management on the same Windows installation it came from if the plan is to boot it later. Windows can change the virtual disk’s signature to avoid a collision with the physical source disk, while the captured installation’s Boot Configuration Data still points to the old signature. The result can be a virtual machine that cannot find its own boot disk. Copy the image to the new PC first, then connect it to Hyper-V there.
Hyper-V makes this a compatibility project
MakeUseOf correctly identifies Hyper-V as the cleanest built-in option for Windows Pro, Enterprise, and Education users. Microsoft’s current Hyper-V documentation lists those editions for Windows 11; Windows Home does not include the full Hyper-V feature set and management experience described in the guide. Hardware virtualization also has to be enabled, and Hyper-V requires Second Level Address Translation on modern Windows hosts.
The choice between a Generation 1 and Generation 2 virtual machine is not a cosmetic setting. Generation 1 emulates legacy BIOS booting, while Generation 2 uses UEFI firmware. A VHDX made from an older BIOS-based Windows installation should normally be placed in a Generation 1 VM; a UEFI/GPT installation belongs in Generation 2. Selecting the wrong generation produces the familiar failure mode of a perfectly intact disk image that simply will not start.
Secure Boot is another point where the source overstates the need to disable protection. Microsoft documents Secure Boot support for supported Windows guests running in Generation 2 VMs. A captured Windows install may have startup trouble for several reasons, including its generation, boot layout, or age, but the first sensible configuration is the Microsoft Windows Secure Boot template—not disabling Secure Boot by default. Turn it off only as a troubleshooting step after confirming the guest was originally a UEFI installation and still will not boot under the Windows template.
The first boot should also be handled as an experiment, not a permanent production launch. The guest Windows installation will detect a new set of virtual devices, attempt to load drivers, and may ask for activation because its hardware identity has materially changed. That can be especially significant for installations that originally came with an OEM Windows license, as well as for paid applications bound to the old motherboard, MAC address, USB license dongle, or graphics hardware.
A cautious first run should be isolated from ordinary work. Before connecting an old Windows image to the internet, check its patch level and whether it contains unsupported software. The old system may have years of saved passwords, browser cookies, VPN profiles, mapped shares, and auto-login applications. Hyper-V’s Default Switch is convenient, but it also gives the preserved machine network access. For a legacy image that only needs to open a program or export settings, start without a network adapter; attach one temporarily only if an activation or software component truly requires it.
Preserve the configuration before trying to modernize it
The strongest reason to keep an old PC alive in a VM is not nostalgia. It is the ability to inspect a working configuration while rebuilding on supported hardware. That changes how the virtual machine should be used.
Rather than immediately running an old installation as a daily driver, use it to inventory what is there:
- Export application preferences, address books, templates, custom dictionaries, macros, plugins, and license information while the original configuration is still readable.
- Record mapped drives, printer ports, local database paths, scheduled tasks, service accounts, and unusual environment variables that a clean installation may not reproduce.
- Copy user data out separately after scanning it, rather than treating the VHDX as the only copy of important files.
- Take a Hyper-V checkpoint before testing an untrusted installer, changing a driver, or reconnecting the guest to a network.
This approach also avoids a common failure of PC replacement projects: preserving the old environment becomes an excuse never to migrate. The VM should function as a reference machine. If a legacy application still works, document exactly what it needs and determine whether it can be reinstalled cleanly. If it cannot, the virtualized copy may be the least disruptive short-term answer, but it deserves restricted access and a documented recovery path.
Disk images should also be backed up like any other important artifact. A VHDX is a single large file, and keeping only one copy on the new PC’s internal SSD recreates the same single point of failure that prompted the migration. Store a powered-off master copy separately, then run a working copy in Hyper-V. That preserves an unchanged fallback if a guest update, malware incident, software test, or accidental deletion damages the active VM.
Native VHDX boot is the advanced route, not the default
MakeUseOf presents native boot as a way to get full performance from the old system by adding the VHDX to the new PC’s boot menu. Microsoft does support native boot from VHDX files on supported Windows configurations, but its own deployment guidance frames the feature around managed images and designated hardware—not as an effortless remedy for an arbitrary captured desktop.
Native boot also has limitations omitted by the simplified pitch. Microsoft says hibernation is not supported for a natively booted VHDX, VHDX files cannot be nested inside another VHDX, and native boot is not supported from an SMB share. More importantly, BitLocker cannot encrypt either the host volume containing a natively booted VHDX or volumes inside that VHD. Those restrictions make native boot a poor fit for a portable, encrypted laptop or an environment with ordinary endpoint-security requirements.
There is also no virtualization safety net. Hyper-V presents a defined virtual hardware set and keeps the old OS contained inside the host operating system. Native boot hands the captured Windows installation direct control over the new computer’s hardware. Old storage drivers, obsolete hardware tools, aggressive endpoint software, and software licensing checks are more likely to matter there. If the practical goal is opening a legacy application occasionally, a VM is the lower-risk and easier-to-reverse option.
The sensible outcome is to capture the old installation before selling, wiping, or retiring the original PC; validate that the VHDX boots on the replacement machine; then keep the virtual copy offline or tightly restricted until needed. Done that way, Disk2vhd and Hyper-V preserve something more valuable than an old Windows desktop: the evidence needed to rebuild, migrate, or safely retire the software that was quietly doing the work.