
Microsoft’s current Windows 10 and Windows 11 sharing guidance groups Network discovery, File and printer sharing, and several discovery services together. Microsoft Learn’s SMB documentation adds an important qualification: modern Windows-to-Windows sharing uses SMB2 or SMB3, while SMB1 is deprecated and disabled or absent by default. Start with the checks below in order, and test the share directly rather than relying only on the Network view in File Explorer.
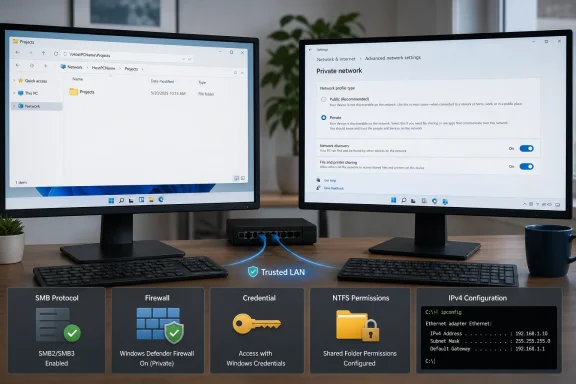 Confirm the share and isolate discovery from access
On the PC that hosts the folder—the SMB server in Microsoft’s terminology—confirm that the folder is actually shared. Right-click the folder, select Properties, open the Sharing tab, then choose Advanced Sharing. The folder needs Share this folder selected, and the share name shown here is the name another PC must use.
From the other PC, open File Explorer and enter the direct path in the address bar:
\\HostPCName\ShareName
For example:
\\DESKTOP-ARCHIVE\Projects
If the hostname path fails, try the host PC’s IPv4 address:
\\192.168.1.25\Projects
You can find the address on the host by opening Command Prompt and running:
ipconfig
Look for the IPv4 Address under the active Wi-Fi or Ethernet adapter.
This is the fastest useful split in the diagnosis. If \\192.168.1.25\Projects opens but \\HostPCName\Projects does not, SMB sharing and folder permissions are probably working; name resolution or network discovery is the problem. If neither direct path opens, concentrate on connectivity, firewall rules, credentials, and permissions. If the share opens directly but the host does not appear under Network in File Explorer, do not rebuild the share—fix discovery only.
Also verify that both devices are connected to the same local network. A PC on a guest Wi-Fi SSID, a VPN, a mobile hotspot, or a router network with client isolation enabled can reach the internet while being deliberately blocked from other local devices.
Set the active network to Private and enable discovery
Windows applies different sharing behavior to Private and Public network profiles. A Public profile is appropriate for airports, hotels, cafés, and other untrusted networks; it is the wrong profile for a trusted home LAN or an internal office segment where these PCs should share files.
On each PC, open Settings > Network & internet, select the active Wi-Fi or Ethernet connection, and set Network profile type to Private. Do this only on a network you trust. Marking a public network as Private makes the device more visible to other systems on that network.
Next, search Start for Manage advanced sharing settings. Under Private networks, enable:
- Network discovery
- File and printer sharing
Microsoft Support recommends these same settings when File Explorer reports that network discovery is turned off. The controls should be enabled on the host PC, and usually on the client PC as well if you want both machines to appear under File Explorer’s Network section.
If the settings appear correct but the host still never shows up in Network, check the services that publish and discover Windows devices. Press Win + R, run services.msc, and ensure these services are running with a startup type of Automatic:
- Function Discovery Provider Host
- Function Discovery Resource Publication
- SSDP Discovery
- UPnP Device Host
The most important one for a Windows PC hosting shares is Function Discovery Resource Publication. Without it, the share may remain reachable through \\HostPCName\ShareName or an IP address but may not advertise itself reliably in File Explorer.
Discovery is a convenience layer, not proof that sharing is broken. Direct UNC access is the better test.
Check both layers of folder permissions
A shared folder has two separate permission gates:
- Share permissions, configured on the Sharing tab.
- NTFS permissions, configured on the Security tab.
Windows applies the more restrictive effective result. Giving an account Full Control in the share permissions does not override a Security-tab rule that allows only Read. Conversely, broad NTFS permissions do not help if the share itself excludes the user.
For a controlled home or small-office setup, create a local account on the host PC for the person or device that needs access, assign it a password, then grant that account only the needed permissions. On the host, use Properties > Sharing > Advanced Sharing > Permissions to add the account, then repeat the access assignment under Properties > Security.
Use Read when the remote user only needs to open or copy files. Use Change at the share level and Modify at the Security level when the user must create, rename, edit, or delete files. Avoid granting Everyone: Full Control merely to test the connection, then forgetting to remove it. Microsoft’s older troubleshooting instructions include Everyone as a diagnostic shortcut, but it is a poor permanent configuration for any network where unknown or untrusted devices may connect.
Do not try to access C$, ADMIN$, or another administrative share as a workaround. Microsoft documents that Windows intentionally restricts remote local-account access to administrative shares in workgroup scenarios. Create an ordinary, explicitly permissioned share instead.
Remove stale credentials and authenticate to the host
A shared-folder error that says “Access is denied,” repeatedly prompts for a password, or authenticates with the wrong user often has nothing to do with permissions. Windows may be automatically submitting a stored credential from an earlier attempt.
On the client PC, search for Credential Manager, open it, and select Windows Credentials. Microsoft Support documents this location as the place to view and remove saved credentials for networks and connected resources. Look for entries matching the host computer name, its IP address, or the share path, and remove stale entries.
Then reconnect to:
\\HostPCName\ShareName
When Windows prompts for a user name, use an account that exists on the host PC. For a local account, enter it in this format:
HostPCName\UserName
For example:
DESKTOP-ARCHIVE\alex
Use the password for that host-side account, not necessarily the PIN or Microsoft account credential used to unlock the client PC. A Windows Hello PIN is local to the device and is not automatically a network-share password.
Password-protected sharing should generally remain enabled. Disabling it can be useful as a very short diagnostic test on an isolated, trusted network, but it trades authenticated access for guest-style behavior. That trade has become less viable on newer Windows 11 builds.
Allow SMB through Microsoft Defender Firewall without disabling the firewall
The firewall check belongs on the host PC, because that is where inbound SMB connections arrive. Microsoft Learn identifies TCP port 445 as the key modern SMB port; older NetBIOS-based sharing can also involve ports 137 through 139. The practical fix is to enable Windows’ built-in sharing rules for the Private profile, not to disable Microsoft Defender Firewall globally or open arbitrary ports to every network.
Search Start for Windows Defender Firewall with Advanced Security and open it. Select Inbound Rules, then locate rules in the File and Printer Sharing group. Enable the relevant SMB inbound rule for the Private profile. On current Windows 11 versions, you may also see a File and Printer Sharing (Restrictive) group, which reflects Microsoft’s newer default firewall behavior.
If another security suite, endpoint agent, router firewall, or VPN product is installed, its filtering can still block SMB even when the Windows rule is enabled. Temporarily disconnecting a VPN is a reasonable test; permanently exposing TCP 445 to the internet is not. SMB shares should stay inside the LAN, protected by the Windows firewall and a trusted network profile.
A quick connectivity test from the client can confirm whether the host is accepting SMB connections:
Test-NetConnection -ComputerName HostPCName -Port 445
A successful TCP test means the client can reach the host’s SMB listener. It does not prove that the account has permission to open the folder. A failure points back to the host’s firewall, network isolation, the host being offline, or a non-SMB networking problem.
Do not “fix” a modern Windows share by enabling SMB1
Microsoft’s Windows Client troubleshooting page still lists SMB1 client support as a possible compatibility step for an inaccessible share. But Microsoft’s more recent SMB security guidance is clearer: SMB1 is deprecated, is no longer installed by default, and should not be the first answer for a Windows 10-to-Windows 11 or Windows 11-to-Windows 11 share.
For two reasonably current Windows PCs, SMB2 or SMB3 should work without SMB1. Enable SMB1 only if you have identified a specific legacy NAS, printer, media box, or older operating system that supports only SMB1—and replace or update that device where possible. Enabling an obsolete protocol broadens the attack surface of every device that can reach it.
Windows 11 version 24H2 also made SMB signing mandatory by default for connections, and Microsoft documents tighter default firewall behavior that no longer includes legacy NetBIOS ports in the standard sharing rules. Those changes can expose old guest-only file servers that previously appeared to work. The proper fix is to configure authenticated SMB2/SMB3 access on the older device, not to weaken the Windows PCs by disabling signing or relying on unauthenticated guest access.
Once \\HostPCName\ShareName opens reliably, map it as a drive from This PC > More > Map network drive and select Reconnect at sign-in. That creates a stable shortcut, but it should be the last step: a mapped drive will only preserve the same discovery, firewall, credential, or permission failure that prevented the UNC path from opening in the first place.