

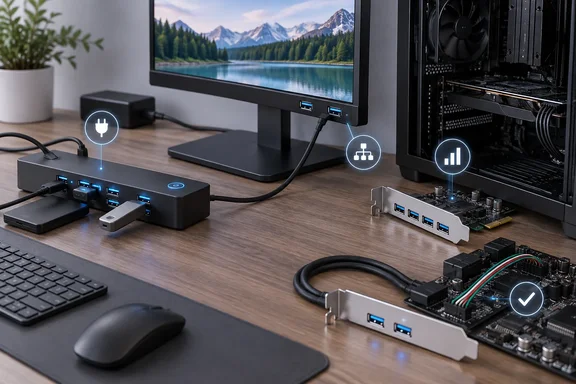
How-To Geek’s September 22 guide outlines these four approaches. Its most useful observation is that a hub’s advertised speed applies to the connection back to the computer, rather than becoming a separate allowance for every socket. That makes the buying decision more specific than finding the accessory with the largest port count.
Start by identifying the constraint: too few connectors, inconvenient connector placement, or insufficient capability for the devices you want to attach. Those problems can look identical from behind a crowded desktop, but they lead to different solutions.
An external USB hub solves the simplest port shortage
An external USB hub is the straightforward option when your desktop already supports the devices you want to use but lacks enough accessible sockets. It connects to an existing USB port and provides additional ports for peripherals. There is no need to open the computer, find an expansion slot, or establish whether the motherboard has spare internal connectors.
The trade-off is a shared connection. In How-To Geek’s example, a 10-port hub has a 10Gbps connection to the PC. Attaching several devices does not turn that into ten independent 10Gbps paths: their traffic must pass through the same upstream link. Here, upstream means the connection from the hub toward the computer; downstream ports are the sockets serving your peripherals.
That arrangement suits the workload Patrick Campanale describes in How-To Geek: a Stream Deck, keyboard, mouse, speakers, printer, and similar accessories. Those are different demands from using a hub primarily for simultaneous large file transfers. A hub can accommodate both kinds of device, but counting connectors alone does not establish whether it meets the combined workload.
Power is a separate choice. How-To Geek recommends an externally powered hub for a desktop because it can support a wider range of devices than relying solely on power from the computer’s USB connection. That is a sensible starting point for a stationary setup, where an additional power adapter is less troublesome than it would be in a laptop bag. It does not establish the power available from every port, however.
Nor should “powered” be read as “supports USB Power Delivery.” The example hub listed by How-To Geek includes a power supply but is explicitly listed without USB-C Power Delivery. The useful lesson is to check data speed and charging capability separately rather than treating a USB-C socket or bundled adapter as proof of both. The product example is not a basis for a broader performance recommendation.
Before choosing a hub, separate three requirements:
- Count the devices that need to remain connected, rather than buying solely for the largest advertised port count.
- Identify which devices will transfer substantial amounts of data at the same time.
- Establish whether you need ordinary peripheral power or a specifically documented charging capability.
For an ordinary collection of desk peripherals, a powered hub is usually the least disruptive route. For a storage-heavy workload, its upstream speed deserves at least as much attention as the number of sockets.
A monitor’s USB hub can put existing ports where you need them
Before buying anything, check whether your monitor already includes a USB hub. How-To Geek describes these ports as ordinary hub connections built into the display, rather than a separate, inherently inferior class of USB. Their immediate advantage is placement: the monitor may be much easier to reach than the back of a tower.
The essential requirement is a USB data connection between the monitor and computer. A working picture does not, by itself, establish that the monitor’s USB ports are connected. As How-To Geek explains, you need the monitor’s upstream USB connection, or a supported USB-C arrangement that carries both video and USB data.
The exact cable arrangement is model-dependent. The evidence does not establish one universal connector or setup sequence for every monitor, so it would be misleading to prescribe one. What you need to establish is specific: which connector is the monitor’s upstream USB connection, whether a separate data cable is required, and whether its USB-C video connection also provides the data path.
Once connected, the monitor can provide a convenient home for a keyboard, mouse, webcam, or other desk accessories. Campanale also notes that placing wireless receivers at the monitor can shorten their distance from the peripherals. Treat that as a placement opportunity, not a guaranteed reception improvement.
Because this is still a hub, moving a device to the monitor does not give it an independent connection to the computer. How-To Geek recommends using these sockets primarily for desk peripherals rather than data-heavy equipment. That is a useful default, but it is not evidence that every monitor hub is unsuitable for storage: the relevant limitation is the particular monitor’s USB connection, whose speed the guide does not establish.
The practical order is therefore simple: confirm that the monitor actually has downstream USB ports, establish its upstream data connection, and use it for devices whose needs fit that connection. If it already provides the sockets you need, an additional external hub may be unnecessary.
A PCIe USB card requires a compatibility decision before a purchase
A PCIe expansion card offers a more substantial hardware change. Instead of connecting another hub to an existing external USB port, it installs in a compatible expansion slot on the motherboard. Pocket-lint independently describes PCIe cards as a way to add USB-A, USB-C, or a mixture of connections to a desktop.
This is the option to investigate when the required ports cannot be supplied conveniently by an external hub or the computer’s existing internal USB connections. It also brings more prerequisites. You need a compatible, available slot and room for the card, rather than merely an empty USB socket on the outside of the case.
How-To Geek illustrates the range with cards offering different mixes of external and internal ports. The meaningful distinction is placement as well as quantity: an internal USB socket does not provide the same everyday convenience as an accessible rear socket. A card’s total port count can therefore overstate how many additional places it gives you to plug in desk accessories.
The guide also describes a USB4 card offering two 40Gbps ports and two DisplayPort 1.4 inputs, while warning that it needs a compatible motherboard. That qualification belongs at the start of the buying decision. The availability of a USB4 add-in card does not establish that any desktop with a spare PCIe slot can accept it.
The exact USB4 card model and its motherboard support requirements are not established in the supplied product description. Consequently, the reported specifications are an example of what expansion cards can offer, not a verified upgrade path for a particular PC. A useful compatibility match must identify the card and motherboard together; matching only the desired USB speed is insufficient.
For a PCIe purchase, establish the card’s required slot, supported operating system, additional power requirements, and any motherboard-specific prerequisites before committing. Those details vary by model, so there is no safe universal installation or driver procedure here. If the seller’s description gives you only a port count and a speed, it has not yet answered the compatibility question.
Motherboard USB headers expose capacity your case may leave unused
A desktop’s external sockets do not necessarily represent every USB connection its motherboard provides. Internal USB headers are connectors on the board that can be routed to ports elsewhere in the case. If a suitable header is unused, an adapter can make that existing capability accessible.
How-To Geek describes two arrangements. One keeps the additional USB connections inside the chassis. The other puts sockets on a rear expansion-slot bracket, with a cable running from that bracket to the motherboard’s USB header.
The rear bracket deserves a careful distinction: occupying an expansion opening does not make an adapter a PCIe card. In the header-based arrangement, the USB connection comes through the cable attached to the motherboard header. The bracket supplies a mounting position at the back of the case.
This is why a header adapter can be an economical alternative to a dedicated card. It exposes a connection the motherboard already supplies rather than requiring the same kind of expansion hardware as a PCIe USB card. How-To Geek reports that these adapters are often cheaper, although it provides no price comparison that would justify a specific savings claim.
The resulting capability depends on the header. The guide identifies unused USB 2.0 connections as useful for peripherals such as mice, printers, and speakers. It also describes using a compatible USB 3.2 Gen 2x2 header and adapter to expose a 20Gbps USB-C port. That higher-speed example is conditional: finding an unused internal connector does not establish that it supplies that speed.
Before selecting an adapter, establish that the header is unused, identify its documented USB capability, and decide whether the resulting socket belongs inside the chassis or outside it. Do not assume your motherboard has a spare header merely because another desktop does. If all suitable headers already serve case ports or internal devices, this route does not provide free additional capacity without changing an existing connection.
Windows power management is not a reason to disable selective suspend
Adding USB hardware and troubleshooting unreliable USB hardware are related tasks, but they should not be confused. A port shortage is a clear reason to expand connectivity. A device that stops responding after idle is a different symptom and does not, on its own, establish that more ports will solve it.
Microsoft’s USB selective suspend documentation provides an important boundary for Windows troubleshooting. Selective suspend allows the hub driver to suspend an individual port without affecting the other ports on the same hub. An idle device entering a lower-power state is therefore part of the intended design, not evidence that the whole hub has failed.
Microsoft also states that selective suspend is enabled by default and strongly recommends against disabling it. Its documentation explains that the mechanism helps reduce power consumption and allows the wider system to enter lower-power states.
That primary documentation does not establish a blanket Device Manager fix for a newly connected hub, monitor, expansion card, or header adapter. Nor does it prove that a particular disconnect is caused by selective suspend. Keep the diagnosis attached to the actual symptom rather than changing Windows power settings as a routine part of adding ports.
For a new connection, first establish the hardware prerequisites described above: a monitor needs its upstream data path, a header adapter needs the correct unused header, and a PCIe card needs a supported installation. Windows settings cannot substitute for those connections.
Choose USB expansion by the device you need to connect
Use an existing monitor hub or an external hub when the immediate goal is connecting ordinary desk peripherals; investigate internal expansion when you need a capability those options cannot provide. This keeps the amount of hardware work proportional to the problem.
| Expansion method | Best reason to consider it | Requirement that decides the purchase |
|---|---|---|
| External USB hub | You need more accessible sockets without opening the PC. | Its shared upstream connection and documented power capabilities must suit the attached devices. |
| Monitor USB hub | Your display already has useful ports near your peripherals. | The monitor needs a supported upstream USB data connection to the desktop. |
| PCIe USB card | You need an internal expansion option with the required external ports. | The card must fit and support the desktop’s slot, motherboard, and operating-system configuration. |
| Motherboard-header adapter | The board has unused USB capability that the case does not expose. | The adapter must match the available header and its capabilities. |
The four approaches can be alternatives, but they need not be mutually exclusive. A monitor can handle convenient desk connections while a suitable expansion card provides a different required port. That is a configuration decision, not evidence that every desktop needs several expansion products.
Keep these five checks in view:
- Use monitor USB ports only after establishing the USB data connection back to the PC.
- Treat a hub’s upstream bandwidth as shared rather than multiplying it by the number of sockets.
- Check charging support separately from whether a hub includes its own power supply.
- Match a PCIe USB card to the actual motherboard and slot requirements, especially for USB4.
- Buy a header adapter only after confirming the unused header’s type and supported capability.
A desktop’s expandability gives you several ways to solve a USB shortage, but the useful upgrade is the one that addresses your particular constraint. Existing monitor ports may be enough; a powered hub may provide the simplest expansion; an internal header or compatible PCIe card may supply what neither can. Establish the connection, speed, and power you need before buying more sockets, and the result will be a more usable PC rather than simply a busier rear panel.