

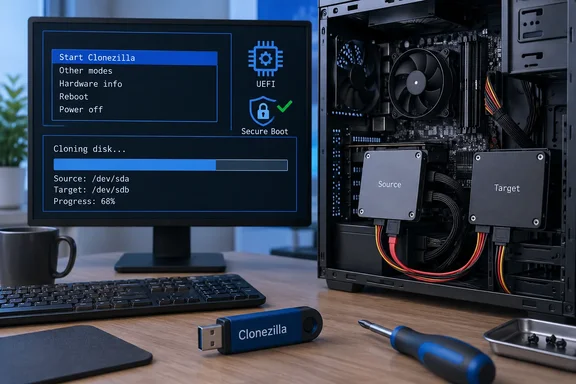
How old is Clonezilla, exactly?
The "over 20 years" claim holds for the project, but it needs a footnote. In a 2010 SourceForge interview, the project's developers said the effort began because classroom machines at Taiwan's National Center for High-Performance Computing outgrew their deployment software. The same interview lists a milestone table with January 2004 as the first Clonezilla SE (Server Edition) release and March 2007 as the debut of Clonezilla Live. The Live edition is the one most home users boot from a USB stick. It is about 19 years old, not 20-plus. The project as a whole passes the mark.
It is also not abandonware. Clonezilla Live 3.3.3-37 was released in mid-September 2026. DistroWatch notes it is based on Debian Sid as of 2026-09-13. The project's changelog adds that the release series has had many incremental builds through August 2026. One entry in the changelog covers a Secure Boot fix. It says the boot menu now conditionally runs efitextmode under Secure Boot lockdown to avoid a "prohibited by secure boot policy" error. That is a relevant fix for anyone running current Windows 11 hardware with Secure Boot on.
What Clonezilla actually does
The project describes itself as a partition and disk imaging/cloning program that handles system deployment, bare-metal backup and recovery. It comes in three forms:
- Clonezilla Live is for single-machine backup and restore.
- Clonezilla lite server and Clonezilla SE are for mass deployment.
The official site says the server variants can clone many (40 plus) computers simultaneously.
Two jobs get called "cloning", and they are different:
- Disk-to-disk clone. The tool copies one drive straight onto another. This suits an SSD upgrade.
- Disk image. The tool saves the disk to a folder on other storage and restores it later. This suits "snapshot before I break something" workflows.
Mishra uses both. He restores an MX Linux image to an experimentation laptop, rolls back a Windows 11 Insider machine after a bad update or tweak, and migrates a Zorin OS install to a new SSD.
Why it boots from USB
Clonezilla can't image a drive that is in use. Its own limitations list says online imaging and cloning are not implemented, so the partition must be unmounted. That is why you boot into it from a USB stick or other media instead of running it as a Windows app. It is also why it can still work when Windows won't start.
The project's walkthrough has one warning that matters for Windows users. The running OS must be completely shut down, not hibernated and not in fast-boot mode. On Windows, a normal "Shut down" with Fast Startup enabled can leave the NTFS volume in a hibernated state. Disable Fast Startup or use a restart before imaging. Skipping this is a common cause of failed or inconsistent images.
Supported hardware and file systems
Clonezilla copies only used blocks on file systems it understands. The project's list includes FAT12/16/32, exFAT and NTFS on the Windows side, and ext2/3/4, XFS, JFS and others on Linux. It also covers HFS+ and APFS, and Btrfs is marked "testing". For unsupported file systems, it falls back to a sector-by-sector copy with dd. That copy is slower and bigger. MBR and GPT partition tables are supported, and Clonezilla Live boots on BIOS or UEFI machines.
It is limited to x86 hardware. The minimum requirements are an x86 or x86-64 processor and 196 MB of RAM. Mishra's note that it can't image Raspberry Pi-style ARM boards fits this boundary.
A basic image-save workflow
The official step-by-step guide uses a two-disk example, saving the first disk onto the second. The main stages are:
- Boot the machine from the Clonezilla Live USB. The guide says to use a hotkey such as Esc, F8, F9 or F12 to reach the boot menu, or set the boot order in firmware.
- Choose a language and keyboard layout, then pick Start Clonezilla.
- Choose device-image.
- Choose local_dev and select the storage holding your image repository. The guide notes that options such as sshfs, samba, nfs and webdav are available if a second local disk isn't an option.
- Pick Beginner mode, then savedisk.
- Name the image and pick the source disk.
- Choose compression, whether to check the file system, whether to check the saved image, and whether to encrypt it.
Two options in step 7 deserve attention. Checking the saved image is on by default and is recommended. That matches Mishra's praise for the post-job check. On encryption, he doubts home users will bother. But the project is clear that if you encrypt an image and forget the passphrase, there is no back door to recover it. An image holds your whole system, so a stolen or lost external drive is a real exposure. Encrypting is worth considering if the image will be stored somewhere that isn't physically secure. DistroWatch's coverage of the 3.3.2-31 release also notes that gocryptfs was added for image encryption because of eCryptFS deprecation. The change is recent, so check how encryption is presented in your version.
Making the USB stick
You don't need Ventoy, although Mishra likes it for carrying ten rescue tools on one drive. Clonezilla's own page covers setting up the media from Windows, Linux or macOS. The UEFI route on Windows is simple: download the amd64 zip, make a FAT16/FAT32 partition of at least 1 GB, and extract everything onto it. The project says to include hidden items such as the ".disk" directory. Rufus and Etcher are listed as options for legacy boot.
Do not run makeboot.bat from your hard drive. The docs warn that doing so could stop Windows from booting. Run it only from the USB drive.
Limitations to weigh
Mishra's piece is enthusiastic, and some caveats matter for a fair verdict. From the project's own limitations list:
- No incremental or differential backups. Differential/incremental backup is not implemented yet. Every image is a full snapshot at one point in time. It is not a scheduled backup tool.
- No browsing of images. The image can't be explored or mounted, and you can't recover a single file from it by ordinary means. Restoring one document means restoring far more, or following a workaround.
- Destination size. The destination partition must be equal to or larger than the source. The changelog shows newer releases handle some cases, such as 4kn disk conversion. Check the notes for your version before relying on them.
- Resizing is deliberate. For a bigger target disk, the advanced documentation says the -k1 option creates a proportional partition table and -r resizes the file system. These are Expert-mode choices, and you should confirm the layout first.
- Restore is destructive. Restoring overwrites the target disk. The most common mistake with any cloning tool is swapping source and destination, so read each screen carefully.
Where it fits
Clonezilla is a strong choice for offline, whole-disk snapshots and drive migration. Examples are an SSD upgrade, pre-experiment baselines on a test box, and rescue work on a machine that won't boot. It costs nothing, it runs from a USB stick, and it is still getting regular releases.
It is a poor fit if you want continuous or scheduled backup, easy single-file restores, or a graphical interface. Its text-menu design may also put off newcomers, even if Mishra finds it approachable. Its job is to take a snapshot while the system is switched off. Pair it with a file-level backup if you need to pull out one spreadsheet from last Tuesday.
Mishra's experience with his own machines is anecdotal and not independent testing. The project's documentation backs up the basics, though. If you have never tried Clonezilla, a sensible first step is to image a spare or test machine and restore the image once. You'll learn the menus and confirm the process works before you need it in an emergency.
References
- Clonezilla is over 20 years old, and it's still the best free way to clone a drive XDA · 2026-10-04T13:00:18+00:00
- Clonezilla / News: Stable Clonezilla live 3.3.3-37 Released sourceforge.net
- Distribution Release: Clonezilla Live 2.3.1-18 (DistroWatch.com News) distrowatch.com