

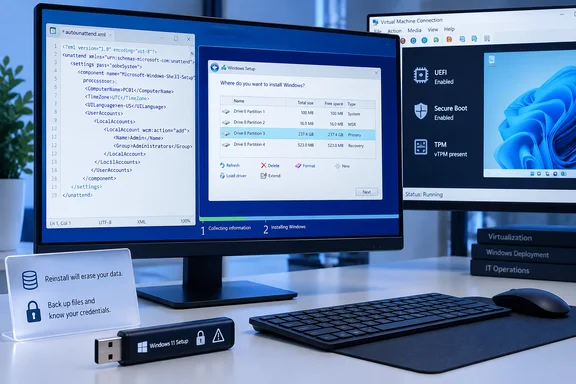
An XDA writer recently described giving that up. They built a Windows 11 installer that answers Setup's questions for them. The core of it is one XML "answer file" named autounattend.xml. Below is what the author did, how the mechanism works according to Microsoft's documentation, and where it can go wrong.
What an answer file actually does
An answer file is a list of answers for Windows Setup, written in advance. According to Microsoft's documentation, it's an XML file of setting definitions and values that Setup reads during installation. It can cover disk partitioning, which image to install, the product key, user account names and display settings. Settings are grouped into configuration passes (windowsPE, specialize, oobeSystem and others), and each pass is a different phase of Setup.
The name matters. Windows looks for answer files in specific places. Microsoft's documented USB method is to save the file as Autounattend.xml in the root of a USB flash drive and boot the PC with the installation media. If no other answer file has been selected, Setup finds it on its own. After that, Windows Setup searches for answer files at the beginning of each configuration pass, including the initial installation and after applying and booting an image. If an answer file is found, and it contains settings for the given configuration pass, it processes those settings.
"One text file does the whole install" is fair shorthand, but it's still shorthand. The file automates only what it contains. Microsoft says Setup skips a page when the matching setting is configured, and shows the Setup screen again when a required setting is empty or wrong. A partial answer file gives you a partially automated install.
Section summary: An answer file is a recipe of pre-made choices. Setup follows the recipe where one exists and asks you where it doesn't.
The XDA build, step by step
The author didn't write the XML by hand. Microsoft's own tool for that is Windows System Image Manager, which is powerful and not much fun. Instead they used Christoph Schneegans' Windows Answer File Generator, a free web tool. It currently describes itself as a way to build answer files for unattended installs of Windows 10 and Windows 11, including versions 24H2, 25H2 and 26H2. It's aimed mainly at clean installs from USB drives or virtual machines, not upgrades.
The author reports these choices:
- Windows PE stage: generate a
.cmdscript for this stage. The author notes this is also the recommended option for VMs. - Edition: Windows 11 Pro.
- Compatibility: turn on the option to bypass the Windows 11 requirements check.
- Express settings: "Disable all."
- Disk configuration: left interactive on purpose, because the drive would be used on machines the author hadn't seen yet.
Next, they downloaded a clean Windows 11 ISO directly from Microsoft instead of trusting a modified image from somewhere online. They opened it in AnyBurn, put autounattend.xml in the root of the image, and saved the modified ISO.
Two notes for anyone copying this:
- The Microsoft ISO contains every edition. Microsoft's download page (currently offering Windows 11 version 25H2) says the image uses your product key to unlock the right edition. "Pro" was a choice made in the answer file, not a property of the download.
- Check the ISO before you modify it. Microsoft's download page explains how to confirm an ISO is intact: run PowerShell's
Get-FileHashon it and compare the SHA256 value with the one Microsoft publishes for your language. Do this before editing, because the hash won't match once you've added a file.
Editing the ISO isn't the only approach. Microsoft's documented method just puts Autounattend.xml in the root of a USB drive. Many people copy the file straight onto a normal installation USB made with the Media Creation Tool and skip ISO editing entirely. The author's method has one advantage: the answer file is baked into a single image, so you can boot it in a VM or write it to any drive.
Section summary: Generator, then a verified official ISO, then the answer file in the root of the media. The only tricky choice is how Setup should handle disks.
Test in Hyper-V before using it on a real PC
The author didn't put the installer on a friend's laptop right away. They tested it in Hyper-V first. The test VM had:
- Generation 2 (UEFI firmware, which Windows 11 requires)
- Secure Boot turned on
- A virtual TPM
- 100 GB of virtual disk
- The modified ISO attached as a virtual DVD and set as the boot device
Microsoft's minimums for a Windows 11 VM are 4 GB of memory, 64 GB of storage, two or more virtual processors, Generation 2, Secure Boot and a virtual TPM. The author calls 4 GB and 64 GB "usually enough." They suggest 8 GB of RAM for a smoother setup and 100 GB of storage to avoid conflicts with the answer file's configuration. Those are the author's preferences, not Microsoft requirements. They're also sensible if your answer file uses automatic partitioning with fixed partition sizes.
In the author's words, the only thing they did was press a key when Hyper-V asked whether to boot from the DVD. The next thing they saw was the Windows 11 desktop, already signed in.
Why test in a VM if the answer file already bypasses the hardware checks? Because a test machine should look like the machines you'll actually install on. A VM with Secure Boot and a TPM shows how the installer behaves on supported hardware. It doesn't show how it behaves on an unusual NVMe controller, an older BIOS-only desktop, or a laptop that needs a storage driver during Setup. One successful VM run is a good sign, not a guarantee.
Section summary: A Generation 2 VM with Secure Boot and a TPM is a safe place to find mistakes. Real hardware can still add surprises.
The disk warning is the most important part
The author's most useful point is that automatic partitioning is great when you know the target machine and dangerous when you don't. Microsoft's reference describes settings that control which disk and partition Windows installs to, and whether that disk is wiped. If the answer file says "wipe disk 0" and disk 0 on your friend's PC is their photo drive rather than the boot SSD, Setup will do exactly what you told it to.
For a drive you carry between machines, the author's approach (automate everything except the disk choice) is the right default. You keep one manual step: picking the correct drive in Setup. The author still checks the machine and the drive every time, and so should you.
Schneegans' generator has another safeguard. Its documentation says Setup picks up a file named autounattend.xml automatically, but a file with a different name (such as notautounattend.xml) is ignored unless you point to it explicitly. That's useful if you'd rather not have a USB drive that can start an automated install just by being plugged in at boot.
Security: answer files are not a place for secrets
This part is easy to overlook. Answer files often contain local account passwords and product keys, and they don't disappear after installation. Microsoft's own documentation says the answer file is validated and then cached to the computer. Valid answer files are cached to the $Windows.~BT\Sources\Panther directory during the windowsPE and offlineServicing configuration passes. After the Windows installation is extracted to the hard disk, the answer file is cached to %WINDIR%\panther.
Microsoft does remove some data: during unattended Windows installation, answer files are cached to the computer. For each configuration pass, sensitive information such as domain passwords and product keys are deleted in the cached answer file. Security researchers still check for these files routinely. SpecterOps' documentation for its SharpUp tool notes that unattended install files can contain local administrator passwords, domain join credentials, and product keys, and that they're often left behind after installation, accessible to any user on the system. Password fields in these files are often only Base64-encoded, which is not encryption.
Practical advice:
- Open the XML in a text editor before using it and look for passwords, keys and auto-logon credentials.
- Treat the USB drive as sensitive. It's effectively a note with your default credentials on it.
- Don't reuse your personal password in an installer you'll use on other people's PCs. Use a throwaway password and have the new owner change it at first sign-in, or leave account creation interactive.
- Clean up afterwards. Microsoft advises deleting cached answer files before handing a PC over, as long as no pending oobeSystem settings still need to run.
About the requirements bypass
Bypassing the requirements check is convenient, and that convenience is exactly why it deserves a closer look. It only tells Setup to stop checking. It doesn't make unsupported hardware supported. Microsoft's download page warns that a PC that doesn't meet the requirements "will no longer be supported and won't be entitled to receive updates." If a friend's old laptop gets through Setup because of your USB drive, tell them what that means for them.
The bottom line
A Windows 11 answer file won't manage your IT for you. It turns the choices you'd make anyway into a repeatable file. The XDA author's workflow is a solid template for hobbyists and the person everyone calls when a PC breaks: generate the file with Schneegans' tool, add it to a verified Microsoft ISO, test it in a Generation 2 Hyper-V VM with Secure Boot and a TPM, and only then use it on real hardware.
Keep three things manual: choosing the disk, protecting credentials, and making an honest call about hardware support.
For admins managing hundreds of machines, this is a small version of what deployment tools like Autopilot, MDT and Configuration Manager already do at scale. For everyone else, it means the next reinstall involves fewer clicks.
Readers who want to go further can also look into debloat scripts, driver injection and local-account setup during Windows 11 OOBE.
References
- I stopped setting up Windows by hand, and one text file now does the whole install for me - XDA XDA · 2026-09-26T13:00:17+00:00
- Generate autounattend.xml files for Windows 10/11 schneegans.de
- Automate Windows Setup | Microsoft Learn learn.microsoft.com