

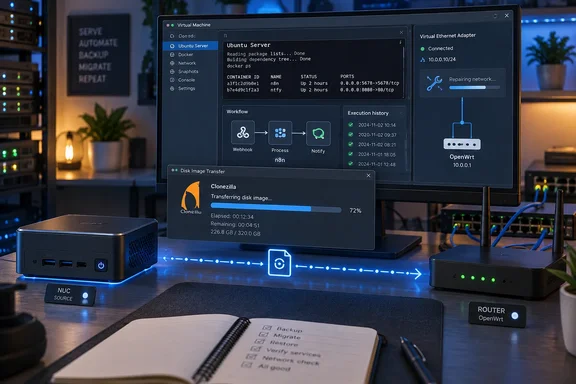
The result also needs one important clarification. The NUC’s 120 GB SSD became a 9.12 GB compressed backup image, not a running server with a 9.12 GB disk. The restored virtual machine received a 128 GB virtual disk. Understanding that distinction—and the difference between a bootable clone and a functioning service—is what makes this migration useful beyond one person’s home lab.
Moving n8n meant preserving its working state
The physical server was modest: an Intel NUC6CAYB with a Celeron J3455, 4 GB of RAM, and a 120 GB SanDisk SSD. MakeUseOf identifies its operating system as Ubuntu Server 26.04.1 LTS and reports approximately 19 GB of occupied filesystem space. Its two Docker workloads were n8n, the workflow automation application, and ntfy, the notification service.
Those applications were doing more than sitting behind a web interface. One n8n workflow monitored a Home Ops server; another checked a remote Glances instance and produced a daily report. Telegram notifications were part of the setup. The migration therefore had to preserve schedules, credentials, previous executions, and the state used to distinguish an outage from a recovery.
This is the practical reason a pair of Docker Compose files was insufficient for this particular move. The files described the container deployment, while persistent data also lived in directories mounted into the containers. The author wanted the application’s accumulated working state, along with Caddy configuration and certificates, to arrive intact.
A full-disk migration made the preservation boundary straightforward: carry the existing Ubuntu installation and its disk contents into a virtual machine. That avoided reconstructing the application stack from incomplete notes. It also preserved old configuration, including a network rule that would become the main obstacle after restoration.
The Docker audit established what had to survive
Before imaging, the author inspected the deployment with:
sudo docker compose ls
sudo docker inspect n8n --format '{{range.Mounts}}{{.Source}} -> {{.Destination}}{{println}}{{end}}'
The first command listed the Compose projects. The second displayed the source and destination paths for n8n’s mounts, exposing the relationship between host-side storage and the directories visible inside the container.
That mount information is more useful than simply noting that “n8n runs in Docker.” It identifies the storage dependencies that must accompany the application. A replacement container can start successfully while lacking the data that made the original instance useful; preserving the relevant host directories addresses that separate requirement.
The author also reports confirming an unless-stopped restart policy. The mount-inspection command above does not display that policy, so its output should not be treated as verification of automatic startup. In this case, automatic startup was subsequently observed after restoration, when Docker brought n8n and ntfy back up.
Before changing anything, the author deliberately stopped Homarr on the monitored server and checked that the automation delivered outage and recovery notifications. This created a functional baseline. After migration, the same controlled event could reveal whether the restored system behaved like the original.
A separate archive covered the n8n and ntfy directories, Caddy configuration, and certificates, with SHA-256 hashes prepared for integrity checks. The archive served a different purpose from the whole-disk image: it preserved the important application material separately from the mechanism used to move the operating system.
For someone repeating this approach, the prerequisite is consequently broader than having a spare USB drive. The documented path assumes access to the original Linux installation, knowledge of its persistent application storage, permission to interrupt it, and a destination capable of hosting the restored VM. It also assumes that the important state being preserved actually resides on the disk being captured.
Clonezilla compressed the backup without shrinking the server
The NUC’s SSD appeared as approximately 111.8 GB of usable capacity. Its layout included a 1 GB EFI partition and a roughly 110.7 GB ext4 partition, with about 19 GB occupied in the Ubuntu filesystem.
Clonezilla’s documentation explains why the backup could be much smaller than the disk: for supported filesystems, including ext4, it saves occupied blocks through tools such as Partclone. Unsupported filesystems instead fall back to sector-by-sector copying. The difference is particularly useful for a mostly empty system disk. Clonezilla
Compression then reduced the saved data further. The author selected Clonezilla’s parallel Zstandard option, -z9p, and obtained the reported 9.12 GB image. Clonezilla’s own imaging instructions identify -z9p as parallel Zstandard compression, corroborating the option used in the account. Clonezilla
These are separate operations. Used-block imaging avoids carrying all the unused space; compression reduces the storage required by the captured data. Neither operation, by itself, changes the capacity or partition layout required by the restored system.
| Storage figure | What it represented | What a reader should take from it |
|---|---|---|
| 120 GB | The advertised capacity of the physical SanDisk SSD. | This was the original system disk, not the amount of application data. |
| Approximately 19 GB | The occupied space reported for the Ubuntu filesystem. | The disk was mostly empty, making used-block imaging valuable. |
| 9.12 GB | The completed compressed Clonezilla image. | This was the backup’s size in this migration, not a universal compression expectation. |
| 128 GB | The new VMware virtual disk. | The destination retained enough capacity for the original disk layout. |
Clonezilla lists an equal-or-larger destination partition as a requirement for its normal restore path. That makes the 128 GB destination an important part of the procedure, not an incidental specification. A reader should not use the 9.12 GB image size to justify creating a 10 GB virtual disk. Clonezilla
The offline capture provided a defined handover point
Clonezilla also states that online imaging is not supported: the partition being captured must be unmounted. Its instructions call for the original operating system to be completely shut down before booting Clonezilla Live. For this migration, that means planning an interruption to the monitoring service, even though the application configuration is carried across intact.
The reported imaging sequence was:
- Boot the physical NUC from Clonezilla Live, using a separate boot device from the image repository.
- Choose
device-imageto save an image instead of copying directly from one disk to another. - Select the USB repository; Clonezilla’s documented local-storage route uses
local_dev. - Choose
savedisk, name the image, and select the internal SanDisk SSD as the source. - Select parallel Zstandard compression with
-z9p. - Verify the completed image before moving on to restoration.
The device selection deserves attention before confirming any operation. The system disk supplies the contents; the repository stores the image. These roles reverse conceptually during restoration, when the saved image supplies the contents and the blank virtual disk receives them.
The MakeUseOf account gives inconsistent capacities for the repository USB drive, referring to both 100 GB and 115 GB. That inconsistency does not change the reported image result, but neither figure should become a purchasing requirement. What matters operationally is the repository’s actual free capacity, and the 9.12 GB result cannot be assumed in advance for a different server.
Clonezilla’s image verification is one checkpoint, not the final acceptance test. It checks the saved image through the imaging tool’s process. It cannot establish that n8n will authenticate to its services, keep its old address, or send a recovery notification after the move.
VMware Workstation preserved Ubuntu’s disk, not its Ethernet hardware
The destination VM closely followed the original machine’s memory allocation and boot arrangement, while using virtual hardware:
| VMware setting | Reported configuration |
|---|---|
| Firmware | UEFI. |
| Processor allocation | One virtual processor with two cores. |
| Memory | 4 GB. |
| Storage | A blank 128 GB SATA virtual disk. |
| Network | A bridged adapter, initially disconnected. |
| Recovery media | The Clonezilla ISO and a passed-through USB image repository. |
The account does not identify the VMware Workstation version or the host operating system. This is therefore a documented Ubuntu-guest migration into Workstation, not a verified compatibility recipe for a particular Windows release or Workstation build.
The author attached the Clonezilla ISO to the virtual optical drive and passed the repository USB device into the guest. Clonezilla mounted the repository’s NTFS partition and located the saved image. Restoration then copied both original Ubuntu partitions onto the blank VMware disk.
The restore operation is restoredisk; the account’s restoreddisk spelling is a typo. More importantly, restoration overwrites the selected destination. Before proceeding, the target must be the intended blank virtual disk, with the USB repository remaining the source of the saved image.
For this setup, the sequence was:
- Create the Ubuntu VM with UEFI firmware and the blank 128 GB SATA disk.
- Leave its bridged network adapter disconnected.
- Attach the Clonezilla ISO and make the USB repository available to the guest.
- Boot Clonezilla, select the saved image, and restore it to the virtual SATA disk.
- Boot the restored Ubuntu installation while keeping the clone isolated from the production network.
Isolation was deliberate. The clone initially carried the same hostname, service configuration, application credentials, and expectations about its IP address as the physical server. Leaving both instances active on the same network would complicate an already sensitive handover.
The new virtual NIC had a different MAC address, so an identical hardware address was not the conflict demonstrated here. The immediate concerns were the duplicated server identity, address assumptions, and potentially overlapping automation activity. Keeping the physical source off or isolated while bringing the replacement into service avoids asking two copies of the same deployment to act as the live system.
Ubuntu reached its familiar login prompt after restoration. User accounts, the hostname, Docker installation, files, and system services had survived. That narrowed the remaining work considerably: the operating system could boot from the restored disk, but its network configuration still described the NUC.
Netplan and OpenWrt needed two separate repairs
The first problem was inside Ubuntu. The old Netplan configuration matched the NUC’s Ethernet adapter by MAC address, while VMware presented a different adapter. The author inspected the configuration and current addressing with:
sudo grep -R. /etc/netplan
ip -br address
Netplan’s documentation confirms the relevant behavior: a match rule can select an interface by its permanent MAC address, and set-name can give that matching interface a chosen name. A rule tied to the removed physical adapter therefore needed attention even though the rest of the server had survived the disk restore. Netplan
The VMware adapter initially appeared as ens33. The author backed up the Netplan file, replaced the physical adapter’s MAC match with the virtual adapter’s address, and retained enp3s0 as the interface name expected by the existing configuration.
There is a consequential transcription problem in the published account: it gives two different MAC addresses for the VMware adapter. Use the actual virtual NIC’s MAC address, not either copied example. The reusable part is the configuration relationship—match the replacement adapter, then retain the required interface name—not the literal address from someone else’s VM.
This is also why a two-line Netplan fragment should not be treated as a complete replacement configuration. The match and set-name properties belong inside the relevant Ethernet definition in the existing YAML file. The server’s other settings, including how it obtains an address, still matter.
Netplan documents configuration files under /etc/netplan/ and applies them with:
sudo netplan apply
For this migration, the VM console is the sensible place to perform the repair: networking is already broken, and a network change can interrupt remote access. Preserve the existing configuration before editing it, as the author did, and verify the resulting interface and address after applying the change. Netplan
A working DHCP lease still left n8n at the wrong address
Repairing the interface match solved only the first problem. DHCP then assigned 192.168.1.234, while the server’s existing configuration expected 192.168.1.249.
MakeUseOf reports that the address change disrupted bookmarks, local service URLs, n8n integrations, and Caddy-related HTTPS access. The account does not detail the certificate names or trust arrangement, so it would be too broad to conclude that changing a DHCP lease inherently invalidates Caddy certificates. The supported conclusion is narrower: this deployment depended on its previous address, and receiving a different one broke access and integration assumptions.
The author repaired that dependency at the OpenWrt router. The old reservation for 192.168.1.249 was replaced with a reservation associating that address with the VMware adapter’s MAC address. A reboot confirmed that the VM obtained and retained the intended address.
These were two distinct repairs in two administrative locations:
- The Ubuntu Netplan change allowed the guest to configure the replacement Ethernet adapter.
- The OpenWrt reservation change restored the address expected by the applications and their clients.
A successful DHCP lease therefore was an intermediate milestone. The meaningful network result was the correct adapter operating at the address on which the existing services depended.
The author also reports that a reboot cleared a notification-routing error associated with the temporary address, then installed open-vm-tools. No package version or installation transcript is provided. That finishing step should not be confused with the documented network remedy: the adapter match and DHCP reservation were the changes that restored the expected network identity.
n8n’s outage-and-recovery test established the useful result
After the network repairs, the author opened n8n at its original HTTPS address. Both workflows were present, previous execution history remained available, and Docker had started n8n and ntfy automatically.
Each observation checked a different part of the migration. The original HTTPS address tested the restored access path. Workflow visibility checked the application’s stored definitions. Execution history checked that the move retained more than an empty installation. Automatic container startup checked whether the services returned without being launched manually after boot.
The strongest test repeated the controlled interruption performed before imaging. On the monitored Home Ops server, the author ran:
sudo docker stop homarr
The next scheduled n8n execution detected the outage and delivered notifications through ntfy and Telegram. The author then restored the monitored container:
sudo docker start homarr
The following scheduled execution detected recovery and sent the all-clear notifications.
These commands are specific to the monitored Homarr deployment. They are not commands to run indiscriminately on the n8n VM, and deliberately stopping a service is appropriate only where the operator has permission and can tolerate the interruption. The purpose is to create a known state change that the monitoring workflow is supposed to detect.
Waiting for the scheduled executions was important. An immediate manual check of the n8n interface would not exercise the same path as the recurring monitoring task. Here, the author observed the workflow proceed through its normal schedule and take the expected branch in both directions.
The result demonstrated that the restored workflow could still reach its monitoring target, recognize the tested state changes, and use the required notification integrations. It also gave useful evidence that the credentials and state needed for that path remained usable. That is a stronger acceptance criterion than a login prompt or a successful SSH connection.
The detailed functional test covered the Homarr outage-and-recovery path. The account also says both workflows were alive and executing, but it does not describe a separate full daily-report cycle after migration. An operator adopting the method should preserve that distinction and test each business-relevant workflow before retiring its original host.
Once satisfied, the author created a VM snapshot. The whole migration reportedly took about three hours, much of it waiting for imaging and restoration. That is one deployment’s elapsed time, not a downtime guarantee or a transfer-speed benchmark for other hardware.
What this means for your n8n migration
Choose full-disk migration when preserving a known-working deployment is more valuable than rebuilding it cleanly, and when a planned interruption is acceptable. This NUC was a good candidate because the important workload was contained in a generic Ubuntu installation with disk-resident application state, and the demonstrated hardware-specific failure was repairable networking.
Running n8n inside a Linux VM is not unique to this case. In a separate home-lab deployment, Ed Brad describes an Ubuntu 24.04 LTS VM on Proxmox hosting the container runtime, allocated two virtual CPUs, 4 GB of RAM, and 100 GB of disk. That provides another concrete example of the deployment pattern, though it does not corroborate this Clonezilla migration or establish universal n8n sizing requirements.
The decision here is about moving an existing working system, not selecting the fastest hypervisor or finding n8n’s minimum specifications. The supplied evidence contains no comparative performance measurements and no before-and-after power readings. The established benefit is that the automation service continued in a VM and the NUC became available for a file-server role.
Before following the same path, make these checks:
- Identify the persistent n8n and ntfy directories, supporting configuration, and credentials that must survive, and retain a separate application-data archive alongside the disk image.
- Plan for an offline capture, verify the completed Clonezilla image, and size the destination for the original partition layout rather than the compressed backup.
- Keep the clone disconnected during restoration and initial inspection, then ensure the original server is off or isolated before the replacement takes over.
- Use the VM’s actual network-adapter identity when repairing Netplan, and separately update the DHCP reservation if existing services depend on the old IP address.
- Validate the original HTTPS access path, execution history, automatic startup, and each important workflow with a controlled functional test before repurposing the NUC.
A clean rebuild remains a different choice with a different objective. The full-disk approach carries the working configuration forward, including obsolete settings and accumulated clutter. The reported Netplan failure is a useful illustration: preserving the complete system saved application reconstruction work while also preserving a hardware assumption that needed correction.
Likewise, this account is not a migration recipe for a server dependent on proprietary devices, hardware-bound licensing, or an unrelated Windows installation. The observed success belongs to this Ubuntu-and-container workload. Matching those boundaries is more useful than treating “Clonezilla to VMware” as a universal conversion guarantee.
The NUC can change jobs after the VM passes acceptance
The full-disk image, separate application archive, and post-validation snapshot address different stages of the move. The image preserves the captured system for restoration. The application archive retains important data and configuration separately. The snapshot marks a VM state reached after the networking and workflow tests.
Clonezilla’s documented limitations reinforce the reason to keep those copies separate. Its normal image format is not directly mountable for ordinary file browsing, and the project does not offer incremental or differential backup in this workflow. A successful one-time migration therefore does not establish an ongoing backup process for the automations that continue running afterward. Clonezilla
There is also a clear handover boundary before the original hardware becomes a file server. While the NUC still contains the old installation, it remains another copy of the automation server. Repurposing it should follow validation of the VM and preservation of the recovery material, not merely the first successful virtual boot.
For this deployment, the useful achievement was continuity: the monitoring workflows, their history, and their tested notification behavior survived a change of hardware without being rebuilt from memory. Clonezilla moved the disk state; Netplan and OpenWrt repairs restored the network assumptions; the outage-and-recovery test established that the service could do its job. Only then was the mini PC genuinely free for its next one.