

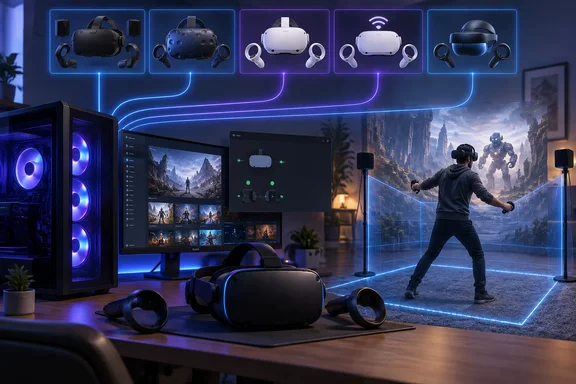
Next Reality’s Steam VR setup guide separates those paths, a more useful approach than repeatedly launching SteamVR and hoping a headset appears. Valve’s SteamVR listing and Microsoft’s Windows Mixed Reality instructions establish the key checkpoints: headset detection, controllers and boundaries, the connection to SteamVR, and finally the game. Working through those checkpoints in order also makes troubleshooting considerably more focused.
There is an important September 2026 qualification. Microsoft identifies Windows 11 version 24H2 as the removal point for Windows Mixed Reality, and its stated Steam compatibility window for existing devices on Windows 11 version 23H2 runs through November 2026. Owners of an HP Reverb G2, Samsung Odyssey, or Lenovo Explorer need to settle that operating-system question before following an installation procedure.
SteamVR setup starts with the headset, not the game
Steam is the library and launcher. SteamVR supplies the VR environment and associated tools for supported headsets, including a status monitor, input and display settings, a dashboard, and the Chaperone room-boundary system. Some headsets work with SteamVR directly; others require another application to establish their PC connection first.
A runtime is the software environment a VR application uses to work with the headset. Next Reality notes that some games use OpenXR, a standard interface for VR applications, and can use a vendor runtime even when launched from Steam. SteamVR can also serve as an OpenXR runtime. Owning a game in Steam therefore does not, by itself, establish which runtime that game should use.
Start by identifying the row that describes your equipment:
| Headset or connection | Software involved | First useful connection checkpoint | Play-space setup |
|---|---|---|---|
| Valve Index | Steam and SteamVR | SteamVR’s headset and controller status | SteamVR Room Setup and Chaperone |
| Lighthouse-tracked HTC Vive, Vive Pro, or Vive Pro 2 | SteamVR, plus model-dependent HTC software | SteamVR and any required HTC application | SteamVR Room Setup |
| Windows Mixed Reality | Mixed Reality Portal, SteamVR, and Windows Mixed Reality for SteamVR | The Mixed Reality home environment and visible controllers | Mixed Reality Portal |
| Quest through wired Quest Link | Meta Quest Link on the PC, then SteamVR for the SteamVR path | A working Link connection | Quest’s own boundary setup |
| Quest through Air Link | Meta Quest Link and a local wireless connection | A working Air Link session | Quest’s own boundary setup |
| Quest through Steam Link | Steam on the PC and Steam Link on the headset, using SteamVR for VR games | The headset’s Steam Link connection to the PC | Quest’s own boundary setup |
The Vive distinction is particularly important. These lighthouse-tracked Vive models use base stations for tracking; the standalone Vive Focus line follows a different setup path. Base stations are tracking equipment, not a substitute for the headset’s PC connection.
SteamVR itself is free to install. Engadget’s September 22 guide confirms that you can search for SteamVR inside Steam and install it from there. Microsoft also documents an alternative: open the Steam Library’s Tools section, find SteamVR, right-click it, and select the installation option.
SteamVR’s minimum requirements are only one part of compatibility
Valve’s store listing gives a baseline of an Intel Core i5-4590 or AMD FX 8350-equivalent processor, 4 GB of RAM, and an NVIDIA GeForce GTX 970 or AMD Radeon R9 290-equivalent graphics card. Its recommended graphics entry names the GTX 1060 and Radeon RX 480.
Those are SteamVR’s published requirements, not a promise about every game, headset resolution, or streaming route. Microsoft’s own SteamVR guidance explicitly says that application requirements vary. A PC that satisfies the runtime’s baseline can still fall short of the game or the headset connection software.
Valve’s listing also contains older Windows requirements alongside a notice that the Steam client supports Windows 10 and later beginning January 1, 2024. The older references to Windows 7 and Windows 8.1 should not be treated as current Steam client support. Equally, Steam supporting a Windows version does not establish that Windows Mixed Reality remains available on it.
For Quest Link, the cable needs to transfer data. A USB-C connector on the headset end says nothing about whether a particular cable is charging-only. For wireless connections, the headset and PC need a working local-network path; Next Reality recommends Ethernet for the PC and a nearby router to reduce variables. A 5 GHz or supported 6 GHz connection can help, but frequency alone is no guarantee of a smooth session.
Valve Index and lighthouse Vive put Room Setup in SteamVR
For Valve Index, SteamVR is the main setup environment. Its status window is where you establish that the headset and controllers are available, and its Room Setup defines the play area used by Chaperone.
The supported sequence is straightforward:
- Install SteamVR through Steam.
- Set up and power the base stations, then connect the headset to the PC.
- Start SteamVR and establish that the headset and controllers are detected.
- Run SteamVR Room Setup before the first session.
- Launch a VR-compatible game from the Steam library and choose its VR option if a launch choice appears.
Success means more than seeing SteamVR running on the desktop. The headset should present the VR environment, the required controllers should be available, and the room boundary should correspond to the space in which you are playing.
Valve describes Chaperone as the system for setting and viewing the limits of the available room. Next Reality recommends repeating Room Setup when changing rooms or moving furniture. Complete that step before returning to a game: a previously drawn boundary describes the previous arrangement.
Lighthouse-tracked HTC Vive headsets follow the same broad SteamVR sequence, but the required HTC software and base-station compatibility depend on the model. Next Reality specifically flags Vive Pro 2 as a configuration that can require HTC software alongside SteamVR. The available evidence does not establish one HTC installer or one wiring procedure that safely covers Vive, Vive Pro, and Vive Pro 2.
Likewise, do not treat first- and second-generation base stations as interchangeable components of a universal kit. Establish the compatibility of the headset, controllers, and base-station generation before mixing equipment. Installing SteamVR cannot resolve a hardware combination that the tracking system does not support.
For these headsets, the practical dividing line is clear: first get the required hardware and any model-specific software working, then complete SteamVR Room Setup, and only then test the game.
Windows Mixed Reality now has an operating-system gate
Windows Mixed Reality requires a separate bridge called Windows Mixed Reality for SteamVR. Microsoft describes it as the component that enables SteamVR experiences to run on Windows Mixed Reality immersive headsets. Mixed Reality Portal handles the initial headset environment; the bridge connects that environment to SteamVR.
Microsoft’s lifecycle notice names Windows 11 version 24H2 as the version that removes Windows Mixed Reality. It says existing devices continue to work with Steam through November 2026 if users remain on the released Windows 11 version 23H2. After November 2026, Windows Mixed Reality no longer receives security updates, nonsecurity updates, bug fixes, technical support, or online technical-content updates.
That is more specific than saying support is “narrowing.” For a PC on an affected Windows release, a missing Portal is not necessarily an installation fault. Reinstalling SteamVR does not restore an operating-system component that Windows has removed.
The compatibility statement also needs to stay within its boundaries. Microsoft’s November 2026 provision concerns Windows Mixed Reality devices and Windows 11 version 23H2; it is not a general assurance about the support status of every Windows edition or a recommendation to hold an everyday PC on an older release indefinitely.
Existing compatible Windows Mixed Reality installations follow Microsoft’s sequence
For an installation that still meets Microsoft’s stated Windows conditions, its documented procedure is:
- Complete Windows Mixed Reality setup, including the play-space boundary in Mixed Reality Portal.
- Install Steam and sign in.
- Install SteamVR.
- Install Windows Mixed Reality for SteamVR.
- Connect the headset and turn on the motion controllers.
- Wait until the Windows Mixed Reality home has loaded and the controllers are visible.
- Open Steam on the desktop and launch a SteamVR game from the library.
The exact bridge name matters. SteamVR alone is not the complete Windows Mixed Reality installation, and an unrelated third-party tool with a similar description is not the component Microsoft specifies.
The most useful success checkpoint is step six. Once the Mixed Reality home is visible and the controllers appear, the Windows-side setup has reached a working state. If the headset never reaches that environment, focus on Portal, Windows, the connection, and the headset before treating the SteamVR bridge as the cause.
Microsoft also documents two useful controls for a running session. Pressing straight down on either motion controller’s thumbstick opens the Steam dashboard; pressing the Windows button exits the SteamVR game to the Windows Mixed Reality home. The Desktop app inside that home can provide access to the PC desktop without removing the headset.
Multiple headsets can send the game to the wrong device
Microsoft warns that when a Windows Mixed Reality headset is plugged in, SteamVR games launch to that headset. Its documented remedy when using another headset is to unplug the Windows Mixed Reality device first.
This is a particularly relevant check for someone moving from a Reverb G2 or another Windows Mixed Reality headset to a different PC-VR device. A game appearing in the wrong headset can be a device-selection consequence, even though the newly connected headset is functioning.
For existing owners, the immediate decision is whether the current Windows installation can still run the documented stack. The next decision is how to handle the approaching November 2026 end of Windows Mixed Reality servicing; the setup procedure should not obscure that deadline.
Meta Quest offers three PC paths with different dependencies
Quest PC VR adds a connection stage between the standalone headset and the Windows PC. Next Reality distinguishes wired Quest Link, wireless Air Link, and Valve’s Steam Link app. Choose one route for the initial setup so that the connection checkpoint and required software remain clear.
Quest Link and Air Link both use the Meta Quest Link application on Windows. Steam Link is a separate route and does not require Meta Quest Link. Their names are similar enough to invite confusion, but the software requirements are different.
Quest’s play-space boundary remains in the headset’s own software for these routes. Next Reality calls this Guardian; interface names can change between headset software versions. The relevant point is where to configure it: use Quest’s boundary setup, rather than treating SteamVR Room Setup as the primary owner of the Quest play area.
Wired Quest Link removes the wireless-network variable
For the wired SteamVR path, Next Reality gives this sequence:
- Install Meta Quest Link on the Windows PC and sign in with a Meta account.
- Complete the headset’s own boundary setup.
- Connect Quest to the PC with a USB data cable.
- Enable Link in the headset when prompted or through its Link control.
- Confirm that the Link environment is working.
- Open SteamVR on the PC, then launch the game.
Quick Settings is the location identified in the guide for enabling Link, but labels and placement can move between Quest software versions. The intended action is to start the PC Link session; merely connecting a cable and seeing the battery charge does not establish that session.
A working Link environment is the checkpoint before SteamVR. If Link never connects, opening more SteamVR windows does not address the missing PC-to-headset connection.
Wired Link is a useful first test when a suitable cable is already available because it removes local Wi-Fi conditions from the connection path. It still depends on a working USB data connection and compatible PC software.
Air Link uses the Meta connection over the local network
For Air Link, install and sign in to Meta Quest Link on the PC, complete the Quest boundary, and make sure the headset and PC are on the same local network. Pair Air Link using the headset’s wireless Link controls, then confirm that the PC session opens before starting SteamVR and the game.
Next Reality recommends connecting the PC to the router by Ethernet and keeping the router nearby. These are ways to reduce potential network trouble, not a universal bandwidth or latency specification.
The success condition is the same as wired Link: the Meta PC session should work before you move on to SteamVR. If pairing fails or the session never opens, investigate the local-network connection first.
Steam Link skips the Meta Quest Link application
For Valve’s route, start Steam on the PC and launch Steam Link on the supported Quest headset. Connect to the PC from inside the headset app, then launch the VR game through the resulting Steam session. SteamVR should be installed on the PC for this VR path.
This gives Quest owners a separate way into their Steam library without installing Meta Quest Link for that connection. It remains a PC-streaming route, so a working headset app does not remove the need for a suitable Windows PC and local network.
Steam Link and Air Link should not inherit each other’s requirements by assumption. The evidence here establishes their different application chains, but not a complete, current model-by-model wireless compatibility matrix or one router specification that applies to both.
A working SteamVR connection still needs the game’s VR launch path
After the headset connects, launch the intended game from Steam. Next Reality describes three common behaviors: a title can start directly in VR, offer a desktop-versus-VR launch choice, or expose a VR toggle inside its own settings.
Choose the VR option when Steam or the game offers one. If the title opens on the monitor, establish whether it is waiting for an in-game VR command before changing the headset setup. A working headset connection and a desktop-mode game can coexist.
Steam’s VR labels are useful for finding titles, but they do not promise compatibility with every controller, headset, tracking system, or runtime. The game’s requirements remain separate from SteamVR’s broad hardware support. For an older title, recent reports about the actual headset and controller combination can be more useful than the presence of a longstanding VR label alone.
If a game stays flat despite a working VR environment, follow this order:
- Look for the game’s own VR mode or launch choice.
- Inspect any custom Steam launch options already set for that title. Next Reality identifies the game’s Properties menu as the place to begin; exact client layout can vary.
- For an OpenXR title, establish which installed runtime the game is intended to use before changing the active runtime.
There is no verified universal launch parameter in this procedure. Adding a command copied from another game can create another variable without addressing the original problem.
A community discussion about Microsoft Flight Simulator illustrates why game-specific instructions need to remain game-specific: users described switching into VR from within the running game. That does not establish a keyboard shortcut or launch order for unrelated Steam titles. The useful general lesson is to distinguish “the headset is ready” from “this game has entered VR.”
SteamVR troubleshooting works best at the first failed checkpoint
Fix the earliest failed connection first. If the headset is missing from its vendor application, start there. If that application works but SteamVR fails, investigate the handoff. If both work and only one game stays on the monitor, return to the game’s launch and runtime choices.
This approach also prevents a common diagnostic mistake: treating every bad VR session as a graphics-performance problem. Failure to detect a headset, loss of tracking, missing boundaries, and uneven frame delivery are different symptoms.
A missing headset calls for connection checks
For a wired connection, Next Reality recommends checking whether Windows detects the device in Device Manager and whether the headset presents the expected Link prompt, where applicable. Try a cable known to support data and a direct PC USB connection rather than a hub.
Those checks help isolate the connection; they do not prove that every undetected headset has a bad cable. If Windows reports a USB or driver error, record the actual error rather than assuming SteamVR is responsible.
For a wireless route, first confirm that the PC and headset are on the same local network. Then test the session closer to the router and consider competing traffic. Wait for the selected connection application to show a working session before continuing downstream.
A SteamVR status error narrows the investigation
Valve’s SteamVR listing identifies its VR Status Monitor as the place to inspect system state. Next Reality recommends noting which component is affected when an icon reports trouble: the headset, a controller, or a base station.
For paths with a separate vendor application, its suggested restart sequence is to close both applications, reopen the vendor application, wait for the headset connection, and then reopen SteamVR. Index does not gain an extra vendor-app requirement from that advice; use the sequence appropriate to the selected headset path.
If the problem persists, preserve the specific symptom. “The controller is missing after Portal loads” is much more actionable than “VR does not work.”
Microsoft documents a way to collect a SteamVR System Report for further diagnosis: open the menu from the small SteamVR status window, select Create System Report, and save it to a file. That captures information for a support report without requiring an improvised driver reset or reinstall.
Stutter, tracking loss, and boundary errors need separate responses
Next Reality distinguishes uneven frame delivery from a world that drifts or a controller that freezes in place. Treat these as starting descriptions, not definitive diagnoses: green status icons establish a connection state, not perfect rendering, tracking, or wireless delivery.
On a wireless route, testing closer to the router and reducing competing network traffic can help isolate streaming conditions. On a wired route, inspect the cable and test another suitable port. Avoid changing several unrelated settings at once, because it then becomes difficult to tell which change affected the symptom.
Microsoft provides a specific recovery action for Windows Mixed Reality users who increased SteamVR’s application-resolution multiplier and then saw performance deteriorate. Its guide locates the control under SteamVR Settings > Applications and says to restore the slider to its default level, then restart the game so the change takes effect. Increasing that multiplier raises the PC’s rendering workload; this remedy addresses that particular change, not every cause of stutter.
For a missing or incorrect boundary, return to the system that owns the play space: SteamVR Room Setup for Index and lighthouse Vive, Mixed Reality Portal for Windows Mixed Reality, or Quest’s own boundary setup. Restore the correct boundary before resuming movement-based play.
What this means for your Steam VR setup
Choose the headset path before installing extra software or changing runtimes. Existing Windows Mixed Reality owners should resolve Windows compatibility first; Index, Vive, and Quest users can begin with their connection and play-space checkpoints.
- Install SteamVR, but also install the bridge or vendor application required by the connection path you actually intend to use.
- Confirm that the headset and required controllers work in their first setup environment before troubleshooting the game.
- Complete the play-space boundary in SteamVR, Mixed Reality Portal, or Quest’s own software, according to the headset.
- Use the game’s VR launch choice or in-game toggle, and change OpenXR runtime selection only for an established game requirement.
- Treat Windows Mixed Reality’s November 2026 servicing deadline as a separate planning issue from getting an existing session running today.
Getting into VR on Steam becomes a repeatable procedure once the connection, boundary, runtime, and game are treated as distinct checkpoints. For most users, the next useful action is the first incomplete step in that chain. For Windows Mixed Reality owners, it also means deciding how long an existing Windows 11 version 23H2 setup remains practical as Microsoft’s stated support window approaches its end.