

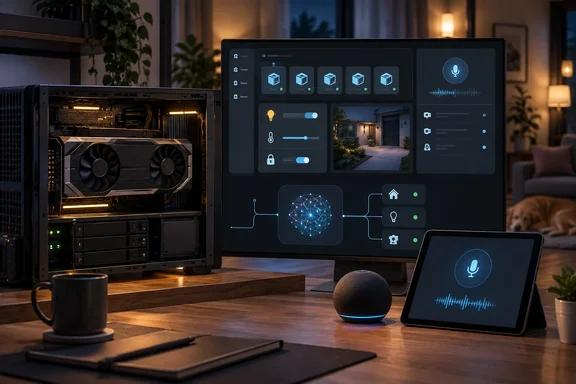
The setup: Proxmox, an LXC container and a 2016 GPU
Pande says the GTX 1080 sits in an older first-generation Ryzen system running Proxmox VE 9.2. The GPU is passed through to a Linux container (LXC) running llama.cpp, the open-source inference engine. He admits this took far more work than he expected. Once he fixed the compatibility problems, he says the card ran Google's Gemma 4 E4B model at more than 45 tokens per second, sometimes topping 50.
Read that number as one hobbyist's result, not a GTX 1080 benchmark. He doesn't give the model's quantization, the llama.cpp build, his CUDA or driver setup, context length, or how he measured throughput. All of those can move token rates a lot.
He picked Gemma 4 E4B for its size and speed. He describes it as having 5.1 billion effective parameters, with knowledge that he says rivals 8B-class models. In his testing it was more accurate with Home Assistant than other sub-9B models he tried. He's also honest about its limits: the model still makes mistakes when a single instruction involves several devices.
Some context from general industry knowledge: the GTX 1080 has 8GB of VRAM, which limits you to small, usually quantized models. NVIDIA has also said its 580 driver branch is the last to support Pascal, alongside Maxwell and Volta. That means anyone building on this card is using hardware with a known support horizon. Pande doesn't say which driver or CUDA version he runs, so it's unclear whether that played into his "compatibility issues."
Section summary: An old GPU can serve a small local LLM fast enough for smart-home queries. The quoted speed comes from one configuration whose settings weren't disclosed, and multi-device commands still trip up the model.
Home Agent vs. the new official llama.cpp integration
To connect Home Assistant to his llama.cpp container, Pande uses Home Agent, a custom integration from the Home Assistant Community Store (HACS). His reason is that Home Assistant's built-in Ollama integration doesn't support llama.cpp as a provider. The same LXC also runs nomic-embed-text-1.5, an embedding model that Home Agent uses.
That reasoning was sound for most of the past year, and the community workarounds show it. In one Home Assistant Community thread, a user who had moved from Ollama to llama.cpp said they haven't found a way to connect a home assistant to my local llama server. HACS projects filled the gap, including Llama Assist, which creates a new Conversation agent in Home Assistant, which can be selected in the Voice Assistants section of the Home Assistant UI.
The situation has since changed. According to Home Assistant's own integration page, the llama.cpp service was introduced in Home Assistant 2026.8. TechFuel HQ reports that Home Assistant 2026.8 shipped a native llama.cpp integration on August 5. The official documentation says it works with a local or remote server that implements the OpenAI-compatible chat completions API. It names llama.cpp, llama-cpp-python and vLLM among the compatible backends.
This doesn't mean Pande picked the wrong tool. Home Agent may do things his setup relies on, such as the embedding model, and the official page lists only one entity type: a conversation agent. But readers starting from scratch now have a first-party option, and the "Ollama doesn't support llama.cpp" reason no longer settles the question.
Setting up the official llama.cpp integration
Based on Home Assistant's documentation:
- Run an OpenAI-compatible server first. Home Assistant doesn't host the model. The docs give
[url]http://localhost:8080/v1[/url]as the typical llama.cpp endpoint, though you can use any port. - Add the integration. Go to Settings > Devices & services, select Add Integration, and choose llama.cpp.
- Enter the base URL of your server, including the
/v1path. An API key is optional if your server doesn't require authentication. - Pick the chat model when prompted once the connection works.
- Tune the options. Click the cogwheel on the integration card to set the instructions (written in Home Assistant templating), the Control Home Assistant level, and whether to use recommended settings for max tokens, temperature and top P.
If the connection fails, the docs suggest these checks. Confirm the server is running and reachable from the Home Assistant host. Verify that the URL contains the correct protocol (HTTP or HTTPS), hostname, port, and path (such as /v1). Also check that no firewall blocks traffic between Home Assistant and the server, and that any API key is correct. In a Proxmox setup where the model runs in one container and Home Assistant in a separate VM, network reachability is the first thing to check.
Section summary: Pande's HACS route made sense when he built it. Since Home Assistant 2026.8, though, a native llama.cpp conversation agent exists for anyone with an OpenAI-compatible endpoint.
Guardrails: the model only sees what you expose
When you give an LLM access to your house, keep its permissions tight. Home Assistant's documentation says the model can only control or provide information about entities that are exposed to it. The developer documentation adds that the Assist API matches what the built-in conversation agent can do, and that it can't perform administrative tasks.
In practice, go to the exposed-entities page and expose only what you actually want to control by voice or chat. That also relates to Pande's multi-device errors: a smaller list of entities gives a small model fewer ways to get things wrong. Industry experience with small models backs this up. TechFuel HQ tested models on an RTX 5080 against 24 spoken commands and found that the model reliability spread (71% to 96% on a 24-command corpus) matters more than speed. Its hardware is very different from a GTX 1080, but the point carries over: a fast wrong answer that switches off the wrong light is still wrong.
Section summary: Limit exposed entities, check which control level you've granted, and judge local models on accuracy, not just tokens per second.
The voice pipeline: an old tablet becomes a satellite
Gemma also handles the conversation part of Pande's voice assistant. Whisper does speech-to-text and Piper does text-to-speech, both on the Home Assistant VM rather than the GPU container. For the microphone he uses an old Android tablet running the Home Assistant Companion app, which now supports wake words. Before that, he says, a DIY voice satellite meant building ESP32 or Raspberry Pi hardware, unless you bought the official Voice Preview Edition.
The timing is on record. Home Assistant's 2026.3 release on March 4, 2026 added experimental on-device wake-word detection to the Android Companion app. It uses microWakeWord, the same engine as the Voice Preview Edition. The Android documentation also says Assist works on tablets, not just phones. It doesn't list tablet models, and Pande doesn't give his tablet's Android or app version.
Enabling wake words on Android
According to Home Assistant's Android docs, you need Companion app 2026.2.3 or later, Assist set as the default assistant app, and either Home Assistant Cloud or a manually configured local Assist pipeline. Then:
- Open the Home Assistant app and go to Settings > Companion app.
- Open Assist for Android.
- Turn on Wake word detection.
- Choose Hey Nabu, Hey Jarvis or Hey Mycroft.
Once it's on, detection works with the device locked or the app in the background. Wake-word detection happens entirely on the device, and no audio reaches Home Assistant until the wake word is heard. Running commands still needs a connection to your Home Assistant instance.
Two caveats. First, battery drain. Listening continuously keeps the CPU awake, because Google doesn't let third-party apps use the low-power hotword hardware that "Ok Google" relies on. On a tablet that stays plugged in as a wall panel, that hardly matters. On your phone, it's noticeable. You can switch detection on and off remotely with the command_wake_word_detection command (turn_on or turn_off). Home Assistant suggests automating it so it runs only when you're home. Second, the feature is experimental. If the app hangs or stops opening, go to Settings > Apps > Default apps > Digital assistant app and pick a different assistant, or none.
Section summary: The Android Companion app's wake-word support, added in 2026.3, turns a spare tablet into a voice satellite at no cost. Plan for the battery drain and remember it's still experimental.
Frigate: from object detection to AI summaries
The GTX 1080 also used to do object detection for Frigate, the open-source NVR, running in its own Proxmox LXC with GPU passthrough. Pande has since moved his small camera setup to a Raspberry Pi with an AI Kit. Home Assistant still receives Frigate alerts through the HACS Frigate integration. His automation then uses Gemma 4 E4B's vision capability to write a summary of the footage and send it to his tablet dashboard.
These roles weren't all running on the GPU at once. Object detection has moved off the card, and speech processing runs on the Home Assistant VM. What the GPU does now is serve the language model, including the vision-based summaries.
Why this matters for Windows and PC hobbyists
Many PC builders have an old graphics card sitting in a drawer. Pande's experience suggests it can do more than collect dust or sell for very little. The same passthrough skills carry over: before his smart-home project, he used the card in a Windows 11 VM to stream games to an old smartphone.
Running your own AI server also isn't limited to Linux. TechFuel HQ's tests ran llama-server on Windows on a Ryzen 7 7800X3D and RTX 5080 system, and Home Assistant's new integration pointed at that same OpenAI-compatible endpoint. If your Home Assistant box can reach a Windows gaming PC over the network, that PC can act as the model server when it's switched on. Whether you want your lights to depend on your gaming rig's power state is up to you.
Going local has costs as well as benefits. You avoid cloud LLM providers, which is why Pande avoided ChatGPT and Anthropic in the first place. In exchange, you look after drivers, containers, passthrough and model tuning yourself, on hardware whose driver support is winding down. For people who enjoy that work, it's a good way to reuse an old card. For people who just want the kitchen lights to come on, it's a lot of setup.
Bottom line: An old GPU can run a small, useful local assistant for Home Assistant. Anyone starting now should begin with the official llama.cpp integration added in 2026.8, keep the exposed entities to a minimum, and expect small models to struggle with complex multi-device commands.
References
- I turned an old GPU into Home Assistant's brain, and now my LLMs talk to my smart devices XDA · 2026-09-28T14:00:16+00:00
- How to connect Llama.cpp server to Home Assistant? - Configuration - Home Assistant Community community.home-assistant.io
- GitHub - M4TH1EU/llama-assist: Manage your smart home in Home Assistant with local LLMs running with llama.cpp · GitHub github.com