

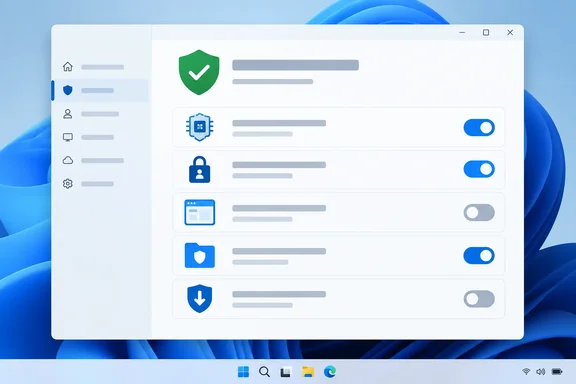
His result applies to one laptop. It doesn't prove how every PC ships. Still, you can check your own machine in about ten minutes, and Microsoft's documentation explains why a device might end up this way. Below are each of the five settings, where to find it, what can break, and how to recover if something does.
Why these settings can be off
Most of these features restrict what software is allowed to do, which makes them either very useful or quite annoying. Drivers, authentication plug-ins, unsigned tools and older apps can all get caught.
Upgrades matter too. A PC that moved from Windows 10, or from an older Windows 11 release, may have kept settings a clean install would have turned on automatically. Microsoft also notes that the options on the Core isolation page depend on your Windows version and your hardware.
Summary: A setting that is off doesn't mean you've been attacked. It means a layer isn't running. Before you turn it on, find out why it's off.
1. Memory Integrity (HVCI)
Where: Windows Security > Device security > Core isolation details
Memory Integrity is also called Hypervisor-protected Code Integrity (HVCI). It uses hardware virtualization to create an isolated space where Windows checks kernel-mode code before running it. Microsoft says this makes it harder for malware to take over a PC through low-level drivers.
On Akinleye's laptop the toggle wasn't shown at all, and the cause was that virtualization was turned off in the firmware. Microsoft confirms that hardware virtualization must be enabled for the feature to work.
If the toggle is missing:
- Open Task Manager and go to the Performance tab. Under CPU, check whether it says virtualization is enabled.
- If it's disabled, enter your UEFI/BIOS. Microsoft's route is Settings > System > Recovery, then Restart now next to Advanced startup. After the restart, choose Troubleshoot > Advanced options > UEFI Firmware Settings > Restart.
- Find the virtualization option. The name depends on the manufacturer. Akinleye mentions Intel VT-x and AMD SVM Mode as common labels. Microsoft points users to their PC maker's own instructions and notes that virtualization is already enabled on Surface devices.
- Change only that one setting. Microsoft warns that changing other firmware settings could stop you from getting into Windows. Back up first.
- Back in Windows, turn Memory Integrity on and restart.
Common failure point: incompatible drivers. If Memory Integrity won't turn on, or it blocks a driver later, Microsoft recommends checking Windows Update or the device maker for a compatible driver. If there isn't one, you can remove the device or app that uses the old driver. Microsoft says a blocked driver is "most likely not malicious in any way." It just fails the stricter check.
Turning Memory Integrity off again is the last resort. On a Secured-core PC, doing so removes the device from its Secured-core state.
There's a small extra benefit. Kernel-mode Hardware-enforced Stack Protection, on the same page, needs Memory Integrity enabled plus a CPU with Intel Control-Flow Enforcement Technology or AMD Shadow Stack. Getting HVCI running may therefore make a second protection available.
2. Local Security Authority (LSA) protection
Where: The same Core isolation details page, below Memory Integrity
The Local Security Authority checks your credentials at sign-in and manages the tokens used for single sign-on. That makes it an obvious target for credential thieves. LSA protection helps stop untrusted code from running inside LSA or reading its memory. You need to restart after changing it.
Akinleye found it off, with a warning that his device may be vulnerable. That warning means the protection isn't running. It doesn't mean credentials were stolen.
Microsoft's own documents disagree about the default:
- Microsoft's Windows Security support page says LSA protection is on by default on all devices: immediately on new installs, and on upgraded PCs after a five-day evaluation period and a reboot.
- Microsoft Learn's configuration guide is narrower. On Windows 11 22H2 and later, automatic enablement applies when the device is a new installation (not an upgrade) and the device can run HVCI.
That second condition may explain some of what Akinleye saw. His laptop couldn't run HVCI until he enabled virtualization. We can't confirm that was the cause on his machine, but it's a reasonable thing to check on yours.
Compatibility: Microsoft Learn says any plug-in loaded into LSA must carry a Microsoft signature. Smart card drivers, cryptographic plug-ins and password filters are examples. Unsigned ones won't load. If something breaks after enabling it:
- Windows shows a notification naming the blocked file. Microsoft says you can remove the software that loads it, or turn off future warnings for that file.
- Admins and power users can open Event Viewer at Applications and Services Logs > Microsoft > Windows > CodeIntegrity > Operational. Event 3033 means a driver didn't meet Microsoft signing requirements. Event 3063 means it failed the shared-section security requirements.
- For managed fleets, Microsoft recommends first listing every LSA plug-in and driver in use, including internal password filters, and testing before a wide rollout.
3. Smart App Control
Where: Windows Security > App & browser control > Smart App Control settings
Smart App Control blocks apps before they run instead of scanning afterward. Microsoft's cloud service first tries to judge whether an app is safe. If it can't decide, an app with a valid signature can run, and an unsigned or invalidly signed app is blocked. The setting has three states: On, Off and Evaluation. In Evaluation mode the feature watches how you use the PC and can turn itself off if it would get in your way too often.
What has changed is how you enable it. For years Smart App Control needed a clean install, and turning it off once meant a reset to get it back. Microsoft's current FAQ now says recent Windows updates allow Smart App Control to be enabled without requiring a clean installation.
Akinleye puts the change in 2026. The rollout was uneven:
- Microsoft first disclosed the change in the January 29, 2026 preview update, KB5074105, then removed the feature from that update's documentation in February.
- It came back in the March 26 preview release, KB5079391, where Microsoft said the ability to turn Smart App Control on or off without a clean installation was beginning its rollout.
- According to Topedia, with the cumulative update KB5083769 from 14 April, Microsoft updated the option to enable Smart App Control without requiring a Windows 11 reinstall.
Why your controls may be greyed out (Evaluation was greyed out on Akinleye's PC):
- It's a staged rollout. Fully patched 24H2 and 25H2 PCs may still not all expose it at precisely the same time.
- Microsoft lists other blockers: your device is enterprise-managed or developer-mode has been configured, or the PC is running in S mode.
- Diagnostic data matters. If optional diagnostic data is off, Microsoft says you'll need to reset this PC, or reinstall Windows, and select Send optional diagnostic data during the setup process.
The catch for developers and tinkerers: There is currently no way to bypass Smart App Control protection for individual apps. You can turn Smart App Control off, or (better yet), contact the developer of the app and encourage them to sign their app with a valid signature. There's no allow list for your own unsigned build scripts.
It also affects the LSA troubleshooting above. Microsoft Learn notes that LSA audit events aren't generated while Smart App Control is on. If you need to audit LSA plug-ins, audit first and deal with Smart App Control afterward.
4. Controlled folder access
Where: Windows Security > Virus & threat protection > Manage ransomware protection
Controlled folder access blocks untrusted apps from changing files in protected folders. Ransomware needs exactly that ability to encrypt your files. Microsoft lists Documents, Pictures, Videos, Music and Desktop as protected by default, and you can add more folders.
After Akinleye turned it on, it logged a low-severity block involving Android DeX. That's one user's experience, not a known general conflict. Windows also suggested setting up OneDrive. Microsoft describes OneDrive integration as a way to recover files after a ransomware attack, not something Controlled folder access needs in order to work.
If a trusted app can't save:
- Read the Windows Security notification to see which app was blocked.
- Microsoft suggests saving the file somewhere outside the protected folders for now.
- Go to Allow an app through Controlled folder access and add the app.
- Save to the original location again.
Microsoft adds a warning here: any app you allow gets access to your protected folders. If that app is later compromised, those files are exposed. Only add apps you actually trust.
5. Potentially unwanted app (PUA) blocking
Where: Windows Security > App & browser control > Reputation-based protection settings
PUAs aren't necessarily malware. Think of bundled toolbars, adware and installers that add extra software. Microsoft says PUA blocking has been on by default since early August 2021. Akinleye still found it off, and he doesn't know why. His experience shows that the documented default doesn't guarantee your PC has it on. On an organization-managed device, you may not be allowed to change it.
After enabling it: Check both sub-options so apps and downloads are blocked. If a legitimate but little-known tool gets flagged, look in Protection history to see what was blocked before assuming it's malware.
How to roll these out without breaking things
Akinleye suggests changing one setting at a time, and that's the most useful advice in his article.
| Setting | Main risk | Recovery path |
|---|---|---|
| Memory Integrity | Old drivers blocked | Updated driver; remove the device |
| LSA protection | Unsigned auth plug-ins fail | Notification, CodeIntegrity events 3033/3063 |
| Smart App Control | Unsigned apps blocked, no exceptions | Signed version or turn it off |
| Controlled folder access | Trusted apps can't save | Allow the app |
| PUA blocking | Low-reputation tools flagged | Check Protection history |
His PC kept working normally, and Device Manager showed no warnings. That's reassuring, but it's one laptop. Gamers with old anti-cheat drivers, smart card users with third-party middleware, and developers running unsigned builds should expect more friction.
Bottom line: If your Windows 11 PC was upgraded rather than clean-installed, open Windows Security and check these settings yourself. Don't assume your defaults match anyone else's. Make each change deliberately, one at a time, and restart after each so you know which one caused any problem.
References
- Microsoft Defender has stronger protections you probably aren’t using - MakeUseOf MakeUseOf · 2026-09-29T15:00:15+00:00
- Configure added LSA protection | Microsoft Learn learn.microsoft.com
- Device Security in the Windows Security App | Microsoft Support support.microsoft.com