

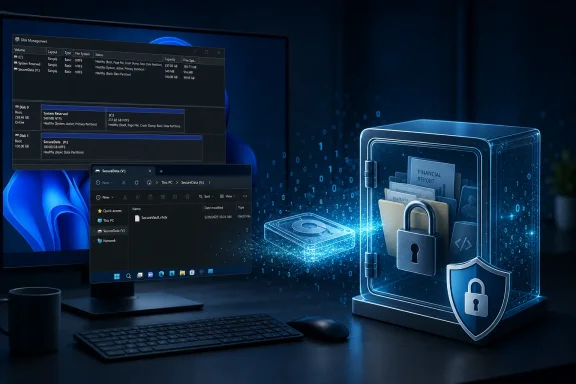
Windows 11 has no shortage of security features, but one of its most useful tools for protecting a small collection of sensitive files is often overlooked: a BitLocker-encrypted virtual hard disk. By creating a VHDX file, mounting it as a normal drive, and encrypting that virtual drive with BitLocker, Windows users can build a self-contained encrypted vault without installing another encryption suite or encrypting the entire PC.
The appeal is immediate. A virtual hard disk can live as a single
That does not make it a replacement for whole-device encryption. It is a different layer of protection with different strengths, limitations, and operational trade-offs. For many Windows 11 Pro users, however, the encrypted VHDX approach is one of the cleanest ways to create a private file vault using tools already built into the operating system.
A virtual hard disk is a disk image stored inside a file. In Windows, the modern format is generally VHDX, which improves on the older
Once attached through Disk Management or command-line tools, Windows treats the VHDX as though another physical disk had been connected. It can be initialized, partitioned, formatted with NTFS, assigned a drive letter, and used for ordinary file storage.
The key distinction is that everything stored on that virtual disk is ultimately contained within one host file. For example:
That VHDX may appear in File Explorer as drive
BitLocker adds encryption to the volume inside the VHDX. A user who mounts the VHDX must then unlock the BitLocker-protected volume using the configured password, recovery key, smart card, or other permitted unlock method.
This creates a useful two-part access model:
But full-disk encryption has a practical limitation: once Windows boots and the user signs in, the operating system drive is generally available for the duration of that session. That is exactly what most users want for normal work, yet it does not provide a convenient way to place one project, folder collection, or document archive behind a separately managed lock.
A BitLocker-encrypted VHDX solves that narrower problem.
This is especially useful for people who share a household computer, regularly hand a device to someone else for troubleshooting, or simply want stronger compartmentalization between everyday files and highly private material.
That convenience should not be confused with a complete backup strategy. A copied VHDX can protect against a lost or failed machine, but it does not automatically protect against accidental deletion, ransomware, file corruption, or an overwritten backup. Multiple versioned backups remain important.
However, Windows 11 Pro, Enterprise, and Education editions already include the main building blocks:
Windows 11 Pro, Enterprise, Education, and related business-oriented editions support manual BitLocker drive encryption. Windows Home can support Device Encryption on compatible hardware, but Device Encryption is not the same as having the full BitLocker management experience for manually encrypting a chosen VHDX volume.
Before planning a BitLocker VHDX vault, check the installed edition:
Open the Run dialog with
and press Enter. This launches Disk Management, the classic Windows tool for managing physical disks, partitions, and virtual disks.
From the Action menu, select Create VHD.
VHDX offers meaningful advantages:
A dynamically expanding VHDX starts small and grows as data is written into the virtual disk, up to the maximum size selected during creation. For a 100 GB virtual disk, the VHDX does not instantly consume 100 GB of physical space on the host drive.
A fixed-size VHDX reserves its full configured capacity immediately. A 100 GB fixed VHDX generally consumes roughly that amount of host storage from the start.
Dynamically expanding disks are attractive because they conserve storage initially. They are especially sensible for document vaults, moderately sized archives, and project containers that may grow over time.
Fixed-size disks can be more predictable in some performance-sensitive or tightly managed storage scenarios. But for a personal encrypted file vault, dynamic expansion is often the practical default.
There is one critical caveat: a dynamically expanding VHDX can still run the host drive out of space. If a user creates a 500 GB VHDX on a physical drive with only 150 GB free, the VHDX may mount normally at first, but it can grow only until host storage is exhausted.
A virtual disk’s stated maximum capacity is not a guarantee that the physical storage beneath it can support that capacity.
For most modern systems, choose GPT rather than MBR. GPT is the current partitioning standard and is well suited to Windows 11 systems.
Then create a New Simple Volume, assign an available drive letter, and format the volume with NTFS.
NTFS remains the sensible default for a BitLocker-protected Windows data volume because it supports the permissions, metadata, file sizes, and general compatibility expected from a Windows storage drive.
At this point, the VHDX will appear in File Explorer like a normal drive. It is not yet encrypted, so it should not be treated as secure until BitLocker setup has been completed.
The wizard will present unlock and recovery choices based on the drive type, Windows edition, and any device-management policies in effect.
A short, reused password is a weak foundation for an encrypted vault. The encryption algorithm may be strong, but a guessable password gives an attacker a far easier route than attempting to defeat the encryption itself.
A good vault password should be:
A recovery key should be kept separate from the VHDX file. Storing the recovery key inside the encrypted VHDX would be useless, since it would be inaccessible precisely when it is needed.
Safer options can include:
However, a virtual disk intended to move between different PCs deserves more planning. If the VHDX may be mounted on older Windows installations, compatibility can become a deciding factor.
The practical rule is straightforward:
After finishing work, save and close files stored on the virtual drive. Then detach the VHDX through Disk Management or use the available drive-management options in Windows.
When the virtual disk is detached:
A mounted BitLocker data drive can be locked using supported BitLocker management methods. A VHDX can also be detached so the virtual disk itself is no longer attached to Windows. For routine personal use, detaching the VHDX after work is typically the clearest way to remove the sensitive drive from view.
That means the VHDX method is highly effective for protecting data at rest, such as when the virtual disk is detached or the PC is shut down. It is not a magic barrier against threats already operating inside an active Windows session.
For this reason, users should:
This matters more than it may initially appear.
If sensitive files are copied out of the vault, downloaded elsewhere, edited in another folder, or exported to the Desktop, those copies are outside the VHDX. They are protected only by whatever security applies to the host drive.
Similarly, applications may create traces outside the encrypted virtual disk, including:
If only the VHDX is encrypted, the attacker may still gain access to unprotected Windows files, installed software, user profile information, browser data, application caches, and system artifacts stored outside the container. The encrypted vault remains protected, but the computer as a whole does not.
For portable PCs, the strongest everyday approach is usually layered:
If that one file becomes corrupted, deleted, or encrypted by ransomware, an entire vault may be affected at once.
A sensible backup plan for an encrypted VHDX should include more than copying the active file to one external drive.
A backup that has never been tested is only a hopeful assumption.
It is a strong option when the requirements look like this:
For example, a user who needs the same encrypted archive to open effortlessly on Windows, macOS, Linux, Android, and iPhone may prefer a platform-neutral encrypted-storage workflow. A user handling extremely sensitive regulated, legal, medical, or corporate information may need a managed solution with auditing, escrow, endpoint protections, and formal policy controls.
Likewise, someone who needs to hide data from an adversary who can access an unlocked Windows session must think beyond a simple encrypted container. Endpoint compromise, keylogging, remote access malware, and physical coercion are threat-model problems that a detached VHDX alone cannot solve.
Its best use is as a locked drawer inside a broader security plan. The VHDX protects a dedicated set of files when it is detached or BitLocker-locked. Full-disk BitLocker protects the rest of the PC when it is powered down. Strong passwords, careful recovery-key storage, routine backups, and secure everyday Windows habits complete the picture.
For Windows users who want a clean private workspace without encrypting every file they own, a BitLocker-encrypted virtual hard disk remains one of the most capable built-in tools available. It turns an ordinary
The appeal is immediate. A virtual hard disk can live as a single
.vhdx file on an internal SSD, a secondary drive, or selected backup media. When mounted, it behaves like an ordinary Windows drive with its own drive letter. When detached, it disappears from File Explorer. Add BitLocker to the volume inside it, and the VHDX becomes a password-protected container for documents, source code, financial records, private exports, archived projects, or any other files that deserve stronger separation from the rest of the Windows installation.That does not make it a replacement for whole-device encryption. It is a different layer of protection with different strengths, limitations, and operational trade-offs. For many Windows 11 Pro users, however, the encrypted VHDX approach is one of the cleanest ways to create a private file vault using tools already built into the operating system.
 Overview: What an Encrypted VHDX Actually Does
A virtual hard disk is a disk image stored inside a file. In Windows, the modern format is generally VHDX, which improves on the older .vhd format with stronger resilience features and support for much larger virtual disks.Once attached through Disk Management or command-line tools, Windows treats the VHDX as though another physical disk had been connected. It can be initialized, partitioned, formatted with NTFS, assigned a drive letter, and used for ordinary file storage.
The key distinction is that everything stored on that virtual disk is ultimately contained within one host file. For example:
D:\PrivateVault\WorkArchive.vhdxThat VHDX may appear in File Explorer as drive
V: while mounted. After it is detached, V: vanishes. The underlying .vhdx file remains, but Windows no longer exposes its internal folders and files as an accessible volume.BitLocker adds encryption to the volume inside the VHDX. A user who mounts the VHDX must then unlock the BitLocker-protected volume using the configured password, recovery key, smart card, or other permitted unlock method.
This creates a useful two-part access model:
- Attach the VHDX so Windows can see the virtual disk.
- Unlock BitLocker to access the encrypted file system stored on it.
Why a VHDX Vault Can Be More Practical Than Encrypting Everything
Full-disk encryption remains one of the most important protections for a Windows laptop or desktop. BitLocker on the Windows system drive helps protect the operating system, installed applications, user profiles, hibernation data, and other information if a machine is stolen while powered off.But full-disk encryption has a practical limitation: once Windows boots and the user signs in, the operating system drive is generally available for the duration of that session. That is exactly what most users want for normal work, yet it does not provide a convenient way to place one project, folder collection, or document archive behind a separately managed lock.
A BitLocker-encrypted VHDX solves that narrower problem.
A separate boundary for private material
An encrypted virtual disk can isolate data such as:- Tax records and financial statements
- Password manager exports
- Personal scans and identity documents
- Legal files
- Private photos
- Sensitive work-in-progress material
- Development repositories and configuration archives
- Offline project backups
- Exported email archives
- Portable document collections
This is especially useful for people who share a household computer, regularly hand a device to someone else for troubleshooting, or simply want stronger compartmentalization between everyday files and highly private material.
A portable project container
The VHDX model also works well for project-based storage. A developer, designer, student, consultant, or researcher can keep an entire active project within one virtual disk file, including:- Project documents
- Local source code
- Notes and specifications
- Encrypted exports
- Supporting media
- Build artifacts
- Offline reference materials
That convenience should not be confused with a complete backup strategy. A copied VHDX can protect against a lost or failed machine, but it does not automatically protect against accidental deletion, ransomware, file corruption, or an overwritten backup. Multiple versioned backups remain important.
No third-party vault application is required
Windows users often turn to third-party encrypted-container software because they want a locked space rather than whole-device encryption. In many cases, that is perfectly reasonable. Dedicated tools may offer cross-platform support, advanced hidden-volume features, specialized key-file workflows, or more flexible container formats.However, Windows 11 Pro, Enterprise, and Education editions already include the main building blocks:
- Disk Management for creating and attaching virtual disks
- VHDX for the container format
- NTFS for the file system
- BitLocker for encryption
- PowerShell and
manage-bdefor management and automation
The Windows Edition Requirement Is More Important Than It Looks
The phrase “free encrypted vault” needs an important qualification. The virtual hard disk capability itself is built into modern Windows, but BitLocker Drive Encryption is not available as a standard manually managed feature in Windows Home.Windows 11 Pro, Enterprise, Education, and related business-oriented editions support manual BitLocker drive encryption. Windows Home can support Device Encryption on compatible hardware, but Device Encryption is not the same as having the full BitLocker management experience for manually encrypting a chosen VHDX volume.
Before planning a BitLocker VHDX vault, check the installed edition:
- Open Settings.
- Select System.
- Open About.
- Review the Windows edition listed under Windows specifications.
Managed devices may impose additional restrictions
Business PCs, school-issued systems, and devices governed by organizational policy can introduce another complication. Even on Windows 11 Pro or Enterprise, administrators may control whether users can:- Enable BitLocker on data volumes
- Use password protectors
- Save recovery keys locally
- Store recovery information in an online account
- Use removable drives
- Enable automatic unlocking
- Change encryption methods
Creating the Virtual Hard Disk in Disk Management
The creation process is simple, but the choices made during setup affect capacity, portability, and reliability.Open the Run dialog with
Windows + R, type:diskmgmt.mscand press Enter. This launches Disk Management, the classic Windows tool for managing physical disks, partitions, and virtual disks.
From the Action menu, select Create VHD.
Choose VHDX rather than legacy VHD
Windows still supports the older VHD format, but VHDX is the better default for nearly every modern Windows 11 use case.VHDX offers meaningful advantages:
- Better resilience against certain unexpected I/O failures
- Support for much larger virtual disks
- Improved alignment and support for modern storage hardware
- Better suitability for current Windows environments
- A format designed for newer virtualization and storage capabilities
Dynamically expanding versus fixed size
Disk Management offers two primary allocation models.A dynamically expanding VHDX starts small and grows as data is written into the virtual disk, up to the maximum size selected during creation. For a 100 GB virtual disk, the VHDX does not instantly consume 100 GB of physical space on the host drive.
A fixed-size VHDX reserves its full configured capacity immediately. A 100 GB fixed VHDX generally consumes roughly that amount of host storage from the start.
Dynamically expanding disks are attractive because they conserve storage initially. They are especially sensible for document vaults, moderately sized archives, and project containers that may grow over time.
Fixed-size disks can be more predictable in some performance-sensitive or tightly managed storage scenarios. But for a personal encrypted file vault, dynamic expansion is often the practical default.
There is one critical caveat: a dynamically expanding VHDX can still run the host drive out of space. If a user creates a 500 GB VHDX on a physical drive with only 150 GB free, the VHDX may mount normally at first, but it can grow only until host storage is exhausted.
A virtual disk’s stated maximum capacity is not a guarantee that the physical storage beneath it can support that capacity.
Initializing and formatting the VHDX
After creation, Disk Management lists the new virtual disk as Not Initialized. The new disk must be initialized before Windows can create a volume on it.For most modern systems, choose GPT rather than MBR. GPT is the current partitioning standard and is well suited to Windows 11 systems.
Then create a New Simple Volume, assign an available drive letter, and format the volume with NTFS.
NTFS remains the sensible default for a BitLocker-protected Windows data volume because it supports the permissions, metadata, file sizes, and general compatibility expected from a Windows storage drive.
At this point, the VHDX will appear in File Explorer like a normal drive. It is not yet encrypted, so it should not be treated as secure until BitLocker setup has been completed.
Encrypting the Mounted Drive With BitLocker
With the VHDX mounted and formatted, open File Explorer, select This PC, right-click the new virtual drive, and choose Turn on BitLocker. The same workflow is available through the BitLocker Drive Encryption Control Panel.The wizard will present unlock and recovery choices based on the drive type, Windows edition, and any device-management policies in effect.
Use a strong, unique password
If the VHDX is configured to use a password protector, its practical security depends heavily on that password.A short, reused password is a weak foundation for an encrypted vault. The encryption algorithm may be strong, but a guessable password gives an attacker a far easier route than attempting to defeat the encryption itself.
A good vault password should be:
- Long rather than merely complicated
- Unique to the encrypted VHDX
- Not reused for an email account, Microsoft account, or password manager
- Stored in a reputable password manager where appropriate
- Memorable enough to avoid unsafe written reminders
- Resistant to personal-information guesses
Protect the recovery key like the vault itself
The BitLocker recovery key is not an optional afterthought. It is the emergency route back into the encrypted drive if the normal password is lost, forgotten, or rejected after a configuration problem.A recovery key should be kept separate from the VHDX file. Storing the recovery key inside the encrypted VHDX would be useless, since it would be inaccessible precisely when it is needed.
Safer options can include:
- Storing the recovery information in a secure Microsoft account, where appropriate
- Printing it and keeping it in a physically secure location
- Saving it in a protected password manager
- Keeping a copy on a separately secured backup device
- Following organizational key-escrow requirements on managed systems
Encryption mode affects portability
Windows may offer a choice between a newer encryption mode and a compatibility-oriented mode. The newer mode is normally the preferred choice for drives that will remain on current Windows systems.However, a virtual disk intended to move between different PCs deserves more planning. If the VHDX may be mounted on older Windows installations, compatibility can become a deciding factor.
The practical rule is straightforward:
- Choose the newer encryption mode for a vault that stays on modern Windows systems.
- Consider compatible mode if the encrypted volume must be opened on older supported Windows environments.
Detach, Lock, and Understand the Difference
One of the strongest features of this method is the ability to make the private drive disappear from normal use.After finishing work, save and close files stored on the virtual drive. Then detach the VHDX through Disk Management or use the available drive-management options in Windows.
When the virtual disk is detached:
- Its drive letter disappears from File Explorer.
- Windows applications can no longer browse the mounted file system.
- The VHDX returns to being a single container file.
- The encrypted files inside are no longer exposed as an accessible volume.
A mounted BitLocker data drive can be locked using supported BitLocker management methods. A VHDX can also be detached so the virtual disk itself is no longer attached to Windows. For routine personal use, detaching the VHDX after work is typically the clearest way to remove the sensitive drive from view.
Do not rely on an open session for confidentiality
While the VHDX is mounted and BitLocker-unlocked, its contents are available to the signed-in Windows environment according to normal file permissions. Malware running under the user’s account, a remote-control attacker with access to the desktop session, or another person using an unlocked PC may be able to access the vault.That means the VHDX method is highly effective for protecting data at rest, such as when the virtual disk is detached or the PC is shut down. It is not a magic barrier against threats already operating inside an active Windows session.
For this reason, users should:
- Detach the vault promptly after use.
- Lock the PC when stepping away.
- Keep Windows and security software updated.
- Avoid opening the vault while using untrusted software.
- Treat an unlocked VHDX as sensitive data that is presently accessible to the operating system.
The Biggest Security Limitation: It Does Not Encrypt the Rest of Windows
An encrypted VHDX vault protects the files stored inside the encrypted virtual volume. It does not automatically protect everything outside that volume.This matters more than it may initially appear.
If sensitive files are copied out of the vault, downloaded elsewhere, edited in another folder, or exported to the Desktop, those copies are outside the VHDX. They are protected only by whatever security applies to the host drive.
Similarly, applications may create traces outside the encrypted virtual disk, including:
- Recent file lists
- Thumbnail caches
- Search index entries
- Temporary files
- Autosave copies
- Print spool data
- Application crash reports
- Browser downloads
- Clipboard history
- Cloud synchronization copies
- Page-file or hibernation-related data in some circumstances
Full-disk BitLocker remains the stronger laptop-theft defense
A stolen laptop is one of the clearest cases where whole-device encryption matters.If only the VHDX is encrypted, the attacker may still gain access to unprotected Windows files, installed software, user profile information, browser data, application caches, and system artifacts stored outside the container. The encrypted vault remains protected, but the computer as a whole does not.
For portable PCs, the strongest everyday approach is usually layered:
- Enable BitLocker or Device Encryption for the Windows system drive.
- Use a separate BitLocker-encrypted VHDX for particularly private files.
- Maintain secure backups with recovery information stored separately.
- Use strong account credentials and Windows Hello where available.
- Keep the vault detached when not actively needed.
Backup Strategy: A Single File Is Convenient, Not Invincible
The VHDX format makes backup easier in one sense: one file can represent an entire encrypted project or private archive. But single-file convenience also creates a concentration risk.If that one file becomes corrupted, deleted, or encrypted by ransomware, an entire vault may be affected at once.
A sensible backup plan for an encrypted VHDX should include more than copying the active file to one external drive.
Recommended backup practices
- Keep at least one backup separate from the primary Windows PC.
- Use versioned backups where possible.
- Do not leave the only backup permanently connected to the computer.
- Verify that a backup VHDX can actually be mounted and unlocked.
- Preserve the BitLocker recovery information separately from every copy of the VHDX.
- Ensure the backup destination has enough free space for the VHDX as it grows.
- Avoid copying the VHDX while it is actively mounted and heavily used.
A backup that has never been tested is only a hopeful assumption.
When an Encrypted VHDX Is the Right Tool
A BitLocker-protected VHDX is particularly well suited to users who want a private encrypted folder alternative that remains native to Windows.It is a strong option when the requirements look like this:
- The user has Windows 11 Pro, Enterprise, or Education.
- The files are primarily used on Windows.
- The desired vault needs to be mounted only when needed.
- The user wants to avoid installing another encryption application.
- The protected data can remain inside one self-contained container.
- Portability between Windows PCs is more important than seamless cross-platform use.
- The user is willing to manage passwords, recovery keys, and backups carefully.
For example, a user who needs the same encrypted archive to open effortlessly on Windows, macOS, Linux, Android, and iPhone may prefer a platform-neutral encrypted-storage workflow. A user handling extremely sensitive regulated, legal, medical, or corporate information may need a managed solution with auditing, escrow, endpoint protections, and formal policy controls.
Likewise, someone who needs to hide data from an adversary who can access an unlocked Windows session must think beyond a simple encrypted container. Endpoint compromise, keylogging, remote access malware, and physical coercion are threat-model problems that a detached VHDX alone cannot solve.
A Native Windows Vault With Clear Boundaries
The encrypted VHDX approach is not a hidden superpower that eliminates every data-security concern. It is a practical Windows 11 security technique with very specific benefits: separation, encryption at rest, portability as a single file, and no additional software requirement for BitLocker-capable Windows editions.Its best use is as a locked drawer inside a broader security plan. The VHDX protects a dedicated set of files when it is detached or BitLocker-locked. Full-disk BitLocker protects the rest of the PC when it is powered down. Strong passwords, careful recovery-key storage, routine backups, and secure everyday Windows habits complete the picture.
For Windows users who want a clean private workspace without encrypting every file they own, a BitLocker-encrypted virtual hard disk remains one of the most capable built-in tools available. It turns an ordinary
.vhdx file into a manageable encrypted vault—one that can be mounted for work, detached when finished, backed up as a unit, and kept out of sight until it is genuinely needed.References
- Primary source: MakeUseOf
Published: 2026-07-22T15:30:12+00:00
Loading…
www.makeuseof.com