

Windows sign-in options are meant to make a PC both faster to unlock and harder for anyone else to access. In practice, a forgotten PIN, a missing fingerprint reader, an unwanted password prompt, or a newly connected webcam can turn the experience into a confusing mix of settings. The good news is that Windows 11 and Windows 10 keep most of the controls in one place: Settings > Accounts > Sign-in options.
That page does more than choose between a password and a PIN. It controls Windows Hello, physical security keys, lock-screen privacy, Dynamic lock, restart sign-in behavior, and—in newer Windows 11 builds—passkey storage and Enhanced Sign-in Security. Understanding how those pieces fit together is the difference between a smooth daily sign-in experience and an accidental lockout.
Open Start > Settings > Accounts > Sign-in options.
On Windows 11, the page is usually divided into two main sections:
A missing sign-in option is not always a malfunction. Facial recognition needs a compatible infrared camera, fingerprint sign-in needs a fingerprint reader, and an organization can disable settings through device-management policies.
A Microsoft account password may be used across services such as Outlook, OneDrive, Microsoft 365, Xbox, and account recovery. A Windows Hello PIN is associated with the individual PC and is protected using the device’s local security hardware where available.
That distinction has practical benefits:
If that option is unavailable, choose Sign-in options at the login screen and sign in using the account password instead. Once inside Windows, reset the PIN from Settings.
Avoid treating the PIN as the only recovery route. Maintaining access to the primary account password and its verification methods prevents a small local sign-in problem from becoming a full account-recovery problem.
If face recognition becomes inconsistent after a major appearance change, a different lighting setup, or a camera relocation, use Improve recognition from the Facial recognition section. If the feature must be removed entirely, choose Remove and configure it again later.
Use Add a finger to enroll another print. If recognition becomes unreliable, remove the stored fingerprint data and enroll it again carefully.
Keep the PIN active. It is the local fallback that makes face and fingerprint sign-in practical rather than fragile.
A standard USB webcam is not automatically a Windows Hello facial-recognition camera. Likewise, a generic biometric device may not include the correct Windows Hello support.
In that case, changing a local setting may not be possible or may revert after the PC syncs with organizational management. The correct remedy is to follow the organization’s approved sign-in process rather than trying to bypass policy.
The setting matters most when a user wants to connect an external Windows Hello camera or fingerprint reader.
This is a security trade-off:
Settings > Accounts > Sign-in options > Additional settings > Enhanced sign-in security
Turn the toggle Off only if a non-ESS external camera or fingerprint reader must be used for Windows Hello.
On some Windows 11 version 23H2 systems, the equivalent setting is called Sign in with an external camera or fingerprint reader. The labels can appear counterintuitive:
For a new ESS-capable fingerprint reader, Windows may request an updated PIN before enrollment. Complete that prompt, then register fingerprints through the standard Fingerprint recognition section.
If a browser-based route is needed, the Microsoft account password reset page can be used after identity verification. The recovery process depends on having access to an approved email address, phone number, authenticator method, or recovery information.
The key risk is obvious but often ignored: if all recovery methods are outdated, password reset becomes much more difficult. Review account security information periodically, especially after changing a phone number or email address.
If a password reset disk was created in advance, select Use a password reset disk instead.
An administrator account on the same PC may also be able to reset another local user’s password through Computer Management > Local Users and Groups > Users. This tool is not available in every Windows edition, and resetting a password this way can affect access to data protected by the previous credentials.
On supported Windows 11 systems, manage device passkeys through:
Settings > Accounts > Passkeys
Select the menu next to an entry to delete a device-bound passkey. Under Advanced options, Windows can show available passkey services and supported credential-manager integration.
Passkeys can be stored in different places:
In Windows 11, open Settings > Accounts > Sign-in options > Additional settings and find the option asking when Windows should require sign-in again after the user has been away.
Windows 10 places a similar control under Require sign-in.
For a personal desktop in a secure room, a slightly more relaxed setting may be appropriate. For a laptop, shared household device, office workstation, or any computer used around visitors, requiring sign-in after sleep is the safer default.
To enable it:
Dynamic lock is useful as a safety net, but Bluetooth distance detection is imprecise. Walls, wireless interference, and device battery conditions can affect timing. The dependable habit remains simple: press Windows key + L whenever stepping away.
Showing account details is convenient on a personal machine, but hiding them reduces the information visible to someone standing in front of the PC. On a laptop used in public places, less lock-screen information is usually the better choice.
Windows may also offer controls for restartable apps and post-update setup. These settings allow Windows to save certain sign-in information so it can restore apps or finish setup after a restart.
That convenience should be evaluated carefully:
Automatic logon means that anyone who starts the PC may gain access to the selected user account and its files. Even documented automatic-logon methods carry real risk, particularly on portable devices, family PCs, office machines, and systems connected to sensitive networks.
Automatic logon only makes sense for a physically secured, single-purpose machine where the consequences of unrestricted local access are clearly understood.
For improved security, only allow Windows Hello sign-in for Microsoft accounts on this device
Windows 10 may refer to it as Require Windows Hello sign-in for Microsoft accounts.
When enabled, Windows removes the Microsoft account password as a normal sign-in method for that device and relies on Windows Hello methods instead. This can improve day-to-day protection against password-based local sign-in attempts.
However, turn it on only after confirming that the PIN works reliably and that at least one additional Windows Hello method is available where possible. A face reader, fingerprint sensor, or security key can provide useful redundancy, but the PIN remains the core fallback.
The setting affects sign-in to that PC. It does not eliminate the need to protect the Microsoft account password online.
A balanced configuration usually includes:
That page does more than choose between a password and a PIN. It controls Windows Hello, physical security keys, lock-screen privacy, Dynamic lock, restart sign-in behavior, and—in newer Windows 11 builds—passkey storage and Enhanced Sign-in Security. Understanding how those pieces fit together is the difference between a smooth daily sign-in experience and an accidental lockout.
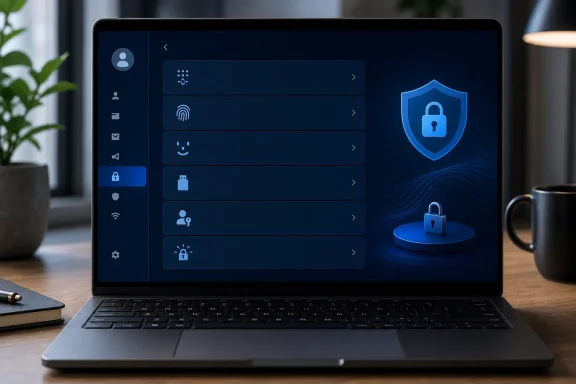 Start at the Windows Sign-in Options Page
Open Start > Settings > Accounts > Sign-in options.On Windows 11, the page is usually divided into two main sections:
- Ways to sign in
- Facial recognition (Windows Hello)
- Fingerprint recognition (Windows Hello)
- PIN (Windows Hello)
- Security key
- Password
- Passkeys, on supported versions
- Additional settings
- When Windows should require sign-in again
- Dynamic lock
- Lock-screen account-detail visibility
- Restartable app behavior
- Windows Hello-only sign-in
- Enhanced Sign-in Security on compatible hardware
A missing sign-in option is not always a malfunction. Facial recognition needs a compatible infrared camera, fingerprint sign-in needs a fingerprint reader, and an organization can disable settings through device-management policies.
Understand the Difference Between a PIN and a Password
One of the most important Windows security concepts is that a Windows Hello PIN is not the same thing as a Microsoft account password.A Microsoft account password may be used across services such as Outlook, OneDrive, Microsoft 365, Xbox, and account recovery. A Windows Hello PIN is associated with the individual PC and is protected using the device’s local security hardware where available.
That distinction has practical benefits:
- A compromised PIN is generally limited to that device.
- A PIN does not replace the need to protect the Microsoft account itself.
- Changing a Microsoft account password does not necessarily require changing the Windows Hello PIN.
- Forgetting a PIN does not always mean the online account password is forgotten.
- A unique, well-protected Microsoft account password.
- Multi-factor authentication on the Microsoft account.
- A Windows Hello PIN.
- Face or fingerprint sign-in where reliable compatible hardware is available.
- A recovery method that is tested before an emergency occurs.
Change or Reset a Windows Hello PIN
The PIN (Windows Hello) option is the default everyday sign-in method on many modern Windows PCs. It works even when face recognition or fingerprint sign-in is unavailable, making it an essential fallback.Change a PIN When You Know the Existing One
To replace the current PIN:- Open Settings > Accounts > Sign-in options.
- Select PIN (Windows Hello).
- Choose Change PIN.
- Enter the current PIN.
- Enter and confirm the new PIN.
- Complete the verification prompts.
Reset a PIN You Have Forgotten
If Windows is already open and you have access to the desktop:- Go to Settings > Accounts > Sign-in options.
- Open PIN (Windows Hello).
- Select I forgot my PIN.
- Verify the account as prompted.
- Create a new PIN.
If that option is unavailable, choose Sign-in options at the login screen and sign in using the account password instead. Once inside Windows, reset the PIN from Settings.
Why PIN Resets Sometimes Fail
PIN resets can become complicated if the device is offline, the Microsoft account verification method is inaccessible, or a work or school policy controls Windows Hello. In those situations, the password sign-in method is especially important.Avoid treating the PIN as the only recovery route. Maintaining access to the primary account password and its verification methods prevents a small local sign-in problem from becoming a full account-recovery problem.
Set Up Face Recognition and Fingerprint Sign-In
Windows Hello biometric sign-in can make Windows far more convenient without requiring users to type a password every day. Face recognition is typically the most seamless option on supported laptops, while a fingerprint reader can be an excellent choice for desktops and shared family PCs.Configure Facial Recognition
To add face sign-in:- Open Settings > Accounts > Sign-in options.
- Select Facial recognition (Windows Hello).
- Choose Set up.
- Enter the Windows Hello PIN if asked.
- Follow the on-screen camera prompts.
If face recognition becomes inconsistent after a major appearance change, a different lighting setup, or a camera relocation, use Improve recognition from the Facial recognition section. If the feature must be removed entirely, choose Remove and configure it again later.
Configure Fingerprint Recognition
To enroll a fingerprint:- Open Settings > Accounts > Sign-in options.
- Select Fingerprint recognition (Windows Hello).
- Choose Set up.
- Confirm the PIN when prompted.
- Touch and lift the registered finger repeatedly until enrollment finishes.
Use Add a finger to enroll another print. If recognition becomes unreliable, remove the stored fingerprint data and enroll it again carefully.
When Biometrics Are Convenient but Not Enough
Biometric login is fast, but it should not be the only trusted method. A camera can fail in poor lighting, a fingerprint sensor can be blocked by moisture or dirt, and hardware drivers can occasionally break after an update.Keep the PIN active. It is the local fallback that makes face and fingerprint sign-in practical rather than fragile.
Fix Missing Windows Hello Options
When the face or fingerprint category is missing, do not immediately assume Windows is damaged. Start by checking the underlying requirement.Check the Hardware
For face sign-in, the PC needs a Windows Hello-compatible infrared camera. For fingerprint sign-in, it needs a built-in or compatible external fingerprint reader.A standard USB webcam is not automatically a Windows Hello facial-recognition camera. Likewise, a generic biometric device may not include the correct Windows Hello support.
Check Drivers and Windows Update
If the hardware was previously detected but disappeared:- Restart the PC.
- Install available Windows updates.
- Check Device Manager for camera, biometric, or USB device warnings.
- Install the device manufacturer’s current driver or firmware package.
- Disconnect and reconnect an external device directly to the PC rather than through an unreliable hub.
Check Organization Policies
On a work-managed PC, the missing setting may be intentional. Companies can require a particular sign-in method, block biometrics, prevent PIN changes, restrict passkey providers, or enforce a lock-screen policy.In that case, changing a local setting may not be possible or may revert after the PC syncs with organizational management. The correct remedy is to follow the organization’s approved sign-in process rather than trying to bypass policy.
Enhanced Sign-in Security and External Hello Devices
Newer Windows 11 PCs may display Enhanced Sign-in Security, often shortened to ESS, under Additional settings. This feature is designed to strengthen the protection around biometric sign-in by using compatible hardware and software components.The setting matters most when a user wants to connect an external Windows Hello camera or fingerprint reader.
What ESS Changes
When Enhanced Sign-in Security is enabled, Windows only allows biometric sensors that meet its requirements to be used for Windows Hello sign-in. A non-compatible peripheral may still work inside an app—for example, as a camera in a video meeting—but Windows can block it from authenticating the user at the lock screen.This is a security trade-off:
- ESS enabled: Higher protection for compatible biometric hardware, but fewer external sign-in peripherals may work.
- ESS disabled: Better compatibility with non-ESS Windows Hello peripherals, but the additional ESS protection is not active.
Settings > Accounts > Sign-in options > Additional settings > Enhanced sign-in security
Turn the toggle Off only if a non-ESS external camera or fingerprint reader must be used for Windows Hello.
On some Windows 11 version 23H2 systems, the equivalent setting is called Sign in with an external camera or fingerprint reader. The labels can appear counterintuitive:
- When the external-device toggle is off, ESS is enabled.
- When the external-device toggle is on, ESS is disabled so compatible external peripherals can work.
A Better Approach Than Disabling Security First
Before turning ESS off, verify whether the device has the correct driver, whether the peripheral is genuinely Windows Hello compatible, and whether the manufacturer offers updated firmware. Disabling a protection feature should be a deliberate compatibility decision, not the first troubleshooting step.For a new ESS-capable fingerprint reader, Windows may request an updated PIN before enrollment. Complete that prompt, then register fingerprints through the standard Fingerprint recognition section.
Change or Recover a Windows Password
Windows handles password changes differently depending on whether the PC uses a Microsoft account or a local account.Change a Password from Settings
The path is the same for both account types:- Open Settings > Accounts > Sign-in options.
- Select Password.
- Choose Change.
- Follow the account-specific prompts.
Reset a Forgotten Microsoft Account Password
At the sign-in screen, choose I forgot my password if it is available. Windows will guide the user through account verification using configured recovery methods.If a browser-based route is needed, the Microsoft account password reset page can be used after identity verification. The recovery process depends on having access to an approved email address, phone number, authenticator method, or recovery information.
The key risk is obvious but often ignored: if all recovery methods are outdated, password reset becomes much more difficult. Review account security information periodically, especially after changing a phone number or email address.
Reset a Forgotten Local Account Password
For a local account, select the password entry arrow at the sign-in screen, choose OK, then select Reset password. Windows can ask the account’s security questions before allowing a new password.If a password reset disk was created in advance, select Use a password reset disk instead.
An administrator account on the same PC may also be able to reset another local user’s password through Computer Management > Local Users and Groups > Users. This tool is not available in every Windows edition, and resetting a password this way can affect access to data protected by the previous credentials.
Use Passkeys and Physical Security Keys
Windows sign-in settings now sit alongside the broader shift away from traditional passwords. That shift includes both passkeys and physical security keys, but they are not identical.Passkeys
A passkey is a modern sign-in credential used for websites, apps, and supported accounts. Instead of entering a password, the user confirms identity with a local method such as a PIN, fingerprint, face recognition, or phone unlock.On supported Windows 11 systems, manage device passkeys through:
Settings > Accounts > Passkeys
Select the menu next to an entry to delete a device-bound passkey. Under Advanced options, Windows can show available passkey services and supported credential-manager integration.
Passkeys can be stored in different places:
- The Windows device through Windows Hello
- A synced credential manager
- A smartphone or tablet
- A physical security key
Physical Security Keys
A physical security key is usually a USB, NFC, or USB-C device used to verify sign-in. To manage one for Windows:- Open Settings > Accounts > Sign-in options.
- Select Security key.
- Choose Manage.
- Insert the USB key or tap the NFC key when prompted.
- Follow the device’s verification instructions.
Control When Windows Requires Sign-In Again
The authentication method matters, but so does the timing. A strong PIN provides little protection if the device remains unlocked whenever its owner walks away.In Windows 11, open Settings > Accounts > Sign-in options > Additional settings and find the option asking when Windows should require sign-in again after the user has been away.
Windows 10 places a similar control under Require sign-in.
For a personal desktop in a secure room, a slightly more relaxed setting may be appropriate. For a laptop, shared household device, office workstation, or any computer used around visitors, requiring sign-in after sleep is the safer default.
Use Dynamic Lock as a Backup, Not a Habit
Dynamic lock can automatically lock a Windows PC when a Bluetooth-paired phone moves out of range.To enable it:
- Pair the phone in Bluetooth settings.
- Open Settings > Accounts > Sign-in options.
- Go to Additional settings.
- Enable Dynamic lock.
Dynamic lock is useful as a safety net, but Bluetooth distance detection is imprecise. Walls, wireless interference, and device battery conditions can affect timing. The dependable habit remains simple: press Windows key + L whenever stepping away.
Protect Lock-Screen Privacy and Restart Behavior
The Windows sign-in screen can expose more information than many users realize. Under Additional settings, use Show account details on the sign-in screen to control whether identifying details such as an email address appear before login.Showing account details is convenient on a personal machine, but hiding them reduces the information visible to someone standing in front of the PC. On a laptop used in public places, less lock-screen information is usually the better choice.
Windows may also offer controls for restartable apps and post-update setup. These settings allow Windows to save certain sign-in information so it can restore apps or finish setup after a restart.
That convenience should be evaluated carefully:
- It can reduce disruption after updates.
- It may be useful on a personally controlled desktop.
- It is less attractive on a shared PC or portable system.
- It should not be confused with regular automatic logon.
Avoid Casual Automatic Logon Configuration
Old tutorials frequently recommendnetplwiz shortcuts or registry changes to remove the sign-in requirement. That advice can be incomplete on current Windows builds and can weaken device security significantly.Automatic logon means that anyone who starts the PC may gain access to the selected user account and its files. Even documented automatic-logon methods carry real risk, particularly on portable devices, family PCs, office machines, and systems connected to sensitive networks.
Automatic logon only makes sense for a physically secured, single-purpose machine where the consequences of unrestricted local access are clearly understood.
Enable Windows Hello-Only Sign-In Carefully
For personal Microsoft accounts, Windows may provide a setting labeled similar to:For improved security, only allow Windows Hello sign-in for Microsoft accounts on this device
Windows 10 may refer to it as Require Windows Hello sign-in for Microsoft accounts.
When enabled, Windows removes the Microsoft account password as a normal sign-in method for that device and relies on Windows Hello methods instead. This can improve day-to-day protection against password-based local sign-in attempts.
However, turn it on only after confirming that the PIN works reliably and that at least one additional Windows Hello method is available where possible. A face reader, fingerprint sensor, or security key can provide useful redundancy, but the PIN remains the core fallback.
The setting affects sign-in to that PC. It does not eliminate the need to protect the Microsoft account password online.
A Practical Windows Sign-In Checklist
A secure Windows login setup does not need to be complicated. It needs to include enough redundancy that one failed sensor or forgotten code does not lock out the legitimate owner.A balanced configuration usually includes:
- A unique Microsoft account password and current recovery information
- A Windows Hello PIN that is not easily guessed
- Face recognition or fingerprint sign-in on compatible hardware
- At least two enrolled fingerprints when using a fingerprint reader
- A configured physical security key for important accounts where appropriate
- Lock-screen account details hidden on portable or shared PCs
- Sign-in required after sleep or inactivity
- Manual locking with Windows key + L as a daily habit
- Dynamic lock as an additional backup rather than the only lock method
- Careful consideration before disabling Enhanced Sign-in Security
- No automatic logon on a device containing personal, work, or financial data
References
- Primary source: Technobezz
Published: 2026-07-23T16:54:57.914000+00:00
Loading…
www.technobezz.com - Official source: learn.microsoft.com
Windows Hello Enhanced Sign-in Security | Microsoft Learn
Windows Hello Enhanced Sign-in Security provides your organization an additional level of security using biometrics or PIN.learn.microsoft.com - Official source: support.microsoft.com
Loading…
support.microsoft.com