

A USB device that refuses to appear in File Explorer, charge properly, sync with its companion app, or work in the expected Windows feature does not automatically need a downloaded “USB driver.” In Windows 11 and Windows 10, most USB hardware relies on built-in class drivers and Plug and Play detection. The practical fix is usually to restore normal detection, install an approved update, or match a manufacturer driver package to the exact device and purpose.
The key is to start with the least invasive option. Windows can manage keyboards, mice, flash drives, printers, hubs, cameras, phones, audio adapters, and many other USB devices without a separate installation program. Installing random driver packages too early can replace a working driver, introduce incompatibilities, or expose the PC to unsafe software.
This guide explains how to install USB drivers on Windows 11 and Windows 10 safely, how to identify when a driver is actually the problem, and when to use Device Manager, Windows Update, manufacturer support tools, or the
A driver is the software layer that lets Windows communicate with hardware. It translates Windows requests into instructions that a device can understand, whether that device is a USB storage drive, an Android phone, a serial adapter, a printer, or a specialized piece of lab equipment.
Windows includes a broad collection of Microsoft-provided USB drivers. These cover core functions such as:
However, the word USB describes the connection method, not necessarily the device’s full feature set. A USB-connected printer may require a manufacturer package for scanning tools and maintenance utilities. A smartphone may need an app or development driver for debugging. A USB-to-serial converter may need a chipset-specific driver before it creates a COM port.
The first goal, then, is not to install a driver blindly. It is to determine whether Windows needs a driver at all.
Connect the device directly to the PC if possible. Avoid a hub, front-panel connector, monitor hub, docking station, or extension cable while testing. Those accessories add extra hardware layers that can complicate detection and power delivery.
Verify the following:
If a device does not power on, disconnects repeatedly, or works only in one port, focus on hardware, power delivery, chipset drivers, and firmware before downloading a device driver.
Optional driver updates are not always installed automatically. That distinction matters: Windows may have a newer or more specific driver available even though the PC reports that it is fully up to date.
For example:
Open it by right-clicking the Start button and selecting Device Manager, or by searching for Device Manager from Start.
Look in the category most likely to contain the device:
Device Manager may report that the best driver is already installed. That message does not always mean the hardware is perfect. It means Windows did not find a higher-ranked driver through that workflow. A manufacturer package, a different USB cable, a firmware update, or a device-mode change may still be necessary.
Use manual installation only when the driver comes from:
This is where the computer manufacturer’s support resources are often more useful than Device Manager.
Common examples include:
Older Dell Update and Alienware Update tools should not be treated as the default path on current systems. Official vendor support channels increasingly consolidate maintenance around their current utilities and web-based detection tools.
Before applying firmware:
A phone that charges successfully is not necessarily connected for data transfer. It may be using a charge-only cable, a limited USB port, or a phone setting that defaults to charging mode.
If the iPhone does not appear:
Typical modes include:
If troubleshooting a USB hub or host controller:
Rollback is particularly useful when a working USB audio device, serial adapter, dock, or storage controller develops problems right after a Windows Update or manufacturer driver update. It is not a cure for a cable failure, a failing port, or an unsupported device.
Open Command Prompt as administrator before running these commands.
To add and install a single driver package:
To add and install matching INF packages from a folder:
To force Windows to scan for newly connected hardware:
To list devices with an identified problem:
PnPUtil is powerful because it interacts directly with Windows driver-package management. That is also why it should be used carefully. Do not point it at a folder full of unknown drivers, and do not use it as a substitute for identifying the correct hardware model.
Older DevCon-based instructions remain common in archived troubleshooting guides, but PnPUtil is the practical built-in choice for modern Windows driver-management tasks.
Signs of policy-related blocking include:
The appropriate action is to provide the device model, purpose, and any Device Manager error code to the organization’s IT administrator.
When a specific driver is necessary, use the official hardware manufacturer, select a package matched to the exact model and Windows version, and avoid generic driver-download services. For persistent failures, investigate the cable, USB port, power delivery, chipset, firmware, and device mode alongside the driver itself.
The safest solution is not the most aggressive one. It is the smallest verified change that restores reliable USB detection, data transfer, charging, synchronization, or device-specific functionality without destabilizing the rest of the system.
The key is to start with the least invasive option. Windows can manage keyboards, mice, flash drives, printers, hubs, cameras, phones, audio adapters, and many other USB devices without a separate installation program. Installing random driver packages too early can replace a working driver, introduce incompatibilities, or expose the PC to unsafe software.
This guide explains how to install USB drivers on Windows 11 and Windows 10 safely, how to identify when a driver is actually the problem, and when to use Device Manager, Windows Update, manufacturer support tools, or the
PnPUtil command line.
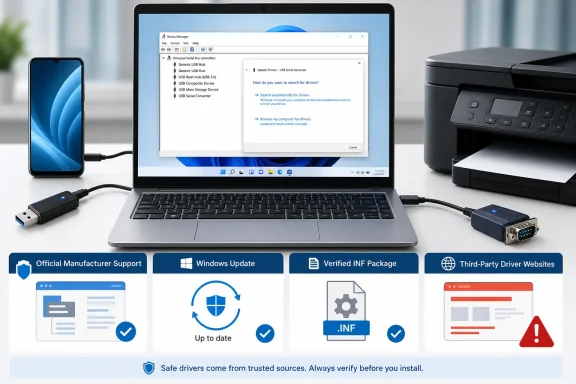 Background: What a USB Driver Actually Does
A driver is the software layer that lets Windows communicate with hardware. It translates Windows requests into instructions that a device can understand, whether that device is a USB storage drive, an Android phone, a serial adapter, a printer, or a specialized piece of lab equipment.Windows includes a broad collection of Microsoft-provided USB drivers. These cover core functions such as:
- USB host controllers
- USB hubs
- Composite USB devices
- Human Interface Devices, including keyboards and mice
- USB mass-storage devices
- Audio devices
- Cameras and imaging hardware
- Generic USB communication through WinUSB
- Portable devices using Media Transfer Protocol (MTP)
However, the word USB describes the connection method, not necessarily the device’s full feature set. A USB-connected printer may require a manufacturer package for scanning tools and maintenance utilities. A smartphone may need an app or development driver for debugging. A USB-to-serial converter may need a chipset-specific driver before it creates a COM port.
The first goal, then, is not to install a driver blindly. It is to determine whether Windows needs a driver at all.
Start With the Physical Connection
Before troubleshooting Windows, rule out connection issues. USB problems are frequently caused by a cable, port, power limitation, docking station, or device mode rather than a missing driver.Connect the device directly to the PC if possible. Avoid a hub, front-panel connector, monitor hub, docking station, or extension cable while testing. Those accessories add extra hardware layers that can complicate detection and power delivery.
Check the cable and port
A cable can be physically intact and still be unsuitable for the job. This is especially common with USB-C accessories and phone cables.Verify the following:
- Try a different USB port on the computer.
- Try a different cable known to support data, not only charging.
- Test the device on another PC where practical.
- Test another known-good USB device on the suspect port.
- Avoid loose adapters and low-quality USB hubs during diagnosis.
- For external drives, use the supplied power adapter if the drive has one.
- For USB-C devices, confirm that the port supports the required features, such as data transfer, charging, DisplayPort, or Thunderbolt.
If a device does not power on, disconnects repeatedly, or works only in one port, focus on hardware, power delivery, chipset drivers, and firmware before downloading a device driver.
Let Windows Detect the Device Automatically
The simplest installation method is often the correct one. Windows uses Plug and Play to identify newly connected hardware, locate a suitable driver already installed on the system, and configure the device.- Connect the USB device directly to the computer.
- Wait a moment for Windows to detect it.
- Watch for a notification that the device is ready.
- Open the relevant app or Windows feature.
- Test the device’s core function.
- A USB flash drive should appear in File Explorer.
- A USB keyboard or mouse should work immediately.
- A camera may appear in the Camera app.
- A phone may appear under This PC after it is unlocked and set to the correct USB mode.
- A USB serial adapter may appear in Device Manager under Ports (COM & LPT).
Install USB Driver Updates Through Windows Update
When automatic setup does not solve the issue, Windows Update should be the next stop. Microsoft distributes many hardware-driver updates through Windows Update, including optional updates published by hardware partners.Optional driver updates are not always installed automatically. That distinction matters: Windows may have a newer or more specific driver available even though the PC reports that it is fully up to date.
Windows 11: Check optional driver updates
- Open Start and select Settings.
- Choose Windows Update.
- Select Advanced options.
- Open Optional updates.
- Expand the Driver updates category if it appears.
- Select the relevant update or updates.
- Choose Download and install.
- Restart the PC after installation.
Windows 10: Check optional driver updates
- Open Start and select Settings.
- Select Update & Security.
- Open Windows Update.
- Select Advanced options.
- Enable Receive updates for other Microsoft products when you update Windows if the setting is available.
- Return to Windows Update and select Check for updates.
- Select View optional updates if it appears.
- Open Driver updates, select the relevant entries, and choose Download and install.
- Restart the computer.
Do not install every optional driver at once
Optional updates are useful, but restraint is important. Install the update that matches the issue whenever possible.For example:
- Install a chipset or USB controller update when several USB ports or devices behave incorrectly.
- Install a Bluetooth, audio, network, or camera driver when that specific device category has a problem.
- Avoid updating unrelated drivers during focused troubleshooting.
Use Device Manager to Update a USB Device Driver
Device Manager is the central Windows tool for inspecting detected hardware, reviewing driver status, and reinstalling a malfunctioning device.Open it by right-clicking the Start button and selecting Device Manager, or by searching for Device Manager from Start.
Look in the category most likely to contain the device:
- Universal Serial Bus controllers — USB hubs, host controllers, unknown USB devices, composite devices
- Portable Devices — phones, media players, and MTP devices
- Ports (COM & LPT) — USB-to-serial adapters and similar hardware
- Disk drives — external storage hardware
- Human Interface Devices — keyboards, mice, controllers, and input accessories
- Cameras — webcams and imaging devices
- Other devices — hardware Windows recognizes but cannot classify correctly
Search automatically for a driver
- In Device Manager, expand the relevant category.
- Right-click the affected USB device.
- Select Update driver.
- Choose Search automatically for drivers.
- Follow any Windows Update prompt that appears.
- Close the wizard when it finishes.
- Restart Windows if the device remains unavailable.
Device Manager may report that the best driver is already installed. That message does not always mean the hardware is perfect. It means Windows did not find a higher-ranked driver through that workflow. A manufacturer package, a different USB cable, a firmware update, or a device-mode change may still be necessary.
Install a Downloaded Driver Folder Manually
Some manufacturers provide a traditional installer such as an.exe or .msi file. Others distribute a folder containing an INF file, catalog file, and supporting binaries. The INF file tells Windows how to install and match the driver package to hardware.Use manual installation only when the driver comes from:
- The official PC manufacturer support page
- The official device manufacturer support page
- Microsoft Update Catalog, when you know the exact package you need
- A trusted enterprise software repository managed by an organization
Install a driver from an extracted folder
- Download the driver package from the official support page.
- Extract it first if it arrives as a ZIP archive.
- Open Device Manager.
- Expand the category containing the affected device.
- Right-click the device and select Update driver.
- Select Browse my computer for drivers.
- Select Browse and choose the folder containing the INF files.
- Leave Include subfolders enabled when available.
- Select Next.
- Finish the installation and restart the PC.
.sys file. Windows uses the INF file to decide whether the driver package matches the device’s hardware ID and operating-system requirements.Verify the driver matches the hardware
A driver package must match more than the product name. Check that it is intended for:- The exact device model or hardware revision
- The correct Windows version and architecture
- The right connection type or chipset
- The intended use case, such as file transfer, serial communications, audio, printing, or Android debugging
Update the PC’s Chipset, USB Controller, and Firmware
When multiple USB ports fail, devices disconnect randomly, or an entire side of a laptop loses USB functionality, the issue may not be the peripheral’s driver at all. It may involve the PC’s chipset, USB host controller, BIOS/UEFI firmware, dock firmware, or power-management configuration.This is where the computer manufacturer’s support resources are often more useful than Device Manager.
Use the PC maker’s official update tools
Major PC manufacturers offer utilities that identify a system and recommend model-specific updates. These can include chipset packages, USB controller updates, firmware, and dock compatibility fixes.Common examples include:
- Dell and Alienware: SupportAssist or the official Drivers & Downloads page
- HP: HP Support Assistant or HP Software and Driver Downloads
- Lenovo: Lenovo Vantage and System Update
- Intel-based systems: Intel Driver & Support Assistant, where appropriate
- Samsung PCs: Samsung Update
Older Dell Update and Alienware Update tools should not be treated as the default path on current systems. Official vendor support channels increasingly consolidate maintenance around their current utilities and web-based detection tools.
Firmware updates deserve extra care
Firmware can resolve genuine USB stability issues, particularly with docks, USB-C controllers, Thunderbolt hardware, and newer laptops. But firmware installation carries more risk than an ordinary driver update.Before applying firmware:
- Plug in AC power.
- Keep the battery charged.
- Disconnect nonessential accessories.
- Do not interrupt the process.
- Confirm the update is explicitly intended for the exact PC, dock, or peripheral.
Phone USB Drivers: File Transfer, Device Management, and Development Are Different Jobs
Phone-related USB issues are often confusing because one phone can expose different USB functions depending on the cable, unlock state, selected USB mode, and installed software.A phone that charges successfully is not necessarily connected for data transfer. It may be using a charge-only cable, a limited USB port, or a phone setting that defaults to charging mode.
iPhone, iPad, and iPod touch on Windows
For current Apple device management on Windows, install the Apple Devices app from the Microsoft Store. This is the modern starting point for managing, syncing, updating, and restoring compatible Apple devices on Windows.If the iPhone does not appear:
- Unlock the device.
- Connect it with a known-good data cable.
- Respond to the Trust This Computer prompt on the phone.
- Open Apple Devices.
- Check Device Manager for an Apple-related portable device or USB entry.
- Restart both the PC and the phone if detection fails.
Android file transfer
Most modern Android phones do not need a separate driver merely to transfer files. Connect the phone, unlock it, then select the desired USB preference from the Android notification panel.Typical modes include:
- File Transfer / Android Auto
- USB tethering
- MIDI
- Photo transfer
- Charging only
Android development and ADB drivers
Android debugging through ADB is different from ordinary file transfer. Development tools may require a vendor-specific USB driver.- Google Android devices used for ADB typically use the Google USB Driver installed through Android Studio’s SDK Manager.
- Samsung devices used for development can use Samsung’s official Android USB driver package.
- Other manufacturers may supply their own ADB driver package or rely on compatible generic support.
Reinstall a Broken USB Driver
If Windows recognizes the device but it still fails, a stale or corrupted device installation may be the cause. Reinstalling the device from Device Manager forces Windows to enumerate it again after restart.- Save work and close applications.
- Open Device Manager.
- Expand the relevant hardware category.
- Right-click the malfunctioning device.
- Select Uninstall device.
- Confirm the removal.
- Restart the PC.
Be cautious around USB controllers
Removing one specific peripheral is usually low risk. Removing entries under Universal Serial Bus controllers can be more disruptive, especially if the PC depends on a USB keyboard, mouse, external storage device, or dock.If troubleshooting a USB hub or host controller:
- Keep a non-USB input option available where possible.
- Disconnect unnecessary USB storage devices first.
- Restart promptly after removal.
- Do not uninstall numerous controller entries without a clear reason.
Roll Back a Driver After a Bad Update
If the USB problem began immediately after a driver update, the right move may be to return to the previous version rather than hunt for another download.- Open Device Manager.
- Right-click the affected device and choose Properties.
- Open the Driver tab.
- Select Roll Back Driver.
- Choose the closest reason for the rollback.
- Confirm the choice.
- Restart the PC if prompted.
Rollback is particularly useful when a working USB audio device, serial adapter, dock, or storage controller develops problems right after a Windows Update or manufacturer driver update. It is not a cure for a cable failure, a failing port, or an unsupported device.
Advanced Installation With PnPUtil
PnPUtil is a built-in Windows command-line utility for managing driver packages in the Driver Store. It is useful for IT administrators, technicians, and advanced users working with standalone INF packages.Open Command Prompt as administrator before running these commands.
To add and install a single driver package:
pnputil /add-driver device.inf /installTo add and install matching INF packages from a folder:
pnputil /add-driver C:\Drivers\*.inf /installTo force Windows to scan for newly connected hardware:
pnputil /scan-devicesTo list devices with an identified problem:
pnputil /enum-devices /problemPnPUtil is powerful because it interacts directly with Windows driver-package management. That is also why it should be used carefully. Do not point it at a folder full of unknown drivers, and do not use it as a substitute for identifying the correct hardware model.
Older DevCon-based instructions remain common in archived troubleshooting guides, but PnPUtil is the practical built-in choice for modern Windows driver-management tasks.
When Windows Blocks USB Driver Installation
On a workplace or school PC, the inability to install a USB driver may be intentional. Organizations can use device-installation restrictions, Windows Update policies, endpoint security controls, and administrative permissions to block unknown devices or prevent users from changing drivers.Signs of policy-related blocking include:
- Installation messages stating that the action is restricted by policy
- An administrator credential prompt that cannot be completed
- A driver that installs successfully on a personal PC but not on a managed device
- USB storage that is detected but inaccessible
- A device listed in Device Manager with a restriction-related error
The appropriate action is to provide the device model, purpose, and any Device Manager error code to the organization’s IT administrator.
The Safest USB Driver Troubleshooting Order
A disciplined process reduces risk and avoids unnecessary software changes.- Test the cable, port, power source, and direct connection.
- Let Plug and Play finish automatic setup.
- Run Windows Update and review Optional updates.
- Use Device Manager to inspect status and search automatically.
- Install only an official manufacturer driver that matches the exact hardware.
- Update chipset, USB controller, dock, or firmware packages when multiple ports or devices are affected.
- Uninstall and reinstall a malfunctioning device entry.
- Roll back a newly updated driver if the issue began after that update.
- Use PnPUtil only for known, verified INF driver packages.
- Escalate policy-controlled or enterprise device problems to IT.
Conclusion
Installing USB drivers on Windows 11 and Windows 10 is usually simpler than it first appears because Windows already includes support for a wide range of USB device classes. Start with automatic detection, Windows Update, and Device Manager before downloading anything manually.When a specific driver is necessary, use the official hardware manufacturer, select a package matched to the exact model and Windows version, and avoid generic driver-download services. For persistent failures, investigate the cable, USB port, power delivery, chipset, firmware, and device mode alongside the driver itself.
The safest solution is not the most aggressive one. It is the smallest verified change that restores reliable USB detection, data transfer, charging, synchronization, or device-specific functionality without destabilizing the rest of the system.
References
- Primary source: Technobezz
Published: 2026-07-23T16:22:11.854000+00:00
How to Install USB Drivers on Windows 11 and Windows 10 | Technobezz
Install USB drivers on Windows with Windows Update, Device Manager, and official manufacturer downloads.www.technobezz.com - Official source: support.microsoft.com
Automatically get recommended and updated hardware drivers | Microsoft Support
Use Windows Update to automatically get updated and recommended drivers for hardware devices on a Windows device.support.microsoft.com - Official source: learn.microsoft.com
Troubleshooting Device and Driver Installations - Windows drivers | Microsoft Learn
Use these guidelines to verify that your device is installed correctly or diagnose problems with your device installation.learn.microsoft.com