

Out-of-office email is one of Outlook’s most useful features, but it is also one of its most inconsistently placed settings. The exact steps depend on whether you use new Outlook for Windows, classic Outlook, Outlook on the web, Outlook for Mac, or Outlook mobile—and, more importantly, whether your mailbox is hosted on Microsoft 365, Exchange, Outlook.com, or a POP/IMAP service such as Gmail.
For most work, school, Outlook.com, and Hotmail accounts, the answer is Automatic Replies. This server-based feature continues working even when your PC is shut down. For POP and IMAP accounts that do not expose Automatic Replies, classic Outlook can create a rule-based workaround, but that method has a major limitation: Outlook must remain open and running for replies to be sent.
A properly configured Outlook out-of-office message does more than tell people you are unavailable. It can set a clear return date, direct urgent requests to the appropriate person, protect internal information, keep your calendar accurate, and reduce unnecessary follow-up messages while you are away.
Before changing Outlook settings, it helps to separate two features that are often confused.
Automatic Replies send email responses to people who message you. They are the actual out-of-office email function.
Out of office calendar events change how your availability appears to coworkers in Outlook and Teams. They do not automatically send email replies.
For a complete absence setup, use both:
That limitation is important for users who have moved from classic Outlook to the new client. The interface may look modern and unified, but mailbox capabilities still depend on the underlying email service.
This often occurs with:
This approach also provides useful calendar controls while you set up the message.
Block my calendar for this period is usually a sensible choice. It helps colleagues see that you are unavailable and reduces the chance of new meetings being scheduled during leave.
Automatically decline new invitations can be useful for complete absences, especially when there is no delegate managing your calendar. However, it can also cause confusion if coworkers expect you to review invitations after returning.
Decline and cancel my meetings is the most disruptive option. It can be appropriate for extended leave, but it should be used carefully. Important project meetings, customer calls, and recurring appointments may need to be reassigned or handled by another organizer rather than simply canceled.
The Tools menu distinction is worth remembering. Mac users who look for a Windows-style File tab can spend unnecessary time searching for a setting that is present but located elsewhere.
For example, a user with:
The major weakness is simple: classic Outlook must remain open and running for the rule to send messages. If the computer restarts, sleeps, loses power, signs out, or Outlook crashes, the reply may stop working.
Example external message:
When the integration is available, the scheduled out-of-office message and time period appear in Outlook as Automatic Replies. This is useful, but users should still verify the final message and dates in Outlook if the absence is important or extended.
This is a convenience feature, not a substitute for review. Automatic replies can reveal information externally, so users should always check:
For most work, school, Outlook.com, and Hotmail accounts, the answer is Automatic Replies. This server-based feature continues working even when your PC is shut down. For POP and IMAP accounts that do not expose Automatic Replies, classic Outlook can create a rule-based workaround, but that method has a major limitation: Outlook must remain open and running for replies to be sent.
A properly configured Outlook out-of-office message does more than tell people you are unavailable. It can set a clear return date, direct urgent requests to the appropriate person, protect internal information, keep your calendar accurate, and reduce unnecessary follow-up messages while you are away.
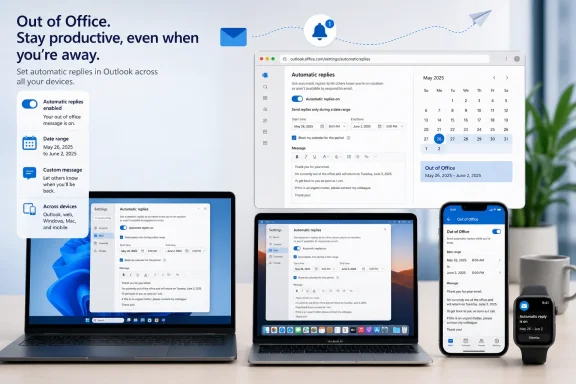 Overview: Automatic Replies vs. Calendar Availability
Before changing Outlook settings, it helps to separate two features that are often confused.Automatic Replies send email responses to people who message you. They are the actual out-of-office email function.
Out of office calendar events change how your availability appears to coworkers in Outlook and Teams. They do not automatically send email replies.
For a complete absence setup, use both:
- Configure Automatic Replies for email communication.
- Create or enable an Out of office calendar block for scheduling visibility.
- Consider declining or canceling meetings only when it is genuinely appropriate.
- Use separate internal and external messages where the mailbox supports them.
First, Identify Your Outlook Version and Account Type
The most common troubleshooting mistake is following the right instructions in the wrong Outlook app. Microsoft currently maintains multiple Outlook experiences, and their menus are not identical.The Outlook versions that matter
You may be using one of the following:- New Outlook for Windows — the newer Windows app with web-style settings.
- Classic Outlook for Windows — the traditional desktop app with the File tab and ribbon.
- Outlook on the web — Outlook accessed in a browser through a work, school, Outlook.com, or Hotmail account.
- Outlook for Mac — the Microsoft Outlook client for macOS.
- Outlook mobile — the Outlook app for Android, iPhone, or iPad.
Why the mailbox type matters more than the app
The built-in Automatic Replies feature is generally available for:- Microsoft 365 work or school mailboxes
- Exchange Online mailboxes
- Exchange mailboxes
- Outlook.com accounts
- Hotmail accounts
- Microsoft-hosted consumer email accounts
- Gmail accounts configured through IMAP
- Yahoo Mail accounts configured through IMAP
- Generic POP accounts
- Generic IMAP accounts
Set Up Out of Office in New Outlook for Windows
New Outlook for Windows places account controls under its settings interface rather than the familiar File menu. For Microsoft 365, Exchange Online, Outlook.com, and Hotmail-style accounts, this is the quickest way to configure an automatic reply.Steps to turn on Automatic Replies
- Open new Outlook for Windows.
- Select View on the ribbon.
- Choose View settings.
- Select Accounts.
- Open Automatic Replies.
- Turn on Automatic replies.
- Enable Send replies only during a time period if you want Outlook to turn the message off automatically.
- Set the start date, time, end date, and end time.
- Write your internal message under Send automatic replies inside your organization.
- Enable Send replies outside your organization if external senders should receive a response.
- Add a separate external message.
- Select Save.
What new Outlook does not support
New Outlook does not provide server-side Automatic Replies for Gmail, Yahoo, or other POP/IMAP accounts. If you use one of those accounts, you may need to configure vacation responses directly in the provider’s webmail settings or use classic Outlook’s rule-and-template method.That limitation is important for users who have moved from classic Outlook to the new client. The interface may look modern and unified, but mailbox capabilities still depend on the underlying email service.
Configure Out of Office in Classic Outlook for Windows
Classic Outlook remains widely used in businesses because of its extensive local features, add-in support, and familiar ribbon interface. When connected to a compatible Exchange or Microsoft 365 mailbox, it offers the traditional Automatic Replies dialog.Steps for supported Microsoft 365 and Exchange accounts
- Open classic Outlook for Windows.
- Select File.
- Choose Automatic Replies.
- Select Send automatic replies.
- Enable Only send during this time range if you want a scheduled start and end.
- Set your return date and time.
- On the Inside My Organization tab, write the message for coworkers.
- Select the Outside My Organization tab.
- Enable Auto-reply to people outside my organization if appropriate.
- Write a separate external response.
- Select OK.
When the Automatic Replies button is missing
If you select File and see Manage Rules & Alerts but no Automatic Replies button, your mailbox probably does not support Outlook’s Exchange-based out-of-office function.This often occurs with:
- Gmail
- Yahoo Mail
- ISP-provided addresses
- Personal custom-domain mailboxes
- POP3 accounts
- IMAP accounts
Use Outlook on the Web From Any Browser
Outlook on the web is often the best option when you are already away from your work computer. Because the settings are saved to the mailbox itself, the reply continues to work regardless of whether Outlook desktop is running.This approach also provides useful calendar controls while you set up the message.
Steps to create an Outlook web out-of-office reply
- Sign in to Outlook on the web or Outlook.com.
- Select Settings.
- Open Mail and then Automatic replies. In some current layouts, the route may appear as Accounts > Automatic replies.
- Turn on Automatic replies.
- Enable Send replies only during a time period.
- Enter the start and end dates and times.
- Choose whether to enable Block my calendar for this period.
- Decide whether Outlook should automatically decline new meeting invitations during the absence.
- Decide whether existing meetings should be declined and canceled.
- Enter your automatic reply message.
- Enable external replies if needed and write a separate message for outside senders.
- Select Save.
Calendar and meeting controls deserve caution
The calendar options are powerful, but they should not be enabled casually.Block my calendar for this period is usually a sensible choice. It helps colleagues see that you are unavailable and reduces the chance of new meetings being scheduled during leave.
Automatically decline new invitations can be useful for complete absences, especially when there is no delegate managing your calendar. However, it can also cause confusion if coworkers expect you to review invitations after returning.
Decline and cancel my meetings is the most disruptive option. It can be appropriate for extended leave, but it should be used carefully. Important project meetings, customer calls, and recurring appointments may need to be reassigned or handled by another organizer rather than simply canceled.
Set Automatic Replies in Outlook for Mac
Outlook for Mac uses a different menu path from either Windows version. Instead of starting from File or View settings, users access the feature from the macOS menu bar.Steps for Outlook on macOS
- Open Outlook and switch to Mail view.
- Select Tools.
- Choose Automatic Replies.
- Select the appropriate account if Outlook asks you to choose one.
- Turn on Send Automatic Replies.
- Enter the message for people inside your organization.
- Enable the time-period option and set the start and end dates if you want the reply to expire automatically.
- Enable the external-message option if it is available for your mailbox.
- Choose whether replies should go only to contacts or to all external senders.
- Enter the external message and close the Automatic Replies window.
The Tools menu distinction is worth remembering. Mac users who look for a Windows-style File tab can spend unnecessary time searching for a setting that is present but located elsewhere.
Turn On Outlook Out of Office From Your Phone
Outlook for iOS and Android can manage Automatic Replies without requiring access to a Windows PC or Mac. That makes the mobile app particularly useful when travel begins unexpectedly or an absence needs to be extended at short notice.Steps in Outlook mobile
- Open the Outlook app.
- Select Settings.
- Tap the email account that needs an out-of-office reply.
- Select Automatic Replies.
- Turn on the Automatic Replies switch.
- Enable Reply during a time period and set the start and end dates.
- Enable Block my calendar if you want an absence event created.
- Use Clear my calendar if you need to decline or cancel selected meetings.
- Choose whether to reply to everyone or only to people in your organization.
- Add internal and external messages where the app offers separate fields.
- Select Save or the check mark.
Remember that each mailbox is separate
If Outlook mobile contains multiple accounts, turning on an automatic reply for one mailbox does not automatically configure the others.For example, a user with:
- A Microsoft 365 work account
- A personal Outlook.com address
- A Gmail address
Create an Out-of-Office Rule for POP and IMAP Accounts
Classic Outlook can imitate an out-of-office reply for unsupported accounts by combining an email template with a rule. This is a workable fallback, but it is not equal to server-side Automatic Replies.The major weakness is simple: classic Outlook must remain open and running for the rule to send messages. If the computer restarts, sleeps, loses power, signs out, or Outlook crashes, the reply may stop working.
Step 1: Create the reply template
- In classic Outlook, select New Email.
- Write the subject line and body of your absence reply.
- Select File.
- Select Save As.
- Choose *Outlook Template (.oft) from the Save as type** list.
- Give the template a recognizable name, such as
Out_of_Office_July. - Select Save.
Step 2: Create the rule
- Select File.
- Choose Manage Rules & Alerts.
- Open the E-mail Rules tab.
- Select New Rule.
- Under Start from a Blank Rule, select Apply rule on messages I receive.
- Select Next.
- Leave the conditions blank if the rule should apply to all incoming messages.
- Select Next again.
- Confirm Yes when Outlook asks whether the rule should apply to every message.
- Select reply using a specific template.
- In the rule description, select the underlined a specific template link.
- Set Look In to User Templates in File System.
- Select the template you created.
- Choose Open, then Next.
- Add exceptions where appropriate.
- Name the rule.
- Confirm that Turn on this rule is selected.
- Select Finish.
Essential rule exceptions
A rule that replies to every incoming message can create noise or interact badly with automated mail systems. Add exceptions where possible for:- Mailing lists
- Newsletters
- Automated alerts
- No-reply addresses
- Messages with terms such as “unsubscribe”
- Delivery notifications
- System-generated reports
Write Better Internal and External Out-of-Office Messages
An effective automatic reply is concise, professional, and useful. It should tell senders what they need to know without revealing personal details that create security or privacy risks.What to include in an internal reply
An internal message can be more detailed because it is sent to people inside the organization. Consider including:- The date you will return
- Whether you will have limited access to email
- The name or team handling urgent issues
- An internal escalation path
- A project or department contact for time-sensitive work
Thank you for your message. I am out of the office through August 14 and will have limited access to email. For urgent customer-support matters, please contact the Service Desk. For project approvals, contact Jordan Lee. I will respond as soon as possible after I return.
What to include in an external reply
External messages should be shorter and more cautious. Avoid sharing holiday locations, flight details, personal phone numbers, internal staffing information, or sensitive escalation paths.Example external message:
Thank you for your email. I am currently out of the office and will return on August 14. For urgent assistance, please contact our main support team. Otherwise, I will respond after I return.
What to avoid
Do not include:- Detailed travel itineraries
- Home addresses or personal contact details
- Exact location information
- Names and direct details of staff who should not be public-facing
- Sensitive project status
- Passwords, account data, or confidential material
- Promises to respond immediately after returning
Add an Out of Office Block to Your Outlook Calendar
Email replies communicate availability to senders, but calendars communicate availability to coworkers. Create an Out of office event to help people understand why you cannot accept meetings.New Outlook for Windows
- Open Calendar.
- Select Home.
- Choose New Event.
- Add a title such as “Out of Office.”
- Set the dates.
- Turn on All day for a full-day absence.
- Open the availability or Busy menu.
- Select Out of office.
- Select Save.
Classic Outlook for Windows
- Open Calendar.
- Select Home.
- Choose New Appointment.
- Enter the title and dates.
- Select All day event if appropriate.
- Set Show As to Out of office.
- Select Save & Close.
Use Teams or Copilot to Manage the Same Absence
For Microsoft 365 work and school accounts, Microsoft Teams can synchronize an out-of-office message with Outlook Automatic Replies. This can be convenient for employees who spend most of their day in Teams rather than email.Schedule out of office through Teams
In Teams desktop, the usual path is:- Select your profile picture.
- Choose Set status message.
- Select Schedule out of office.
- Turn on Automatic replies.
- Enter the message.
- Configure external replies if allowed.
- Set the time range.
- Select Save.
When the integration is available, the scheduled out-of-office message and time period appear in Outlook as Automatic Replies. This is useful, but users should still verify the final message and dates in Outlook if the absence is important or extended.
Copilot-assisted setup
Microsoft 365 Copilot can draft, update, enable, or disable automatic replies in supported Microsoft 365 environments. A user can ask Copilot to set an out-of-office reply for a date range, review the generated draft, and confirm the final configuration.This is a convenience feature, not a substitute for review. Automatic replies can reveal information externally, so users should always check:
- The absence dates
- The internal contact named for urgent work
- The external message
- Whether outside replies are enabled
- Whether the language is suitable for customers and partners
Administrator Options for User and Shared Mailboxes
IT administrators can configure Automatic Replies for Microsoft 365 mailboxes without signing in as the mailbox owner. This is valuable when an employee is unexpectedly unavailable, on extended leave, or unable to access their account.User mailbox configuration
Administrators can use the Microsoft 365 admin center to open:- Users
- Active users
- The affected user
- Mail settings
- Automatic replies
- Recipients
- Mailboxes
- The relevant mailbox
- Others
- Manage automatic replies
Shared mailbox configuration
For a shared mailbox, an administrator can generally use the Microsoft 365 admin center:- Open Teams & groups.
- Select Shared mailboxes.
- Select the mailbox.
- Edit Automatic replies.
- Enter messages for internal and external senders.
- Save the configuration.
Final Checks Before You Leave
Before your absence begins, take a minute to verify the configuration. A short checklist prevents the most common Outlook out-of-office failures.- Confirm the start and end date.
- Confirm the correct time zone.
- Make sure the external reply is enabled only if needed.
- Check that the external message does not expose private information.
- Verify that the internal contact is available and expects referrals.
- Add an Out of office calendar block.
- Review meetings that need delegation, cancellation, or reassignment.
- If using a classic Outlook rule, ensure the PC and Outlook will remain running.
- Turn off old or duplicate rules that could send conflicting messages.
- Test the reply using another account when practical.