Fix Greyed-Out Windows Update Settings and Remove Old Update Policies in Windows 10/11
Difficulty: Intermediate | Time Required: 15 minutesIf your Windows Update page shows messages like “Some settings are managed by your organization”, has greyed-out buttons, prevents pausing updates, blocks optional updates, or keeps targeting an old Windows version, you may have leftover update policies on the PC.
This can happen after using a work or school account, third-party “debloat” or privacy tools, Windows Update blockers, old WSUS settings, or previous Group Policy tweaks. The good news: on a personal PC, you can usually clear these policies and return Windows Update to normal.
This guide applies to Windows 10 version 22H2 and Windows 11, including recent Windows 11 releases such as 23H2, 24H2, and 25H2. As of May 2026, Windows 10 version 22H2 is outside standard support unless covered by an applicable ESU, LTSC, or organization-managed servicing arrangement.
Prerequisites
Before starting, make sure you have:Quick walkthrough
- An administrator account
- A few minutes to restart the PC
- A personal device, not a company-managed PC
Warning: Do not remove update policies on a work, school, or organization-managed computer unless your IT administrator approves it. Managed policies may be required for security, compliance, or update scheduling.
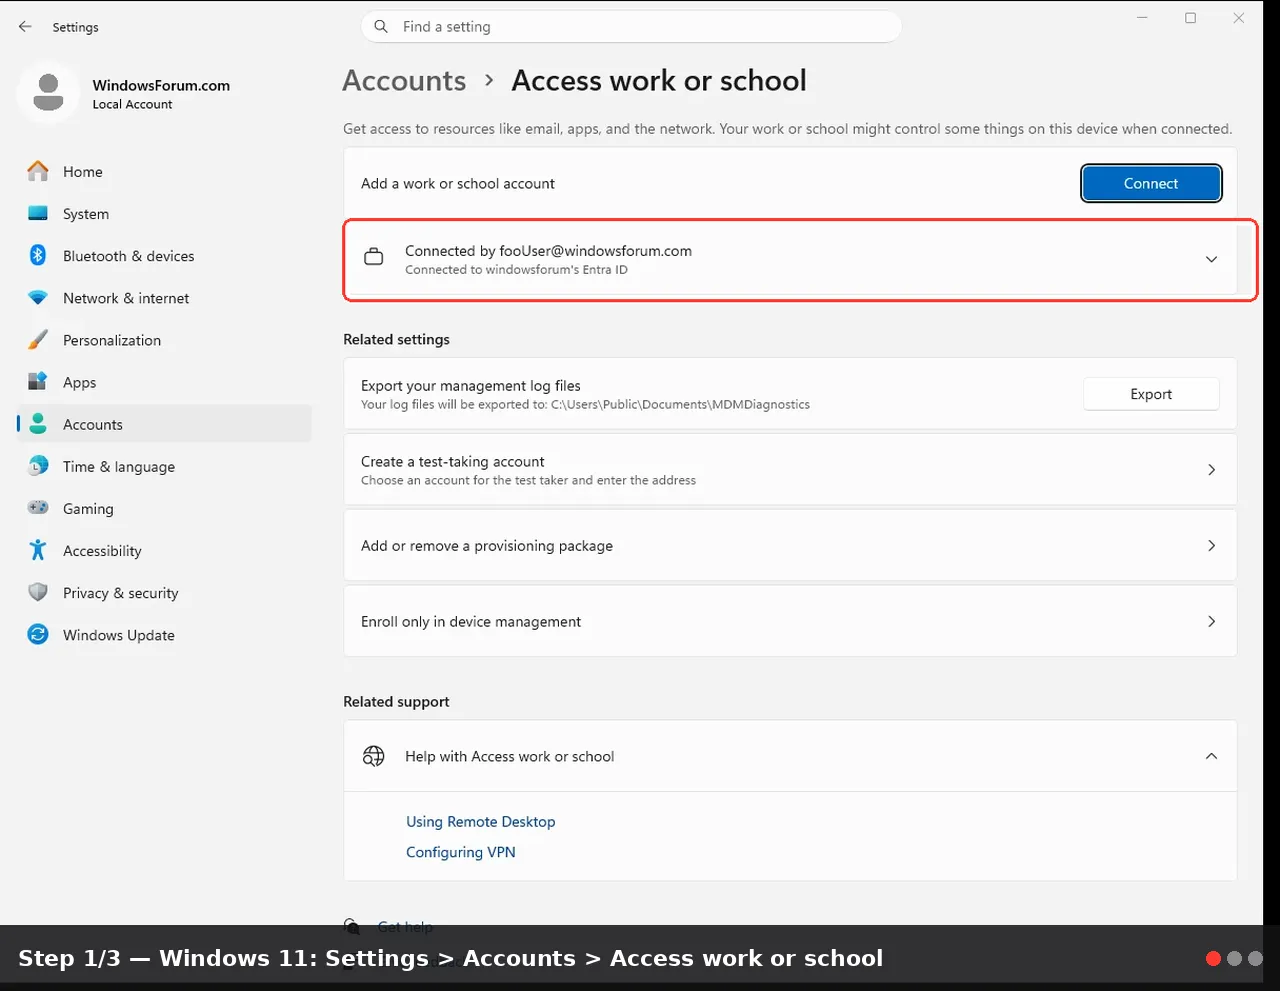
Step 1: Check Whether the PC Is Still Managed
Before deleting anything, check whether Windows is currently connected to a work or school management account.- Open Settings.
- Go to:
- Windows 11:
Settings > Accounts > Access work or school - Windows 10:
Settings > Accounts > Access work or school - Look for connected work, school, Microsoft Entra ID, MDM, or organization accounts.
- If this is your personal PC and an old account is listed, select it and choose Disconnect.
- Restart the computer.
Note: If the device is still enrolled in mobile device management, Windows may recreate the same policies after you remove them locally.
Step 2: Create a Restore Point
Because this tutorial includes policy and registry cleanup, create a restore point first.- Press Windows + R.
- Type:
SystemPropertiesProtection - Press Enter.
- Select your system drive, usually C:.
- Click Configure if protection is off, then enable it.
- Click Create.
- Name it something like:
Before Windows Update policy cleanup - Click Create again.
Step 3: Remove Windows Update Policies Using Group Policy
This method is available on Windows 10/11 Pro, Enterprise, and Education editions. If you use Windows Home, skip to Step 4.- Press Windows + R.
- Type:
gpedit.msc - Press Enter.
- Navigate to:
Computer Configuration > Administrative Templates > Windows Components > Windows Update - Check the main Windows Update folder and any subfolders such as:
- Manage end user experience
- Manage updates offered from Windows Update
- Windows Update for Business
- Manage updates offered from Windows Server Update Service
- Open each of the following policies if present and set them to Not Configured:
- Configure Automatic Updates
- Remove access to use all Windows Update features
- Remove access to Pause updates
- Do not connect to any Windows Update Internet locations
- Specify intranet Microsoft update service location
- Do not include drivers with Windows Updates
- Select when Preview Builds and Feature Updates are received
- Select when Quality Updates are received
- Select the target Feature Update version
- Enable optional updates
- Click Apply, then OK for each changed policy.
Tip: “Not Configured” usually means Windows returns control to the Settings app and uses the default Windows Update behavior.
Step 4: Clear Old Windows Update Registry Policies
If Windows Update is still greyed out, or if you are using Windows Home, remove stale policy keys from the registry.Warning: Editing the registry incorrectly can cause system problems. Follow the steps carefully and keep the backup created below.
- Right-click Start.
- Select Terminal (Admin), Windows PowerShell (Admin), or Command Prompt (Admin).
- First, export a backup of the Windows Update policy key:
reg export "HKLM\SOFTWARE\Policies\Microsoft\Windows\WindowsUpdate" "%USERPROFILE%\Desktop\WindowsUpdatePolicyBackup.reg" - If the command says the key does not exist, that is fine. Continue.
- Now delete the Windows Update policy key:
reg delete "HKLM\SOFTWARE\Policies\Microsoft\Windows\WindowsUpdate" /f - Next, refresh Group Policy:
gpupdate /force - Restart the PC.
This removes common policy values such as old WSUS server settings, target release version locks, deferral settings, pause policies, automatic update restrictions, and Windows Update access blocks.
Step 5: Check Windows Update Again
After restarting:- Open Settings.
- Go to:
- Windows 11:
Settings > Windows Update - Windows 10:
Settings > Update & Security > Windows Update - Check whether the greyed-out options are restored.
- Select Check for updates.
- Open Advanced options and verify that pause, optional update, driver, and restart settings behave normally.
If the message “Some settings are managed by your organization” disappears, the cleanup worked.
Step 6: If the Message Comes Back
If the same restrictions return after a reboot, one of these is likely true:- The PC is still connected to work or school management.
- A third-party privacy, update blocker, or “tweaking” tool is reapplying policies.
- A local scheduled task or script is restoring registry values.
- Security software is enforcing Windows Update behavior.
- Your organization is managing the device through MDM or domain policy.
Step 7: Optional Windows Update Repair Commands
If the settings are no longer greyed out but updates still fail to download or install, repair the Windows image and system files.- Open Terminal, PowerShell, or Command Prompt as administrator.
- Run:
DISM /Online /Cleanup-Image /RestoreHealth - When it finishes, run:
sfc /scannow - Restart the PC.
- Try Windows Update again.
Note: These commands repair Windows component corruption. They do not remove organization policies by themselves, but they are useful if Windows Update remains broken after policy cleanup.
Tips and Troubleshooting Notes
- If you are on Windows Home, you normally will not have the Local Group Policy Editor. Use the registry method instead.
- If a registry backup was created on your desktop, keep it for a few days. You can double-click it later to restore the old policy values if needed.
- If your PC previously used WSUS, removing the policy key allows it to scan Microsoft’s public Windows Update service again.
- If you intentionally blocked feature updates with a target version policy, removing it may allow Windows to offer a newer Windows release.
- Restarting is important. Some Windows Update settings do not fully refresh until after a reboot.
Conclusion
Greyed-out Windows Update settings are usually caused by leftover Group Policy, registry, WSUS, or device management settings. By checking management enrollment, resetting Windows Update policies to Not Configured, and removing stale registry policy keys, you can restore normal control over updates on a personal Windows 10 or Windows 11 PC.Key Takeaways:
- Greyed-out Windows Update options often come from old policy settings.
- Use Group Policy first on Pro, Enterprise, or Education editions.
- Use the registry cleanup method for Windows Home or stubborn leftover policies.
- Do not remove policies from company-managed devices without approval.
- After cleanup, Windows Update should regain normal settings and update behavior.
This tutorial was generated to help WindowsForum.com users get the most out of their Windows experience.
Last edited: