Fix Low Disk Space Fast: Move User Folders + Change Default Save Location (Win10/11)
Difficulty: Intermediate | Time Required: 20 minutesRunning low on space on your C: drive (especially on smaller SSDs) is one of the fastest ways to slow Windows down, trigger update failures, and cause annoying “Low disk space” warnings. The good news: you can reclaim a lot of space quickly by doing two safe, built-in changes:
Quick walkthrough
- Move the big user folders (Documents, Downloads, Pictures, Videos, Desktop) to another drive.
- Change default save locations so new files/apps don’t keep filling C:.
This guide works on Windows 10 and Windows 11 and doesn’t require third-party tools.
Prerequisites
Before you start, make sure you have:- A second storage location with free space:
- Another internal drive (recommended), e.g. D: or E:
- Or a second partition on the same drive
- (External USB drives work, but are not ideal for Desktop/Documents because disconnects cause issues.
- A few minutes where you can close apps that might be using your files (browsers, Office, game launchers).
- Optional but recommended: a quick backup of important files.
Note (Windows 11/10): The screenshots/labels may look slightly different, but the steps and settings are the same.
Step-by-Step: Move User Folders to Another Drive (Recommended)
This method uses the built-in Location tab, which updates Windows paths safely (no broken links, and apps follow the move properly).1) Create destination folders on the new drive
- Open File Explorer.
- Go to your secondary drive (e.g. D:).
- Create a new folder such as:
D:\Users\<YourName>\- Inside it, create folders you’ll move, for example:
D:\Users\<YourName>\DesktopD:\Users\<YourName>\DocumentsD:\Users\<YourName>\DownloadsD:\Users\<YourName>\PicturesD:\Users\<YourName>\Videos
Tip: Keeping the same folder names as Windows uses makes it easier to recognize and manage later.
2) Move “Documents”
- In File Explorer, click This PC.
- Under Folders, right-click Documents → Properties.
- Open the Location tab.
- Click Move…
- Browse to:
D:\Users\<YourName>\Documents(or your chosen location). - Click Select Folder → Apply.
- When asked to move files, click Yes.
3) Repeat for other large folders
Repeat the same process for:- Desktop
- Downloads
- Pictures
- Videos
- Music (optional, but useful if you store a lot of audio)
Warning: Don’t move system-managed hidden folders manually (likeAppData) using this method. Stick to the standard libraries (Documents, Downloads, etc. unless you really know what you’re doing.
4) Confirm Windows is using the new locations
- Right-click Documents (or any moved folder) under This PC.
- Choose Properties → Location.
- Confirm the path now points to your new drive (e.g.
D:\Users\...).
Step-by-Step: Change Default Save Locations (So C: Stays Clean)
Moving folders helps a lot, but Windows may still save new content to C: by default. This section changes those defaults.5) Change where new content is saved (Windows Settings)
- Open Settings:
- Windows 10: Start → Settings
- Windows 11: Start → Settings
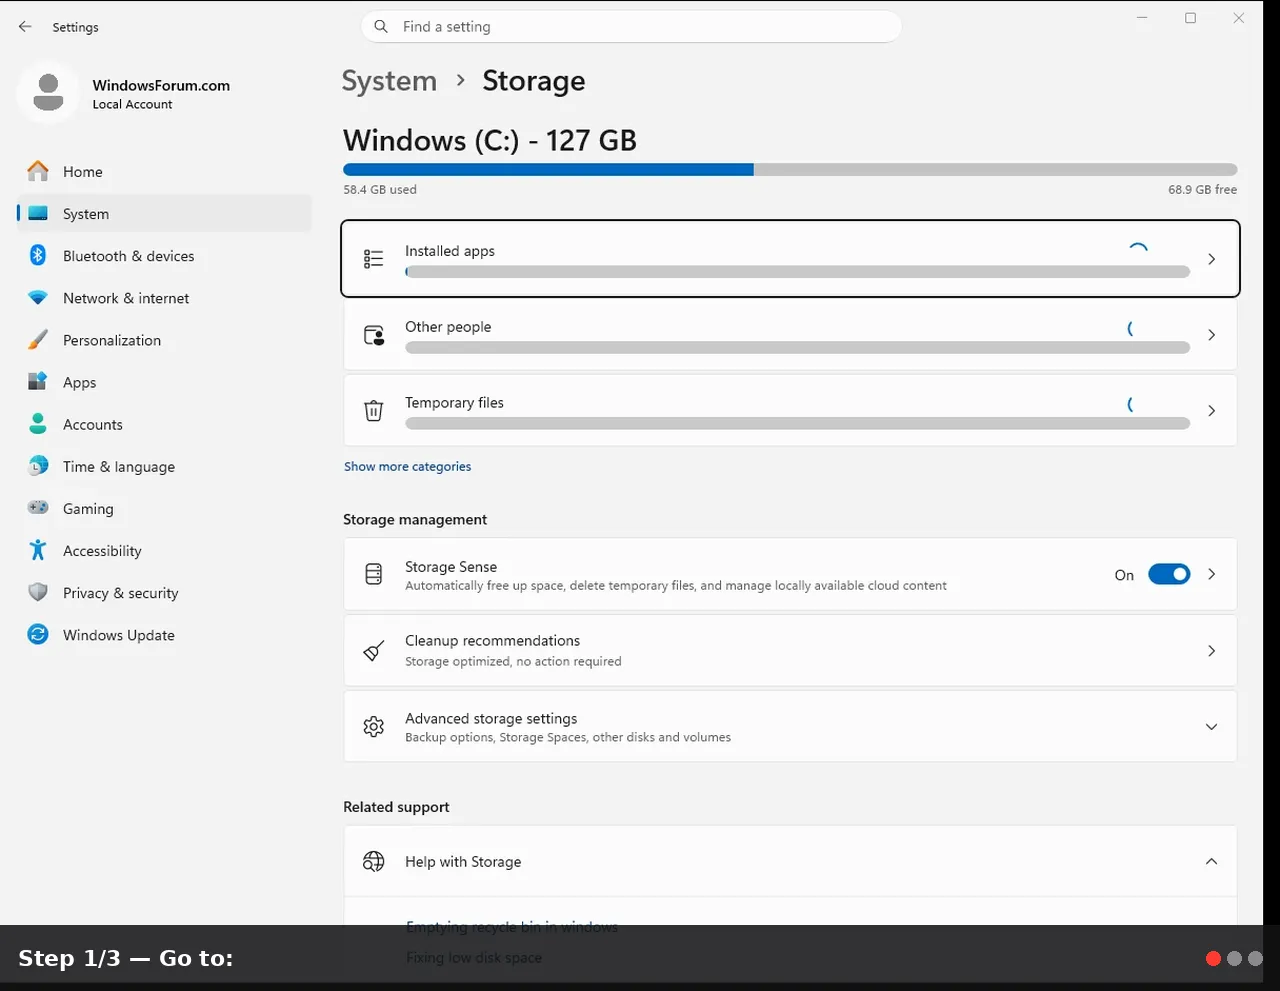
- Go to:
- System → Storage
- Find and open:
- Advanced storage settings → Where new content is saved
Now set the drop-downs to your preferred drive (like D:):
- New apps will save to: (optional—see warning below)
- New documents will save to:
- New music will save to:
- New photos and videos will save to:
- New movies and TV shows will save to: (if shown)
- New maps will save to: (rarely used)
Warning (Apps): “New apps will save to” mainly affects Microsoft Store apps. Classic desktop apps (Chrome, Steam, Adobe installers, etc. may still default to C: unless you change their install path during setup.
(Optional) Move Microsoft Store Apps (If They’re Using Too Much Space)
If you have a lot of Store apps or games installed:- Go to Settings → Apps → Installed apps (Win11) / Apps & features (Win10).
- Click an app that supports moving.
- Choose Move (if available) and select your secondary drive.
Note: Not all apps support moving. The Move button will be missing for many desktop apps and some system apps.
Tips, Warnings, and Troubleshooting
Tip: Downloads grows the fastest
If you only move one folder, move Downloads first. It often contains installers, ZIP files, and duplicates you don’t need long-term.Tip: Keep OneDrive in mind (if enabled)
If your Desktop/Documents are synced with OneDrive, you may be using:C:\Users\<You>\OneDrive\Documentsetc.
- OneDrive → Settings → Sync and backup / Backup
Changing OneDrive backup after moving folders can re-route them unexpectedly.
Warning: Avoid “cut and paste” for known folders
DraggingC:\Users\<You>\Documents to D: manually can break the special folder mapping in Windows. Use the Location tab method for these known folders.Troubleshooting: Location tab missing?
If you don’t see a Location tab:- Make sure you right-click the folder under This PC (the special folder), not a random folder you created.
- For some folders, the Location tab may not exist—stick to the main libraries listed earlier.
Troubleshooting: “Can’t move the folder because there is a folder in the same location…”
This usually happens if:- The destination folder already contains a Windows-known folder structure or data conflicts.
- Choose a new empty folder as destination (e.g.
D:\Users\<You>\Documents2), complete the move, then reorganize later.
Troubleshooting: Programs still saving to C:
Many apps have their own settings:- Browsers: change download location
- Office apps: change default save location
- Editing apps: change scratch/cache/temp locations
- Game launchers (Steam/Epic): set library install location to D:
Quick verification: did you actually free space?
After moving folders:- Open Settings → System → Storage
- Check the C: drive usage again.
- You should see reduced usage under categories like Documents, Pictures, etc.
Conclusion
By moving your primary user folders to a secondary drive and updating Windows’ default save locations, you reduce pressure on your C: drive, prevent future “low disk space” alerts, and improve system stability—especially during Windows Updates. It’s one of the most effective “20-minute fixes” you can do on a cramped SSD.Key Takeaways:
- Move Documents/Downloads/Pictures/Videos/Desktop using the Location tab to safely reclaim C: space.
- Change Where new content is saved so new files don’t keep piling onto C:.
- Optional: Move supported Microsoft Store apps and adjust app-specific save/download paths for best results.
This tutorial was generated to help WindowsForum.com users get the most out of their Windows experience.
Last edited: