

Windows failing to detect a device is rarely a mystery, but it is often a chain of small failures: a cable that only charges, a dock that cannot pass enough power, a driver that no longer matches the hardware, a disabled device entry, or an app permission that blocks access after Windows has already recognized the device.
The fastest route to a fix is to avoid treating every missing device the same way. A USB drive that does not appear in File Explorer, a Bluetooth headset that will not pair, a webcam that works in one app but not another, and an external monitor that remains black can all look like “Windows not detecting devices.” Underneath, however, they involve different layers of Windows 11.
This guide focuses on the eight troubleshooting steps that solve the largest share of device detection problems without resorting to risky registry edits, generic driver-updater utilities, or unnecessary Windows resets.
Before changing drivers or Windows settings, establish what “not detected” actually means.
A device can fail at several points:
A good troubleshooting rule is to make one change at a time, then test again. This prevents a successful repair from becoming impossible to identify and avoids introducing a second problem while trying to solve the first.
Windows uses Plug and Play services to recognize hardware, assign device information, load drivers, and expose the hardware to applications. A connection can fail partway through that process due to a power-state issue, a temporary driver crash, a dock handshake failure, or a device that was connected before Windows finished loading.
A practical reset sequence is:
A USB-C cable may support charging but not high-speed data. Another may support data but not video output. A dock can have enough ports for several devices while lacking the bandwidth, power delivery, or display support needed for all of them at once.
This is particularly important for:
Disconnect unused USB hardware during testing. Several high-draw devices connected through one hub or dock can cause intermittent disconnects that look like driver failures.
This approach is preferable to downloading a random driver package from a search result. Third-party driver sites often bundle installers, provide outdated packages, or make it difficult to verify whether a driver is appropriate for the exact PC model and Windows version.
Driver updates can resolve:
Avoid “driver updater” applications. They can misidentify hardware, install unnecessary versions, and create a recovery problem that is more difficult than the original missing-device issue.
Open it by right-clicking the Start button and selecting Device Manager.
The goal is not merely to find a yellow warning icon. The goal is to determine whether the device appears in any form: active, disabled, hidden, unknown, or incorrectly categorized.
A faded entry does not automatically mean the hardware is broken. It may simply represent a device Windows remembers from an earlier connection.
To restore it:
This is where uninstalling the device can help. It sounds aggressive, but when performed in Device Manager, it usually removes the current device instance and allows Windows to rebuild it after a restart.
Removing broad controller categories can temporarily disable keyboards, mice, drives, networking, or other essential hardware until Windows rebuilds them. That can be appropriate in advanced cases, but it is not a first-line repair and should not be attempted without a recovery plan.
For most users, target the specific failing device first.
Rollback is especially useful for display adapters, Bluetooth radios, Wi-Fi adapters, audio interfaces, and specialized USB hardware where a new driver introduced instability.
The key point is that a device being switched on is not the same as being discoverable. Most headphones, mice, keyboards, speakers, controllers, and phones need a deliberate pairing mode.
Also keep the device close to the PC during pairing. USB 3.x equipment and poorly shielded cables can sometimes interfere with Bluetooth signals, so move the accessory away from busy USB hubs, external SSDs, and high-speed cables if pairing remains unreliable.
Swift Pair is convenient, not mandatory. If the notification never arrives, use the normal Bluetooth Settings or Quick Settings pairing flow.
For a printer that appears installed but refuses to work, remove it from Printers & scanners, restart Windows, then add it again.
Network printers and scanners also require the PC and device to be on the same network. In homes with multiple routers, extenders, or guest networks, the PC may have internet access while still being unable to discover the printer.
For shared printers, enable:
Avoid relying on a simple display splitter if the goal is to extend a desktop across multiple independent monitors. Many inexpensive splitters duplicate one video signal rather than create separate extended displays.
Right-click Start and select Disk Management. Then inspect the lower pane carefully.
A disk may be:
If it is a brand-new, empty drive, initialize it, create a New Simple Volume, assign a drive letter, and format it. This is how a new storage device becomes visible in File Explorer.
Do not initialize, format, or create a volume on a disk that contains data you need. Those actions can make recovery more difficult and may overwrite metadata needed to restore files. If a previously working drive suddenly appears uninitialized or unallocated, stop and investigate the drive’s health, enclosure, cable, and backup status first.
This is particularly common with webcams, microphones, headsets, printers, removable drives, and browser-based meeting or recording tools.
In Microsoft Teams, open Settings > Devices and select the correct speaker, microphone, and camera. In Zoom, use its Video & effects and Audio settings to select and test the hardware.
A common scenario is a USB webcam being detected successfully while an app remains pointed at a laptop’s built-in camera. The same applies to microphones: Windows may recognize an external headset mic while the app continues using a webcam mic, monitor mic, or disabled virtual audio device.
For Microsoft Edge, review the site’s Camera and Microphone permissions under site settings. For Google Chrome, use Settings > Privacy and security > Site settings, then check the Camera and Microphone sections.
Choose the correct device, allow the website, and remove any accidental block. A website can be denied access even when Windows itself allows the browser to use the camera or microphone.
IT administrators can restrict:
Trying to bypass workplace restrictions can create compliance and security problems. It can also leave an employee unable to receive support if the device later causes instability or data exposure.
Search Get Help for targeted tools such as:
Use this escalation order:
Windows device detection problems become much easier to solve once the troubleshooting process follows the signal path: connection first, Windows recognition second, driver health third, device-specific settings fourth, and application permissions last. That order avoids needless repairs and turns a vague “not detected” error into a practical, repeatable diagnosis.
The fastest route to a fix is to avoid treating every missing device the same way. A USB drive that does not appear in File Explorer, a Bluetooth headset that will not pair, a webcam that works in one app but not another, and an external monitor that remains black can all look like “Windows not detecting devices.” Underneath, however, they involve different layers of Windows 11.
This guide focuses on the eight troubleshooting steps that solve the largest share of device detection problems without resorting to risky registry edits, generic driver-updater utilities, or unnecessary Windows resets.
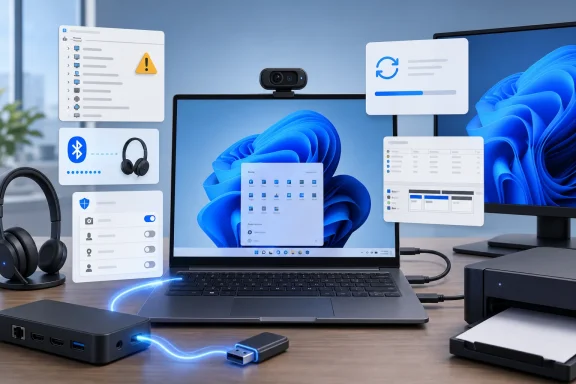 Overview: Identify Where Detection Fails
Before changing drivers or Windows settings, establish what “not detected” actually means.A device can fail at several points:
- Physical connection: The PC never receives a usable signal from the device.
- Windows hardware detection: The device is not listed in Device Manager or Settings.
- Driver installation: Windows sees the hardware but cannot communicate with it correctly.
- Windows configuration: The device is disabled, offline, hidden, or assigned incorrectly.
- Application access: Windows detects the hardware, but a browser, meeting app, or media program cannot use it.
- Network or organization policy: A printer, camera, Bluetooth accessory, or removable drive is blocked by network configuration or workplace management.
A good troubleshooting rule is to make one change at a time, then test again. This prevents a successful repair from becoming impossible to identify and avoids introducing a second problem while trying to solve the first.
1. Restart Windows and Reconnect the Device Properly
It sounds basic because it is basic, but a clean reconnect followed by a full restart remains one of the most effective Windows device troubleshooting methods.Windows uses Plug and Play services to recognize hardware, assign device information, load drivers, and expose the hardware to applications. A connection can fail partway through that process due to a power-state issue, a temporary driver crash, a dock handshake failure, or a device that was connected before Windows finished loading.
Start with a true clean reconnect
Follow this order:- Disconnect the device from the PC.
- Turn off the device if it has its own power switch.
- Wait at least 10 seconds.
- Reconnect it directly to the PC where possible.
- Restart Windows from Start > Power > Restart.
- Test the device only after Windows has fully returned to the desktop.
Printers, scanners, and powered accessories need a longer reset
For printers, scanners, docking stations, USB hubs, external drives, and displays, remove power as well as the data connection.A practical reset sequence is:
- Turn off the hardware.
- Unplug its power adapter.
- Wait roughly 30 seconds.
- Reconnect power.
- Turn the device back on.
- Connect it to the PC and restart Windows.
When this fix is most likely to work
A restart and reconnect is a strong first move when:- The device worked earlier the same day.
- The problem started after sleep, hibernation, docking, or undocking.
- Windows made the USB connection sound but nothing appeared afterward.
- Bluetooth suddenly disappeared from quick settings.
- A monitor stayed black after waking a laptop.
- A printer or scanner stopped responding after a router, power, or firmware interruption.
2. Eliminate Cable, Port, Dock, and Power Problems
The most common error in Windows device troubleshooting is assuming every cable with the same connector provides the same capabilities. It does not.A USB-C cable may support charging but not high-speed data. Another may support data but not video output. A dock can have enough ports for several devices while lacking the bandwidth, power delivery, or display support needed for all of them at once.
Connect directly to the PC
Remove every unnecessary component between the device and the computer:- Bypass USB hubs and docking stations.
- Avoid adapters where possible.
- Connect external drives directly to a PC USB port.
- Connect a monitor directly by HDMI, DisplayPort, or a verified USB-C display connection.
- Use the manufacturer-supplied cable when available.
- Test with a different known-good cable.
Test a different port—but test intelligently
Try another USB port, but do not switch ten things at once. A meaningful test looks like this:- Keep the same device and same cable.
- Change only the PC port.
- Observe whether Windows detects the device.
- If not, keep the port and switch only the cable.
- If possible, test the device on another PC.
Watch for USB-C capability mismatches
USB-C is a connector shape, not a guarantee of a feature set. On laptops, some USB-C ports may support charging and data only, while another supports DisplayPort Alt Mode, Thunderbolt, or USB4 functionality.This is particularly important for:
- External monitors
- USB-C docks
- High-speed external SSDs
- Ethernet adapters
- Capture devices
- USB-C audio interfaces
Ensure powered devices are actually receiving power
External hard drives, larger USB hubs, audio interfaces, printers, scanners, and docks may need their own power adapter. A device can light up, spin briefly, or show a status LED while still lacking enough stable power to enumerate properly in Windows.Disconnect unused USB hardware during testing. Several high-draw devices connected through one hub or dock can cause intermittent disconnects that look like driver failures.
Verify the monitor’s active input
For an external display, Windows cannot detect a signal that the monitor is not listening for. Open the display’s physical Input or Source menu and choose the port actually in use:- HDMI
- DisplayPort
- USB-C
- Thunderbolt
- DVI, on older displays
3. Use Windows Update Before Hunting for Drivers
Windows Update is the safest first place to look for hardware drivers. It can deliver recommended drivers automatically, while additional driver packages may appear under optional updates.This approach is preferable to downloading a random driver package from a search result. Third-party driver sites often bundle installers, provide outdated packages, or make it difficult to verify whether a driver is appropriate for the exact PC model and Windows version.
Check for standard and optional updates
In Windows 11:- Open Start > Settings > Windows Update.
- Select Check for updates.
- Install all available updates.
- Restart the PC.
- Return to Windows Update > Advanced options.
- Turn on Receive updates for other Microsoft products.
- Under Additional options, open Optional updates.
- Review any available driver updates.
- Select the relevant driver packages and choose Download and install.
- Restart once more.
Why a Windows update can fix missing hardware
A driver is the software bridge between Windows and a hardware component. Without a compatible driver, Windows may recognize that something is connected but present it as an unknown device, disable its functions, or fail to expose it to apps.Driver updates can resolve:
- Bluetooth pairing failures
- Wi-Fi adapters that vanish after an upgrade
- Audio devices missing from the output list
- External monitor detection failures
- USB controller instability
- Camera and microphone errors
- Storage controllers that fail to expose drives correctly
Use manufacturer drivers when Windows Update comes up empty
If Windows Update does not provide a working driver, use the official support page for either:- The PC manufacturer, for laptops and prebuilt desktops
- The device manufacturer, for peripherals and add-in hardware
Avoid “driver updater” applications. They can misidentify hardware, install unnecessary versions, and create a recovery problem that is more difficult than the original missing-device issue.
4. Refresh Detection in Device Manager
Device Manager remains the central Windows tool for determining whether the operating system sees hardware at all.Open it by right-clicking the Start button and selecting Device Manager.
The goal is not merely to find a yellow warning icon. The goal is to determine whether the device appears in any form: active, disabled, hidden, unknown, or incorrectly categorized.
Reveal hidden devices and rescan the PC
If the hardware category itself seems absent:- Open Device Manager.
- Select View > Show hidden devices.
- Select Action > Scan for hardware changes.
A faded entry does not automatically mean the hardware is broken. It may simply represent a device Windows remembers from an earlier connection.
Look in the right category
Windows may place missing hardware in a less obvious category:- Bluetooth for radios and paired accessories
- Cameras for webcams
- Disk drives for external and internal storage
- Display adapters and Monitors for displays
- Human Interface Devices for keyboards, controllers, and touch hardware
- Network adapters for Ethernet, Wi-Fi, and some USB network devices
- Portable Devices for phones and media players
- Printers and Print queues for printing hardware
- Sound, video and game controllers for microphones, speakers, interfaces, and capture devices
- Universal Serial Bus controllers for USB hubs and controllers
- Other devices for hardware missing a suitable driver
Enable a disabled device
A downward arrow or disabled status can indicate that the device has been disabled manually or by an earlier troubleshooting attempt.To restore it:
- Expand the relevant category.
- Right-click the device.
- Select Enable device.
Update the driver from Device Manager
To let Windows look again for a driver:- Right-click the device.
- Select Update driver.
- Choose Search automatically for updated driver software.
- If offered, choose the option to search Windows Update for updated drivers.
- Update driver
- Browse my computer for drivers
- Browse
- Select the folder containing the extracted driver files
- Choose Next
.exe installer, run it first unless its documentation specifically instructs manual installation.5. Reinstall or Roll Back a Faulty Driver
If Windows detects the device in Device Manager but it still does not work, the driver may be corrupted, incorrectly configured, or incompatible with a recent update.This is where uninstalling the device can help. It sounds aggressive, but when performed in Device Manager, it usually removes the current device instance and allows Windows to rebuild it after a restart.
Reinstall the device driver
Use this method when the device appears in Device Manager but behaves incorrectly:- Save your work and close open applications.
- Open Device Manager.
- Expand the category containing the affected hardware.
- Right-click the device.
- Select Uninstall device.
- Confirm the uninstall.
- Restart Windows.
- If Windows does not reinstall the device automatically, open Device Manager and choose Action > Scan for hardware changes.
Do not remove unrelated controller entries casually
There is an important distinction between uninstalling the affected device and removing every USB controller, storage controller, or system device in sight.Removing broad controller categories can temporarily disable keyboards, mice, drives, networking, or other essential hardware until Windows rebuilds them. That can be appropriate in advanced cases, but it is not a first-line repair and should not be attempted without a recovery plan.
For most users, target the specific failing device first.
Roll back after a bad driver update
If the device stopped working immediately after a driver update, rollback is often more sensible than chasing another update.- Open Device Manager.
- Right-click the affected device.
- Select Properties.
- Open the Driver tab.
- Choose Roll Back Driver.
- Select a reason when prompted.
- Confirm the rollback and restart if requested.
Rollback is especially useful for display adapters, Bluetooth radios, Wi-Fi adapters, audio interfaces, and specialized USB hardware where a new driver introduced instability.
6. Pair Bluetooth Devices Using Windows 11’s Current Controls
Bluetooth failures often come down to one of four issues: Bluetooth is disabled, the accessory is not genuinely in pairing mode, the accessory has low power, or Windows is using a narrow discovery filter.The key point is that a device being switched on is not the same as being discoverable. Most headphones, mice, keyboards, speakers, controllers, and phones need a deliberate pairing mode.
Pair from Quick Settings
In Windows 11:- Select the Network, Sound, or Battery icon near the clock.
- Ensure Bluetooth is switched on.
- Select the chevron next to the Bluetooth quick setting.
- Put the accessory into pairing mode.
- Look under New devices.
- Select the device and follow the prompts.
Set discovery to Advanced
If the Bluetooth device never appears:- Open Start > Settings > Bluetooth & devices > Devices.
- Find Bluetooth devices discovery under Device settings.
- Change it from Default to Advanced.
- Put the accessory back into pairing mode.
- Try pairing again.
Check battery level, distance, and interference
A Bluetooth device with a weak battery may power on but fail to enter or maintain pairing mode. Charge it fully, or use new batteries before continuing.Also keep the device close to the PC during pairing. USB 3.x equipment and poorly shielded cables can sometimes interfere with Bluetooth signals, so move the accessory away from busy USB hubs, external SSDs, and high-speed cables if pairing remains unreliable.
Use Swift Pair when it appears
Some accessories support Swift Pair, which displays a Windows notification when the device is nearby and in pairing mode. If prompted for permission to use Swift Pair, allow it and select Connect when Windows identifies the accessory.Swift Pair is convenient, not mandatory. If the notification never arrives, use the normal Bluetooth Settings or Quick Settings pairing flow.
7. Use the Correct Windows Settings Page for Printers, Cameras, Drives, and Displays
Not every device should be fixed through Device Manager. Several categories have dedicated Windows 11 controls that expose problems Device Manager cannot solve.Printers and scanners
For printer or scanner detection:- Open Start > Settings > Bluetooth & devices > Printers & scanners.
- Select Add device next to Add a printer or scanner.
- Wait for detection to finish.
- Select Add device beside the correct hardware.
For a printer that appears installed but refuses to work, remove it from Printers & scanners, restart Windows, then add it again.
Network printers and scanners also require the PC and device to be on the same network. In homes with multiple routers, extenders, or guest networks, the PC may have internet access while still being unable to discover the printer.
For shared printers, enable:
- Network discovery
- File and printer sharing
Cameras and microphone devices
If a camera appears in Device Manager but Windows reports it as disabled:- Open Start > Settings > Bluetooth & devices > Cameras.
- Look under Disabled cameras.
- Select the camera.
- Choose Enable.
- Settings > Privacy & security > Camera
- Settings > Privacy & security > Microphone
- Device-level access
- App access
- The individual app
- Desktop app access, where required
External monitors
For a monitor that remains undetected or black:- Confirm its physical input source.
- Press Windows key + P.
- Select Extend or another appropriate display mode.
- Open Settings > System > Display and use the display detection controls if available.
- Press Windows key + Ctrl + Shift + B to reset the graphics driver.
Avoid relying on a simple display splitter if the goal is to extend a desktop across multiple independent monitors. Many inexpensive splitters duplicate one video signal rather than create separate extended displays.
External and internal drives
If Windows detects a drive but File Explorer does not show it, use Disk Management.Right-click Start and select Disk Management. Then inspect the lower pane carefully.
A disk may be:
- Offline
- Uninitialized
- Unallocated
- Missing a drive letter
- Formatted with a file system Windows cannot read
- Failing physically
If it is a brand-new, empty drive, initialize it, create a New Simple Volume, assign a drive letter, and format it. This is how a new storage device becomes visible in File Explorer.
Do not initialize, format, or create a volume on a disk that contains data you need. Those actions can make recovery more difficult and may overwrite metadata needed to restore files. If a previously working drive suddenly appears uninitialized or unallocated, stop and investigate the drive’s health, enclosure, cable, and backup status first.
8. Fix App Permissions, Browser Blocks, and Workplace Restrictions
A Windows device can be detected at the operating-system level and still be unavailable to the program that matters.This is particularly common with webcams, microphones, headsets, printers, removable drives, and browser-based meeting or recording tools.
Check permissions inside the application
For meeting and collaboration apps, choose the intended device in the app’s own settings.In Microsoft Teams, open Settings > Devices and select the correct speaker, microphone, and camera. In Zoom, use its Video & effects and Audio settings to select and test the hardware.
A common scenario is a USB webcam being detected successfully while an app remains pointed at a laptop’s built-in camera. The same applies to microphones: Windows may recognize an external headset mic while the app continues using a webcam mic, monitor mic, or disabled virtual audio device.
Check browser permissions separately
Windows privacy settings and browser permissions are separate layers.For Microsoft Edge, review the site’s Camera and Microphone permissions under site settings. For Google Chrome, use Settings > Privacy and security > Site settings, then check the Camera and Microphone sections.
Choose the correct device, allow the website, and remove any accidental block. A website can be denied access even when Windows itself allows the browser to use the camera or microphone.
Understand managed PC limitations
On work and school Windows 11 PCs, the device may be blocked intentionally by organization policy.IT administrators can restrict:
- Installation of USB and other device classes
- Specific hardware IDs
- Removable device installation
- Camera use
- Bluetooth pairing behavior
- Printer access
- Driver installation and updates
Trying to bypass workplace restrictions can create compliance and security problems. It can also leave an employee unable to receive support if the device later causes instability or data exposure.
Use the modern Get Help troubleshooters
For current Windows 11 troubleshooting, use the Get Help app rather than relying on legacy command-line troubleshooters.Search Get Help for targeted tools such as:
- Bluetooth troubleshooter
- Printer troubleshooter
- Camera troubleshooter
- Audio troubleshooter
- Network diagnostics
msdt.exe /id DeviceDiagnostic workflow should not be the center of a modern repair process. The legacy Microsoft Support Diagnostic Tool platform has been deprecated, and older inbox troubleshooters are being retired or redirected.The Safest Escalation Path When Nothing Works
If all eight fixes fail, the next step depends on whether the device is missing everywhere or only on one Windows PC.Use this escalation order:
- Test the device with another compatible cable.
- Test it on another PC.
- Test a known-good device in the same PC port.
- Confirm whether the device appears in Device Manager.
- Check Windows Update and official manufacturer drivers.
- Review the device’s own firmware and support documentation.
- For internal drives, Bluetooth radios, or integrated cameras, inspect BIOS or UEFI settings if the hardware is absent even before Windows loads.
- For managed PCs, contact IT before attempting invasive repairs.
Windows device detection problems become much easier to solve once the troubleshooting process follows the signal path: connection first, Windows recognition second, driver health third, device-specific settings fourth, and application permissions last. That order avoids needless repairs and turns a vague “not detected” error into a practical, repeatable diagnosis.
References
- Primary source: Technobezz
Published: 2026-07-23T16:28:30.664000+00:00
Windows Not Detecting Devices? 8 Fixes That Actually Work | Technobezz
Windows not detecting devices? Fix USB, Bluetooth, printers, monitors, cameras, mics, and drives in Windows 11.www.technobezz.com