Reduce Windows 10/11 Input Lag: Enable Hardware-Accelerated GPU Scheduling (HAGS)
Difficulty: Intermediate | Time Required: 10 minutes
Hardware-Accelerated GPU Scheduling (HAGS) is a Windows feature that shifts some GPU scheduling work from the CPU to the GPU’s dedicated scheduling hardware. In some systems—especially gaming PCs or machines under heavy graphics load—this can slightly reduce input lag, smooth frame pacing, and lower CPU overhead.
That said, HAGS is not a guaranteed performance win for every PC. Some users see improvements, others see no change, and a small number may encounter stuttering or app/game instability depending on drivers and GPU/monitor setups. This guide walks you through enabling HAGS safely, verifying requirements, and troubleshooting common issues.
Prerequisites (Before You Start)
Quick walkthrough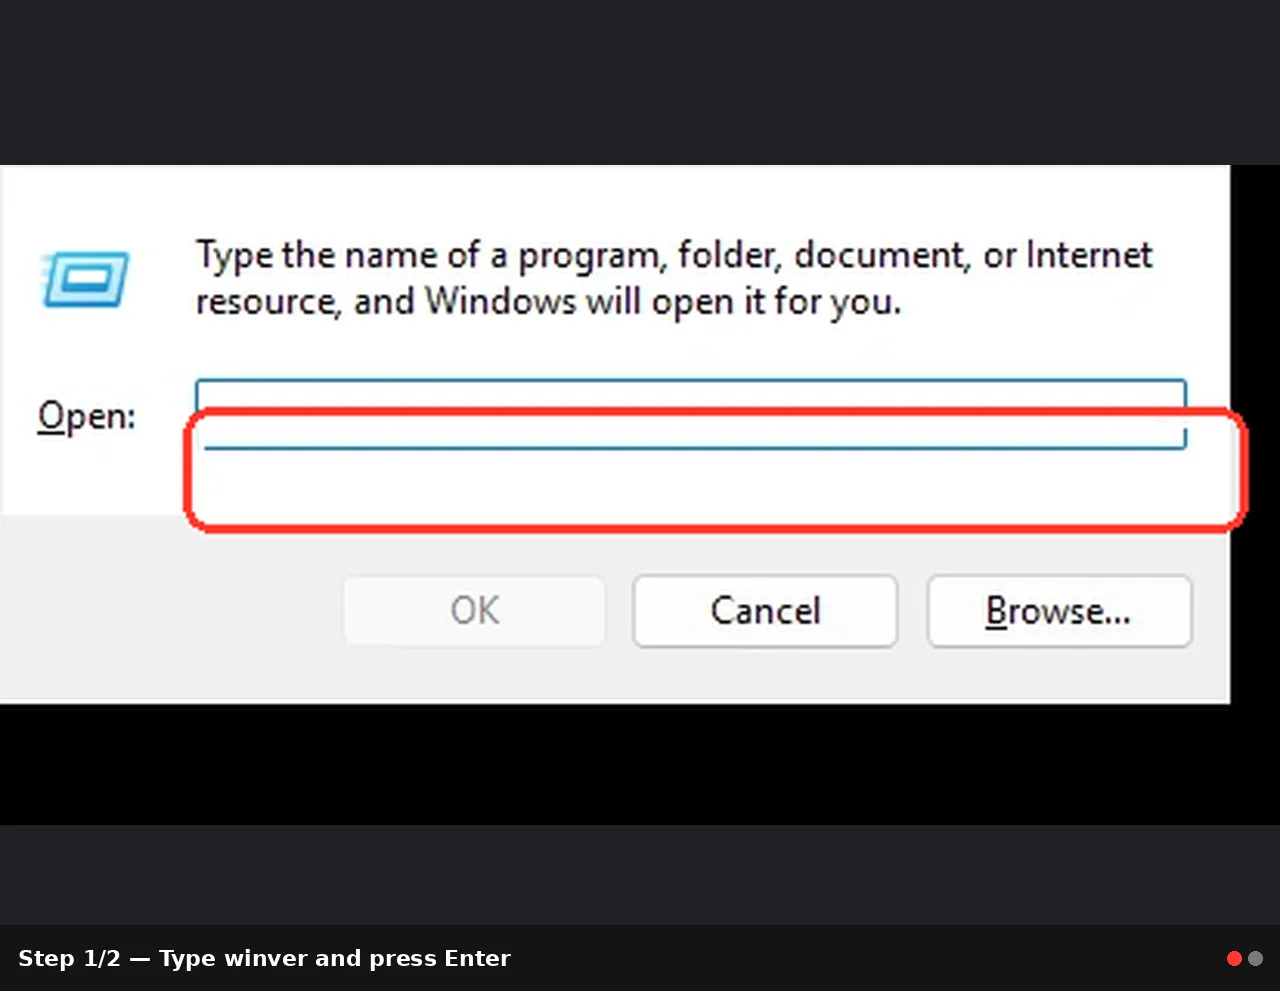
1) Supported Windows version
HAGS support depends on Windows version:- Windows 10: Version 2004 (May 2020 Update) or later
- Windows 11: All mainstream releases support it, but you still need a compatible driver/GPU
- Press Win + R
- Type
winverand press Enter - Check the Version number
2) Compatible GPU + driver (important)
HAGS generally requires:- A relatively modern GPU (common on NVIDIA GTX 10-series+/RTX, AMD RX 5000+/RX 6000+, and many newer Intel iGPUs)
- A WDDM 2.7+ compatible graphics driver (often satisfied when you use recent drivers)
Note: Even if your GPU is “capable,” outdated drivers can hide the toggle or cause problems.
3) 10 minutes and a restart
Enabling/disabling HAGS requires a restart to take effect.Step-by-Step: Enable HAGS in Windows 10/11
Step 1 — Update your graphics driver (recommended)
This is the single best way to avoid issues and ensure the HAGS toggle appears.- Identify your GPU:
- Press Ctrl + Shift + Esc to open Task Manager
- Go to Performance tab → select GPU
- Note the GPU model (NVIDIA/AMD/Intel)
- Update your driver:
- NVIDIA: Use GeForce Experience or download from NVIDIA’s driver page
- AMD: Use AMD Software: Adrenalin Edition
- Intel: Use Intel Driver & Support Assistant or the newest graphics package for your CPU/iGPU
Tip: Avoid third-party “driver updater” tools. Stick to the GPU manufacturer for clean, current drivers.
Step 2 — Open Graphics settings
The navigation differs slightly between Windows 10 and 11.Windows 11:
- Right-click Start → Settings
- Go to System → Display
- Scroll down and select Graphics
- Open Settings
- Go to System → Display
- Scroll down and click Graphics settings
Step 3 — Find “Hardware-accelerated GPU scheduling”
Look for the toggle labeled:- Hardware-accelerated GPU scheduling
- Turn the toggle On
- Click Restart (or restart manually) when prompted
Warning: Don’t judge performance until after the restart. HAGS is not active until Windows reloads the graphics stack.
Step 4 — (Optional) Enable related features for best results
Depending on your setup, these can help with perceived latency and smoothness:- Game Mode
- Settings → Gaming → Game Mode → On
- Variable Refresh Rate (VRR) (if you have a VRR monitor)
- Windows 11: Settings → System → Display → Graphics → Default graphics settings
- Windows 10: Settings → System → Display → Graphics settings
- Enable Variable refresh rate (if available)
Note: VRR is separate from NVIDIA G-SYNC/AMD FreeSync settings in your GPU control panel. Ideally, configure both Windows and driver-level VRR correctly.
Step 5 — Verify it’s enabled
After reboot:- Return to the same Graphics settings page
- Confirm the toggle still shows On
How to Test for Reduced Input Lag (Quick, Practical Checks)
Because improvements can be subtle, use consistent tests:- Pick one or two games you play often
- Use the same map/scene if possible
- Use the same settings
- Resolution, V-Sync, frame cap, DLSS/FSR, etc.
- Compare “feel” and frame pacing
- Mouse responsiveness
- Stutter during camera movement
- Optional (more reliable): measure
- Use an FPS/frame-time overlay (e.g., the game’s built-in stats or GPU suite overlay)
- Focus on frame-time consistency more than raw FPS
Tip: If you use a frame cap (RTSS or in-game), keep it consistent between tests. Input lag is heavily affected by V-Sync, frame caps, and VRR configuration.
Tips, Notes, and Best Practices
Tip: HAGS isn’t always “better”
HAGS can:- Improve responsiveness in some GPU-bound scenarios
- Reduce CPU overhead slightly in some cases
- Do nothing noticeable on already-balanced systems
- Cause micro-stutter in specific driver/game combinations (rare, but real)
Note: Laptop users should test on AC power
Many laptops change GPU power behavior on battery, which can affect latency and frame pacing more than HAGS itself.Warning: Don’t stack “tweaks” blindly
If you’re troubleshooting input lag, change one setting at a time (HAGS, then test; VRR, then test; etc.. Otherwise, you won’t know what helped or hurt.Troubleshooting: HAGS Toggle Missing or Problems After Enabling
Issue 1: “Hardware-accelerated GPU scheduling” toggle is not showing
Try these steps:- Confirm Windows version
- Run
winver - Windows 10 must be 2004+
- Update your GPU driver
- Install the latest stable driver from NVIDIA/AMD/Intel
- Check if you’re using Remote Desktop / VM
- Some remote/virtualized graphics sessions won’t expose HAGS
- Multiple GPUs / hybrid graphics
- On laptops with iGPU + dGPU switching, the toggle may behave differently. Updating both Intel iGPU drivers and NVIDIA/AMD dGPU drivers can help.
Note: If your hardware/driver combo doesn’t support HAGS, the toggle may never appear—and that’s normal.
Issue 2: Stuttering, flickering, or crashes after turning HAGS on
- Turn HAGS Off
- Go back to Graphics settings → toggle Off → restart
- Clean-install the GPU driver (optional but effective)
- NVIDIA/AMD installers typically offer a “clean installation” option (wording varies)
- After reinstall, try HAGS again
- Check overlays and capture tools
- Disable third-party overlays temporarily (Discord overlay, recording/streaming overlays, etc. and retest
- Rollback driver if the issue started after a driver update
- Use Device Manager → Display adapters → GPU → Driver tab → Roll Back Driver (if available)
Issue 3: Input lag feels worse (especially with V-Sync)
HAGS is only one piece of the latency puzzle. Check these common culprits:- V-Sync enabled without VRR: can increase latency
- No frame cap with VRR: can increase latency near/above the refresh ceiling
- Background CPU load: can cause inconsistent frame times (updates, antivirus scans)
Tip: If you use G-SYNC/FreeSync, consider using a frame cap a few FPS below refresh rate (for example 141 FPS for 144 Hz) to keep latency and frame pacing stable—then evaluate HAGS again.
Conclusion
Enabling Hardware-Accelerated GPU Scheduling (HAGS) is a quick, reversible tweak that may reduce input lag and improve frame-time consistency on supported Windows 10/11 systems. The key is ensuring you’re on a compatible Windows build, using up-to-date GPU drivers, and testing changes in a controlled way. If your system reacts poorly, turning it off is just as easy.Key Takeaways:
- HAGS can reduce CPU overhead and improve responsiveness on some systems, but results vary.
- You need Windows 10 version 2004+ (or Windows 11) and a compatible, up-to-date GPU driver.
- Always restart after changing HAGS and test performance changes methodically.
- If you see stutters or instability, disable HAGS and consider a clean driver install.
This tutorial was generated to help WindowsForum.com users get the most out of their Windows experience.
Last edited: