

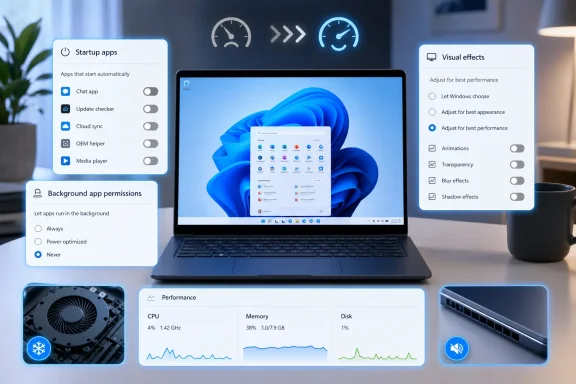
A five-year-old Windows laptop does not have to become a frustrating laptop. Before spending money on replacement hardware, three built-in Windows settings can remove much of the invisible work that makes an aging PC feel slow: unnecessary startup apps, unneeded background activity, and resource-hungry visual effects.
None of these changes increases processor speed, adds RAM, or transforms an old mechanical hard drive into a modern SSD. What they can do is reduce the amount of competition for the hardware already inside the PC. That matters because an older system often feels sluggish not because one component has completely failed, but because too many programs are trying to launch, sync, update, notify, and animate at the same time.
For Windows 11 users trying to speed up an old PC, this is a sensible place to begin. The settings are built into the operating system, easy to reverse, and far safer than installing a so-called PC optimizer that promises miracle gains while adding its own background processes.
The most irritating performance problems are rarely dramatic crashes or error messages. They are the delays that accumulate across a workday: an extra pause after sign-in, a Start menu that takes a moment to react, a browser that hesitates when several tabs are open, or a laptop fan spinning up before any real work has started.
Windows itself has become increasingly capable, but modern software assumes more available memory, faster storage, and more CPU headroom than many older PCs can comfortably provide. A system that originally shipped with 8GB of RAM, a dual-core mobile processor, or a SATA SSD can still be useful, but it has less room for waste.
That waste commonly takes three forms:
A desktop can appear quickly while the PC is still far from ready. The taskbar may load, but the system remains busy indexing, syncing, checking updates, initializing services, and opening applications that were never explicitly requested. This creates the familiar feeling that Windows has “booted” but is still settling down.
The practical goal is not to eliminate every background process. That would be counterproductive and could break useful features. The goal is to ensure the PC spends its limited resources on the programs and services that genuinely matter.
Over years of installing utilities, games, collaboration tools, media software, device managers, and update clients, the startup list can become crowded. A PC may be opening half a dozen applications before the user has launched a browser, document editor, or game.
A startup app can consume:
Windows also provides a second route through Settings > Apps > Startup. The Settings page is useful for quickly toggling entries on or off, while Task Manager is generally more informative because it includes startup-impact data.
Still, it is a valuable clue:
Common examples include:
Use caution around:
If an unfamiliar item appears in Task Manager, right-click it and use Search online before changing it. Checking the publisher name and the file location can also reveal whether the entry belongs to a trusted application or looks suspicious.
That distinction matters for troubleshooting. If a disabled program later proves useful at startup, it can be re-enabled in seconds. No reinstall is necessary, no settings are lost, and no registry cleaner is required.
For many users, trimming startup apps is the single most noticeable Windows performance tweak because it improves the period when an older PC is usually under the greatest load.
This behavior is not automatically bad. In fact, it is essential for some workflows. A cloud-storage client cannot keep files synchronized if it never runs, and a communication app cannot reliably alert users to new messages if it has no background presence.
The problem begins when software continues consuming resources without delivering enough practical value to justify the cost.
That is not a flaw in the process; it reflects the different ways Windows applications are built. A conventional desktop app may handle its own startup and background behavior internally.
For those programs, check the application’s own preferences. Look for options such as:
It often makes sense to allow background activity for:
Likewise, some desktop applications use background services that do not appear as a simple Settings toggle. Disabling every visible background permission will not necessarily stop all activity from a program installed on the PC.
For that reason, Task Manager remains the best reality check. Open it with Ctrl + Shift + Esc, then review the Processes tab when the PC feels slow. Sort by CPU, Memory, Disk, or Network usage to see what is consuming resources in real time.
That observation-based approach is much more useful than disabling random software based on guesswork.
On older hardware, however, the same effects can make the operating system feel less immediate. A menu that fades in, a window that animates into place, or a taskbar effect that hesitates for a fraction of a second may not sound significant. Repeated hundreds of times, the delay becomes noticeable.
But they can make a meaningful difference to perceived responsiveness. When Windows reacts instantly to clicks, menus, and window changes, the computer feels faster even when the underlying hardware is unchanged.
This is particularly relevant for systems with:
A better compromise for many users is Custom. Consider disabling:
Some users may also want to keep thumbnail previews and window contents visible while dragging. These features can improve usability enough to justify their modest resource cost.
Go to:
Settings > Personalization > Colors > Transparency effects
Turning transparency off will not produce a dramatic performance leap, but it reduces another layer of interface rendering. On borderline hardware, every small reduction in visual overhead can help make Windows feel more responsive.
The larger benefit is consistency. When animations, shadows, and transparency are reduced together, the desktop behaves in a more immediate and less distracting way.
They cannot repair hardware limitations or underlying system faults.
In practice, many of these tools are unnecessary, and some create their own problems. A registry cleaner can remove entries that are harmless or needed. A memory optimizer may simply force Windows to move data around rather than improve performance. A third-party cleaner can add scheduled tasks, advertising, telemetry, or another startup process—the exact issue it claims to solve.
Windows already includes the essential tools needed for this type of maintenance:
After making these adjustments, evaluate the machine in practical terms:
Disabling unnecessary startup apps reduces the rush of activity that follows sign-in. Restricting unneeded background apps helps preserve memory, CPU time, battery life, and bandwidth. Cutting back on visual effects removes small but persistent delays from the interface.
Together, these three Windows settings will not turn aging hardware into a current flagship PC. They can, however, restore something that is often more important: a PC that feels ready when it is needed, responds without needless hesitation, and stops wasting its limited resources on software that adds little value.
None of these changes increases processor speed, adds RAM, or transforms an old mechanical hard drive into a modern SSD. What they can do is reduce the amount of competition for the hardware already inside the PC. That matters because an older system often feels sluggish not because one component has completely failed, but because too many programs are trying to launch, sync, update, notify, and animate at the same time.
For Windows 11 users trying to speed up an old PC, this is a sensible place to begin. The settings are built into the operating system, easy to reverse, and far safer than installing a so-called PC optimizer that promises miracle gains while adding its own background processes.
 Why an Older Windows PC Starts Feeling Slow
The most irritating performance problems are rarely dramatic crashes or error messages. They are the delays that accumulate across a workday: an extra pause after sign-in, a Start menu that takes a moment to react, a browser that hesitates when several tabs are open, or a laptop fan spinning up before any real work has started.Windows itself has become increasingly capable, but modern software assumes more available memory, faster storage, and more CPU headroom than many older PCs can comfortably provide. A system that originally shipped with 8GB of RAM, a dual-core mobile processor, or a SATA SSD can still be useful, but it has less room for waste.
That waste commonly takes three forms:
- Applications launching automatically at sign-in.
- Programs remaining active after their visible windows are closed.
- Interface effects that make Windows look smoother but add drawing and animation work.
A desktop can appear quickly while the PC is still far from ready. The taskbar may load, but the system remains busy indexing, syncing, checking updates, initializing services, and opening applications that were never explicitly requested. This creates the familiar feeling that Windows has “booted” but is still settling down.
The practical goal is not to eliminate every background process. That would be counterproductive and could break useful features. The goal is to ensure the PC spends its limited resources on the programs and services that genuinely matter.
Setting One: Audit Startup Apps Before They Audit Your Patience
Startup apps are often the largest and most immediate source of avoidable slowdown. Many programs offer to start with Windows during installation, and that option is frequently enabled by default or buried in an installer screen that users understandably skip past.Over years of installing utilities, games, collaboration tools, media software, device managers, and update clients, the startup list can become crowded. A PC may be opening half a dozen applications before the user has launched a browser, document editor, or game.
What Startup Apps Actually Affect
Startup programs can influence more than the time it takes to reach the desktop. They also affect the first several minutes of responsiveness after sign-in.A startup app can consume:
- CPU time while it initializes, checks accounts, and scans for updates.
- Memory that remains allocated after it finishes loading.
- Disk activity, particularly painful on older hard drives and entry-level SSDs.
- Network bandwidth while downloading updates or syncing cloud files.
- Battery power on laptops that are operating away from the charger.
How to Review Startup Apps in Windows 11
The most useful built-in tool is Task Manager.- Press Ctrl + Shift + Esc to open Task Manager.
- Select Startup apps in the left navigation pane.
- Review the Status column to see whether an app is enabled.
- Review the Startup impact column as a starting point for prioritization.
- Select an app that does not need to open immediately after sign-in.
- Choose Disable from the toolbar or right-click and select Disable.
Windows also provides a second route through Settings > Apps > Startup. The Settings page is useful for quickly toggling entries on or off, while Task Manager is generally more informative because it includes startup-impact data.
Understanding the Startup Impact Column
The Startup impact label is not a complete performance verdict. It reflects Windows measurements of CPU and disk activity during startup, not the full long-term cost of keeping the application running.Still, it is a valuable clue:
- High impact entries deserve a closer look first.
- Medium impact entries may be worth disabling if they are not essential.
- Low impact entries can still add up when many are enabled.
- Not measured does not mean an app is harmless; it means Windows does not have sufficient data for a rating.
What Usually Makes Sense to Disable
The safest candidates are generally optional convenience programs that do not need to be ready at the exact moment Windows starts.Common examples include:
- Game launchers
- Music streaming clients
- Chat applications used only occasionally
- Creative-suite launchers
- Printer promotional tools
- Updaters for nonessential software
- Peripheral lighting controllers
- Browser helper applications
- Storefront clients
- Meeting apps that are not required for work every day
What Should Usually Stay Enabled
Not every startup item is clutter. Some software is legitimately important to the security, reliability, and day-to-day operation of the device.Use caution around:
- Microsoft Defender components and third-party security software
- Password manager background services, if required for browser integration
- Cloud synchronization tools actively protecting critical work files
- Touchpad, keyboard, audio, graphics, and display utilities
- VPN software required by an employer or school
- Backup clients that need scheduled or continuous operation
- Accessibility tools
- Business management or endpoint-security agents on a managed PC
If an unfamiliar item appears in Task Manager, right-click it and use Search online before changing it. Checking the publisher name and the file location can also reveal whether the entry belongs to a trusted application or looks suspicious.
The Important Difference Between Disable and Uninstall
Startup cleanup is deliberately conservative. It is about reducing automatic activity, not removing software at random.That distinction matters for troubleshooting. If a disabled program later proves useful at startup, it can be re-enabled in seconds. No reinstall is necessary, no settings are lost, and no registry cleaner is required.
For many users, trimming startup apps is the single most noticeable Windows performance tweak because it improves the period when an older PC is usually under the greatest load.
Setting Two: Stop Apps From Working When You Are Not Using Them
Startup apps are only part of the picture. Some applications remain active after their main windows are closed, while others are designed to run in the background so they can synchronize data, receive notifications, or perform periodic updates.This behavior is not automatically bad. In fact, it is essential for some workflows. A cloud-storage client cannot keep files synchronized if it never runs, and a communication app cannot reliably alert users to new messages if it has no background presence.
The problem begins when software continues consuming resources without delivering enough practical value to justify the cost.
What Background Activity Can Cost an Old PC
Background applications can use:- RAM, reducing the memory available for active programs.
- CPU cycles, particularly when checking for updates or processing notifications.
- Disk access, which can make the entire system feel less responsive.
- Network traffic, especially on limited or metered connections.
- Battery capacity, a major concern for aging laptops.
Managing Background Permissions in Windows 11
For compatible apps, Windows 11 includes a direct setting for background permissions.- Open Settings.
- Select Apps.
- Open Installed apps.
- Find the application you want to review.
- Select the three-dot menu beside it.
- Choose Advanced options.
- Find Background app permissions.
- Set Let this app run in background to Never if background operation is not useful.
A Crucial Limitation: Not Every App Offers This Control
This setting is most relevant to compatible Windows apps, including many Store-style or packaged applications. Traditional desktop software does not always expose a background-permission control in Windows Settings.That is not a flaw in the process; it reflects the different ways Windows applications are built. A conventional desktop app may handle its own startup and background behavior internally.
For those programs, check the application’s own preferences. Look for options such as:
- Launch at startup
- Keep running when closed
- Minimize to notification area
- Run in the system tray
- Check for updates automatically
- Start background service
- Enable notifications
- Sync in the background
Background Apps Worth Keeping
A blanket “Never” policy can harm the usefulness of Windows. Before stopping an app from running in the background, consider what it is supposed to do.It often makes sense to allow background activity for:
- File-sync clients protecting active documents
- Backup software
- Security and anti-malware tools
- Password managers that depend on background services
- Email and calendar apps that need timely notifications
- Remote-access software used for legitimate support or work
- VPN clients that maintain a required connection
- Accessibility applications
- Device-management tools on company-owned PCs
Background Activity Is Not Always the Main Problem
It is important not to overstate what this setting can accomplish. A poorly optimized browser extension, a browser with dozens of active tabs, a failing hard drive, too little RAM, or malware can make a PC slow even if background permissions look clean.Likewise, some desktop applications use background services that do not appear as a simple Settings toggle. Disabling every visible background permission will not necessarily stop all activity from a program installed on the PC.
For that reason, Task Manager remains the best reality check. Open it with Ctrl + Shift + Esc, then review the Processes tab when the PC feels slow. Sort by CPU, Memory, Disk, or Network usage to see what is consuming resources in real time.
That observation-based approach is much more useful than disabling random software based on guesswork.
Setting Three: Reduce Visual Effects That Add Delay Without Adding Productivity
Windows 11 uses animation, transparency, fading, shadows, and smooth transitions to make the interface feel polished. On a modern PC, these effects are often subtle enough that users never think about them.On older hardware, however, the same effects can make the operating system feel less immediate. A menu that fades in, a window that animates into place, or a taskbar effect that hesitates for a fraction of a second may not sound significant. Repeated hundreds of times, the delay becomes noticeable.
Why Visual Effects Matter
Visual effects are not usually the primary reason a PC performs poorly. Turning them off will not solve a failing drive or give a memory-starved system another 8GB of RAM.But they can make a meaningful difference to perceived responsiveness. When Windows reacts instantly to clicks, menus, and window changes, the computer feels faster even when the underlying hardware is unchanged.
This is particularly relevant for systems with:
- Integrated graphics
- Older mobile processors
- Limited RAM
- High-resolution displays
- Multiple external monitors
- Heavy browser and productivity workloads
- Older graphics drivers
How to Adjust Windows Visual Effects
Windows keeps its classic performance settings available, even in Windows 11.- Open the Start menu.
- Search for Adjust the appearance and performance of Windows.
- Select the matching result.
- Open the Visual Effects tab if it is not already selected.
- Choose Custom.
- Clear the effects you do not need.
- Select Apply, then OK.
The Best Custom Settings for Everyday Use
The nuclear option is Adjust for best performance, which disables nearly all visual effects. That can make Windows feel much snappier on very weak hardware, but it also makes the interface look noticeably plainer.A better compromise for many users is Custom. Consider disabling:
- Animate controls and elements inside windows
- Animate windows when minimizing and maximizing
- Animations in the taskbar
- Fade or slide menus into view
- Fade or slide ToolTips into view
- Fade out menu items after clicking
- Show shadows under windows
- Slide open combo boxes
- Smooth-scroll list boxes
Some users may also want to keep thumbnail previews and window contents visible while dragging. These features can improve usability enough to justify their modest resource cost.
Transparency Is a Separate Quick Win
Windows 11 also includes a more modern transparency control that can be changed from the Settings app.Go to:
Settings > Personalization > Colors > Transparency effects
Turning transparency off will not produce a dramatic performance leap, but it reduces another layer of interface rendering. On borderline hardware, every small reduction in visual overhead can help make Windows feel more responsive.
The larger benefit is consistency. When animations, shadows, and transparency are reduced together, the desktop behaves in a more immediate and less distracting way.
What These Three Changes Can and Cannot Fix
These settings are effective because they target common sources of software overhead. They can improve boot usability, reduce idle resource use, and make the interface feel more responsive.They cannot repair hardware limitations or underlying system faults.
Problems These Changes May Improve
A careful startup, background, and visual-effects cleanup can help with:- Slow sign-in and a delayed usable desktop
- Excessive fan noise after startup
- Too many notification-area icons
- Apps taking longer to open immediately after boot
- Sluggish menus and window transitions
- Poor battery life caused by unnecessary software activity
- General “heaviness” on an otherwise functional PC
Problems That Require Different Solutions
If Windows remains consistently slow after these settings are adjusted, investigate the following areas:- Storage health: A failing hard drive or SSD can cause severe pauses.
- Free disk space: Very low available storage can degrade updates and temporary-file operations.
- Memory pressure: Systems with limited RAM may constantly use the page file, especially with modern browsers.
- Thermal throttling: Dust, poor ventilation, or aging thermal paste can reduce performance.
- Malware or unwanted software: Unexpected processes and browser extensions can consume resources.
- Outdated drivers: Graphics, chipset, Wi-Fi, and storage drivers can affect stability and responsiveness.
- Windows corruption: System-file issues or incomplete updates can create persistent performance problems.
- Mechanical hard drives: Replacing an HDD with an SSD remains one of the most substantial upgrades possible for an older PC.
Avoid the Temptation of Aggressive “Optimization” Tools
The appeal of one-click performance utilities is understandable. They promise to clean the registry, stop hidden services, free memory, remove junk, and make Windows faster with no technical knowledge required.In practice, many of these tools are unnecessary, and some create their own problems. A registry cleaner can remove entries that are harmless or needed. A memory optimizer may simply force Windows to move data around rather than improve performance. A third-party cleaner can add scheduled tasks, advertising, telemetry, or another startup process—the exact issue it claims to solve.
Windows already includes the essential tools needed for this type of maintenance:
- Task Manager for startup and real-time process monitoring
- Settings for application permissions and startup behavior
- Storage cleanup tools for temporary files
- Windows Security for malware protection
- Performance Options for visual effects
A Better Way to Judge Whether the PC Feels Faster
Performance is not only about benchmark scores. An older PC can feel renewed when it reaches a usable state sooner and stays responsive during ordinary work.After making these adjustments, evaluate the machine in practical terms:
- Sign in and see how quickly the desktop becomes ready for work.
- Open the browser, file manager, and a commonly used productivity app.
- Watch Task Manager for sustained CPU, memory, or disk spikes.
- Check whether fewer notification-area apps are running.
- Use the PC for several days before making more changes.
The Sensible First Step Before Replacing Hardware
Windows performance tuning is often presented as an advanced hobby involving registry edits, service lists, scripts, and questionable cleanup software. In reality, the most useful changes are often the least dramatic.Disabling unnecessary startup apps reduces the rush of activity that follows sign-in. Restricting unneeded background apps helps preserve memory, CPU time, battery life, and bandwidth. Cutting back on visual effects removes small but persistent delays from the interface.
Together, these three Windows settings will not turn aging hardware into a current flagship PC. They can, however, restore something that is often more important: a PC that feels ready when it is needed, responds without needless hesitation, and stops wasting its limited resources on software that adds little value.