Use File Explorer Preview Pane and Item Check Boxes to Manage Files Faster
Difficulty: Beginner | Time Required: 10 minutesFile Explorer is where most Windows users spend time opening, moving, renaming, copying, and deleting files. But if you are opening every document just to check what it contains, or holding
Ctrl while trying to select scattered files, you are probably spending more time than necessary.Two built-in File Explorer features can make file management much faster:
Quick walkthrough
- Preview Pane lets you view many files without opening them in a full app.
- Item Check Boxes let you select files and folders using simple check boxes.
Prerequisites
You do not need any special software or administrator permissions.You will need:
- A Windows 10 or Windows 11 PC.
- File Explorer access.
- A folder containing files you want to review or organize, such as Documents, Downloads, or Pictures.
Note: Some file types only preview if the correct app or preview handler is installed. For example, PDFs, Office files, images, and text files usually preview well, but some specialized file formats may not.
Part 1: Open File Explorer
- Press Windows key + E on your keyboard.
This opens File Explorer. - Go to a folder where you keep several files, such as:
- Documents
- Downloads
- Pictures
- Desktop
- If you want a good test folder, use Downloads, because it often contains mixed file types like PDFs, images, installers, and documents.
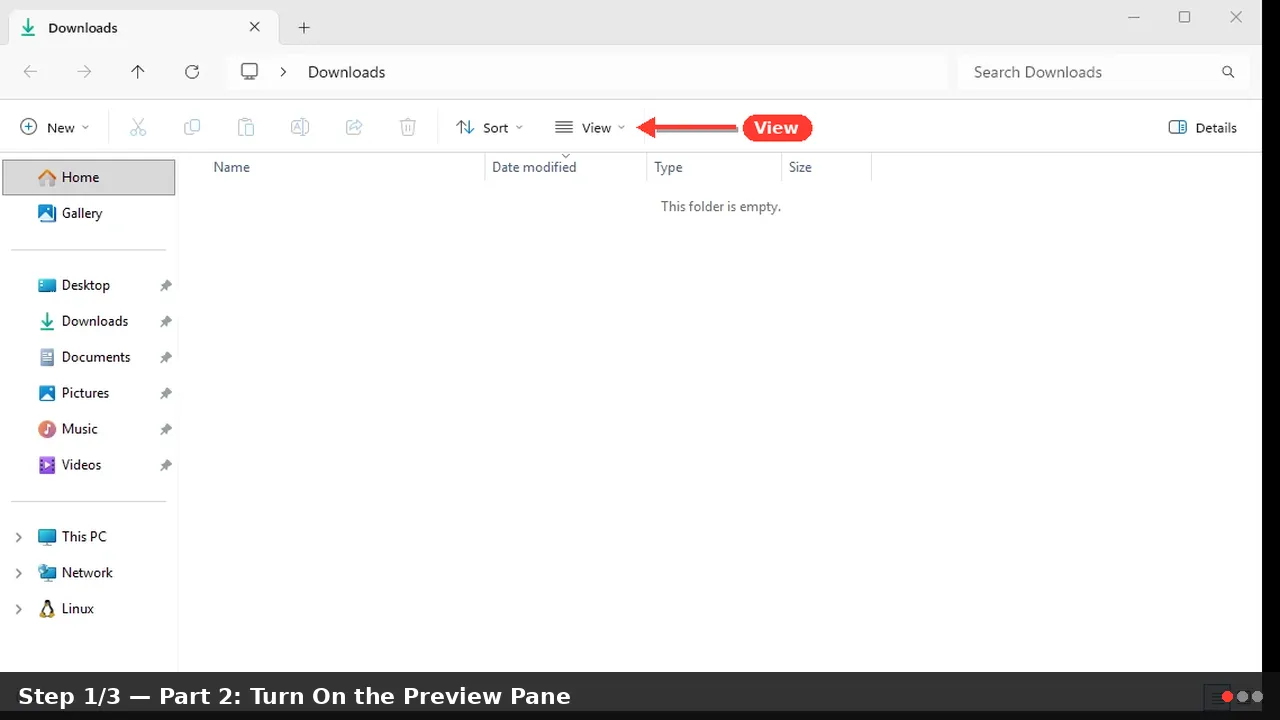
Part 2: Turn On the Preview Pane
The Preview Pane appears on the right side of File Explorer and shows a preview of the selected file.
On Windows 11
- Open File Explorer.
- Click View on the command bar near the top.
- Select Show.
- Click Preview pane.
- Select a file in the folder.
- Look at the right side of the File Explorer window.
A preview should appear if Windows can preview that file type.
On Windows 10
- Open File Explorer.
- Click the View tab at the top of the window.
- Click Preview pane in the ribbon.
- Select a file in the folder.
- The preview should appear on the right side of the window.
Keyboard Shortcut
You can also toggle the Preview Pane on or off with:Alt + PThis works in both Windows 10 and Windows 11.
Tip: If the Preview Pane feels too narrow, move your mouse over the divider between the file list and the preview area. When the cursor changes, drag the divider left or right to resize the pane.
Part 3: Use the Preview Pane to Review Files Faster
Once the Preview Pane is enabled, you can quickly inspect files without fully opening them.- Click a document, image, PDF, or text file.
- Wait a moment for the preview to load.
- Use the arrow keys on your keyboard to move up and down through files.
- Watch the Preview Pane update as each file is selected.
- Looking for the correct version of a document.
- Reviewing downloaded PDFs.
- Sorting screenshots or images.
- Checking text files or scripts.
- Cleaning up duplicate files.
Code:
Resume.docx
Resume-final.docx
Resume-final2.docx
Resume-updated.docx
Resume-new.docxWarning: Be cautious with files from unknown or untrusted sources. The Preview Pane is convenient, but it still uses Windows preview components to read file contents. If a file looks suspicious, scan it with Microsoft Defender or another trusted security tool before interacting with it.
Part 4: Turn On Item Check Boxes
Item Check Boxes make it easier to select multiple files and folders. Instead of holding
Ctrl and clicking each item, you can simply tick a check box beside each file.On Windows 11
- Open File Explorer.
- Click View on the command bar.
- Select Show.
- Click Item check boxes.
- Move your mouse over a file or folder.
You should see a small check box appear beside it. - Click the check box to select the item.
On Windows 10
- Open File Explorer.
- Click the View tab.
- In the Show/hide section, check Item check boxes.
- Move your mouse over a file or folder.
- Click the check box to select it.
Part 5: Select Multiple Files Using Check Boxes
After enabling Item Check Boxes, try selecting several files.- Open a folder with multiple files.
- Hover over the first file you want to select.
- Click its check box.
- Repeat this for each file you want to include.
- Once selected, you can:
- Drag the files to another folder.
- Press Delete to remove them.
- Right-click and choose Copy.
- Right-click and choose Cut.
- Rename, compress, or share them.
Tip: You can still use normal selection shortcuts while Item Check Boxes are enabled. For example,Ctrl + Astill selects everything in the folder, andShift + clickcan still select a range.
Part 6: Combine Preview Pane and Check Boxes
The real productivity boost comes from using both features together.
Here is a simple workflow:
- Open a folder, such as Downloads.
- Turn on Preview Pane.
- Turn on Item Check Boxes.
- Select the first file.
- Use the Down Arrow key to move through files.
- When you find a file you want to move, delete, or keep, click its check box.
- Continue reviewing and selecting files.
- When finished, perform one action on all selected items.
Tips and Troubleshooting
Preview Pane Does Not Show Anything
If the Preview Pane is blank:- Try selecting a different file type, such as a
.txt,.jpg,.png,.pdf, or.docxfile. - Make sure the file is not corrupted.
- Check whether the required app is installed.
- Restart File Explorer or restart your PC.
Preview Pane Is Enabled but Not Visible
The pane may be too small or hidden off to the side.- Look at the far-right edge of File Explorer.
- Drag the divider left to make the pane wider.
- Press
Alt + Pto toggle it off and on again.
Item Check Boxes Do Not Appear
If check boxes do not appear immediately:- Move your mouse over a file or folder.
- Switch to another view, such as Details or Large icons.
- Close and reopen File Explorer.
- Recheck the setting under View > Show > Item check boxes in Windows 11 or View > Item check boxes in Windows 10.
Best View Modes to Use
For file cleanup, Details view is often best because it shows useful columns such as:- Name
- Date modified
- Type
- Size
- In Windows 11, click View and choose Details.
- In Windows 10, click the View tab and choose Details.
Conclusion
The Preview Pane and Item Check Boxes are small File Explorer features, but together they can make everyday file management much faster. The Preview Pane helps you identify files without opening them, while Item Check Boxes make it easier to select exactly what you want to move, copy, delete, or organize.If you regularly clean up your Downloads folder, sort photos, review documents, or manage lots of files, these two options are well worth enabling.
Key Takeaways:
- Preview Pane lets you inspect many files without opening separate apps.
- Use
Alt + Pto quickly turn the Preview Pane on or off. - Item Check Boxes make selecting multiple files easier and more beginner-friendly.
- Windows 11 users can find both options under View > Show.
- Windows 10 users can find them on the View tab.
- Combining both features is ideal for fast file cleanup and organization.
This tutorial was generated to help WindowsForum.com users get the most out of their Windows experience.
Last edited: