Microsoft’s Windows 11 is still free for qualifying Windows 10 PCs, but the company’s strict hardware checks have left a large installed base officially “incompatible.” For many users the answer isn’t necessarily “buy new hardware” — there are well‑documented, practical ways to move to Windows 11 anyway (official tools for compatible machines, a Microsoft‑sanctioned registry escape hatch for narrow cases, and community tools that build relaxed installers). That reality brings trade‑offs: immediate functionality versus long‑term security, update entitlement, and supportability. This feature pulls the best, verified guidance together, verifies the key technical claims against Microsoft and independent reporting, and lays out step‑by‑step options so you can choose a safe, informed path forward.
If you value predictable security updates and vendor support, fix firmware toggles or buy supported hardware. If you prefer to extend a machine’s life and are comfortable troubleshooting, the registry method and Rufus route are practical, well‑documented, and commonly used — but only after careful backups, firmware updates, and acceptance of the long‑term maintenance burden.
Source: PCMag Here's How to Upgrade Your PC to Windows 11, Even If It's Incompatible
 Background / Overview
Why this matters now
Microsoft ended mainstream support for Windows 10 on October 14, 2025. After that date, default Windows 10 installations stopped receiving free security and feature updates; Microsoft published guidance advising migration to Windows 11 or enrollment in a consumer Extended Security Updates (ESU) bridge for eligible devices. That deadline is the practical force driving users to evaluate upgrade options now. At the same time, Windows 11 enforces a higher security baseline than Windows 10: a compatible 64‑bit CPU on Microsoft’s supported list, UEFI firmware with Secure Boot, and a Trusted Platform Module (TPM) version 2.0 are central requirements. Microsoft documents these minimum system requirements on its official requirements pages.The compatibility friction and what “incompatible” actually means
A machine flagged as “incompatible” usually fails one of three checks: TPM 2.0 not present or disabled, Secure Boot not enabled (or the system uses legacy BIOS), or the CPU/CPU features are not on Microsoft’s supported list — in recent releases that includes explicit instruction‑set requirements such as POPCNT / SSE4.2 for certain Windows 11 builds (notably 24H2+). That last category is a hard technical limit: no registry hack or installer trick can add missing CPU instructions. Independent reporting and community testing have confirmed the SSE4.2/POPCNT enforcement introduced in later feature releases can prevent some machines from booting even after a successful install. Microsoft’s official position is consistent: installing Windows 11 on hardware that does not meet the published minimum system requirements is not recommended and devices installed that way “won’t be entitled to receive updates.” The company’s support pages explain the risks and provide rollback steps if issues occur.The supported upgrade paths (what Microsoft recommends)
If your PC meets the requirements, Microsoft provides three supported, free upgrade routes. These are the safest options because they preserve update entitlement, driver servicing, and vendor support.1) Windows Update (the simplest, lowest‑risk path)
- Settings → Update & Security → Windows Update → Check for updates. If Microsoft has staged the free offer, you’ll see “Upgrade to Windows 11 — Download and install.”
- This path is fully supported and preserves apps, settings and Windows Update entitlement.
2) Windows 11 Installation Assistant (official guided upgrade)
- Download the Windows 11 Installation Assistant from Microsoft’s Download Windows 11 page and run Windows11InstallationAssistant.exe. The tool checks compatibility, downloads the new OS, and performs an in‑place upgrade while preserving files and most apps. It is x64‑only and does not run on Arm64 devices.
3) Media Creation Tool or direct ISO (flexible: multi‑PC, clean installs)
- Use Microsoft’s Media Creation Tool to create a USB installer or download the multi‑edition ISO directly from Microsoft’s site and run setup.exe from a mounted image for an in‑place upgrade, or boot the USB for a clean install. This is the standard method for technicians and power users.
How to check compatibility (preflight)
Before doing anything, confirm the specific reason your PC fails the check:- Run the PC Health Check app to see which elements fail the Windows 11 compatibility scan. Microsoft documents how to use the tool.
- Check for TPM: press Win+R → tpm.msc — the TPM management console shows “Specification version: 2.0” if present and enabled.
- Check BIOS mode: Win+R → msinfo32 → look for “BIOS Mode” (UEFI required) and confirm Secure Boot status.
- Confirm CPU features: tools like Coreinfo or CPU‑Z list instruction flags; look specifically for POPCNT / SSE4.2 if you plan to install a later Windows 11 build. Independent reporting shows SSE4.2 (and POPCNT) are enforced in some 24H2 builds.
If your PC is compatible: how to upgrade now (step‑by‑step)
Use the supported route that matches your comfort and goals.- Back up everything (full disk image recommended) and verify the backup.
- Fully update Windows 10 to the latest servicing build (Windows 10 22H2 or later where required).
- Try Windows Update first — if the staged offer is present, accept and follow prompts.
- Download the Windows 11 Installation Assistant from Microsoft’s Download Windows 11 page, run it, click Accept and install, and follow the guided prompts. This keeps apps and most settings intact.
- Use the Media Creation Tool to create a USB installer, or download the multi‑edition ISO from Microsoft and mount/run setup.exe for an in‑place upgrade. Choose “Keep personal files and apps” when prompted to preserve your environment.
If your PC is flagged “incompatible”: practical bypass options
There are two commonly used, community‑documented techniques that technically work for many machines: a registry-based in‑place upgrade bypass and a Rufus‑based relaxed installer. Both rely on official Windows media but modify installer behavior to skip certain checks. Important: these are unsupported by Microsoft and carry explicit caveats about updates and stability. Microsoft’s support page and community guidance both emphasize the risks.Option A — Registry override for in‑place upgrades (MoSetup)
- What it does: when you set a specific registry DWORD (AllowUpgradesWithUnsupportedTPMOrCPU = 1 under HKEY_LOCAL_MACHINE\SYSTEM\Setup\MoSetup), Windows Setup will permit an in‑place upgrade from Windows 10 even if the PC fails some compatibility checks. This approach often preserves applications and settings.
- How to apply (conservative steps):
- Create a full system image and verify backups.
- On Windows 10, open regedit as administrator.
- Navigate to HKEY_LOCAL_MACHINE\SYSTEM\Setup\MoSetup. Create the MoSetup key if missing.
- Create a 32‑bit DWORD named AllowUpgradesWithUnsupportedTPMOrCPU and set Value = 1.
- Mount the official Windows 11 ISO or use the Installation Assistant, then run setup.exe and choose to keep files and apps.
- Limitations and risks: this does not add missing hardware features (TPM or CPU instructions). Microsoft explicitly warns that devices upgraded this way may not be entitled to updates and may display a watermark and a “system requirements not met” message.
Option B — Rufus: build a relaxed USB installer (recommended for missing TPM/Secure Boot)
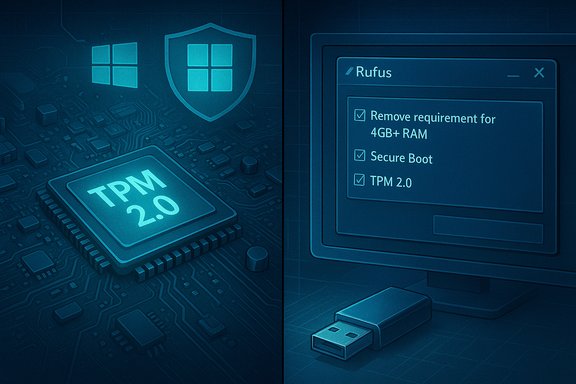
- What Rufus does: recent Rufus releases added a “Windows User Experience” dialog while creating bootable Windows 11 media that exposes explicit checkboxes to remove (at install time) requirements for TPM 2.0, Secure Boot, and certain RAM checks. Rufus automates the same registry wrapper and LabConfig modifications the community used to apply manually. It does not “create” TPM or add CPU instructions; it changes installer logic so Setup proceeds on hardware that would otherwise be rejected.
- Step‑by‑step (safe flow):
- Back up your system (full image + file copy).
- Download the official Windows 11 ISO from Microsoft’s Download Windows 11 page. Do not use modified ISOs from untrusted sources.
- Download Rufus from its official distribution channel (use the latest stable build). Prefer the portable executable for one‑off jobs.
- Insert an empty USB drive (8 GB+; 16 GB recommended). Rufus will format it.
- In Rufus, click SELECT and choose the Windows 11 ISO. Leave the Image option at “Standard Windows installation.” Click START.
- When the Windows User Experience dialog appears, check “Remove requirement for 4GB+ RAM, Secure Boot and TPM 2.0” (and any other options you intentionally need). Confirm and let Rufus build the USB.
- To perform an in‑place upgrade, plug the Rufus USB into the running Windows 10 machine, open the drive in File Explorer, and run setup.exe (choose to keep files and apps). For a clean install, boot from the USB.
- Practical notes:
- Rufus automates registry and wrapper edits that would otherwise be manual; it simplifies the process and reduces the chance of human error.
- Boot‑from‑USB clean installs benefit most from Rufus’ bypasses; running setup.exe from a mounted ISO does not always use the same boot‑time checks the Rufus media changes.
The technical and operational downsides you must accept
Installing Windows 11 on unsupported hardware is not just a single‑session inconvenience — it changes your long‑term maintenance posture. Understand these concrete risks before proceeding.- Update entitlement is uncertain. Microsoft’s official guidance says unsupported installs “aren’t guaranteed to receive updates, including but not limited to security updates.” In practice this has been inconsistent: many unsupported installs have continued to get cumulative updates for months, while others have been selectively excluded or blocked by safeguard holds. Treat update continuity as fragile and changeable.
- Hardware instruction‑set blocks are absolute. If your CPU lacks required instructions (POPCNT / SSE4.2 for some 24H2+ builds), later feature updates may not boot on your machine regardless of any installer bypass. No registry hack or Rufus trick can add CPU microarchitecture features. That is a hard technical limit.
- Drivers and firmware may be unavailable or unsupported. Older vendor drivers may not work correctly under Windows 11, producing functional regressions (audio, networking, graphics). You may need to hunt for third‑party drivers or fallback drivers, which increases operational risk and troubleshooting time.
- Security posture is weakened if TPM/Secure Boot are actually missing or disabled. Feature isolation (like virtualization‑based security and HVCI), BitLocker key protection and measured boot are all materially improved with TPM 2.0 and Secure Boot enabled. Bypassing these checks means you lose those hardware‑anchored protections.
- Vendor warranty and official support are at risk. OEMs and Microsoft may decline to troubleshoot issues caused by running Windows 11 on unsupported hardware; this can complicate repair or replacement scenarios.
Practical, conservative checklist before you attempt any bypass
- Full offline backup: create a verified full disk image (Acronis, Macrium Reflect, or built‑in image) and also a file‑level cloud/ejected copy. Verify you can mount and read the image.
- Record licenses and recovery keys: Windows activation status, BitLocker recovery key, and any OEM driver packages.
- Update firmware: check and apply the latest UEFI/BIOS and chipset firmware from your PC/laptop vendor — this often exposes fTPM/PTT toggles.
- Verify CPU instruction support: run Coreinfo or similar tools to confirm POPCNT/SSE4.2 support if you plan to install modern 24H2 builds. If your CPU lacks those instructions, do not expect future updates to boot.
- Try enabling firmware TPM and Secure Boot first — many “incompatible” results vanish after this step.
- Prefer a clean ISO + Rufus approach for machines missing TPM/Secure Boot; prefer the Microsoft Installation Assistant for machines that are fully compatible and just haven’t been offered the staged upgrade yet.
A short decision guide (which path to pick)
- If your PC is shown as compatible by PC Health Check → use Windows Update or the Installation Assistant. This keeps updates and minimizes headaches.
- If only TPM/Secure Boot is disabled → update UEFI and enable fTPM/PTT and Secure Boot; then re‑run the check. Often the upgrade then proceeds officially.
- If the CPU is unsupported but the machine otherwise works and you accept the risk → use the MoSetup registry trick for an in‑place upgrade or create a Rufus relaxed USB (clean install recommended). Make a full image and be prepared to rollback.
- If the CPU lacks SSE4.2/POPCNT → do not attempt long‑term migration; buying supported hardware or migrating to a supported OS (or using ESU) is the realistic path. No installer tweak will add missing instruction support.
Final analysis — when these hacks are a good idea (and when they aren’t)
- Good candidates:
- Hobbyist or test machines where downtime and manual fixes are acceptable.
- Secondary PCs used for non‑sensitive tasks that need a modern UI or particular app compatibility.
- Scenarios where you plan to replace hardware long term and need an interim working Windows 11 environment.
- Poor candidates:
- Business / compliance / production machines that handle sensitive data.
- Devices where security and guaranteed updates are non‑negotiable.
- Machines with CPUs that lack required instruction sets (POPCNT/SSE4.2) — these are effectively blocked.
Conclusion
Windows 11 is accessible to many users who were initially told their machines are “incompatible.” Official, supported paths exist and remain the recommended approach for most users: Windows Update, the Windows 11 Installation Assistant, or the Media Creation Tool/ISO. For machines that fail the official checks, two widely used community routes exist — a MoSetup registry override for in‑place upgrades, and a Rufus‑generated relaxed USB that automates installer bypasses — and both work on many systems today. Those options rely on official Windows media but intentionally remove Microsoft’s compatibility gates; they should be treated as technical workarounds rather than long‑term support solutions. The decisive trade‑offs are clear: immediate access to Windows 11 versus uncertain update entitlement, possible driver or boot failures (especially on CPUs missing POPCNT/SSE4.2), and loss of some hardware‑anchored security features.If you value predictable security updates and vendor support, fix firmware toggles or buy supported hardware. If you prefer to extend a machine’s life and are comfortable troubleshooting, the registry method and Rufus route are practical, well‑documented, and commonly used — but only after careful backups, firmware updates, and acceptance of the long‑term maintenance burden.
Source: PCMag Here's How to Upgrade Your PC to Windows 11, Even If It's Incompatible