

Microsoft’s current Windows display documentation separates these controls for a reason: HDR brightness, color profiles, calibration, and graphics drivers affect different stages of the image path. Changing every “color” control at once makes a problem harder to diagnose. Start with one monitor, one known image or application, and one reversible setting at a time.
If the problem began immediately after connecting a monitor, dock, TV, HDMI adapter, or graphics driver update, skip ahead to the sections on RGB range and drivers. If it appeared after enabling HDR, begin there.
 Test HDR Before Recalibrating Anything
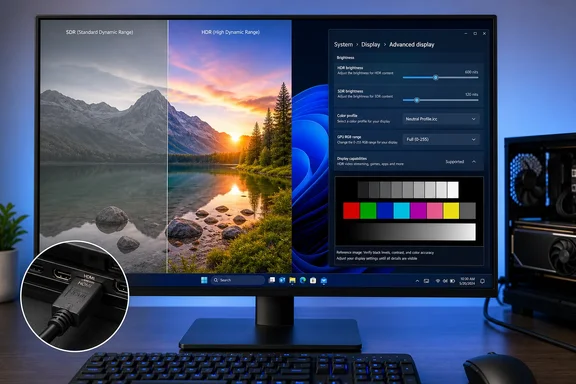
On Windows 11, open Settings > System > Display, select the affected monitor, then open HDR. Turn HDR off temporarily and look at the desktop, a familiar photograph, and the application where the issue is most obvious.
If color immediately returns to normal, the monitor is working; HDR is the variable to address. Intel’s support documentation explains why this can happen: most desktop applications and web content are SDR and use the narrower sRGB color space. On a wide-gamut screen, SDR content can look unusually vivid when HDR is off because it is being displayed outside its intended range. Once HDR is enabled, Windows constrains SDR material more accurately, which some users interpret as faded color.
Do not compensate by increasing monitor saturation, Windows color filters, or GPU vibrance controls. Those changes may make the desktop look punchier while making photographs, video, and color-managed applications less accurate.
Instead, with HDR still enabled, adjust the SDR content brightness control in the Windows HDR settings. The label varies slightly by Windows release; on older Windows 10 builds it may appear under Windows HD Color settings as an HDR/SDR brightness balance. This slider changes how SDR applications are mapped while HDR remains active, and it is the appropriate first adjustment when the desktop is too gray, too dim, or excessively bright.
HDR should normally stay off for an SDR-only monitor. It should also stay off when the affected display is a TV or monitor with a weak HDR implementation that cannot produce convincing highlight brightness. Microsoft notes that some HDR-capable displays reproduce desktop sRGB color poorly in HDR mode, particularly where the panel’s HDR mode is designed more for video playback than PC desktop use.
Before blaming Windows, open the monitor’s own on-screen menu. Disable settings such as Dynamic Contrast, Black Equalizer, “HDR Effect,” Vivid mode, or manufacturer-specific picture enhancement. Use the monitor’s Standard, sRGB, or equivalent neutral preset while troubleshooting. A monitor’s internal processing can override the assumptions behind a Windows ICC profile or calibration.
For an HDR-capable monitor that you intend to use for games and HDR video, Windows 11 offers the Windows HDR Calibration app. Microsoft says the app creates a profile using black-level, peak-brightness, and full-screen-brightness tests, then lets you adjust SDR and HDR color saturation. Run it full-screen on the specific HDR display, in the lighting conditions where you normally use it. Do not run it on the wrong monitor in a dual-display setup.
Windows HDR Calibration is a Windows 11 tool. A Windows 10 system can still use HDR controls, but it does not receive the same current calibration workflow. Windows 10 also reached end of support on October 14, 2025, so a display problem caused by a new driver, monitor, or Windows interaction is less likely to receive a platform-level fix than it would on Windows 11.
Check That Windows Has the Right ICC Profile
An ICC profile is a small file that describes a particular display’s color characteristics: its white point, tonal response, and color gamut. It is not a universal “better color” preset. A profile made for a different monitor—even one with a nearly identical model name—can produce a warm cast, crushed shadows, gray blacks, or visibly dull colors.
In Windows 11, go to Settings > System > Display > Color profile. Select the affected display from the monitor selector at the top of the page. Review the installed profiles before changing anything. If a profile is already marked as the default, write down its name or take a screenshot so you can restore it.
Use Add profile only to install a profile supplied for your exact monitor or laptop panel by its manufacturer, or one created by a proper hardware calibration device. Then select the intended profile and choose Set profile to make it the default.
Windows 10 exposes the same underlying controls through the older Color Management interface. Search the Start menu for Color Management, select the correct monitor on the Devices tab, and check Use my settings for this device before adding or assigning a profile. In multi-monitor systems, verify the display name carefully; it is easy to apply a profile to the laptop panel while judging the image on an external screen.
Microsoft’s documentation now places profile management directly in Windows 11 Settings, but the legacy Control Panel tool remains useful for diagnosis. In particular, the All Profiles tab shows profiles installed system-wide. This is also where Microsoft directs users to remove an HDR calibration profile if they need to undo a calibration test.
A sensible profile test is simple:
- Keep the current profile recorded, then temporarily select the monitor manufacturer’s profile or remove an obviously incorrect custom profile from the affected display.
- Sign out and back in, or restart, after a major profile change so applications and the graphics driver reload their color state.
- Compare the same image in more than one application, including a browser and a photo viewer, before deciding that the profile was the cause.
Do not download random ICC files from monitor forums, profile-sharing sites, or “color fix” packages. A profile can be technically valid while still being wrong for your particular panel. The best result from a bad profile is no improvement; the usual result is a misleading correction that complicates later calibration.
Windows 11 also includes Automatically manage color for apps on supported displays. Microsoft describes this as automatic color management, which can improve consistency between color-managed and ordinary apps and reduce visible banding in gradients. It is worth testing after you have assigned the correct profile, especially on a modern wide-gamut display. It is not a repair for a bad monitor mode, a wrong HDMI range, or an inaccurate ICC file.
Use Calibration for Tone and White Balance, Not Guesswork
Windows includes a basic calibration wizard. In Windows 11, select Calibrate display from the Color profile page. On either Windows 10 or Windows 11, you can also search for Calibrate display color or run dccw.exe.
The wizard adjusts gamma, brightness, contrast, and color balance, then saves a display profile. It is useful for correcting a visible green, red, or blue tint, or for reducing an obvious white-point problem. It is less useful for solving the common “my new monitor looks faded” complaint, because that symptom often originates upstream in HDR mode or the RGB signal range.
Use the monitor’s physical controls for brightness and contrast when the wizard requests them. Windows cannot directly control most external monitors’ backlights. Set brightness for a comfortable working level first, then avoid raising contrast until black details disappear or white areas lose texture.
For serious photo, video, print, or design work, visual calibration is only a starting point. Microsoft’s developer documentation explains that a real display calibration relies on optical measurements and a profile created from those measurements. A colorimeter or spectrophotometer is the practical route when accuracy matters. The built-in wizard can make a screen more pleasing; it cannot prove that the screen is accurate.
If the screen is HDR-enabled, avoid stacking a conventional SDR calibration on top of a Windows HDR Calibration profile without knowing what each utility changed. Microsoft’s HDR workflow is intended to provide the display luminance and gamut information HDR apps and games need. Treat HDR calibration and SDR visual tuning as separate jobs.
Fix Full-versus-Limited RGB on HDMI Displays
A monitor that looks pale, with dark gray blacks and weak contrast across the entire desktop, may be receiving a limited-range video signal when it expects full-range PC RGB. This is especially common after connecting a monitor through HDMI, a receiver, a dock, a capture device, or a television-oriented input.
AMD’s current documentation distinguishes RGB Full, which uses values 0–255, from RGB Limited, which uses 16–235. NVIDIA documents the same distinction. The correct setting is not always “Full”: the graphics card’s output and the monitor or TV input mode must match. A mismatch in either direction can create washed-out blacks or, conversely, make shadow detail disappear.
For an AMD Radeon system, open AMD Software: Adrenalin Edition, find the display settings, and inspect Pixel Format. A PC monitor connected directly by DisplayPort or HDMI commonly expects RGB 4:4:4 Pixel Format PC Standard (Full RGB). A television or video-oriented display may expect limited range unless its input is explicitly configured for PC use.
For NVIDIA, open NVIDIA Control Panel > Display > Change resolution. Under the output settings, inspect Output color format and Output dynamic range. RGB with Full range is typical for a PC monitor configured for full-range input; use Limited only when the display documentation or its picture mode requires it.
Check the monitor menu as well. TVs often label the matching option as HDMI Black Level, RGB Range, HDMI Range, PC Mode, or Input Signal Plus. A Windows setting can be correct while the screen itself is set to interpret it incorrectly.
This is a display-chain issue, so test after each change using a black-level pattern or a dark image with subtle shadow detail. Do not judge only by whether the Windows taskbar looks darker. The goal is to distinguish black from near-black without turning midtones muddy.
Roll Back a Driver Only When the Timeline Fits
If colors changed immediately after Windows Update or a GPU driver installation, record the driver version before experimenting. Open Device Manager > Display adapters, right-click the active GPU, choose Properties, and open the Driver tab.
Microsoft’s driver guidance supports rolling back a driver when a recent update caused the issue. Select Roll Back Driver if it is available, restart the PC, and retest the same display configuration. This is more controlled than uninstalling drivers or using third-party cleanup utilities as a first response.
If no rollback is available, use Windows Update first, then obtain a driver only from the PC maker or GPU manufacturer. Microsoft explicitly warns against downloading drivers from unrelated driver sites. Laptop owners should favor the laptop manufacturer’s graphics package when one is available, because hybrid graphics systems often depend on an Intel, AMD, or NVIDIA driver combination validated for that machine.
A driver reinstall is justified when the issue persists across HDR settings and correct ICC profiles, or when Device Manager shows an error. It is not justified merely because a new monitor looks different from the old one. A wider-gamut display, different panel technology, or a changed monitor picture mode can reveal a color-management problem that the previous screen hid.
The practical endpoint is straightforward: leave HDR enabled only when the display benefits from it, assign an ICC profile only when it belongs to that exact screen, and make the GPU’s RGB range match the monitor’s input mode. Once those three layers agree, washed-out Windows color usually stops being a Windows mystery and becomes a normal, repeatable display configuration.