

A shared To Do list is useful for household chores, packing lists, small projects, or recurring team routines. Everyone who joins can work from the same list, see task changes, and receive shared-list activity notifications if they enable them. The list owner controls whether the invitation link remains open for additional people and can stop sharing altogether when the project ends.
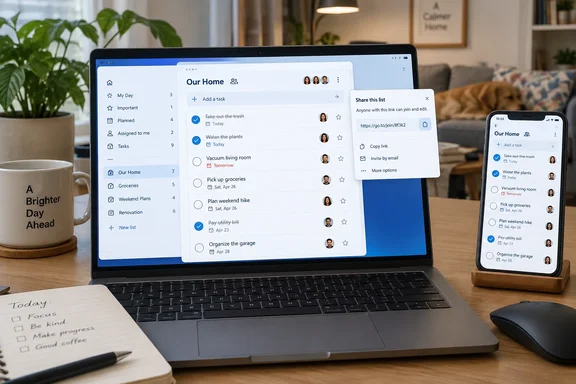 Check account compatibility before you share
Before creating the list, make sure every collaborator can use a compatible Microsoft account.
- Personal use: Share from one personal Microsoft account to other personal Microsoft accounts. Outlook.com, Hotmail, Live, Skype, and Xbox sign-ins are common examples of personal Microsoft accounts.
- Work or school use: A shared list owned by a work or school account can be shared only with people in the same organization. An external personal account cannot join it.
- Mixed household and work use: For a household list, create it while signed in with a personal Microsoft account. Do not create it under an employer or school account if family members need to join.
- List ownership matters: Microsoft To Do allows you to share lists that you created. If the Share control is missing, check whether you opened a built-in smart list such as My Day, Planned, or Important, or a list created by somebody else.
Open Microsoft To Do from the Start menu and confirm the account shown in the app is the one you intend to use. If you have both personal and work accounts, take a moment to verify this before creating the list; account type determines who can join.
Create a list for the household or project
- In Microsoft To Do, look at the left-side list pane.
- Select + New List.
- An untitled list is created. Type a clear name, such as:
Household choresKitchen remodelFriday client handoffCamping weekend
- Select the new list if it is not already open.
- In the Add a task box, type the first task and press Enter.
- Continue adding the major tasks. Keep each task specific enough that another person can tell when it is finished. For example:
- “Buy groceries” is broad.
- “Buy ingredients for Tuesday dinner” is clearer.
- “Call contractor” is broad.
- “Confirm Thursday delivery window with contractor” is actionable.
- Select a task to open its detail view when it needs more context.
- Use + Add step to split a larger task into smaller checkable actions. For example, a task named “Prepare guest room” might include steps for changing bedding, clearing a drawer, and testing the bedside lamp.
- Use the note area in the task detail view for information that collaborators need, such as measurements, a pickup code, or a short explanation of the expected result.
Tasks, notes, steps, reminders, and due dates belong to the shared list itself. Put project information in the task that needs it instead of relying on a separate message thread that some collaborators may miss.
Add due dates, reminders, and recurring work
Due dates identify when something should be finished. Reminders prompt you at a particular time. Use both when a task needs attention before its deadline.
- Select a task in your list to open the detail view.
- Select Add due date.
- Choose Today, Tomorrow, Next week, or Pick a date.
- If you choose Pick a date, select the exact date and save it.
- Select Remind me in the same task detail view.
- Choose Later today, Tomorrow, Next week, or Pick a date & time.
- For a custom reminder, select the date and time that will give you enough time to act before the task is due.
- For chores or routines that repeat, select Repeat and choose Daily, Weekdays, Weekly, Monthly, Yearly, or Custom.
A task with a due date appears in the Planned smart list, where Microsoft To Do organizes scheduled work by date. This is useful when a shared household list becomes long: you can keep all tasks in the common list while using Planned to focus on the next due items.
For a shared task, choose the reminder owner deliberately. A reminder is most useful when the person expected to take the next action opens the task and sets it on their own device.
Share the list with collaborators
Warning: An invitation link can be forwarded. Send it only through a communication channel you trust, and close the link after the intended people have joined.
- Open the list you created.
- Select the Share icon at the top of the task window.
- Select Create invitation link.
- Select Copy link.
- Open the email, chat, or messaging app you want to use.
- Paste the link into a message and send it to the intended collaborators. Microsoft To Do supports sharing the link through email, Microsoft Teams, or another messaging app.
- Ask each person to open the invitation link while signed in to the correct Microsoft account.
- After they join, have each collaborator open the shared list in their own Microsoft To Do app.
The list owner does not need to resend a separate invitation for every task. Once a person has joined the shared list, newly added tasks and completed tasks are reflected in that same list for its members.
Assign work after members have joined
For a small household list, you may simply agree verbally who will do each task. For a project list with several people, task assignment makes responsibility visible.
- Confirm that the person you want to assign work to has already joined the shared list.
- Open the shared list.
- Select the task to open its detail view.
- Select Assign to.
- Select the shared-list member who should own the task.
- Repeat for other tasks that need a clear owner.
In the Windows app, you can also assign a task as you create it. In the task entry field, type @ and then begin typing a member’s name. Select the person when their name appears.
Assigned tasks appear in the assignee’s Assigned to you smart list if that smart list is enabled. To check its availability, open Settings in Microsoft To Do, choose Smart lists, and make sure Assigned to you is turned on.
Do not move an assigned task to another list unless you are prepared to assign it again. Moving a task between lists removes its assignment.
Keep shared-list notifications useful
Microsoft To Do can notify you about activity in shared lists, including when someone joins, adds a task, completes a task, unchecks a task, deletes a task, or assigns a task to you.
To enable or disable shared-list activity notifications within To Do:
- Open Microsoft To Do.
- Select Settings.
- Select Notifications.
- Turn Shared list activity on to receive activity alerts, or turn it off if the list is generating too many notices.
A To Do reminder can still be missed if Windows is blocking app notifications.
Windows 11 notification settings
- Select Start > Settings > System > Notifications.
- Make sure the main Notifications switch is turned on.
- Under Notifications from apps and other senders, select Microsoft To Do if it appears.
- Turn on the notification options you want, particularly notification banners and notification-center visibility.
- Check whether Do not disturb is active. Windows can silence banners while Do not disturb is on, although notifications may remain available in Notification Center.
Windows 10 notification settings
- Select Start > Settings > System > Notifications & actions.
- Turn on Get notifications from apps and other senders.
- Under Get notifications from these senders, select Microsoft To Do.
- Enable the notification options you want, such as banners, Action Center notifications, and sound.
- Check Focus assist if reminder banners are not appearing. Focus assist can suppress notifications during configured quiet periods or activities.
Lock down the invitation link after everyone joins
The invitation link is a joining mechanism, not a one-time email invitation. Once the intended collaborators are members, close the link so it cannot be used to add more people.
- Open the shared list.
- Select Share.
- Select Manage access.
- Turn on Limit access to current members.
This disables the invitation link for new joiners while keeping access available to the people who are already members. Use this setting after your household, team, or project group is complete.
Microsoft To Do’s documented sharing controls are list-wide. Limit access to current members prevents additional people from joining; it does not stop access for the people already in the list. If you need to end access for every collaborator, use the stop-sharing procedure below.
Verify that the list is synchronized
Perform a simple test before relying on a shared list for a deadline or important household task.
- On the owner’s PC, add a test task such as
Sync check. - Give it a due date for tomorrow.
- If another member is available, assign the task to them.
- On the other person’s Microsoft To Do app, open the shared list.
- Confirm that the test task appears with its due date and assignment.
- Have the second person mark the task complete.
- Return to the owner’s app and confirm that the task is shown as completed there as well.
- If shared-list activity notifications are enabled, check whether the relevant activity appears as a Windows notification or in Notification Center.
Once the test succeeds, delete the test task or rename it into a real project task.
Stop sharing and close a finished project
Warning: Selecting Stop sharing removes access for all current collaborators. Microsoft To Do makes the list private to its owner again. Use it only after you have confirmed that nobody else still needs the list.
- Open the shared list as the person who created it.
- Select Share.
- Select Manage access if necessary.
- Select the red Stop sharing button.
- Confirm the action if prompted.
After sharing stops, current members no longer have access and only the list owner can open the list. This is the appropriate cleanup step when a move, event, household project, or short-term work effort is over.
If you want to keep the completed work as a private record, stop sharing and leave the list in place. If you no longer need the list at all, you can delete it afterward from the list options. Delete only a list you created and only after confirming that its tasks and notes are no longer needed.
Fix common sharing and reminder problems
The Share button is missing
Open a list that you created. Built-in smart lists such as My Day, Planned, Important, and Assigned to you are views of tasks rather than lists you can share. A list created by another person may also not offer you the owner’s sharing controls.
The recipient sees “Can’t join list”
First, confirm that the owner has not deleted the list or stopped sharing before the recipient joined. Then verify account compatibility:
- A personal-account list must be joined with a personal Microsoft account.
- A work or school account list is unavailable to people outside the owner’s organization.
- Ask the recipient to open the link while signed in to the intended account, particularly if their browser has multiple Microsoft accounts active.
If the list owner enabled Limit access to current members before the recipient joined, the owner must create a new invitation link and allow the recipient to join before locking access again.
A task is not showing as assigned
The person must join the shared list before they can be selected in Assign to. Also check whether the task was moved to another list after it was assigned; moving it removes the assignment. Reopen the task and assign it again.
Due dates appear, but reminders do not pop up
Check both layers of notification settings:
- In Microsoft To Do, make sure the task has a Remind me time, not only an Add due date value.
- In Windows, make sure Microsoft To Do notifications are allowed.
- Check Windows 11 Do not disturb or Windows 10 Focus assist.
- Open Notification Center to see whether Windows received the reminder but suppressed its banner.
Shared-list activity is too noisy
Open Microsoft To Do > Settings > Notifications, then turn Shared list activity off. This changes activity alerts on that device; it does not stop the list from updating or remove anyone’s access.