

The good news: most cases can be narrowed down in about 15 minutes, without registry edits, “driver updater” utilities, or performing ritual sacrifices to Device Manager.
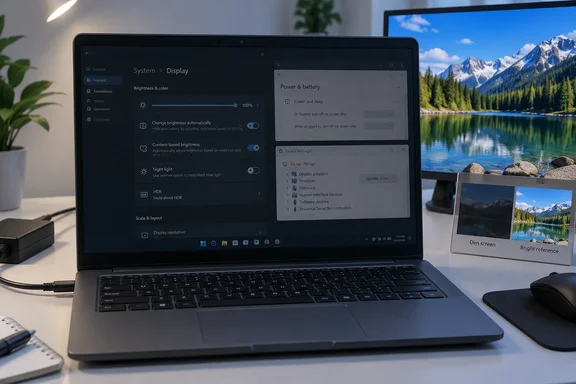 First: identify the kind of dimness
Start with a simple test:
Quick walkthrough
- Open Settings > System > Display.
- Move the Brightness slider down, then back up.
- Open a bright, mostly white page and then a dark image or video scene.
- Plug in the charger if this is a laptop, then unplug it again.
Those tests reveal useful clues:
- Brightness changes with the room lighting: ambient-light adaptive brightness is likely enabled.
- Brightness or contrast shifts between dark and light content: content adaptive brightness control is the likely suspect.
- The display changes when unplugging the PC: battery or HDR power behavior may be responsible.
- The slider does little, is missing, or the change began after an update: investigate the display driver.
- Only an external monitor is dim: Windows may not control its backlight at all; use the monitor’s physical buttons or on-screen menu.
Microsoft notes that Windows’ built-in brightness slider generally applies to a laptop’s internal screen. A desktop display or external monitor normally relies on its own hardware controls.
Turn off ambient-light adaptive brightness
Some laptops and tablets include an ambient-light sensor. Windows can use it to brighten the screen in a sunny room and dim it in darker surroundings. That is sensible in theory, but it can feel like the PC is second-guessing you in practice.
To disable it where available:
- Open Start > Settings > System > Display.
- Expand Brightness.
- Turn off Change brightness automatically when lighting changes.
If the option is absent, your device may not include a compatible light sensor, or its manufacturer may manage the feature through its own utility. Its absence is not itself an error.
What success looks like
After the setting is off, moving from a bright room to a dim one should no longer cause Windows to alter the internal display’s brightness on its own.
Quick takeaway: If the brightness changes because you changed rooms, disable adaptive brightness based on lighting.
Stop Windows from changing brightness based on what is on screen
Windows 11 can also adjust brightness and contrast based on displayed content. This feature is commonly called Content Adaptive Brightness Control or CABC. A dark video scene, a dark-themed app, or a mostly black webpage can trigger it—even when the brightness slider remains unchanged.
Microsoft describes this as a power-saving feature intended to balance display quality with battery life. It is most noticeable to people editing photos or videos, working with color-sensitive material, or simply trying to read text without the screen playing mood lighting.
To disable it in Windows 11:
- Open Start > Settings > System > Display.
- Expand Brightness.
- Find Change brightness based on content.
- Select Off.
The other choices are:
- Always — content-based adjustment remains active on battery and AC power.
- On battery only — the adjustment is limited to battery use.
- Off — Windows stops adjusting brightness and contrast based on displayed content.
Not every computer exposes this menu. CABC support depends on the display hardware and whether the PC manufacturer enabled the feature. On compatible Surface devices, Microsoft specifically documents the same Display > Brightness > Change brightness based on content > Off route.
The trade-off
Turning CABC off can reduce battery life. That is the point of the feature, after all. But for consistent image appearance, it is usually the correct trade: a few more minutes of battery life are not terribly helpful if your spreadsheet looks like it is fading into a Victorian novel.
Quick takeaway: If dimming happens when switching between dark and light apps, images, or videos, turn off content-based brightness.
Check Energy Saver and power behavior
A laptop may lower brightness to extend battery runtime. That is normal, but it becomes confusing when a system remains dim after plugging in, wakes dim after sleep, or behaves differently on battery than it does on AC power.
In Windows 11:
- Go to Settings > System > Power & battery.
- Expand Energy saver.
- Check whether it is enabled now or configured to activate at a particular battery percentage.
- Turn it off temporarily and reassess the screen.
Also check Settings > System > Display > Brightness. Microsoft’s current battery guidance says that, where present, the automatic-lighting and content-optimization brightness options can be cleared from this area.
If Windows offers Power mode, choose Balanced while troubleshooting. A highly aggressive efficiency setting is not necessarily broken, but it can make display behavior more conservative when battery power is low. Microsoft notes that some systems may not expose every power-mode choice, particularly when a custom power plan is active.

Also check HDR
On HDR-capable laptops, Windows and the PC manufacturer may alter HDR behavior when switching between AC power and battery. That can change the screen’s apparent brightness, black levels, and color saturation.
To test whether HDR is part of the problem:
- Open Settings > System > Display.
- Select the affected display if multiple monitors are connected.
- Open HDR.
- Temporarily turn Use HDR off, then compare the image.
If the dimness disappears, the screen is not necessarily faulty; the issue may be HDR’s battery behavior or SDR/HDR brightness balance. Microsoft also notes that HDR screens can take longer to react to ambient-light brightness changes.
Quick takeaway: A problem that appears only on battery power is more likely to be an energy-saving or HDR setting than a failed panel.
Refresh, update, or reinstall the display driver safely
When the brightness slider does nothing, disappears, or the problem started after a driver or Windows update, the graphics driver is the next sensible target.
Try the quick graphics reset first
Press:
Windows key + Ctrl + Shift + B
The screen may blink and make a short beep. This restarts the graphics subsystem without restarting the entire PC. Microsoft includes this shortcut in its display troubleshooting guidance.
If that does not help, restart Windows normally before changing drivers.
Update through Windows Update first
For most people, Windows Update is the safest initial route because it supplies manufacturer-published drivers that have been distributed through Microsoft’s update channel.
Windows 11
- Open Settings > Windows Update.
- Select Advanced options.
- Open Optional updates.
- Look under Driver updates.
- Install a relevant display or graphics driver, then restart.
Windows 10
- Open Settings > Update & Security > Windows Update.
- Select Check for updates.
- If available, choose View optional updates.
- Install a relevant graphics driver and restart.
Optional drivers are not installed automatically, so it is worth looking there when a display problem begins.
Update from Device Manager
If Windows Update has nothing useful to offer:
- Right-click Start and choose Device Manager.
- Expand Display adapters.
- Right-click the graphics adapter—commonly Intel, AMD, or NVIDIA.
- Select Update driver.
- Choose Search automatically for drivers.
Do not confuse Display adapters with Monitors. Brightness control is usually tied to the GPU driver and the internal display’s supporting hardware, so begin with the display adapter.
If the issue began after an update, roll back
If the screen became dim immediately after a new graphics driver arrived:
- Open Device Manager > Display adapters.
- Right-click the graphics adapter and select Properties.
- Open the Driver tab.
- Select Roll Back Driver if the option is available.
- Restart.
That is often preferable to blindly installing a newer driver when the newer one is the suspect. Microsoft recommends driver rollback as a troubleshooting option when a display issue follows an update.
Reinstall only if updating and rollback fail
Reinstallation is safe when done methodically:
- In Device Manager, expand Display adapters.
- Right-click the affected adapter and choose Uninstall device.
- If offered, select Attempt to remove the driver for this device.
- Confirm the uninstall and restart the PC.
- After Windows restarts, return to Device Manager.
- Right-click the adapter, select Update driver, then choose Search automatically for drivers.
Before uninstalling, write down the adapter’s exact name. If Windows does not restore a working driver, download one from the PC maker’s support page—or the GPU maker only when that vendor explicitly supports your hardware configuration. Avoid third-party “driver updater” tools; they add another layer of mystery to a problem that already has enough moving parts. Microsoft’s documented guidance supports reinstalling a display driver through Device Manager when simpler fixes do not resolve the issue.
Do not overlook Night light and external monitors
A screen can look dim when it is actually warm-tinted rather than lower in backlight intensity. Check:
Settings > System > Display > Night light
Turn it off temporarily or reduce its Strength. On HDR devices especially, Night light can make colors appear heavily tinted or harder to read.
For an external monitor, open its built-in on-screen display using the physical buttons or joystick. Check:
- Brightness
- Contrast
- Eco or power-saving mode
- Dynamic contrast
- Black stabilizer or low-blue-light mode
- Input-specific picture presets
If only one external screen is affected, the monitor’s settings, cable, dock, or adapter are more likely culprits than Windows-wide brightness controls.
When it is time to suspect hardware
Software troubleshooting has limits. Consider hardware service if:
- The screen remains dim during the manufacturer’s startup logo or BIOS/UEFI screen.
- Backlight brightness flickers independently of Windows.
- The panel is dim at every setting, including Safe Mode.
- An external display looks normal while the laptop’s internal panel remains extremely dark.
- Brightness changes only when the lid angle moves, suggesting a cable or hinge-area issue.
At that point, the likely cause is outside Windows: the display panel, backlight circuitry, ambient-light sensor, internal display cable, power system, or a vendor-specific firmware issue may need attention.
Finally, this guide still includes Windows 10 because many PCs remain in use, but its support status matters. Microsoft ended free Windows 10 security updates, technical assistance, and standard Windows Update servicing on October 14, 2025. A brightness fix can keep an older PC usable, but it does not change that security deadline.