
A firmware update can resolve meaningful problems that Windows updates and driver reinstalls cannot: startup instability, CPU or memory compatibility issues, hardware-detection bugs, power-management defects, security vulnerabilities, or device-specific reliability problems. But BIOS updates are not routine “install every available version” upgrades. They replace code that initializes the hardware before Windows loads, which is why a careful process matters more than speed.
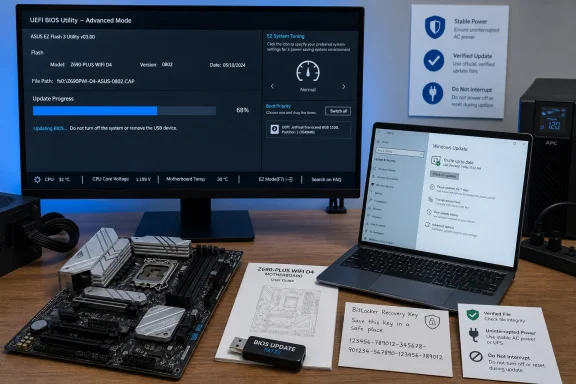 Background: BIOS, UEFI, and Why Firmware Updates Carry More Risk
BIOS—the Basic Input/Output System—was historically the firmware responsible for starting a PC and handing control to an operating system. Nearly all current Windows systems use UEFI, the more modern firmware architecture, although manufacturers and users still commonly call an update a “BIOS update.”
This firmware is responsible for foundational work:
- Initializing the processor, memory, storage, graphics, and embedded controllers.
- Applying hardware settings such as boot order, Secure Boot, TPM, virtualization, and fan controls.
- Passing the machine safely to Windows.
- Providing the low-level environment used by pre-boot recovery and diagnostics tools.
That position makes firmware especially important—but also unforgiving. A normal application update can usually be removed. A bad firmware image, a file meant for a similar but different board revision, or a loss of power during the flash process can prevent the machine from completing its startup sequence.
The modern Windows ecosystem has reduced some of that risk. Microsoft supports a system for manufacturers to package and deliver UEFI firmware through Windows Update, where the update is targeted to appropriate hardware and handed to UEFI through the UpdateCapsule mechanism. Microsoft documents this as a consistent firmware delivery platform for supported Windows hardware. That is the strongest reason to begin with Windows Update rather than hunting for a download.
Still, the update channel does not eliminate the need for judgement. Firmware releases can reset BIOS settings, trigger a BitLocker recovery prompt, alter memory-training behavior, or change support for an older operating system. The goal is therefore not simply to install the newest available version. It is to install the right update, for the right reason, through the right method.
Decide Whether the Update Is Actually Necessary
Before downloading anything, identify the practical reason for updating. Firmware updates are often worthwhile when a manufacturer explicitly lists a fix for a problem affecting the PC, or when the release notes add required compatibility for new hardware.
Strong reasons to update include:
- A vendor bulletin identifies a security issue addressed by the firmware.
- The system suffers from a repeatable boot, sleep, battery, USB, graphics, storage, or docking problem that the release notes address.
- A motherboard needs a newer firmware version to support an installed or planned CPU.
- A business IT team has approved a firmware baseline for managed machines.
- The manufacturer’s support utility recommends a critical BIOS or UEFI update for the exact device.
Reasons to pause include:
- The PC works reliably and the release notes contain no relevant fix.
- The downloaded firmware does not match the full model number, board revision, service tag, or product identifier.
- A laptop cannot be connected to stable AC power.
- The system is currently unstable due to overclocking, failing memory, or intermittent power loss.
- The update notes require intermediate firmware versions, configuration changes, or bundled management-engine updates that have not been reviewed.
A BIOS update is not generally a performance upgrade. Motherboard makers may include CPU microcode, memory compatibility, power behavior, or security changes that affect performance indirectly, but that does not make every firmware release a must-install patch. Treat release notes as the deciding document.
Find the Current Firmware Version First
Windows can show the current BIOS version without entering setup:
- Press Windows + R.
- Type
msinfo32and press Enter. - In System Summary, locate BIOS Version/Date.
- Record the manufacturer, version string, and date.
For deeper confirmation, restart the PC and enter firmware setup using the manufacturer’s designated key—commonly F2, Delete, Esc, or another key shown on the startup screen. Check the firmware version there as well, particularly if Windows reports a generic system-board value.
The exact identity of the hardware matters more than the apparent similarity of product names. A Dell laptop should be identified by its Service Tag; an HP system by its product or serial number; a Lenovo by machine type and model; and a custom-built desktop by the motherboard’s complete model and revision. A BIOS intended for a board that differs only by Wi-Fi controller, DDR4 versus DDR5 support, chipset revision, or regional SKU can be rejected—or worse, can be the wrong image entirely.
The Safest First Option: Windows Update
For many Windows PCs, Windows Update is the preferred first stop. Microsoft’s model allows OEMs to publish targeted firmware packages through the same servicing path used for device drivers, while the firmware itself verifies applicability before installation. Microsoft’s official guidance explains that firmware packages delivered through Windows Update are processed by UEFI during the update workflow.
On Windows 11:
- Open Start > Settings > Windows Update.
- Select Check for updates.
- Install any update clearly identified as Firmware, System Firmware, BIOS, or a manufacturer-branded firmware package.
- Open Advanced options > Optional updates.
- Review Driver updates for an optional firmware entry.
- Choose Download & install, then allow Windows to restart normally.
On Windows 10, the corresponding area is Settings > Update & Security > Windows Update, with optional driver updates available through the optional-updates workflow when the manufacturer provides them.
This route has several advantages:
- The package is distributed through an authenticated Windows servicing channel.
- Hardware targeting is built into the delivery model.
- The update is less likely to be manually mismatched to a sibling device.
- It fits naturally into the vendor’s supported update strategy.
- On managed PCs, administrators can control firmware deployment rather than relying on end users to locate files.
Dell specifically documents Windows Update as one supported BIOS route, noting that its firmware packages can appear under optional driver updates as Dell Firmware. Dell’s BIOS and UEFI guide also places Windows Update alongside SupportAssist, manual installers, USB flashing, and Dell Command | Update.
Why “Optional” Does Not Mean Unimportant
Windows labels many hardware updates as optional because they may not apply to every configuration or because the manufacturer wants the user or administrator to choose the timing. It does not mean a firmware update is necessarily insignificant.
However, optional status also does not create an obligation to install blindly. Read the version and description, compare it with the currently installed firmware, and confirm that the manufacturer and device identity are correct. If an organization manages the device through Intune, Windows Autopatch, or another endpoint-management platform, follow the organization’s approved servicing process instead of installing firmware independently.
Use the Manufacturer’s Update Utility When Windows Update Has Nothing
When Windows Update does not offer the needed firmware, the next-best option is usually the PC maker’s official update application. These tools normally detect the system identity automatically, narrow the available update list, and prepare the reboot sequence.
The benefit is not merely convenience. Automated vendor utilities reduce the chance that a user will confuse near-identical product names, download a desktop image for a laptop, or select a board revision that looks correct at a glance.
Dell: SupportAssist and Dell Command | Update
For consumer and general-purpose Dell systems, open SupportAssist from the Start menu, choose Update software, and select Start to scan for updates. Dell’s instructions use that sequence for automated BIOS and UEFI installation. Dell’s official BIOS update guide also identifies Dell Command | Update as the appropriate tool for business-oriented models including Latitude, OptiPlex, and Precision systems.
For a Dell business PC:
- Open Dell Command | Update.
- Select Check.
- Find the BIOS or UEFI update in the results.
- Select it and choose Install.
- Restart only when the utility prompts for it.
Older Dell documentation and older installations may reference Dell Update or Alienware Update, but Dell states that support for both applications expired at the end of 2024 and directs users toward SupportAssist instead. That retirement notice appears in Dell’s current BIOS guidance.
HP: HP Support Assistant and the BIOS Update Utility
On supported HP consumer and business systems, open HP Support Assistant, choose the device, select Updates, and check for available firmware. If an appropriate BIOS package is offered, use the vendor workflow rather than extracting or running individual files manually.
HP emphasizes the central safety rule: a BIOS designed for a different computer model can damage the system or leave it unable to operate. HP’s BIOS recovery documentation explicitly warns against installing a BIOS intended for another model. That warning is especially relevant because HP product families often include numerous nearly identical regional and enterprise configurations.
Lenovo: Lenovo Vantage and Lenovo Support
Lenovo systems should begin with Lenovo Vantage. Open the app, check System Update, and install a UEFI BIOS package only when it is offered for that device. Lenovo’s official documentation lists Vantage as a supported method and says users can alternatively download the specific package and its installation instructions from Lenovo Support. Lenovo’s UEFI BIOS update guidance also notes that selected models may support a flash-update disc or ISO-style method.
The important distinction is that Lenovo offers different package types for different models. Do not assume a bootable image is interchangeable with a Windows flash utility merely because both are labelled “BIOS update.”
Surface: Windows Update Is the Primary Firmware Path
Surface devices are a special case because Microsoft delivers their drivers and firmware primarily through Windows Update. The Surface app can check update status and open Windows Update, but the normal firmware installation happens through the Windows servicing channel. Microsoft’s Surface update guidance recommends automatic updating for most users and provides manual .msi packages as an advanced option.
Before updating a Surface, Microsoft advises connecting power, ensuring at least 40% charge, keeping the device powered on, and using a stable internet connection. Those preparation requirements are documented on Microsoft Support. A firmware update should never be treated as a reason to force-restart a device that appears temporarily idle.
Manual Downloads: The Exact-Model Rule
Manual firmware installation is appropriate when the automated route does not offer an update needed for a documented fix, when a Windows installation is unavailable, or when the manufacturer’s support instructions specifically require a USB method.
The rule is simple: download firmware only from the original manufacturer’s official support site, and only after identifying the exact device.
For branded PCs, use the manufacturer’s identifier:
- Dell: Service Tag, Express Service Code, or exact model.
- HP: Serial number, product number, or exact product configuration.
- Lenovo: Machine type, serial number, and model.
- Acer: Serial Number, SNID, or part number.
- ASUS laptops and desktops: Exact model designation.
- Custom-built systems: Motherboard model and revision, printed on the board or confirmed in the vendor utility.
For custom desktops, do not download a retail motherboard BIOS for a system built by a large OEM unless the OEM explicitly provides it. Dell, HP, Lenovo, and other manufacturers may customize firmware, security keys, hardware maps, thermal behavior, or recovery tooling. The motherboard brand visible inside the chassis is not automatically the correct firmware source.
What to Check on the Download Page
Before executing a downloaded BIOS package, verify all of the following:
- Exact model and revision match the hardware.
- Current firmware version is older than the offered version.
- The release notes apply to the intended configuration.
- Any prerequisite or intermediate update is installed first.
- The package type matches the operating system or flash method.
- The file comes from the manufacturer’s official domain—not a mirror, driver archive, forum attachment, or “all BIOS downloads” site.
- A reliable AC adapter is connected for a laptop, with a charged battery as an additional safeguard.
If a page presents several similarly named files, stop and compare the model identifiers rather than selecting the newest-looking version. The safest update is not always the latest date shown in a broad product-family list; it is the newest compatible version for the exact hardware.
Protect BitLocker Before a Manual Firmware Update
Firmware changes can alter measurements used by the TPM and Windows boot-security protections. As a result, a Windows device encrypted with BitLocker may request its recovery key after a BIOS or UEFI update.
Microsoft’s support guidance says BitLocker protection should be suspended for non-Microsoft manufacturer firmware updates, TPM firmware updates, and other non-Microsoft updates that modify boot components. Microsoft explains that failing to suspend protection can cause a recovery-key prompt on the next restart.
Before a manual vendor BIOS update:
- Confirm the BitLocker recovery key is available from the organization, Microsoft account, printout, or approved password-management system.
- Open Control Panel > System and Security > BitLocker Drive Encryption.
- Select Suspend protection for the operating-system drive.
- Confirm the action.
- Perform the firmware update.
- After Windows starts normally and the update is confirmed, return to BitLocker and choose Resume protection.
Microsoft notes that protection remains suspended until it is manually resumed when using the relevant configuration. Its BitLocker guidance includes both Control Panel and PowerShell methods. That makes the final step essential: never leave BitLocker paused after the successful update.
Some vendor update utilities may handle this process automatically on particular models, but that is not a reason to assume every tool will. Confirm the vendor documentation for the individual package and make sure the recovery key is accessible before restarting.
USB Flashing: Use It When the Model Supports It
A USB flash method is valuable when Windows will not boot, when the PC maker recommends flashing outside Windows, or when maintaining a self-built motherboard. But it is not inherently safer simply because it bypasses Windows. Its safety comes from following the exact board or PC documentation.
Most firmware tools require a USB drive formatted as FAT32. The BIOS image may need extraction from a ZIP archive, copying to the root of the drive, or—on certain Flashback-style systems—renaming to a precise filename. These requirements vary by model.
Dell BIOS Flash Update
On compatible Dell systems, copy the official Dell BIOS executable to a FAT32 USB drive, restart, press F12 to reach the One-Time Boot Menu, then select BIOS Flash Update. Dell’s instructions confirm that USB flashing is useful when Windows cannot boot or when the normal executable cannot initiate the update, but only models that actually display the F12 BIOS Flash Update option support the workflow. Dell’s USB BIOS-flashing guide provides the compatibility caveat and the menu process.
ASUS EZ Flash 3
ASUS desktop boards with EZ Flash 3 can update directly from UEFI. ASUS instructs users to prepare a FAT16 or FAT32 USB drive, enter firmware setup, switch to Advanced Mode with F7, then open Tools > ASUS EZ Flash 3 Utilities and choose the BIOS image. ASUS’s EZ Flash 3 documentation also warns not to shut down or reset during the update.
The distinction between EZ Flash and USB BIOS FlashBack matters. EZ Flash runs from the firmware setup interface and requires a functioning system capable of reaching it. FlashBack is a separate feature present only on supported boards and may use a dedicated port and button. Never assume a board has FlashBack just because it has EZ Flash.
MSI M-FLASH
MSI’s current M-FLASH workflow starts with a FAT32-formatted USB drive and a BIOS file downloaded from the exact motherboard’s official support page. MSI instructs users to extract the archive, copy the relevant files to the USB drive’s root directory, press Delete during startup, choose M-FLASH, select the file, and confirm the update. MSI’s official BIOS-update instructions specifically warn not to turn off the computer, disconnect power, or remove the USB drive while flashing.
Gigabyte Q-Flash and Q-Flash Plus
Gigabyte’s Q-Flash is built into supported firmware and updates the BIOS without first loading Windows. Gigabyte documentation says to use an update file matching the motherboard model, save it to FAT12, FAT16, or FAT32 media, then use End during POST or F8 within BIOS setup to open Q-Flash. Gigabyte’s Q-Flash guide also advises loading optimized defaults after the update and confirms that the firmware file must match the board model.
Q-Flash Plus is different: it is a physical-button recovery-style feature available only on selected boards. Its file naming, port selection, and power requirements vary by model. Follow the motherboard manual rather than applying generic online instructions, particularly because the required filename can differ across board generations.
Flashback and Recovery Are Lifelines, Not Everyday Update Methods
Some systems include hardware-level update or recovery capabilities designed for failed flashes, unsupported CPUs, or non-booting machines. These features are powerful precisely because they operate outside the usual Windows environment.
Examples include:
- ASUS USB BIOS FlashBack
- MSI Flash BIOS Button
- Gigabyte Q-Flash Plus
- HP BIOS Recovery
- Dell F12 BIOS Flash Update
- Dell BIOS Flash Update – Remote on supported models
These mechanisms should be used only after checking the manual for the exact model. A “BIOS” USB port is not necessarily the same as an ordinary USB port. A filename requirement for one MSI or Gigabyte board may be wrong for another. A recovery routine may require a particular key combination, adapter connection, or USB format.
HP’s BIOS recovery process, for example, can use a recovery drive prepared on another working PC, but HP notes that the method is not supported on every device and that certain systems with HP Sure Start use different behavior. HP’s recovery documentation describes creating the recovery media and using the Windows + B startup sequence on supported notebooks.
The key lesson is that recovery methods should be prepared before they are needed whenever practical. Save the support-page URL, download the model-specific instructions, and keep a known-good USB drive available for a desktop system that depends on motherboard firmware updates.
What Not to Do During a BIOS or UEFI Update
The update process is usually short, but it can appear slower than expected while the firmware writes, verifies, reboots, trains memory, or reinitializes hardware. The correct response is patience.
Do not:
- Shut down the PC because the display remains black for several minutes.
- Press reset because the progress indicator appears unchanged.
- Disconnect the laptop AC adapter.
- Remove the USB flash drive during a USB-based update.
- Run the update while the system is overclocked or suffering from known stability faults.
- Use a BIOS from a third-party download site.
- Flash firmware for a “close enough” model.
- Force a downgrade unless the manufacturer explicitly supports it and provides a reason.
- Change several BIOS options immediately before an update, making troubleshooting harder afterward.
ASUS and MSI both explicitly warn against powering off, resetting, or removing flash media during their respective UEFI update procedures. ASUS’s EZ Flash guidance and MSI’s M-FLASH instructions are aligned on that basic rule.
After the Restart: Verify, Restore, and Observe
A successful restart is not the entire job. Confirm that the intended firmware version is installed and that essential settings still match the machine’s required configuration.
After Windows loads:
- Open
msinfo32and verify the BIOS Version/Date. - Enter UEFI setup if necessary and check the reported version there.
- Confirm that the system date and time are correct.
- Verify boot order, Secure Boot, TPM, virtualization, RAID/AHCI mode, and other configuration settings that matter to the system.
- Re-enable BitLocker protection if it was suspended.
- Reconnect peripherals and test startup, networking, storage, sleep, and any hardware related to the update’s release notes.
- Restore only known-good custom settings, such as XMP/EXPO memory profiles or virtualization, one change at a time.
A firmware update may reset settings to defaults. Gigabyte, for example, recommends loading optimized defaults after a Q-Flash update so the system can redetect peripherals cleanly. Gigabyte’s Q-Flash documentation reflects a broader best practice: do not assume customized settings survive a major firmware revision unchanged.
If the machine enters BitLocker recovery, use the saved recovery key rather than repeatedly changing BIOS settings in an attempt to bypass the prompt. If Windows will not boot after a completed update, consult the exact model’s official recovery documentation before trying a different firmware image.
The Sensible Firmware Strategy for Windows PCs
Safe BIOS updating is ultimately less about memorizing hotkeys than following a disciplined hierarchy of trust. Start with Windows Update when the manufacturer publishes firmware there. Use the official vendor utility when it identifies a matching update. Download manually only from the exact model’s support page, and use USB flashing, Flashback, or recovery only when that individual device documents the feature.
That hierarchy protects against the most common failures: installing the wrong image, flashing an update meant for a different system variant, interrupting a firmware write, overlooking BitLocker, or copying instructions from a motherboard that merely resembles the one on the desk. Firmware can fix problems that Windows cannot reach, but it deserves a maintenance process built around verification, stable power, and the manufacturer’s own instructions.
