
Microsoft’s current support documentation describes Studio Effects as AI features powered by a compatible neural processing unit, or NPU. Microsoft Learn adds an important technical detail for troubleshooting: the PC maker must also provide the Windows Studio Effects driver support for the device. If the Studio Effects tile or camera controls are missing, the issue is usually device capability or a driver—not a setting hidden inside a meeting app.
For a quick pre-call upgrade, turn on only the effects that solve a visible problem. Background blur is useful when the room is distracting; Voice Focus can help in a noisy space; Automatic Framing is best when you need to stand or move. Enabling everything by default can make a laptop work harder, consume more battery, and produce a video feed that looks less natural than the unprocessed camera.
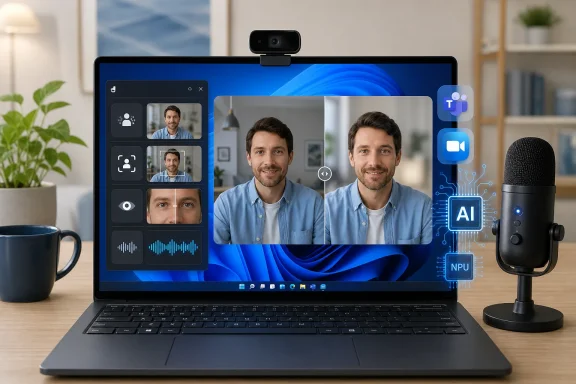 Confirm That the PC Supports Studio Effects
Open Quick Settings by selecting the network, volume, or battery area next to the clock on the taskbar. Look for a Studio Effects tile. If it is present, the PC has exposed at least some compatible Studio Effects controls in Windows.
If the tile is absent, select the edit control in Quick Settings and check whether Studio Effects is available to add. Microsoft notes that the action may simply not be pinned. If it is not available in the editing list either, open Settings > Bluetooth & devices > Cameras, select the camera you use for calls, and look for a Camera Effects or Windows Studio Effects section.
No Studio Effects controls in either location generally means the device lacks the required NPU support, does not have the required manufacturer driver, or is using a camera configuration Windows cannot expose to the feature. Microsoft’s documentation says Windows 11 version 22H2 or later is required, but installing a newer Windows release will not add the feature to hardware without a supported NPU.
Current Copilot+ PCs with NPUs rated above 40 TOPS receive the broadest collection of effects. Microsoft also says some devices with lower-performance compatible NPUs may offer the core set: background effects, standard Eye Contact, Automatic Framing, and Voice Focus. Features such as Portrait Light, creative filters, and the more aggressive Eye Contact Teleprompter mode have narrower hardware availability, with Microsoft specifically limiting several of them to Snapdragon-based Copilot+ PCs.
Turn On Effects from Quick Settings Before a Call
Quick Settings is the fastest place to adjust Studio Effects when a meeting is about to start.
- Select the network, speaker, or battery icon in the taskbar’s notification area.
- Select Studio Effects.
- Use the available switches and menus to enable the camera and microphone effects you need.
- Start a test call or use the Windows Camera app preview before joining an important meeting.
- Select Reset Effects if you need to return the camera and microphone to their default behavior.
The settings apply to the selected hardware, rather than belonging solely to one calling application. Microsoft Learn’s developer documentation explains that Studio Effects are applied at the camera or microphone level, so an app can receive the processed feed even when the app does not have its own Studio Effects integration. That is the practical advantage over relying on a different blur or noise-suppression setting in every meeting client.
It also creates a useful rule: start with the Windows effect, then avoid duplicating the same effect inside the meeting app. For example, enable Windows background blur first, then leave Zoom or Teams background blur off unless you specifically need that app’s virtual background or branding feature. Two separate processing layers can make edges around hair, glasses, hands, or a moving chair look less convincing.
Quick Settings is ideal for temporary adjustments. Turn on Background Blur for a client call from a home office, then turn it off afterward if you need the full camera view for a demonstration or want to reduce power use on battery.
Use Camera Settings for Per-Camera Defaults
For a more durable setup, open Settings > Bluetooth & devices > Cameras, then choose the camera you intend to use. On a laptop, that will usually be the front-facing integrated camera; on supported newer hardware, Windows may also expose compatible third-party cameras.
This page gives a live preview and ties the configuration to that camera. That matters for anyone who alternates between an internal laptop camera, a USB webcam, a docking-station camera, or a conference-room device. The best settings for a close laptop camera are rarely the best settings for a wide-angle webcam mounted above a monitor.
Microsoft Learn describes the Camera Settings configuration as per camera, per user, and per machine. In practical terms, a colleague signing into the same shared PC may need to configure their own preferences, while changing from the laptop’s camera to an external webcam can require separate adjustment. Do not assume that a good result on the built-in camera follows you automatically to every camera attached to the PC.
The Windows Camera app offers another route. Open Camera from Start, then select the Windows Studio Effects icon near the upper-right of the app when it is available. This is a useful preflight check because it lets you view the same camera feed that video-call software will request, without inviting anyone into a test meeting.
Choose the Effect That Matches the Problem
Background effects keep attention on the person rather than the room. Standard Blur applies a straightforward blur, while Portrait Blur aims for a stronger, portrait-style separation between subject and background. Use Standard Blur for routine calls; use Portrait Blur only after checking the preview, especially with patterned clothing, loose hair, pets, or objects frequently moving into frame.
Automatic Framing detects the person in the camera view and crops or zooms to keep them centered. It is valuable for presentations, standing desks, or anyone who shifts position while explaining work. It is less useful when two people need to share one camera, when you want a whiteboard or product in frame, or when the camera has little extra resolution available for cropping.
Eye Contact adjusts the appearance of gaze so a person looking at the screen appears closer to looking at the camera. Microsoft’s standard Eye Contact mode is deliberately limited: it corrects the common downward gaze from reading a screen below the lens, but does not correct side-to-side eye movement. Use it sparingly during one-to-one calls and presentations. Turn it off when demonstrating a document, reading notes, or discussing material on a second screen, because the uncorrected eye movement may better match what viewers see you doing.
On compatible Snapdragon Copilot+ PCs, the Teleprompter version of Eye Contact uses stronger correction intended for people reading across a screen. It is a specialized option, not a universal upgrade. Review the camera preview before a formal presentation and use the least aggressive setting that looks natural.
Voice Focus isolates the speaker’s voice and reduces background noise through the supported microphone. It can help with keyboard noise, fans, nearby conversation, and the general hum of a shared workspace. It cannot rescue a microphone positioned far from the speaker, nor does it make a loud room acoustically quiet; wearing a headset remains the more dependable answer for persistent noise and echo.
Test the Result in the App You Actually Use
Before relying on Studio Effects, verify the exact camera and microphone selected by the meeting application. A common failure is enabling an effect on the laptop camera while Teams, Zoom, or a browser tab is using an external webcam; the Windows controls can be working perfectly on the wrong device.
Run a short test with the same lighting, seating position, and microphone you will use for the real call. Check the edges of your face and hair against the blurred background, step back to see how Automatic Framing reacts, and speak while typing or playing a realistic background sound to judge Voice Focus. A preview that looks polished while sitting perfectly still can fail when normal meeting behavior begins.
Camera effects can affect performance and battery life, Microsoft warns, particularly Background Effects, Eye Contact, and Automatic Framing. On a laptop, reserve the heavier video effects for calls where they add real value, and disable them before recording, gaming, or working away from power if the machine is already under load.
The clearest setup is often the simplest: Voice Focus for a noisy room, Standard Blur for privacy, and no other processing unless the preview shows a specific problem. Studio Effects earns its place when it makes the call easier to follow—not when it advertises that the camera is being processed.