

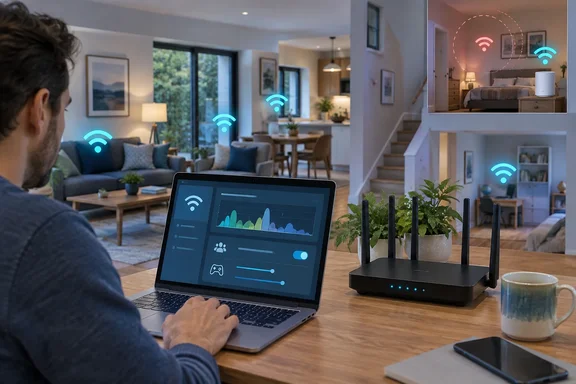
The argument makes sense, but it has limits. These settings can fix congestion, interference and traffic priority problems. They can't fix a room the signal doesn't reach. This guide covers each setting, what it actually does, how to test it from a Windows PC, and when mesh really is the answer.
Is this a coverage problem or a congestion problem?
Edmonds agrees that mesh has real strengths. A mesh system is a main router plus satellite nodes that pass the connection between each other. That makes it a good fit for large homes, several floors, thick walls and awkward layouts where the router can't sit in a central spot. He also says XDA's mesh reviews have found the systems easy to set up, with seamless coverage.
His objections are about cost and complexity:
- Cost up front. Even two-node kits are expensive, especially if the kit also replaces your router and you don't want slower Wi-Fi.
- Harder to troubleshoot. A household that isn't technical may struggle to work out why the Wi-Fi stopped working.
- Backhaul sharing. Depending on the hardware, some mesh systems share bandwidth on the wireless link between nodes, which can raise latency and cut speeds.
The key point is that mesh doesn't fix everything, especially when the cause is the amount of traffic in the air and how the router handles it. The rest of this guide assumes your signal is decent in most rooms but the network feels slow or unreliable when everyone is using it.
Summary: If the signal is weak in far rooms, you have a coverage problem, and repositioning, a wired access point or mesh is the fix. If the signal is strong but performance still drops, try the settings below first.
Step 1: Find your router's admin page from Windows
Every change here is made in the router's app or its web interface. Edmonds notes that the gateway address is often 192.168.1.1, but it varies by brand and ISP, so check it rather than guess.
- Open Command Prompt or Windows Terminal.
- Run
ipconfig. Microsoft's documentation says that without any parameters, the command shows IPv4 and IPv6 addresses, the subnet mask and the default gateway for every adapter. - Find your active Wi-Fi adapter and copy its default gateway address.
- Type that address into your browser, or use the router maker's official iOS or Android app.
Before changing anything, look up your exact router model and hardware version. Many ISP routers hide some or all of these controls, and a menu the reviewer found may not exist on your unit.
Step 2: Confirm MU-MIMO is on, and know what it can't do
MU-MIMO (multi-user, multiple-input multiple-output) lets an access point send separate data streams to several devices at the same time. Older single-user MIMO (SU-MIMO) served one device at a time. Edmonds suggests checking the router's spec sheet for MU-MIMO support and then looking in the wireless section of the admin panel. He says it should normally be on by default, though some brands ship with it off.
Some of his explanation needs correcting. Cisco Meraki's Wi-Fi 6 technical guide gives the details:
- Wi-Fi 5 (802.11ac) added downlink MU-MIMO, which lets the access point transmit to up to four clients at once.
- Wi-Fi 6 (802.11ax) extends MU-MIMO to up to eight clients and adds uplink MU-MIMO, so clients can also transmit to the access point at the same time.
- OFDMA is a separate Wi-Fi 6 feature. It is not what makes MU-MIMO work in both directions. Meraki explains that OFDMA gives different groups of frequencies (subcarriers) to different clients, while MU-MIMO reuses the same frequencies across different spatial streams.
The other catch is device support. Meraki notes that older devices can connect to a Wi-Fi 6 access point but only use the features of the newest standard they support. Turning MU-MIMO on doesn't upgrade an old laptop's Wi-Fi chip. How much you gain depends on how many of your devices support these features.
Summary: If your router has MU-MIMO, leave it on. Just expect a bigger improvement in a home full of newer devices than in one full of older ones.
Step 3: Check which channels your neighbours are using
Edmonds suggests using a Wi-Fi analyser app, or the router's own scan tool if it has one, to spot crowded channels. Windows can do a basic version of this without extra software.
Run netsh wlan show networks mode=bssid. HPE's support documentation says it will display all the BSSIDs which the wireless NIC is seeing, including signal, radio type and channel for each one. The output can be long, so HPE suggests saving it to a file: netsh wlan show networks mode=bssid > filename.txt.
To trim it down, a long-running tip from the Tips, Tricks and Tools blog uses netsh wlan show networks mode=bssid | findstr "SSID Signal Channel". To see which channel your own PC is connected on, netsh wlan show interfaces reports the SSID, signal strength, channel, and authentication method for the current connection.
How to read the results:
- 2.4 GHz: Cisco's RF reference guide notes that only channels 1, 6 and 11 don't overlap in the U.S. The same blog's advice still holds: if all three are busy, it's better to pick one from the recommended three which has the weakest and least signals rather than a channel in between.
- Limits of netsh: It only shows what your adapter can detect. The developers of the free lswifi scanner say their tool provides more information about nearby Wi-Fi networks than built-in tools, including RSSI and 6 GHz details on capable adapters. Neither tool is a full RF survey, and neither will detect a microwave oven or a baby monitor causing interference.
Step 4: Treat channel width as an experiment
Channel width decides how much spectrum each Wi-Fi channel uses. Wider channels carry more data, but they also overlap more with neighbouring networks, which leads to more retries and dropped connections. Edmonds suggests 20 MHz on 2.4 GHz and 80 MHz on 5 GHz when your scan shows crowding.
Cisco's guidance supports the 2.4 GHz advice. It warns against 40 MHz on that band because of co-channel interference, and with only three clean channels available, 20 MHz is the sensible default.
On 5 GHz, 80 MHz isn't automatically the best choice:
- If your router is set to 160 MHz, dropping to 80 MHz is a real reduction and may improve stability.
- If it already runs at 80 MHz, choosing 80 MHz changes nothing. Try 40 MHz instead.
- Cisco's best-practice guidance says 80 MHz works well when there's enough clean spectrum. In dense environments it recommends narrower widths, and its RF guide calls 40 MHz the "sweet spot" for high-density deployments. A detached house and a crowded apartment block may need different settings.
Sometimes the router's automatic mode does a good job, so keep your changes only if tests show they help.
Step 5: Use QoS for congestion, not for weak signal
Edmonds describes QoS as the least obscure of the three settings. It helps when gaming, video calls, streaming and large downloads all compete at once, because it lets latency-sensitive traffic go first.
QoS doesn't add bandwidth, though. TP-Link's support documentation describes its QoS as giving a prioritised device more bandwidth when the network is overloaded. It works by setting priorities for devices or applications. Some models also ask you to enter your total internet bandwidth, either from a speed test or manually if the result doesn't match your ISP plan. Menu names and options differ by brand and firmware, so follow your router's own instructions. QoS can decide who waits during a busy evening, but it won't fix a dead zone.
Change one setting at a time
To know which change helped, test methodically:
- Write down the current settings, or take screenshots, before you change anything.
- Change one thing, such as MU-MIMO, the width on one band, or a single QoS rule.
- Test the same rooms, with the same devices and the same activities, ideally when the network is normally busy.
- Keep the change if it helps, and undo it if it hurts. Some older devices can react badly to changes in router settings.
Edmonds gave no router model, speed figures, latency numbers or floor plan, so his results can't be reproduced as they stand. Treat his settings as sensible things to try, not guaranteed fixes.
Bottom line
The core idea is sound: many "my Wi-Fi is slow" complaints come from crowded channels and competing traffic, not from missing coverage. Checking ipconfig, running a netsh scan and spending half an hour in the router's settings costs nothing. If your signal is strong in most rooms, that may be all you need.
If a bedroom two floors up still shows one bar after all this, no setting will create a new access point there. That's the point where mesh, or better still a wired access point, earns its price.
References
- These obscure settings on my router fixed more than a mesh network ever could XDA · 2026-09-28T13:36:44+00:00
- Cisco Wireless Controller Command Reference, Release 8.10 - Config Commands: 802.11 (Cisco Wireless LAN Controller Software) - Cisco cisco.com
- Cisco Catalyst 9800 Series Configuration Best Practices - Cisco cisco.com