

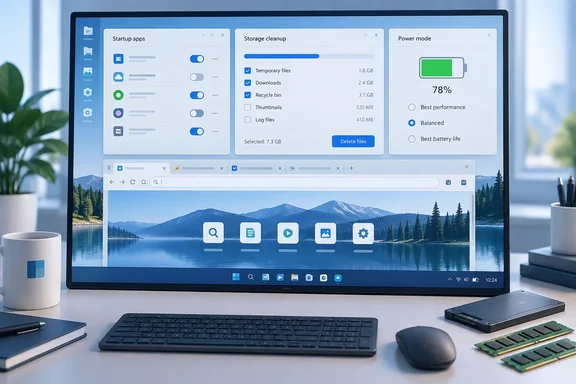
Below is the full routine, with the verified steps and the points that need a caveat.
Step 1: Trim your startup apps
New software often adds itself to the startup list. It then launches every time you sign in and sits in the system tray using resources. Microsoft's support documentation says startup apps can slow both boot time and overall performance. It covers Windows 10 and Windows 11.
There are two ways to manage them:
- Settings: go to Start > Settings > Apps > Startup and switch each app on or off.
- Task Manager: right-click Start, choose Task Manager, and open the Startup apps tab. Select an app, then choose Disable or Enable.
Task Manager is more useful for this job because it shows a Startup impact rating for each app. Shareef suggests clicking the Status column to sort enabled apps from disabled ones, then checking the impact column for heavy hitters. Microsoft publishes the thresholds behind those ratings:
| Rating | What it means |
|---|---|
| None | The startup app is disabled |
| Not Measured | The app is enabled, but no data is available yet |
| Low | Under 300 ms of CPU time and under 292 KB of disk use |
| Medium | 300 ms to 1 second of CPU, or 292 KB to 3 MB of disk |
| High | Over 1 second of CPU, or over 3 MB of disk |
Caveat: these ratings measure only the cost at sign-in. Disabling a "High" app may shave a moment off your boot, but it won't necessarily make the PC feel faster during the day. Keep anything you actually need at sign-in, such as VPN clients, sync tools, and security software. If an app doesn't appear in the list, Microsoft says it may start from the shell:startup folder instead. You can open that folder from the Run dialog and delete the shortcut there.
Section summary: disable what you don't need, and keep what your work depends on. The change is fully reversible.
Step 2: Clear out junk files, carefully
Microsoft confirms that a nearly full drive can slow the PC and cause problems installing Windows updates. Windows includes several cleanup tools:
- Storage settings: go to Settings > System > Storage to see what's using space.
- Cleanup recommendations: Windows 11 sorts candidates into Temporary files, Large or unused files, Files synced to the cloud, and Unused apps. It shows how much space each would free, and you pick what to remove.
- Disk Cleanup: search for "disk cleanup," pick the drive, and tick the file categories you want gone. Microsoft notes that Downloaded Program Files, Temporary Internet Files and Thumbnails are ticked by default. For update leftovers and other system files, select Clean up system files.
- Storage Sense: turn it on under Settings > System > Storage to automate cleanup.
Microsoft's documentation gives a few Storage Sense details worth knowing:
- It's off by default. If the drive runs low and you've never touched the setting, Windows may turn it on and notify you.
- With default settings it clears temporary files and older Recycle Bin items. It doesn't touch your Downloads folder or cloud files unless you tell it to.
- It works only on the system drive, usually C:. Other drives are managed from Advanced storage settings.
Two corrections
The "15% free space" rule. Shareef writes that Windows needs at least 15% free space on the system drive. Microsoft's documentation gives no such universal figure. It says low-disk thresholds vary with disk size and minimum operating requirements, and that you've reached low-disk status when the capacity bar in Storage settings turns red. Keeping reasonable headroom is sensible. Just don't treat 15% as an official Microsoft requirement.
Deleting "Previous Windows installation(s)." This is the one checkbox that can cost you something. Microsoft warns that removing it deletes the Windows.old folder, and you can't undo that: you lose the option to roll back to your previous Windows version. Windows deletes it automatically 10 days after an upgrade anyway. If you've upgraded recently and aren't yet sure the new version suits you, leave it alone.
For finding large files, Shareef recommends the third-party tool TreeSize. It's optional. Windows can do much of the same job itself: in File Explorer, switch to Details view, sort by Size, and check Videos, Pictures, Music and Downloads first, which Microsoft says usually hold the largest files.
Section summary: look at what's selected before you click Delete, and keep your rollback option until you're happy with an upgrade.
Step 3: Check your power mode
Windows 11 puts these controls in Settings > System > Power & battery. Shareef describes three power modes (Best power efficiency, Balanced and Best performance) and says laptops can hold back performance on battery to save power.
His steps: expand Power mode, set the plugged-in option to Best performance, and do the same for battery if you don't want throttling there either. Microsoft's documentation confirms the Power mode setting and its location. Its battery guidance also says power mode options depend on your PC's hardware and manufacturer, so your screen may not match the two-dropdown layout the guide describes. Use whatever your device actually shows.
There's also a trade-off to weigh. Microsoft describes Best power efficiency as cutting consumption by limiting background activity. The flip side is that Best performance uses more power, which usually means a warmer laptop and shorter battery life. That's a reasonable choice on a desktop or a docked laptop, but it isn't a free speed boost.
Energy saver is the second setting. Microsoft says it manages system processes and power use to balance performance against battery life. You can choose the battery level at which it turns on, under the Energy saver section next to "Turn energy saver on when battery level is at." Shareef says it starts at 30% by default and suggests lowering it to 20% or 10%. I couldn't confirm the 30% default in Microsoft's documentation, so check what your PC is set to. Lowering the threshold keeps full performance running longer, but it uses up your remaining battery faster.
Section summary: Best performance suits plugged-in work. On battery, the defaults exist for a reason.
Step 4: Get your browser tabs under control
Shareef admits to hoarding tabs, and his fixes are sensible:
- Save sessions with an extension (he uses Session Buddy).
- Set yourself a tab limit. He aims to stay under 10, which is his own rule, not a browser requirement.
- Review and close tabs at the end of each session.
- Put links you want to revisit in Sticky Notes instead of leaving the tabs open.
Chrome users have a built-in option too. According to Google's Chrome help pages, Settings > Performance > Memory Saver puts tabs you aren't using to sleep and reloads them when you click back. It offers Moderate, Balanced (recommended) and Maximum levels, and you can list sites that should always stay active. Some activity keeps a tab awake regardless, including audio or video playback and calls, active downloads, half-filled forms and pinned tabs.
Edge users need an update. Shareef notes that Edge Collections no longer lets you add all your open tabs to a collection. The situation has since gone further. TechRepublic reports that Microsoft removed Collections in Edge Stable 149, released June 4, 2026, ending access to the browser's built-in save-and-organize tool. Before that, adding new items stopped in Edge 145.
If you had saved Collections, recovery now depends on whether users moved pages to Favorites, exported data before the update, or used a personal Microsoft account tied to Bing Saves. One limitation: according to Microsoft Q&A, the Move to Favorites option moved only saved web pages (URLs). Images, notes, and other non-page items were not moved.
To save all your open tabs in Edge today, press Ctrl+Shift+D. Microsoft documents this shortcut as saving every open tab to a new Favorites folder. It doesn't replace Collections, but it covers the "I'll read these later" habit.
Section summary: fewer open tabs means less memory in use, and built-in tab sleeping reduces the discipline you need.
Step 5: Consider the hardware
Settings can only do so much. Shareef argues that storage and memory are often the real cause of lag. If Windows still runs from a spinning hard drive, moving to a SATA or NVMe SSD is the classic fix for constant high disk usage. That's widely accepted industry knowledge rather than something Microsoft documentation specifically backs up.
On memory, he calls 16GB the modern standard and suggests adding an 8GB module as an affordable upgrade. Plenty of new machines ship with 16GB, but it's not a formal standard. Microsoft's official minimum for Windows 11 is 4GB, and it notes that some features need more. That's the floor for installing Windows, not a performance recommendation. Whether more RAM helps depends on your workload. Before buying anything, check two things:
- Upgradeability: many thin laptops have soldered memory. Shareef rightly says to check with the manufacturer before opening the case.
- Memory configuration: a mismatched extra module can behave differently from a matched pair. Check your manufacturer's specifications.
The quickest diagnostic is Task Manager's Performance tab. If memory stays near full during your normal work, more RAM will probably help. If it doesn't, you'll likely need to look elsewhere.
The clean-install question
Shareef closes with an old piece of advice: skip the in-place upgrade whenever a major Windows version arrives and do a clean install instead. Microsoft doesn't recommend this as a routine practice, and the costs are real. Microsoft describes a clean install as an advanced option that removes your personal files, apps, customizations and settings, and it tells you to back up first. It also offers gentler options, including reinstalling your current version of Windows while keeping your files, apps and settings.
A clean install makes sense for a PC with deep, unexplained problems, or one you're giving to someone else. As a habit every time a new version ships, it means reinstalling and reconfiguring everything each time for little benefit.
The bottom line
As a maintenance checklist, this holds up. Start with the low-risk, reversible steps: trim startup apps, review cleanup categories before deleting, and get your tabs under control. Adjust power settings knowing you're trading battery life for speed. Leave hardware upgrades and reinstalls until you've identified the actual bottleneck.
Will ten minutes make your PC feel like it did the day you bought it? Probably not. It's still a worthwhile ten minutes, as long as you check what's selected before you delete anything.
References
- Your PC’s a mess, so here’s the 10-minute Windows cleanup anyone can do MakeUseOf · 2026-09-28T13:30:15+00:00
- Personalize Chrome performance - Google Chrome Help support.google.com
- Microsoft Edge Collections Removed in Version 149, Limiting Recovery Options - TechRepublic techrepublic.com