

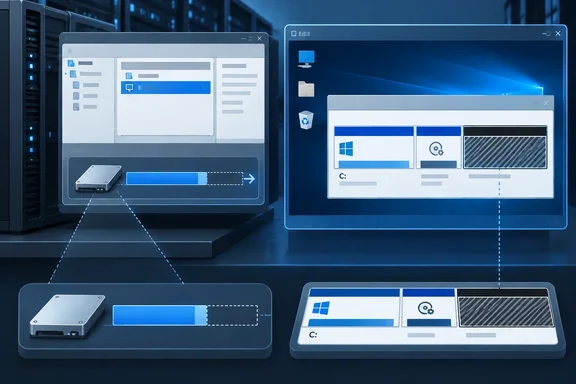
Usually nothing is broken. Extending a Hyper-V volume takes two separate operations at two different layers, and most failures happen because one layer wasn't done, the guest OS can't see the change yet, or something in the partition layout is in the way. Below are the six common fixes, checked against Microsoft's documentation, with notes on where the usual advice claims too much.
The core idea: host first, then guest
Treat the job as two resizes:
- Host level: increase the maximum size of the VM's VHD or VHDX file.
- Guest level: get Windows inside the VM to see the new capacity, then extend the partition into it.
Microsoft's older Hyper-V documentation spells this out. Expanding a virtual hard disk increases the disk capacity of the virtual hard disk. However, to make the additional disk space available to the virtual machine requires some extra configuration. Inside the VM, the virtual hard disk expansion is reflected under Disk Manager as an unallocated disk volume.
Microsoft's current Resize-VHD reference says the same thing another way: the cmdlet changes the maximum size of the virtual disk file and does nothing to the partitions inside it. Neither layer knows what the other is doing. The host grows the disk, and the guest has to claim the new space.
Section summary: If the VHDX is bigger but C: isn't, the host step is done and the guest step is not.
Fix 1: Expand the virtual hard disk in Hyper-V Manager
If Disk Management inside the VM shows no unallocated space, the virtual disk probably hasn't been grown yet. On the Hyper-V host:
- Open Hyper-V Manager.
- Right-click the affected VM and select Settings.
- Under SCSI Controller or IDE Controller, select the virtual hard disk.
- Click Edit.
- Choose Expand, then click Next.
- Enter the new size.
- Click Next, then Finish.
- Restart the VM if you shut it down.
You can also start from the Actions pane. Microsoft's Windows Server 2012 R2 guide describes how you click Edit Disk to start the Edit Virtual Hard Disk Wizard, then browse to the file. In that guide, the size is specified in gigabytes with a maximum size of 64TB for any virtual hard disk.
Whether the VM can stay running depends on the controller. Microsoft's Resize-VHD documentation says a disk on a VM's IDE chain can't be resized while the VM is online, while a disk on the SCSI chain can. Generation 1 VMs usually boot from IDE, so for those, shut down first. If you don't know which controller the disk uses, powering off is the safe choice.
Fix 2: Rescan the disk inside the VM and extend the volume
Windows doesn't always notice right away that its disk has grown. Inside the VM:
- Press Windows + R, type
diskmgmt.mscand press Enter. - Click Action > Rescan Disks.
- Find the disk you expanded and check that a black Unallocated bar appears immediately after the target partition.
- Right-click the partition and select Extend Volume.
- Work through the wizard and click Finish.
Microsoft's "Extend a basic or dynamic volume" guide, which covers Windows 10, Windows 11 and Windows Server 2016 through 2025, adds a prerequisite people often miss: Disk Management must run with administrator rights. A non-elevated console is one of the listed reasons the Extend Volume option isn't available.
If a rescan still shows no new space, go back to the host. Check that you expanded the right file and that the VM is actually attached to that file. Picking the wrong VHDX from a folder of similar names is an easy mistake.
Fix 3: Make sure nothing sits between the volume and the free space
This is the most common reason Extend Volume stays grayed out. Microsoft's rule is strict: unallocated space must be on the same disk and immediately after the volume you want to extend. If any other volume is in between, the extension is blocked.
On Windows VMs, the partition in the way is often the Recovery partition. As StarWind describes it, in some cases, another partition – such as the Recovery Partition – is located between the C: drive and the unallocated space. When this happens, the built-in Disk Management tool cannot extend the volume, and the Extend Volume option will be greyed out.
To check your layout:
- Open Disk Management and find the target volume.
- Look at what is directly to its right.
- If a Recovery or other partition sits between the volume and the unallocated space, stop and back up before changing anything.
Microsoft lists three ways forward, and the order matters:
- Delete the partition in between, but only after backing up or moving any files on it.
- Move it with a non-Microsoft partitioning tool that can relocate volumes without destroying data. StarWind's walkthrough does this, moving the Recovery partition to the end of the disk so that the C: drive and unallocated space are now adjacent.
- Don't extend at all. Create a new, separate volume in the unallocated space instead.
A warning from general admin experience: don't treat deleting a Recovery partition as routine. The same applies to EFI and system partitions unless you know exactly how the VM boots and recovers. A VM that won't boot will cost you more time than a small C: drive. Third-party partition tools also aren't Microsoft-supported, so the risk depends on the product.
Fix 4: Check checkpoints, but diagnose before you delete
Checkpoints can block disk editing, but not in every case. Microsoft's Hyper-V troubleshooting guidance describes a specific pattern:
- The disk expansion option in Hyper-V Manager is grayed out.
- You see the error "Edit is not available because checkpoints exist for this virtual machine."
- Leftover
.avhd/.avhdxfiles remain after a merge.
Microsoft lists three causes: checkpoints that didn't merge correctly, corrupted .avhdx files, or trying to edit the disk while the VM is running or in a saved state. The fix is to power off the VM and merge all pending checkpoints. Microsoft notes that you may need to power the VM off and back on to force a merge.
Hyper-V's own long-standing guidance explains why. Microsoft's Virtual PC Guy blog warned years ago that you shouldn't do this to a virtual hard disk that is associated with a virtual machine that has snapshots (as you will invalidate the snapshots). NAKIVO puts it more broadly: in Hyper-V, you cannot expand disks belonging to a differencing disk chain. Such virtual hard disks have child virtual hard disks associated with them, and any attempt to edit them might result in data loss.
Here's the safe procedure:
- In Hyper-V Manager, select the VM and look at the Checkpoints pane.
- Right-click checkpoints you don't need and choose Delete, or use Delete Checkpoint Subtree to remove a checkpoint and everything after it.
- Wait for the merge to finish.
- Shut down the VM and try the expansion again.
In PowerShell, Remove-VMCheckpoint -VMName <name> -Name <checkpoint> does the same thing. Never delete .avhdx files in File Explorer. Microsoft's checkpoint documentation explains that deleting a checkpoint makes Hyper-V merge the .avhdx data into the .vhdx, and it explicitly says not to delete .avhdx files directly. Deleting them by hand breaks the disk chain.
Fix 5: Check for MBR vs. GPT on disks over 2 TB
This only matters when the virtual disk is intended to grow past 2 TB. Microsoft's volume-extension guide says that to use more than 2 terabytes, the disk must be initialized with the GPT partitioning scheme.
To check:
- In Disk Management inside the VM, right-click the disk label (for example, Disk 0).
- Select Properties and open the Volumes tab.
- Read Partition style: Master Boot Record (MBR) or GUID Partition Table (GPT).
An MBR disk under 2 TB extends normally. For data disks that need to be larger, back up before converting or recreating the disk. For system disks, use a supported conversion method, not manual partition deletion. Also note that Generation 1 VMs boot using BIOS-style firmware, so changing the boot disk layout there needs extra care.
Fix 6: Do the whole job in PowerShell
For admins who prefer scripts, both layers can be handled in PowerShell. On the host, in an elevated session:
Resize-VHD -Path "D:\VMs\Server01\Virtual Hard Disks\Disk01.vhdx" -SizeBytes 200GB
Replace the example path with your real file. According to Microsoft's reference, Resize-VHD can expand both VHD and VHDX files but can shrink only VHDX. It also doesn't reclaim empty blocks in dynamically expanding disks; that's what Optimize-VHD is for. The IDE/SCSI online rule from Fix 1 applies here too.
Inside the guest, also elevated:
$size = Get-PartitionSupportedSize -DriveLetter C
Resize-Partition -DriveLetter C -Size $size.SizeMax
This is the same pattern Microsoft documents. Change the drive letter as needed. One detail from Microsoft's Get-PartitionSupportedSize notes: the cmdlet starts the Optimize Drives (defragsvc) service, which can make it slower on large, fragmented drives. If the command seems to hang, give it time before assuming something failed.
PowerShell won't get you around a blocked layout. If a Recovery partition sits between C: and the free space, SizeMax stays at the current size.
Quick diagnostic table
| Symptom | Most likely cause | Go to |
|---|---|---|
| No unallocated space in guest | VHDX not expanded, or wrong file expanded | Fix 1 |
| Host shows larger disk, guest doesn't | Guest hasn't rescanned | Fix 2 |
| Unallocated space visible, Extend grayed out | Partition in between, or console not elevated | Fixes 2–3 |
| Hyper-V "Edit" unavailable | Unmerged checkpoints, or VM running/saved | Fix 4 |
| Can't use space beyond 2 TB | MBR partition style | Fix 5 |
| Volume won't extend at all | File system isn't NTFS or ReFS | Reformat (backup first) |
The bottom line
On the last row: Microsoft states that only NTFS and ReFS volumes can be extended with Windows' built-in tools. A FAT32 or exFAT volume has to be backed up and reformatted first.
Guides that promise "6 fixes" can make every cause sound equally likely. In practice they aren't. Most failed extensions come down to a skipped guest-side step or a Recovery partition in the way. Checkpoints and MBR limits matter in narrower cases. Checkpoints are worth checking when Hyper-V specifically disables editing, and MBR only matters once the disk goes past 2 TB.
So work through it in this order: host capacity, guest rescan, partition adjacency, then the special cases. Before you touch a virtual disk or partition table, back up the VM or export it.
References
- Unable to Extend Volume in Hyper-V? 6 Fixes That Work Windows Report · 2026-09-28T13:27:12+00:00
- How to Increase Disk Size in Hyper-V: Complete Guide nakivo.com
- Extend a basic or dynamic volume in Windows and Windows Server | Microsoft Learn learn.microsoft.com