

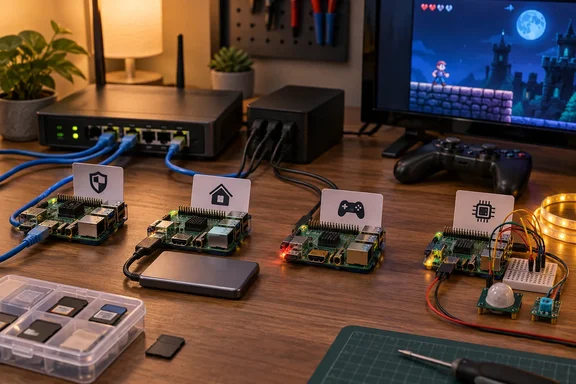
For Windows users and home IT admins, the best reuse projects are the ones that move a single always-on job away from a power-hungry PC: local DNS filtering, a smart-home controller, a living-room emulator, or an electronics controller. The least forgiving option is a general media server, where the difference between direct play and video transcoding can turn a cheap experiment into an unreliable one.
The practical rule is simple: treat the Pi as a dedicated service, give it reliable power and network access, and avoid turning a microSD card into a high-write server disk if an inexpensive USB SSD is available. That approach gets more mileage out of Pi 3 and Pi 4 boards than trying to use them as miniature Windows PCs.
Pi-hole is the lowest-risk project for almost any board
Pi-hole remains the most broadly suitable job for an old Raspberry Pi because DNS filtering needs very little CPU power. Pi-hole’s own documentation lists only 512MB of RAM and 2GB of free storage as minimums, which puts even older, low-memory boards in play. A Pi Zero, Pi 3, or Pi 4 can all handle the basic task of answering local DNS requests, applying blocklists, and forwarding allowed queries to an upstream resolver.
But “install it and point the router at it” leaves out the operational part that determines whether the project is useful. The Pi needs a fixed address on the LAN, either configured directly or reserved in the router’s DHCP table. If its address changes, every client that relies on it for DNS can lose name resolution until the router is corrected.
Pi-hole is also a DNS filter, not a universal ad blocker. It can stop requests to known advertising and tracking domains before they reach a client, which makes it effective across TVs, phones, game consoles, and Windows PCs. It cannot reliably remove an ad served from the same domain as the video, app, or page content; many streaming services and social platforms are designed in ways that limit DNS-level blocking.
The project becomes more technically interesting when the Pi is used to examine what devices are querying, identify noisy smart-home hardware, and enforce per-device blocking groups. Administrators should be cautious about exposing its web console or DNS service beyond the local network. Pi-hole’s documentation specifically recommends a local-only listening mode in its own remote-access guidance, and that is the sensible default.
For users who want to reduce reliance on public DNS providers, Pi-hole can also work with a local recursive resolver such as Unbound. That is not a one-click privacy upgrade: Pi-hole’s documentation warns that some ISPs and consumer routers intercept conventional DNS traffic, which can prevent a local resolver from reaching root servers as intended. Start with ordinary filtered DNS; add recursion only after confirming the network path behaves as expected.
Home Assistant deserves a Pi 4 or newer — and 64-bit software
Home Assistant is a compelling use for an unused Pi because it can replace a collection of vendor apps with one local automation service. How-To Geek correctly recommends a Pi 4 or Pi 5 with at least 2GB of RAM. Home Assistant’s current Raspberry Pi installation guide makes the same recommendation, specifies a 32GB or larger A2-rated microSD card, and favors wired Ethernet for setup and long-term reliability.
The more important limitation for old boards is software architecture. Home Assistant has ended support for 32-bit system architectures in its supported path: systems left on 32-bit ARM no longer receive component update information, including security updates. A Raspberry Pi 3 or Pi 4 may still be usable if it can run a 64-bit operating system, but a much older board should not become the foundation of a household automation system without verifying its supported image first.
That changes the shopping advice. Do not buy a pile of Zigbee, Thread, or Matter accessories until the Pi is running a supported Home Assistant installation and is reachable from a Windows PC at its local address. The central Pi is only the controller; many radio protocols require a compatible USB coordinator or another bridge. “Local” also does not mean every connected device is cloud-free. Home Assistant can automate locally capable devices without sending those automations to a vendor cloud, but cloud-dependent products retain their own vendor dependencies.
Storage is the other overlooked concern. Home Assistant continuously maintains history, databases, backups, logs, integrations, and add-ons. An SD card is fine for testing, but a USB-attached SSD is the better destination for a serious, long-lived installation. Home Assistant’s documentation supports moving its data disk to external storage, which is a worthwhile upgrade before adding cameras, energy monitoring, or a large number of sensors.
For someone with an aging Pi 3, a minimalist Home Assistant deployment may still be a good weekend project. For a household that expects it to control lights, locks, climate, and alerts every day, the Pi 4-plus-SSD combination is the realistic floor.
Media streaming is where the “old Pi” advice needs the biggest warning
A Raspberry Pi makes a capable music server and a good local media player. It is much less dependable as a multi-client video server when playback devices need the server to convert video on the fly.
The distinction is direct play versus transcoding. With direct play, a client such as a smart TV, phone, Windows PC, or streaming box supports the video and audio already stored on the server; the Pi largely reads the file and sends it over the network. With transcoding, Jellyfin or Plex must decode the original media and re-encode it into a format, resolution, bitrate, subtitle arrangement, or audio codec the client accepts. That work is computationally expensive.
Jellyfin’s current hardware-acceleration documentation is especially important here. The project says it has deprecated Raspberry Pi V4L2 hardware-transcoding support, notes that the support was incomplete, and says the Raspberry Pi 5 lacks hardware encoders. In other words, moving to the newest Pi does not solve the hardest part of running a video server. An old Pi is a sound choice for Navidrome music streaming, Kodi with LibreELEC directly connected to a television, or a Jellyfin library intended for clients that will direct-play compatible files. It is a poor first choice for converting 4K content, burning in subtitles, or supporting an unpredictable mix of remote clients.
This is a meaningful correction to the usual “install Jellyfin on a Pi” advice. Build the library around formats your clients already play, connect storage over USB, and test each client before assuming a Pi can replace a Windows desktop or Intel-based mini PC as a transcoding server. If the server dashboard repeatedly shows transcoding, the limitation is not a configuration mystery; it is the job exceeding the hardware’s role.
Retro gaming works best when expectations match the generation
RetroPie, Batocera, Lakka, and similar front ends remain among the most satisfying uses for a Pi that would otherwise collect dust. The appeal is not raw power; it is the ability to create a single-purpose, controller-friendly machine for older systems, connected by HDMI and booting straight into a game library.
How-To Geek’s performance outline is a reasonable starting point: a Pi 3 is appropriate for many arcade, 8-bit, 16-bit, and PlayStation-era systems, while a Pi 4 expands the range of experiments. The warning is that Nintendo 64, Dreamcast, PSP, and later systems are inconsistent rather than guaranteed. Performance varies by emulator, game, image settings, and controller configuration. A board that runs one title perfectly may struggle with another title from the same console.
Windows users should also treat the front end as an appliance, not as a file-management substitute. Prepare the SD card with the platform’s supported imaging process, verify controller input, then transfer only game dumps they are entitled to use. A USB gamepad that works automatically in Windows is often the most valuable accessory in the project; an attractive case and a huge ROM collection do not fix input lag, poor power, or an unstable SD card.
GPIO projects are the hobby with the deepest long-term payoff
The Raspberry Pi’s GPIO header is where it stops being merely a tiny Linux computer and becomes a practical electronics platform. LEDs, buttons, temperature sensors, relays, motors, displays, cameras, and environmental monitors all provide projects with a visible outcome and a reason to learn Python, shell scripting, or basic circuits.
Most of the 40-pin header conventions have stayed familiar across Pi generations, but Raspberry Pi itself warns against treating every older tutorial as interchangeable. The Pi 5 routes user-facing GPIO through its RP1 I/O controller, and older libraries that used deprecated Linux interfaces or direct register access may not work correctly. Raspberry Pi has adjusted its software stack to improve compatibility, yet an old tutorial that hard-codes GPIO chip assumptions can still fail.
The electrical warnings matter more than the code. GPIO is 3.3V logic. Raspberry Pi’s documentation cautions against using 5V with 3.3V components and against driving motors directly from GPIO pins. Use current-limiting resistors for LEDs, a transistor or driver board for relays and motors, and a separate properly rated supply where a project needs real power. Those few precautions prevent the common beginner outcome: a one-evening project that ends with a damaged board.
An old Raspberry Pi does not need to become a full desktop to earn its space. Give it one job it can perform predictably, keep its software supported, and build around the limits of its generation. The board that has sat in a drawer for years may be most valuable when it is doing something quietly useful every day.
References
- 5 tech hobbies you can jumpstart with an old Raspberry Pi How-To Geek · 2026-09-20T10:00:13+00:00