

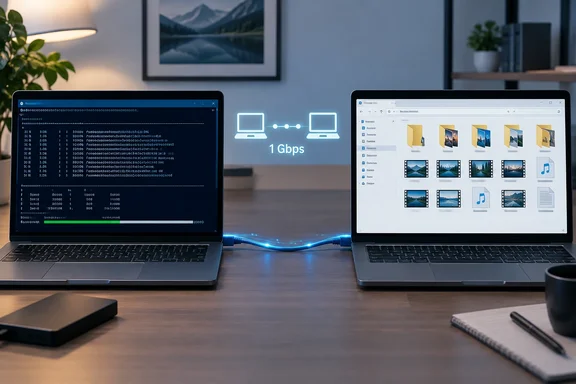
This isn't new technology. Windows has been able to do this for a very long time. It's still worth walking through carefully, because each step has a few ways to go wrong, and learning that 400GB into a 1TB job is no fun.
What the setup involved
Singh's setup was simple. Both laptops had full-size Ethernet ports, and he plugged a regular cable straight between them with no router or switch. The two ports formed a tiny two-computer network, and Windows file sharing worked over it the same way it would on a home LAN.
He reports that the copy ran at about 100MB/s and that the full 1TB took close to three hours. That's his own result from his own hardware, not a benchmark. It does fit the math: gigabit Ethernet tops out at 125MB/s in theory, and file sharing and network overhead take a cut.
What you need:
- Two Windows 10 or Windows 11 PCs, each with an Ethernet port (built-in or a USB adapter)
- One Ethernet cable
- An administrator account on both machines
- The username and password of an account on the source PC
- Enough free space on the destination drive
A note on cables: Singh used a regular cable, not a special crossover cable. Most modern gigabit adapters detect a direct connection and adjust on their own. Very old 10/100 hardware may not.
Summary: One cable and two ports create a working network. No router is needed.
Step 1: Check the link speed before you copy anything
The connection only runs as fast as the slower of the two ports. If one laptop has gigabit Ethernet and the other only supports 100Mbps, the link runs at 100Mbps. That's roughly a tenth of the gigabit rate, which turns a job measured in hours into one measured in days.
To check, open Task Manager, go to the Performance tab and select Ethernet. In PowerShell, Get-NetAdapter shows the same thing in its LinkSpeed column. If Windows reports 100Mbps even though both laptops have gigabit ports, suspect the cable or one of the adapters. Try a different cable first, since that's the cheapest fix.
Step 2: Give each PC a static IP address
With no router, nothing hands out addresses automatically. Singh set them by hand:
- Press Win + R, type
ncpa.cpland press Enter. - Right-click the Ethernet adapter and choose Properties.
- Select Internet Protocol Version 4 (TCP/IPv4) and click Properties.
- On the source PC (the one with the files), enter 192.168.50.1 as the IP address.
- On the receiving PC, enter 192.168.50.2.
- Use the subnet mask 255.255.255.0 on both.
Leave the gateway and DNS fields blank, because this network doesn't reach the internet. Two tips:
- Pick a range your Wi-Fi isn't using. If your home router already uses 192.168.50.x, the two networks can clash. Choose a different third number.
- Remove the settings when you're done. If you later plug the laptop into a normal network with the static address still set, it won't get an address from the router. Switch the adapter back to automatic (DHCP).
Windows 11 users can also do this in Settings > Network & internet > Ethernet > IP assignment > Edit. Microsoft's support documentation describes that route and recommends DHCP when a network provides it.
Step 3: Set the connection to Private and turn on sharing
Windows treats a newly connected network as Public by default, and on a Public network the PC is hidden from other devices. Singh switched the Ethernet connection to Private and turned on network discovery and file and printer sharing.
- Windows 11: Settings > Network & internet > Ethernet, then set the Network profile type to Private. Then search Settings for "Manage advanced sharing settings" and, under Private networks, turn on Network discovery and File and printer sharing.
- Windows 10: The same options are under Settings > Network & internet > Sharing options.
Microsoft's own troubleshooting guide also suggests turning off password-protected sharing. You don't need to for this job, and I'd advise against it. Singh signed in with the source PC's username and password, and keeping that requirement costs you nothing.
Step 4: Share the folder
On the source PC, right-click the folder, choose Properties, go to Sharing > Advanced Sharing and tick Share this folder. Singh named his share Transfer.
Windows 11 also offers another route: right-click the folder, choose Show more options > Give access to > Specific people. Both work, and menu labels differ a little between versions.
On the receiving PC, type the share's path into File Explorer's address bar, for example \\192.168.50.1\Transfer. Use your own share name. Windows asks for the source PC's credentials, and after that the share opens like any other folder. If you sign in to the source PC with a Microsoft account, enter that account's email address and password, not your Windows Hello PIN.
Summary: If the share opens in File Explorer, the network and permissions are working. Everything after this is just copying.
Step 5: Use Robocopy instead of dragging and dropping
This is the step that matters most. Singh chose not to trust a regular File Explorer copy window with nearly 1TB. If a regular drag-and-drop copy fails partway through, it can be hard to tell what finished and what didn't. On the receiving PC he opened PowerShell and ran:
robocopy "\\192.168.50.1\Transfer" "D:\Transferred Files" /E /Z /J /MT:16 /R:2 /W:2 /LOG:"C:\transfer-log.txt"
What each option does:
| Option | What it does |
|---|---|
"\\192.168.50.1\Transfer" | Source: the shared folder on the other PC |
"D:\Transferred Files" | Destination: a folder on the receiving PC (change as needed) |
/E | Copies all subfolders, including empty ones |
/Z | Restartable mode: an interrupted file resumes instead of starting over |
/J | Unbuffered I/O, which helps with large files |
/MT:16 | Copies up to 16 files at a time (the default is 8, maximum 128) |
/R:2 /W:2 | Two retries per failed file, two seconds apart |
/LOG: | Writes a log file (overwrites any existing log) |
That example of copying to a file share with multithreading and restartable mode while enabling multi-threading for higher performance (with the /mt parameter) and the ability to restart the transfer in case it's interrupted (with the /z parameter) is essentially what Microsoft demonstrates in its own Robocopy reference. Microsoft's DFS Replication guidance adds that for mostly large files, you might be able to increase copy performance by adding the /j option for unbuffered I/O. A media library of video files is a good fit for that.
The retry settings matter more than they look. By default, Robocopy retries a failed file a million times with 30 seconds between attempts. One locked file could stall the whole job for a very long time. Setting /R:2 /W:2 means problem files get noted in the log and the copy keeps going.
Some caveats about the command
/Zis slower. The SS64 command reference says restartable mode can significantly reduce copy performance due to the extra logging. On a stable cable between two laptops on the same desk, you could try leaving it off and simply rerun Robocopy if something breaks. By default it skips files that already exist and match, so a second run picks up only what's missing.- 16 threads is a starting point. SS64 notes that more threads help until the network and file system latency become the limiting factor, /MT:16 is a good place to start testing.
- Check the result. Microsoft's documentation says any value equal to or greater than 8 indicates that there was at least one failure during the copy operation. After the job finishes, run
$LASTEXITCODEin the same PowerShell window and read the summary at the end of the log. Microsoft also notes that Robocopy does not copy exclusively locked files, so close your media server software on the source PC first. - Permissions aren't copied. By default Robocopy copies file data, attributes and timestamps, but not NTFS permissions or ownership. That's fine for movies and music. If permissions matter, look at
/COPYALL, which needs admin rights. - Don't swap
/Efor/MIRwithout thinking./MIRdeletes files in the destination that aren't in the source. Test anything destructive with/L(list only) first.
Common problems and fixes
- "Windows cannot access \192.168.50.1": Make sure the connection is set to Private on both PCs and that each PC has an address in the same range. Run
ping 192.168.50.1from the receiver to test the basic connection. - Link shows 100Mbps: Swap the cable, then check both adapters' speed and duplex settings in Device Manager.
- Your credentials are rejected: Use an account that exists on the source PC. Include the PC name if needed (for example
SOURCEPC\username), and use the account password, not the PIN. - Copy speed drops well below the link speed: The drives are probably the bottleneck. Singh points out that SSDs keep up with gigabit Ethernet easily, but a hard drive, or thousands of small files, will slow things down.
Is it worth doing?
Singh doesn't oversell it. Direct Ethernet isn't the fastest way to move 1TB. A fast external SSD will usually beat it, and he wouldn't bother for small transfers. It makes the most sense in one situation: you have hundreds of gigabytes to move, both PCs already have Ethernet ports, and you don't want to buy anything or send your files through someone else's servers.
On a gigabit link at about 100MB/s, 1TB works out to around three hours. You can leave it running overnight. And because Robocopy writes a log, you can check afterward exactly what copied and what didn't.
References
- I moved 1TB between two PCs without Dropbox, a NAS, or a USB drive XDA · 2026-09-26T10:00:16+00:00
- Robocopy | Microsoft Learn learn.microsoft.com
- File sharing over a network in Windows | Microsoft Support support.microsoft.com