

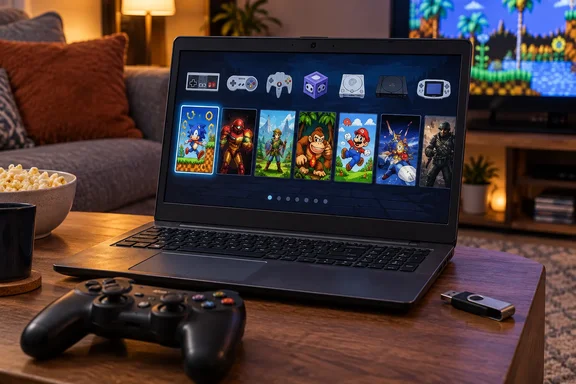
That is easy to describe. Doing it well depends on details the headline skips, including a real chance of wiping the wrong drive. Below is what the setup involves, what Batocera's own documentation adds, and where "never touch a keyboard" stops being true.
What Batocera actually is
Batocera is a complete operating system, not a Windows app. It ships with the emulators already bundled and uses a customized version of EmulationStation as its front end. EmulationStation sorts your games by system and launches the right emulator when you pick one, so SNES, PlayStation and Game Boy Advance games can all sit in one library without a separate program for each console.
Singh also points out that Batocera supports themes, and its scraper can fetch cover art, descriptions and video previews. On a machine meant to feel like a console, the look of the menu matters.
What Batocera does not give you is a commercial game collection. The documentation says it ships with a small selection of freely distributable ROMs, mainly so you can test the setup. Everything else is up to you. As usual, only dump and use games and BIOS files you have the right to use.
Section summary: Batocera takes the place of the Windows-plus-emulators-plus-launcher stack with one controller-first system. You still have to supply the games.
Step by step: getting Batocera onto a PC
Batocera's installation guide says to download an image flashing tool for your operating system such as Raspberry Pi Imager or USBImager, and then download an image file from the download section on the Batocera website that matches the architecture you want to use for Batocera (x86_64 for most PCs, other devices usually have their own specific image). Singh's AMD laptop used the standard x86_64 build.
The full process:
- Pick your target drive. The guide lets you use a USB stick, SD card, hard drive or SSD. You can connect an internal drive over a SATA/M.2-to-USB cable. The documentation lists 16GB as the minimum and recommends 32GB, because automatic updates won't download with only 16GB.
- Flash the image. One browser warning from the guide: some browsers like Chrome/Opera/Safari may take the liberty to unzip the file by themselves and poorly rename them. If the file is more than 4 GB, it is already unzipped.
- Don't panic about the partition sizes. After flashing, the drive shows a small BATOCERA boot partition. The guide explains that the drive also contains a SHARE partition which will be expanded the first time the drive is booted, to consume any unallocated space, and which is not normally visible to Windows.
- Boot from it. If on a recent PC using an x86/x86_64 build, you may need to disable Secure Boot in your BIOS settings. You may also need to enter the boot selection menu with [F10], [F11] or [F12] and select the Batocera drive. UEFI is preferred if available, but not necessary.
- Let the first boot finish. Batocera expands the userdata partition and reboots. Don't turn off the device during this step or you might risk data corruption!
If you get a Secure Boot error: according to the guide, if instead another blue screen appears saying verification failed this means you are in secure boot mode and have not enrolled Batocera's keys yet. Press Enter and follow the on-screen prompts to do so.
Getting into firmware from Windows 11: hold Shift while you click Restart, then go to Troubleshoot → Advanced Options → UEFI Firmware Settings. Batocera's wiki gives the same route. It also warns that laptops usually restrict boot options more than desktop motherboards do. Some office-oriented machines block USB booting entirely. And if you switch off TPM, Windows 11 will probably refuse to boot until you turn it back on.
Section summary: Flashing is the easy part. Firmware settings are where people get stuck: Secure Boot, boot order and USB boot permissions.
The big decision: keep Windows or wipe it?
Singh replaced Windows because he wanted the laptop to be a dedicated gaming machine. He also notes that this is optional, since Batocera runs perfectly well from a USB drive or external SSD. For many WindowsForum readers, that is the key point.
If you do go the internal-drive route, it runs through Main Menu → System Settings → Install Batocera on a New Disk. Batocera's documentation is very direct about the risk: installing this way means all existing data, including your working operating system, gets overwritten. The wiki adds that some motherboards can't boot Batocera from an internal drive even when USB boot works, and it recommends keeping a second computer handy for recovery. An older revision of the guide gives this blunt instruction: Check that you've selected the right drive. This is very easy to mess up and its actions are irreversible.
Before you commit:
- Back up everything on the laptop. Once Windows is overwritten, you'd need a fresh install and a recovery path to get it back.
- Try it from USB first. If games run well and your controller behaves, you've lost nothing by testing.
- Put the library on its own drive. Batocera's external-storage page describes Main Menu → System Settings → Storage Device, which moves ROMs, BIOS files and saves to another drive. Batocera builds the folder structure it needs after a reboot.
Is the wipe worth it? If the laptop has no other job, probably yes: it boots faster, there's one less OS to patch, and there are no Windows Update nags in the middle of a game. If it's also your emergency backup PC, a USB boot drive gives you the console experience without losing anything.
Section summary: Replacing Windows is a choice, not a requirement. Test from external storage before you overwrite anything.
Loading games and BIOS files
Batocera wants your games in per-system folders. Some emulators also need BIOS files; the documentation names certain PlayStation and Neo Geo games as examples. BIOS files belong in the bios/ folder on the SHARE partition. Because they are copyrighted, Batocera doesn't include them and says you'll need to supply your own.
Batocera offers several ways to get files onto the machine:
- Network share: on by default. From Windows File Explorer, go to
\\BATOCERA\share. If your router doesn't handle hostnames well, use the machine's IP address, which you'll find under Main Menu → Network Settings. - Built-in file manager: on x86/x86_64 builds, press F1 from the system list.
- Direct copy from Windows: this is awkward, because Windows can't read Batocera's Linux-formatted partition by default. The wiki itself warns that there are user reports of flaky transfers to Linux-formatted partitions.
To check your BIOS files, open System Settings → Missing BIOS. It shows the expected path and checksum for each file. You don't need to act on every "missing" entry: the wiki notes that many emulators run without some of them, and you only need BIOS files for systems you actually play. After copying games, go to Start → Game Settings → Update Gamelists. Batocera hides systems with no games, so you can begin with a small collection and the menu stays uncluttered.
Section summary: The network share is the easiest route for Windows users. The Missing BIOS checker tells you exactly which file goes where.
Controller-first play, and the hotkey trap
This is where the console feel comes from. Batocera maps many known controllers automatically from its database and opens a configuration screen for unknown ones. Bluetooth pairing is in the settings. In the menus, the default follows the Western/Xbox layout: South confirms and East cancels. You can swap A/B in the developer settings if you grew up with Nintendo.
Everything runs through the hotkey, which is usually Select or a dedicated Guide/Home button. Hold it and press a second button:
| Hotkey + … | What it does (per Batocera's docs) |
|---|---|
| Start | Exit emulator and return to the library |
| Face buttons | Open emulator menu, save state, load state |
| D-pad up/down | Pick save slot |
| D-pad left/right | Rewind (if enabled) / fast-forward |
| L3 | Next disc in multi-disc games |
The wiki warns that these shortcuts don't work in every emulator. They're most reliable with Libretro cores, and some emulators handle the same combination differently. If you use RetroAchievements in Hardcore mode, save and load states are blocked.
The trap: if you assign the hotkey to anything other than Select or a dedicated Home button, that button's command fires immediately. Batocera's own example is setting Start as the hotkey, which makes the emulator quit every time you try to pause. For Xbox controllers, the Guide button is the obvious pick.
When you're finished, press Start for the Main Menu and power off from the Quit menu. You never need to touch the keyboard for that.
Section summary: Hotkey + Start is the most important shortcut. Map the hotkey to Select or Guide/Home, never Start.
Performance: be honest with your hardware
Singh reports that his Ryzen 5 laptop handles plenty of older games well: Super Mario World, Sonic the Hedgehog 2, Tetris, original PlayStation titles like Tekken 3 and Crash Bandicoot, and Mario Kart: Super Circuit on the Game Boy Advance. He also points out that PS2 and GameCube emulation depends much more on CPU and GPU, and results vary from game to game. A system appearing in Batocera's supported list doesn't mean your laptop can run it well.
He didn't give an exact CPU model, GPU or benchmarks, so treat his results as one person's experience, not a spec sheet. His approach is sensible anyway:
- Test the specific games you care about at native resolution first.
- Raise internal rendering resolution only if frame pacing stays smooth. Sharper polygons aren't worth stutter.
- Use save states where they're supported. Batocera can show them in the front end, so you can pick your resume point before a game launches.
Where "no keyboard" ends
The headline is about how the machine feels to use, not how it gets set up. Flashing the image, changing firmware settings, choosing a boot device, copying files and troubleshooting can all still call for a keyboard or a second PC. Some of Batocera's own tools, like the F1 file manager, are keyboard shortcuts. Once it's configured, though, launching games, switching between them, managing saves and powering off all happen from the couch.
Couldn't you do most of this on Windows with a front end like EmulationStation or Playnite? Singh admits he could have. His argument is that Batocera gives you a dedicated gaming machine without any of the PC housekeeping. For a laptop that would otherwise sit in a drawer, that's a good deal. Just back up your data first and check the target drive before you press Install.
References
- I wanted my emulation PC to feel like a console, so I removed every reason to touch a keyboard XDA · 2026-09-30T19:00:20+00:00
- emulationstation_overview (Batocera.linux - Wiki) wiki.batocera.org
- install_batocera (Batocera.linux - Wiki) wiki.batocera.org