

A microphone that suddenly stops working in Windows 11 can derail a meeting, recording session, gaming chat, or voice-typing workflow, but the failure is usually traceable to one of several layers: the hardware connection, Windows’ selected input, privacy permissions, application settings, browser permissions, or the audio driver. The fastest fix is to troubleshoot those layers in order, starting with the physical microphone and Windows’ built-in recording test before changing drivers or installing software.
Windows 11 does not treat a microphone as a single, system-wide switch. Audio passes through a chain that can include the microphone hardware, a USB or Bluetooth controller, an audio driver, Windows privacy controls, the system input selection, and the application that ultimately records the sound.
That layered design improves privacy and gives users flexibility, but it also creates confusing situations. A microphone may work in Windows Settings yet remain silent in Microsoft Teams, or work in a desktop application while a browser-based meeting reports that access is blocked.
Common failure patterns include:
For an analog headset, confirm that it is plugged into the correct jack. Some computers provide a combined four-pole headset socket, while others separate headphone output and microphone input into different ports. A headset designed for a combined socket may require a splitter when connected to a desktop PC with separate jacks.
Check every possible physical mute control:
If the device works when connected directly, the microphone itself is probably healthy. The problem may instead involve USB power delivery, dock firmware, bandwidth allocation, or the accessory’s audio interface.
For Bluetooth devices, charge the headset and make sure it is not simultaneously connected to a phone, tablet, game console, or another computer. Multipoint headsets can sometimes route their microphone to one device while playing Windows audio from another.
Do not rely only on a familiar device name. Audio drivers sometimes expose vague entries such as “Microphone,” “Headset,” “Microphone Array,” or “USB Audio Device.” Speak near each available microphone and watch the input activity meter to identify the correct one.
If the microphone does not appear:
This test creates a useful dividing line. If Windows records the sample clearly, the microphone, connection, and core driver path are working. The remaining problem is likely inside the affected application, browser, account, or meeting.
If the test records silence, continue working at the Windows and hardware layers. Application-specific changes will not help until Windows itself receives an input signal.
Position matters as much as volume. A headset microphone should sit slightly beside the mouth rather than directly in front of it, while a desktop condenser microphone should face the correct direction and remain within its intended pickup range.
If an analog microphone remains extremely quiet, its legacy properties may expose a microphone boost control. Increase boost gradually because each step can amplify electrical noise along with speech.
Make sure the following settings are enabled as needed:
If the indicator appears while the microphone is supposedly idle, check which application is listening. A background meeting client, voice assistant, game launcher, browser tab, or recording utility may have retained the device.
The indicator does not necessarily mean that the application is storing or transmitting audio. It means the program has opened the microphone path, which is still valuable evidence when diagnosing device conflicts.
Record the exact message and contact the organization’s support team. Administrators may need to review microphone privacy policy, browser policy, application permissions, virtual desktop redirection, or security software rules.
Applications sometimes remember a previously connected device. For example, a meeting client may continue targeting a dock microphone after the laptop has been undocked, or a game may retain an old USB headset that no longer exists.
Use this application-level sequence:
A full application exit is different from closing its window. Microsoft Teams, Zoom, Discord, game launchers, audio utilities, and browser processes may continue running in the background until exited from their notification-area icon or terminated through Task Manager.
If the microphone begins working after other programs close, reopen them one at a time. That identifies the conflicting software without forcing broad system changes.
The test-call feature can record a short message and play it back, making it more informative than simply watching an input meter. Availability can depend on the Teams edition, language, account, platform, and organizational policy, and it is not generally available in Teams for the web.
During a meeting:
During a meeting, use the arrow beside Mute or Unmute to switch inputs. A working Windows microphone can still appear silent if Zoom joined with a different device or if the participant joined without computer audio.
Meeting controls also matter. A host can mute participants and may prevent them from unmuting themselves. Depending on the meeting configuration and prior consent, the participant may need to accept an ask-to-unmute prompt or wait for the host to permit self-unmuting.
If Zoom’s meter moves but other participants report poor audio, investigate processing rather than detection. Automatic volume, background-noise suppression, echo cancellation, and original-sound modes can materially change what listeners receive.
Set microphone access to Allow, reload the page, and rejoin the call. Many browser applications do not recognize a permission change until the page refreshes.
Also inspect the web application’s own microphone menu. A site may have permission to record while still targeting an inactive webcam microphone or a disconnected headset.
In Google Chrome, open Settings > Privacy and security > Site settings > Microphone. Make sure sites can request access, choose the desired default microphone, and remove the affected site from the blocked list if necessary.
Because Edge and Chrome use related browser technology, their permission models are similar, but menu wording and icon placement can change between releases. The essential checks remain the same: the site must not be blocked, the right device must be selected, and the page must be reloaded after a change.
Firefox can also expose site permissions through the address bar or the Page Info dialog. If a previous denial was remembered, clearing it and responding to a fresh prompt is often more reliable than trying to repair the running call.
Private browsing, hardened privacy configurations, browser extensions, and enterprise policies can also affect microphone requests. Test the site in a normal browser window with unnecessary extensions disabled before assuming that Windows is responsible.
An alternative route is Start > Settings > System > Troubleshoot > Other troubleshooters, followed by the available audio troubleshooter. Windows may hand the diagnostic process to the Get Help experience, depending on the installed build and servicing state.
Follow the prompts and select the actual microphone when asked. If several similarly named devices appear, choosing the wrong one can produce a misleading “no problem found” result.
If the device is disabled, right-click it and select Enable. Open its properties and verify that device usage is set to enable the device.
Enable the display of disabled and disconnected devices if the microphone is missing from the visible list. This legacy control panel remains useful because it can reveal recording endpoints that the modern Sound page does not immediately emphasize.
Save work and perform a full restart rather than shutting the lid or relying on sleep. Fast Startup can also make a shutdown behave differently from a restart, so Restart is the preferred test when troubleshooting device initialization.
If the device remains broken, uninstalling it can force a clean re-enumeration:
If the microphone stopped working immediately after a driver update, open the device’s Properties > Driver page and use Roll Back Driver when available. A rollback is often preferable to installing an unrelated generic driver from an unofficial website.
For laptops, tablets, docks, and all-in-one PCs, the manufacturer’s support channel may provide a coordinated driver set that Windows Update does not. Surface owners should use Microsoft’s supported Surface update mechanisms, while Dell, HP, Lenovo, ASUS, Acer, and other PC owners should identify the precise model or service tag before downloading packages.
Avoid third-party driver-updater utilities. They can install mismatched codec, chipset, or Bluetooth packages and make recovery more difficult.
Windows 11 and current Bluetooth hardware continue to evolve, but applications can still select an unexpected endpoint or switch behavior when a call begins. If music sounds excellent until the microphone activates, a profile transition may be occurring rather than a hardware failure.
To reset a problematic headset:
If the microphone repeatedly disconnects, test it on another PC. A failure across multiple computers points toward the cable, connector, or microphone electronics rather than Windows.
High-end USB audio interfaces may require a manufacturer driver, control panel, clock configuration, or sample-rate setting. In those cases, confirm that Windows and the recording application use a compatible format.
Use the Windows test recording as a neutral baseline. If the Windows sample is clean but a meeting application sounds poor, inspect the application’s automatic gain, noise suppression, echo cancellation, and voice-isolation features.
Disable optional processing temporarily and test one feature at a time. This is especially important for musicians, podcasters, teachers demonstrating instruments, and users who need to transmit sounds that speech-oriented filters may classify as noise.
Echo usually indicates that speaker output is reaching the microphone. Use headphones, reduce speaker volume, move the microphone away from the speakers, or enable the meeting application’s echo-cancellation mode.
Open the installed security suite and look for microphone protection, privacy protection, application permissions, or blocked-device events. Allow only the trusted application that requires access rather than disabling the entire security product.
If the computer belongs to an employer or school, do not remove security software or bypass policy. Provide IT support with the application name, microphone model, Windows test result, and exact error message.
Virtual desktop platforms may use their own optimization agents, redirection policies, and supported-device lists. Teams or Zoom inside a remote session can behave differently from the same application running locally, particularly when media optimization is enabled.
A useful test is to open a local recording application outside the remote session. If local recording works but the remote environment cannot see the microphone, focus on redirection, policy, and virtual desktop configuration rather than reinstalling the local audio driver.
That evidence turns “the mic does not work” into a precise technical report. Saying that a USB microphone appears in Device Manager but produces silence in the Windows test is far more actionable than reporting that Teams cannot hear anything.
A failed Windows 11 microphone rarely requires random registry edits, third-party repair utilities, or a complete operating-system reset. By treating the audio path as a sequence of hardware, Windows, privacy, application, and network-session layers, most users can identify the broken link quickly, restore clean recording, and avoid disruptive changes that create new problems.
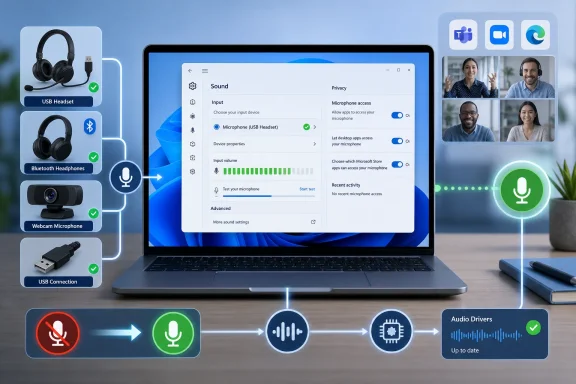 Overview
Windows 11 does not treat a microphone as a single, system-wide switch. Audio passes through a chain that can include the microphone hardware, a USB or Bluetooth controller, an audio driver, Windows privacy controls, the system input selection, and the application that ultimately records the sound.That layered design improves privacy and gives users flexibility, but it also creates confusing situations. A microphone may work in Windows Settings yet remain silent in Microsoft Teams, or work in a desktop application while a browser-based meeting reports that access is blocked.
Why microphone failures are often misleading
The symptom does not always identify the cause. “No microphone detected” points toward a hardware or driver problem, while “we can’t hear you” might mean the wrong input was selected, the application was muted, or its permission was denied.Common failure patterns include:
- The microphone is listed but silent because it is muted, its input volume is too low, or a physical headset switch is engaged.
- Windows records successfully, but one application cannot hear anything because that application selected a different microphone.
- A desktop application works, but a website does not because the browser or the individual site lacks permission.
- The microphone disappeared after an update because an audio, chipset, USB, or Bluetooth driver did not initialize correctly.
- A Bluetooth headset plays sound but does not record because Windows or the application is using another input profile.
- The microphone works locally but not over Remote Desktop because remote audio recording was not redirected into the session.
Start With the Physical Microphone
Software changes cannot repair a disconnected plug, depleted battery, closed headset boom, or active hardware mute switch. A quick physical inspection prevents unnecessary driver reinstalls and setting changes.Check cables, ports, and mute controls
Reconnect the microphone firmly. USB microphones should be inserted directly into a known-working USB port during troubleshooting rather than through an unpowered hub, monitor, keyboard, dock, or adapter.For an analog headset, confirm that it is plugged into the correct jack. Some computers provide a combined four-pole headset socket, while others separate headphone output and microphone input into different ports. A headset designed for a combined socket may require a splitter when connected to a desktop PC with separate jacks.
Check every possible physical mute control:
- Inspect the headset cable for an inline mute button or slider.
- Lower a flip-to-mute boom into its speaking position.
- Check the microphone body for a capacitive or mechanical mute button.
- Look for a keyboard microphone-mute key and its indicator light.
- Open or reposition a webcam privacy shutter if the shutter mechanism also disables the integrated microphone.
- Disconnect and reconnect detachable headset cables at both ends.
Eliminate questionable accessories
Temporarily remove docks, USB audio adapters, extension cables, capture devices, and KVM switches. Connect the microphone directly to the PC and test again.If the device works when connected directly, the microphone itself is probably healthy. The problem may instead involve USB power delivery, dock firmware, bandwidth allocation, or the accessory’s audio interface.
For Bluetooth devices, charge the headset and make sure it is not simultaneously connected to a phone, tablet, game console, or another computer. Multipoint headsets can sometimes route their microphone to one device while playing Windows audio from another.
Select and Test the Correct Windows 11 Input
Windows 11 can retain multiple recording devices, including an internal microphone array, webcam microphone, USB microphone, Bluetooth headset, monitor input, virtual audio cable, and controller headset. Selecting the wrong one is among the most common causes of apparently dead audio.Choose the input device
Open Start > Settings > System > Sound. Under Input, expand or open Choose a device for speaking or recording, then select the microphone you intend to use.Do not rely only on a familiar device name. Audio drivers sometimes expose vague entries such as “Microphone,” “Headset,” “Microphone Array,” or “USB Audio Device.” Speak near each available microphone and watch the input activity meter to identify the correct one.
If the microphone does not appear:
- Disconnect and reconnect the device.
- Try another physical port.
- Turn Bluetooth off and on if the device is wireless.
- Select Add device for a Bluetooth microphone that has not been paired.
- Restart Windows before moving to driver repairs.
Record a Windows test sample
On the microphone properties page, locate Input settings and start the microphone test. Speak in a normal voice for several seconds, stop the test, and play the recorded sample.This test creates a useful dividing line. If Windows records the sample clearly, the microphone, connection, and core driver path are working. The remaining problem is likely inside the affected application, browser, account, or meeting.
If the test records silence, continue working at the Windows and hardware layers. Application-specific changes will not help until Windows itself receives an input signal.
Adjust input volume carefully
Raise the Input volume slider if the sample is too quiet. Avoid immediately setting it to the maximum because excessive gain can introduce clipping, hiss, keyboard noise, and room echo.Position matters as much as volume. A headset microphone should sit slightly beside the mouth rather than directly in front of it, while a desktop condenser microphone should face the correct direction and remain within its intended pickup range.
If an analog microphone remains extremely quiet, its legacy properties may expose a microphone boost control. Increase boost gradually because each step can amplify electrical noise along with speech.
Restore Windows Microphone Permissions
Windows 11 privacy controls can block recording even when the microphone is connected, selected, and working at the driver level. These controls are especially important after an operating-system upgrade, account change, security-policy update, or application reinstall.Enable device and application access
Open Start > Settings > Privacy & security > Microphone. Review the controls from top to bottom rather than changing only one toggle.Make sure the following settings are enabled as needed:
- Microphone access allows microphone use on the device.
- Let apps access your microphone permits supported applications to request access.
- Individual Microsoft Store application controls allow or deny access for listed apps.
- Let desktop apps access your microphone permits traditional Win32 applications, browsers, meeting clients, games, and recording software to use the input.
Understand the privacy indicator
Windows can display a microphone indicator when an application is actively using the device. This is useful both for troubleshooting and privacy.If the indicator appears while the microphone is supposedly idle, check which application is listening. A background meeting client, voice assistant, game launcher, browser tab, or recording utility may have retained the device.
The indicator does not necessarily mean that the application is storing or transmitting audio. It means the program has opened the microphone path, which is still valuable evidence when diagnosing device conflicts.
Check managed devices
On a work or school computer, some privacy options may say they are managed by the organization. In that situation, repeatedly changing local settings or reinstalling drivers may accomplish nothing because Group Policy, mobile-device management, application control, or endpoint security can enforce the restriction.Record the exact message and contact the organization’s support team. Administrators may need to review microphone privacy policy, browser policy, application permissions, virtual desktop redirection, or security software rules.
Fix the Application That Cannot Hear You
A successful Windows test does not guarantee that every program uses the same microphone. Most communication and recording applications maintain their own input selection, volume processing, and mute state.Verify the application’s audio device
Open the affected application’s audio, voice, call, recording, or device settings. Select the same microphone that passed the Windows test.Applications sometimes remember a previously connected device. For example, a meeting client may continue targeting a dock microphone after the laptop has been undocked, or a game may retain an old USB headset that no longer exists.
Use this application-level sequence:
- Select the desired microphone manually instead of leaving the setting on an ambiguous default.
- Confirm that the application’s mute control is off.
- Run its built-in microphone test or level meter.
- Close and reopen the application if the input list appears stale.
- Disconnect unused microphones so that only the intended device remains available.
- Restart the PC if the application continues displaying devices that are no longer connected.
Close applications that may hold the microphone
Modern Windows audio usually allows more than one application to access a microphone, but recording software, specialist audio tools, virtual mixers, and legacy communications programs can still create conflicts. Close unnecessary programs, including those minimized to the notification area.A full application exit is different from closing its window. Microsoft Teams, Zoom, Discord, game launchers, audio utilities, and browser processes may continue running in the background until exited from their notification-area icon or terminated through Task Manager.
If the microphone begins working after other programs close, reopen them one at a time. That identifies the conflicting software without forcing broad system changes.
Troubleshoot Microsoft Teams and Zoom
Meeting applications add another layer of controls because they can select hardware independently, suppress noise, adjust microphone sensitivity, or join without computer audio. A microphone problem that appears moments before a call is often an application-routing issue rather than a broken device.Microsoft Teams
In the Teams desktop application, open Settings and more > Settings > Devices. Under the audio settings, choose the intended microphone and run a test call when that option is available.The test-call feature can record a short message and play it back, making it more informative than simply watching an input meter. Availability can depend on the Teams edition, language, account, platform, and organizational policy, and it is not generally available in Teams for the web.
During a meeting:
- Confirm that the microphone button is not crossed out.
- Select the arrow beside the microphone control.
- Open the additional audio settings.
- Choose the correct microphone.
- Check whether the meeting joined with computer audio, phone audio, room audio, or no audio.
- Use Ctrl + Shift + M to toggle the Teams mute state when keyboard shortcuts are preferable.
Zoom
In the Zoom desktop application, open the profile menu, select Settings, and choose Audio. Select the correct device under Microphone, then run the microphone test and review the input level.During a meeting, use the arrow beside Mute or Unmute to switch inputs. A working Windows microphone can still appear silent if Zoom joined with a different device or if the participant joined without computer audio.
Meeting controls also matter. A host can mute participants and may prevent them from unmuting themselves. Depending on the meeting configuration and prior consent, the participant may need to accept an ask-to-unmute prompt or wait for the host to permit self-unmuting.
If Zoom’s meter moves but other participants report poor audio, investigate processing rather than detection. Automatic volume, background-noise suppression, echo cancellation, and original-sound modes can materially change what listeners receive.
Repair Browser Microphone Access
A browser-based meeting must pass two permission gates: Windows must allow the browser to use the microphone, and the browser must allow the individual website to use it. Either layer can block recording.Check the site permission first
Open the affected website and inspect the icon beside the address bar. Depending on the browser and current state, this may appear as a lock, controls icon, microphone symbol, or permissions indicator.Set microphone access to Allow, reload the page, and rejoin the call. Many browser applications do not recognize a permission change until the page refreshes.
Also inspect the web application’s own microphone menu. A site may have permission to record while still targeting an inactive webcam microphone or a disconnected headset.
Microsoft Edge and Google Chrome
In Microsoft Edge, open the browser’s settings and find Cookies and site permissions > Microphone. Confirm that sites are allowed to ask for microphone access, select the appropriate default input, and review blocked sites.In Google Chrome, open Settings > Privacy and security > Site settings > Microphone. Make sure sites can request access, choose the desired default microphone, and remove the affected site from the blocked list if necessary.
Because Edge and Chrome use related browser technology, their permission models are similar, but menu wording and icon placement can change between releases. The essential checks remain the same: the site must not be blocked, the right device must be selected, and the page must be reloaded after a change.
Mozilla Firefox
In Firefox, open Settings > Privacy & Security, scroll to Permissions, and select the settings control beside Microphone. Change the saved rule for the website to Allow, or remove the saved decision so Firefox asks again.Firefox can also expose site permissions through the address bar or the Page Info dialog. If a previous denial was remembered, clearing it and responding to a fresh prompt is often more reliable than trying to repair the running call.
Private browsing, hardened privacy configurations, browser extensions, and enterprise policies can also affect microphone requests. Test the site in a normal browser window with unnecessary extensions disabled before assuming that Windows is responsible.
Run Windows Audio Diagnostics
Windows 11 includes automated diagnostics that can inspect device state, service configuration, and common audio settings. The troubleshooter is most useful after basic selection and permission checks have failed.Launch the input troubleshooter
Open Start > Settings > System > Sound, scroll to Advanced, and find Troubleshoot common sound problems. Choose the option for Input devices.An alternative route is Start > Settings > System > Troubleshoot > Other troubleshooters, followed by the available audio troubleshooter. Windows may hand the diagnostic process to the Get Help experience, depending on the installed build and servicing state.
Follow the prompts and select the actual microphone when asked. If several similarly named devices appear, choosing the wrong one can produce a misleading “no problem found” result.
Re-enable a disabled recording device
Open Start > Settings > System > Sound, scroll to Advanced, and select More sound settings. On the Recording tab, locate the microphone.If the device is disabled, right-click it and select Enable. Open its properties and verify that device usage is set to enable the device.
Enable the display of disabled and disconnected devices if the microphone is missing from the visible list. This legacy control panel remains useful because it can reveal recording endpoints that the modern Sound page does not immediately emphasize.
Restart the audio path
A restart is not merely a generic suggestion. It clears hung audio sessions, reloads drivers, restarts relevant services, rebuilds portions of the device graph, and forces applications to enumerate available microphones again.Save work and perform a full restart rather than shutting the lid or relying on sleep. Fast Startup can also make a shutdown behave differently from a restart, so Restart is the preferred test when troubleshooting device initialization.
Repair Drivers Without Making the Problem Worse
Driver repair belongs after the faster checks because reinstalling a healthy driver can introduce new variables. It becomes appropriate when the microphone is missing, Device Manager reports an error, or the failure began directly after an update.Inspect Device Manager
Right-click Start and open Device Manager. Check several categories because microphone-related components are not always grouped under one heading:- Audio inputs and outputs can contain individual microphone endpoints.
- Sound, video and game controllers contains audio codecs, USB audio interfaces, and related controllers.
- Bluetooth contains the wireless adapter and headset-related components.
- Universal Serial Bus controllers may matter for USB microphones and docks.
- System devices can contain platform audio controllers on some PCs.
Update, reinstall, or roll back
Start with Update driver > Search automatically for drivers. Windows may already have an appropriate package available locally or through its update mechanisms.If the device remains broken, uninstalling it can force a clean re-enumeration:
- Right-click the affected audio device.
- Select Uninstall device.
- Choose the option to attempt driver removal only when a clean reinstall is genuinely required.
- Restart Windows.
- Return to Device Manager and scan for hardware changes if the device does not return automatically.
If the microphone stopped working immediately after a driver update, open the device’s Properties > Driver page and use Roll Back Driver when available. A rollback is often preferable to installing an unrelated generic driver from an unofficial website.
Use trusted update channels
Check Settings > Windows Update > Advanced options > Optional updates for relevant driver updates. Audio, Bluetooth, chipset, USB, BIOS, and firmware packages can all influence microphone reliability.For laptops, tablets, docks, and all-in-one PCs, the manufacturer’s support channel may provide a coordinated driver set that Windows Update does not. Surface owners should use Microsoft’s supported Surface update mechanisms, while Dell, HP, Lenovo, ASUS, Acer, and other PC owners should identify the precise model or service tag before downloading packages.
Avoid third-party driver-updater utilities. They can install mismatched codec, chipset, or Bluetooth packages and make recovery more difficult.
Solve Bluetooth and USB Microphone Problems
Wireless and USB microphones rely on additional controllers and profiles, so their failure modes differ from those of an integrated laptop microphone.Bluetooth audio profiles and routing
A Bluetooth headset can expose more than one audio mode. High-quality stereo playback historically prioritizes listening quality, while a communications mode enables the microphone and uses a different bandwidth and processing path.Windows 11 and current Bluetooth hardware continue to evolve, but applications can still select an unexpected endpoint or switch behavior when a call begins. If music sounds excellent until the microphone activates, a profile transition may be occurring rather than a hardware failure.
To reset a problematic headset:
- Remove the headset from Windows Bluetooth settings.
- Restart the headset and PC.
- Put the headset into pairing mode.
- Pair it again.
- Select it explicitly as both the input and communications device.
- Test it in Windows before reopening the meeting application.
USB power and enumeration
USB microphones may disappear when a hub cannot provide stable power, a dock has outdated firmware, or Windows fails to enumerate the device after sleep. Connect the microphone directly and try a port on the opposite side of the laptop, which may use a different controller.If the microphone repeatedly disconnects, test it on another PC. A failure across multiple computers points toward the cable, connector, or microphone electronics rather than Windows.
High-end USB audio interfaces may require a manufacturer driver, control panel, clock configuration, or sample-rate setting. In those cases, confirm that Windows and the recording application use a compatible format.
Improve Microphone Quality After Restoring Audio
A microphone can technically work while sounding too quiet, distorted, robotic, intermittent, or overwhelmed by background noise. Once recording returns, optimize quality without masking the underlying problem.Balance gain and distance
Move the microphone closer before adding large amounts of software gain. Increasing volume amplifies the desired voice, but it also raises fan noise, room reflections, electrical hiss, and keyboard sounds.Use the Windows test recording as a neutral baseline. If the Windows sample is clean but a meeting application sounds poor, inspect the application’s automatic gain, noise suppression, echo cancellation, and voice-isolation features.
Watch for processing conflicts
Running multiple enhancement systems at once can degrade speech. Laptop audio suites, headset utilities, Windows effects, and conferencing software may all attempt noise reduction or automatic gain control.Disable optional processing temporarily and test one feature at a time. This is especially important for musicians, podcasters, teachers demonstrating instruments, and users who need to transmit sounds that speech-oriented filters may classify as noise.
Echo usually indicates that speaker output is reaching the microphone. Use headphones, reduce speaker volume, move the microphone away from the speakers, or enable the meeting application’s echo-cancellation mode.
Enterprise, Security, and Remote Desktop Cases
Managed computers and remote sessions introduce controls that are invisible to ordinary consumer troubleshooting. A microphone may be healthy locally yet blocked by policy, security software, or redirection rules.Security and privacy applications
Endpoint-security products can include webcam and microphone protection. These tools may prompt when a new application first requests access or silently block software that lacks an approved rule.Open the installed security suite and look for microphone protection, privacy protection, application permissions, or blocked-device events. Allow only the trusted application that requires access rather than disabling the entire security product.
If the computer belongs to an employer or school, do not remove security software or bypass policy. Provide IT support with the application name, microphone model, Windows test result, and exact error message.
Remote Desktop audio redirection
For the classic Remote Desktop Connection client, open Local Resources, select the settings control under Remote audio, and configure remote audio recording to Record from this computer. The microphone must also work on the local PC before it can be redirected.Virtual desktop platforms may use their own optimization agents, redirection policies, and supported-device lists. Teams or Zoom inside a remote session can behave differently from the same application running locally, particularly when media optimization is enabled.
A useful test is to open a local recording application outside the remote session. If local recording works but the remote environment cannot see the microphone, focus on redirection, policy, and virtual desktop configuration rather than reinstalling the local audio driver.
Strengths and Opportunities
Windows 11’s layered microphone architecture can appear complicated, but it offers meaningful benefits when each layer is understood.- Per-application permissions improve privacy by preventing every installed app from recording automatically.
- Independent application device selection supports complex setups involving headsets, webcams, studio microphones, docks, and room systems.
- Built-in recording tests isolate Windows from application problems and provide a fast diagnostic checkpoint.
- Browser-level permissions protect users from unwanted website access while allowing trusted meeting and recording services.
- Optional driver delivery through Windows Update simplifies recovery for common audio hardware.
- Noise suppression and voice-isolation tools can improve calls when they are configured appropriately for speech.
- Remote audio redirection supports hybrid work without requiring the microphone to be physically attached to the remote computer.
Risks and Concerns
Microphone troubleshooting also presents privacy, security, and reliability risks when changes are made too broadly.- Enabling access globally may expose the microphone to more desktop applications than intended. Review installed software and keep untrusted programs removed.
- Unofficial driver downloads can compromise stability or security. Use Windows Update and the hardware manufacturer’s support channel.
- Deleting driver packages can remove manufacturer-specific processing and controls. Create a recovery plan before performing aggressive driver cleanup.
- Disabling security software can create a larger problem than the microphone failure. Add a narrow application exception instead.
- Excessive microphone gain can amplify private conversations and background noise. Test the actual transmitted signal, not only the local level meter.
- Bluetooth reconnection can change default devices unexpectedly. Recheck both Windows and application selections after pairing.
- Remote sessions can send local audio into managed environments. Confirm organizational policy before enabling microphone redirection.
- Old Windows 10 or Internet Explorer instructions can lead users into obsolete menus. Windows 10 reached end of standard support on October 14, 2025, while Internet Explorer 11 desktop support ended on June 15, 2022.
What to Watch Next
Microsoft continues moving diagnostics toward the Get Help experience while retaining both modern Settings pages and legacy audio dialogs. That combination means menu names and entry points may change even though the underlying troubleshooting logic remains stable.Keep a known-good baseline
After restoring the microphone, record the working configuration:- Note the exact microphone name shown in Windows.
- Save the preferred input choice in each meeting application.
- Record the driver provider and version.
- Keep the PC or headset manufacturer’s firmware utility available.
- Test the microphone after major Windows, driver, dock, or conferencing updates.
- Remove obsolete virtual audio devices that make input lists unnecessarily confusing.
Use a layered escalation path
For future failures, follow the same order every time: hardware, Windows input selection, Windows recording test, privacy permissions, application selection, browser permission, troubleshooter, and drivers. Escalate to manufacturer or organizational support only after recording the results at each stage.That evidence turns “the mic does not work” into a precise technical report. Saying that a USB microphone appears in Device Manager but produces silence in the Windows test is far more actionable than reporting that Teams cannot hear anything.
A failed Windows 11 microphone rarely requires random registry edits, third-party repair utilities, or a complete operating-system reset. By treating the audio path as a sequence of hardware, Windows, privacy, application, and network-session layers, most users can identify the broken link quickly, restore clean recording, and avoid disruptive changes that create new problems.
References
- Primary source: Technobezz
Published: 2026-07-20T19:47:10.840000+00:00
Microphone Not Working on Windows 11? How to Fix It | Technobezz
Microphone not working on Windows 11? Fix input settings, mic access, app permissions, drivers, Bluetooth, and Remote Desktop audio.www.technobezz.com - Official source: support.microsoft.com
Fix microphone problems | Microsoft Support
If you are having trouble with your microphone features, the following information can help you troubleshoot and resolve issues.support.microsoft.com
