Fix High CPU or Disk Usage by Windows Search Indexer (Win 10/11)
Difficulty: Intermediate | Time Required: 20 minutesWindows Search Indexer makes file and Start menu searches much faster. But sometimes it misbehaves and causes high CPU or disk usage (
SearchIndexer.exe, SearchApp.exe, or “Search” processes in Task Manager), making your PC feel slow or unresponsive.This guide walks you through safe, step-by-step methods to diagnose and fix high resource usage from Windows Search on Windows 10 and Windows 11.
Prerequisites
Before you start, you should:Quick walkthrough
- Be comfortable opening Settings, Control Panel, and Task Manager
- Use an account with administrator rights (needed for some steps)
- Be running Windows 10 (v1903 or later) or Windows 11 (any version)
Note: Menu names and locations are nearly identical on Windows 10 and 11. Differences are pointed out where relevant.
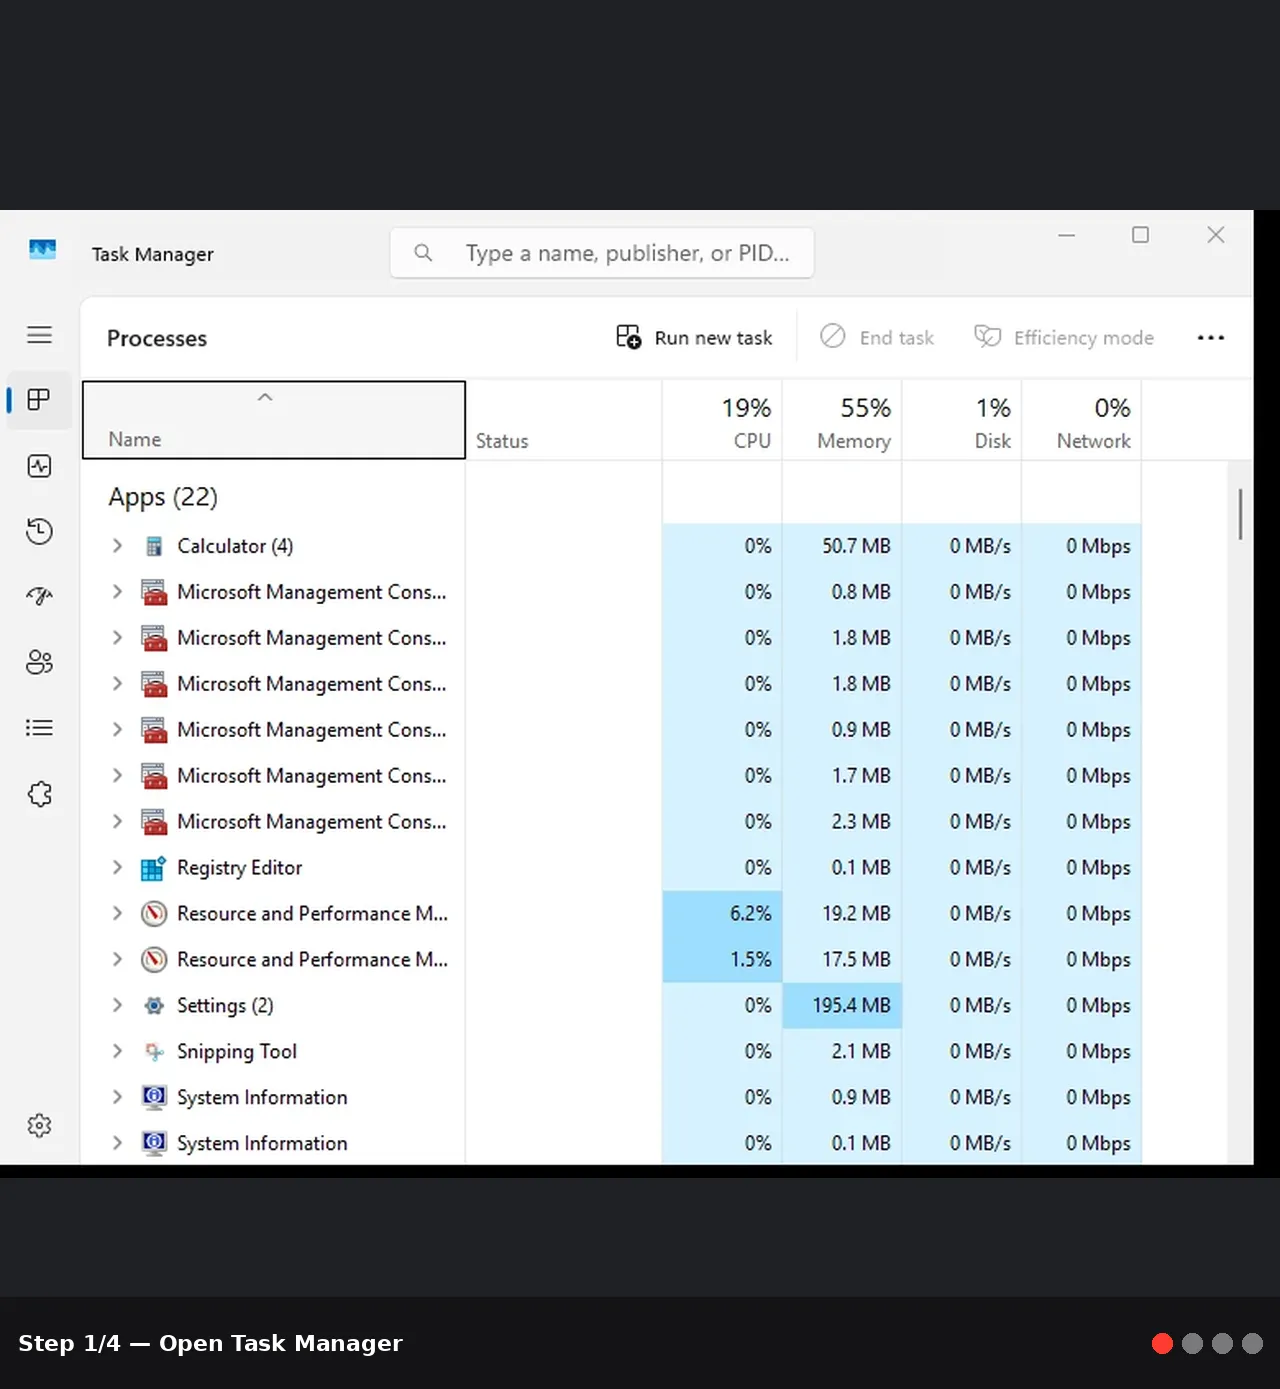
Step 1 – Confirm That Windows Search Indexer Is the Problem
- Open Task Manager
- Press Ctrl + Shift + Esc
- Or right‑click the Taskbar and choose Task Manager
- Switch to the “Processes” tab (or Details for more detail).
- Look for any of the following:
- SearchIndexer.exe (often under “Windows processes”)
- SearchApp.exe or SearchUI.exe
- A process simply labeled Search or Microsoft Windows Search Indexer
- Check:
- CPU column: Is it constantly high (e.g., 20%+ on an idle system)?
- Disk column: Is it often at or near 100%?
If you confirm Search is responsible, continue. If another process is the main culprit, you may need a different guide.
Tip: Some short spikes in CPU/disk usage are normal right after boot, after many file changes, or after Windows updates. Persistent high usage for 10+ minutes while you’re not doing much is a problem.
Step 2 – Temporarily Restart the Windows Search Service
Restarting the service can clear glitches without disabling search permanently.- Press Win + R, type:
services.msc
and press Enter. - In the Services window, scroll down and find Windows Search.
- Check its Status:
- If it’s Running, right‑click it and select Restart.
- If it’s Stopped, right‑click and select Start.
- Wait 1–2 minutes and monitor Task Manager again.
Note: A brief spike right after restarting is normal as indexing resumes. It should settle down within several minutes.
Step 3 – Rebuild the Search Index (Fix Corrupted Index)
A corrupted index is a common cause of high CPU/disk usage. Rebuilding forces Windows to recreate it from scratch.3.1 Open Indexing Options
Windows 10:- Press Win + S and type Indexing Options.
- Click Indexing Options (Control Panel).
- Press Win + I to open Settings.
- Go to Privacy & security → Searching Windows.
- Under More Search Indexer Settings, click Advanced indexing options.
(This opens the classic Indexing Options dialog.
3.2 Rebuild the Index
- In Indexing Options, click Advanced… (you may need admin rights).
- Under the Index Settings tab, find the Troubleshooting section.
- Click Rebuild.
- Confirm when asked.
Windows will now delete and recreate the index.
Warning: During a rebuild, search can be slower and you may see temporary increases in CPU/disk usage. Let it finish (it can take from minutes to a couple of hours depending on files and drive speed). If usage is still very high long after the rebuild completes, move on to the next steps.
Step 4 – Limit What Gets Indexed (Reduce Workload)
Indexing too many locations (especially network drives or large folders with media, archives, or code) can cause constant work.4.1 Review Indexed Locations
- In Indexing Options, click Modify.
- In the top panel (“Change selected locations”), you’ll see checked locations being indexed.
- Click Show all locations (if available) to see everything, including system locations.
4.2 Uncheck Unnecessary Folders
- Uncheck:
- Large folders with movies, music, ISOs, or archives (ZIP/RAR) that you don’t need to search frequently.
- Backup drives and external drives that change often.
- Network locations if they’re slow or unstable.
- Keep checked:
- Your main user profile, usually C:\Users\<YourName> (or at least Documents, Desktop, Pictures, etc.
- The Start menu and system locations that are pre‑selected by default, unless you know what you’re doing.
- Click OK.
Tip: If you store large media collections on a separate drive (e.g., D:\Media), consider unchecking that drive to reduce constant indexing load.
Step 5 – Change Search Indexing Mode (Windows 10/11)
Both Windows 10 and 11 offer different indexing modes that affect performance.5.1 Open Search Settings
- Press Win + I to open Settings.
- Go to:
- Windows 10: Search → Searching Windows
- Windows 11: Privacy & security → Searching Windows
5.2 Switch or Adjust Indexing Mode
Windows 10 and 11 – Search Locations Mode
Under Find My Files, you’ll see:- Classic (Recommended) – Indexes Start menu, Users folder, and a few others. Less intensive.
- Enhanced – Indexes your entire PC, which can use more CPU/disk.
- Select Classic to reduce indexing scope.
- Restart your PC and see if CPU/disk usage improves over the next 24 hours.
Windows 11 Additional Settings
On Windows 11, under More Search Indexer Settings, you can also:- Use Respect power settings when indexing (recommended for laptops)
- Exclude specific folders under Excluded folders (add problem folders here)
Note: Classic mode is often enough for most users and significantly reduces indexer workload.
Step 6 – Exclude Problematic File Types or Paths (Advanced)
Some file types (huge log files, constantly changing database files, etc. can keep the indexer busy.6.1 Exclude File Types
- Open Indexing Options → Advanced….
- Go to the File Types tab.
- Scroll through the list and:
- Uncheck very large or constantly changing types you don’t need searched (e.g.,
.log,.bak, some custom extensions). - Click OK.
6.2 Exclude Paths via Group Policy (Pro/Enterprise) – Optional
If you’re on Windows 10/11 Pro or Enterprise:- Press Win + R, type:
gpedit.msc
and press Enter. - Navigate to:
Computer Configuration → Administrative Templates → Windows Components → Search - Look for policies like:
- “Prevent indexing certain paths”
- Double‑click, set to Enabled, and add paths you want to exclude (e.g.,
D:\Backups\*). - Click Apply → OK, then restart.
Warning: Group Policy changes can affect all users. Only use this if you understand the impact or are managing a shared PC.
Step 7 – Run Search and Indexing Troubleshooter
Microsoft includes a built‑in troubleshooter that can automatically fix some issues.7.1 Windows 10
- Press Win + I → Update & Security → Troubleshoot.
- Click Additional troubleshooters.
- Find and run Search and Indexing.
- Follow the prompts (e.g., “Files don’t appear in search results”, “Indexing is slow”, etc..
7.2 Windows 11
- Press Win + I → System → Troubleshoot → Other troubleshooters.
- Scroll down to Search and Indexing and click Run.
- Follow the on‑screen steps.
Step 8 – Consider Disabling Windows Search (Last Resort / Test Only)
If nothing else works, you can temporarily disable Windows Search to confirm it’s the cause or to regain performance. You’ll lose instant search speed, but basic file browsing will still work.8.1 Stop the Service (Temporary Test)
- Press Win + R, type
services.msc, press Enter. - Right‑click Windows Search → Properties.
- Under Startup type, choose Disabled.
- Click Stop to stop the service immediately.
- Click Apply → OK and reboot.
Important: If you decide to keep Search disabled permanently, remember that:
- Start menu and file search will be slower or limited.
- Some apps that rely on Windows Search may behave differently.
Extra Tips and Troubleshooting Notes
- Check for Malware: High CPU usage blamed on “search” could be malware masquerading as a system process. Run a full scan with Windows Security:
Settings → Update & Security / Privacy & security → Windows Security → Virus & threat protection → Quick/Full scan. - Update Windows: Search indexer fixes are sometimes included in cumulative updates.
Go to Settings → Update & Security / Windows Update and install the latest updates. - SSD vs HDD: On older HDDs, indexing impact is more noticeable. On SSDs, consistent 100% disk from Search is more suspicious and often indicates misconfiguration or corruption.
- Allow Time After Big Changes: After copying many files, reinstalling apps, or a big Windows update, the indexer may be busy for a while. Give it some time before assuming it’s stuck.
Conclusion
By confirming that Windows Search Indexer is the cause, rebuilding the index, reducing what gets indexed, adjusting indexing mode, and using the built‑in troubleshooter, you can usually eliminate persistent high CPU or disk usage from Windows Search on Windows 10 or 11.These changes help your system stay responsive while still giving you fast, reliable search results.
Key Takeaways:
- Verify that SearchIndexer.exe/SearchApp.exe is actually causing the high CPU/disk usage using Task Manager.
- Rebuild the search index to fix corruption and often restore normal behavior.
- Limit indexed locations and file types to reduce background workload, especially on large or slow drives.
- Switch to Classic indexing mode instead of Enhanced if you don’t need whole‑PC search.
- Use the Search and Indexing troubleshooter to automatically repair common issues.
- As a last resort, disable Windows Search temporarily to confirm it’s the cause and restore performance.
This tutorial was generated to help WindowsForum.com users get the most out of their Windows experience.
Last edited: