

Microphone access can be blocked by a physical mute control, the operating system, the individual app, or the website in a browser. Start with the hardware check, then enable the permission layer that applies to the device you are using.
Before changing software settings, inspect the microphone, headset, earbuds, webcam, docking station, keyboard, and any inline cable controls for a mute button or switch. Many headsets show a red light or crossed-out microphone icon when muted.
Also confirm that a detachable microphone is fully connected and that a Bluetooth headset is connected rather than merely paired.
For Windows voice typing, click in a text field and press Windows key + H after microphone access is enabled.
To change a saved decision:
For a site you previously blocked:
To revise a saved choice:
When an app is using the microphone without the camera, iPhone displays an orange indicator near the top of the screen. You can open Control Center to see which app recently used it.
If an app’s microphone permission has been automatically removed after a long period of nonuse, open the app’s settings and look for an unused-app option such as Pause app activity if unused.
First, confirm Chrome itself can use the microphone:
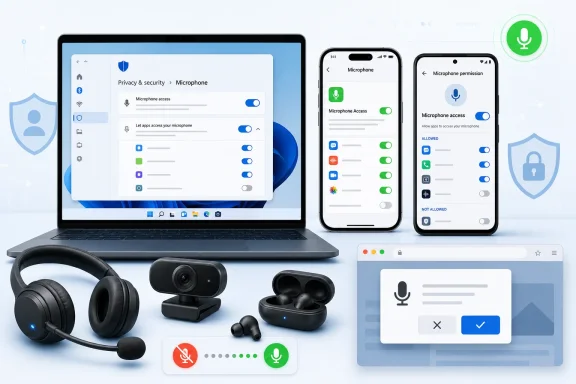 Check the microphone is not muted
Before changing software settings, inspect the microphone, headset, earbuds, webcam, docking station, keyboard, and any inline cable controls for a mute button or switch. Many headsets show a red light or crossed-out microphone icon when muted.Also confirm that a detachable microphone is fully connected and that a Bluetooth headset is connected rather than merely paired.
Turn on microphone access in Windows 11
- Open Start > Settings.
- Select Privacy & security > Microphone.
- Turn on Microphone access.
- Turn on Let apps access your microphone.
- Under the app list, enable the Microsoft Store app that needs access.
- If you are using a traditional desktop program such as a browser, Teams, Zoom, or Discord, turn on Let desktop apps access your microphone.
Select and test the correct Windows microphone
Permission alone will not help if Windows is using a webcam microphone, disconnected headset, or another input device.- Open Settings > System > Sound.
- Under Input, select Choose a device for speaking or recording.
- Choose the microphone or headset you intend to use.
- Select the arrow next to that device to open its properties.
- Under Microphone test, select Start test, speak normally, then select Stop test.
- Play the recorded sample or check the input level to confirm Windows can hear you.
For Windows voice typing, click in a text field and press Windows key + H after microphone access is enabled.
Allow microphone access in Edge, Chrome, or Firefox
A website needs its own permission even when Windows has already allowed the browser to use the microphone. Return to the website after changing a permission and reload the page.Microsoft Edge
When Edge asks to use the microphone, select Allow.To change a saved decision:
- Open the website.
- Select the site information or permissions icon to the left of the address bar.
- Find Microphone and change it to Allow.
- Reload the page.
Google Chrome on Windows
When Chrome displays the microphone prompt, select Allow.For a site you previously blocked:
- Select More > Settings.
- Open Privacy and security > Site settings > Microphone.
- Confirm the intended microphone is selected.
- Under blocked sites, select the website and change Microphone access to Allow, or remove the saved entry so Chrome asks again.
- Reload the website.
Mozilla Firefox
When Firefox asks for microphone access, select Allow. If you want the choice retained, select Remember this decision before allowing or blocking it.To revise a saved choice:
- Select the Firefox menu > Settings.
- Open Privacy & Security.
- Under Permissions, find Microphone and select Settings.
- Change the website to Allow, or remove it so Firefox prompts again.
- Select Save Changes and reload the site.
Turn on microphone permission on iPhone
On iPhone, each app must request microphone permission before it appears in the permission list.- Open Settings.
- Tap Privacy & Security.
- Tap Microphone.
- Turn on the switch for the app that needs microphone access.
- Close and reopen the app, then try the call, recording, or voice feature again.
When an app is using the microphone without the camera, iPhone displays an orange indicator near the top of the screen. You can open Control Center to see which app recently used it.
Turn on iPhone Dictation
If the microphone works in calls and apps but speech-to-text does not:- Open Settings > General > Keyboard.
- Turn on Enable Dictation.
- Confirm by tapping Enable Dictation if iPhone displays a prompt.
If Screen Time prevents microphone changes
A parent, guardian, or device administrator may have restricted microphone privacy changes through Screen Time. Check Settings > Screen Time > Content & Privacy Restrictions. If the setting is locked, the Screen Time passcode or the person managing the device is required.Turn on microphone access on Android
The exact labels can differ between Samsung, Google Pixel, Motorola, and other Android devices, but Android 12 and later generally provide a system-wide microphone control.Use the Quick Settings microphone control
- Swipe down from the top of the screen twice.
- Find the Mic access or Microphone tile.
- Tap it so microphone access is turned on.
Give one Android app microphone permission
- Open Settings > Apps.
- Select the app. You may need to tap See all apps first.
- Tap Permissions > Microphone.
- Choose Allow only while using the app or Ask every time.
If an app’s microphone permission has been automatically removed after a long period of nonuse, open the app’s settings and look for an unused-app option such as Pause app activity if unused.
Allow microphone access in Chrome for Android
Chrome needs both Android app permission and permission for the individual website.First, confirm Chrome itself can use the microphone:
- Open Settings > Apps > Chrome > Permissions.
- Tap Microphone.
- Choose Allow only while using the app.
- Open Chrome.
- Visit the website that needs the microphone.
- Select Allow when Chrome asks.
- In Chrome, tap More > Settings.
- Tap Site settings > Microphone.
- Turn on microphone access if it is disabled.
- Under Blocked, tap the affected website and select Allow.
- Reload the page.
If the microphone is still unavailable
Work through these checks in order:- Test the microphone in a different app. If it works elsewhere, the issue is usually the affected app’s or website’s permission.
- Verify the selected Windows input device under Settings > System > Sound > Input.
- Disconnect and reconnect wired microphones and headsets.
- Confirm Bluetooth headsets are connected and selected as the input device, not only paired.
- Close another app that may be using the microphone, then reopen the affected app or browser tab.
- Check browser site permissions, even if the browser itself has operating-system permission.
- Restart the device if a permission was just changed and the app does not recognize it.
- On work, school, or family-managed devices, look for notices that a setting is managed by an organization. An administrator may control microphone permissions, browser policies, or Android privacy settings.
References
- Primary source: Technobezz
Published: 2026-07-22T19:34:25.104000+00:00
How to Turn On Microphone Access on Windows iPhone and Android | Technobezz
Need to turn on microphone access? Check the current Windows, iPhone, Android, Chrome, Edge, and Firefox microphone settings.www.technobezz.com - Official source: support.microsoft.com
Windows camera, microphone, and privacy | Microsoft Support
Find out how to change privacy settings for your camera and microphone in Windows.support.microsoft.com