

Outlook rules not working in new Outlook for Windows, classic Outlook for Windows, Outlook on the web, or Outlook.com are usually caused by a disabled rule, rule order, an unsupported client-only action, or an Exchange/Microsoft 365 mailbox restriction. These steps apply to personal Outlook.com accounts and Microsoft 365 work or school mailboxes on Windows 10 and Windows 11.
A rule created in classic Outlook for Windows can be either:
If a classic Outlook rule cannot be viewed or edited in new Outlook or Outlook.com, recreate it using the available server-side conditions and actions.
This is especially important when Stop processing more rules is enabled. In new Outlook and Outlook on the web, that setting is enabled by default for newly created rules.
For new Outlook, Outlook on the web, and Outlook.com, open Settings > Mail > Rules, select Edit, correct the setting, and select Save.
Before deleting it, write down:
Warning: The
A Microsoft 365 administrator should check these conditions:
If no Inbox rule works for a work or school mailbox, provide your Microsoft 365 administrator with the mailbox address, the rule name, a test-message time, and any non-delivery report. They should also confirm that the mailbox is not a journaling mailbox and is not using a Microsoft 365 F1 license, both of which can prevent Inbox rules from working.
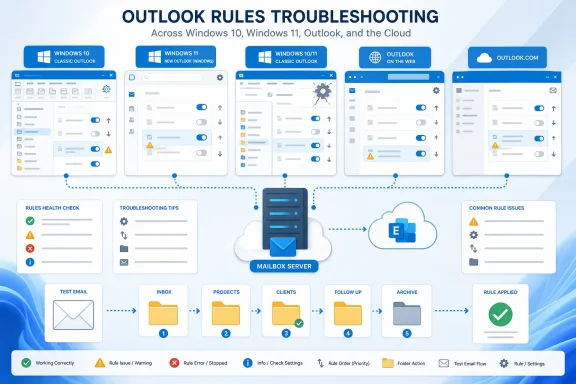 First, confirm what kind of rule you have
A rule created in classic Outlook for Windows can be either:- Server-side: Runs in the mailbox, even while Outlook is closed.
- Client-only: Requires classic Outlook to be open, signed in, and running on the computer where the rule was created.
If a classic Outlook rule cannot be viewed or edited in new Outlook or Outlook.com, recreate it using the available server-side conditions and actions.
Turn the rule back on
A rule can remain listed even when it is disabled.New Outlook for Windows
- Select Settings in the upper-right corner.
- Select Mail > Rules.
- Turn on the toggle beside the rule.
Outlook on the web or Outlook.com
- Select Settings.
- Select Mail > Rules.
- Turn on the toggle beside the rule.
Classic Outlook for Windows
- Select File > Manage Rules & Alerts.
- On the E-mail Rules tab, find the rule.
- Select its check box.
- Select OK.
Run the rule against messages already in the folder
Creating or re-enabling a rule does not normally process mail that was already delivered.New Outlook for Windows
- Select Settings > Mail > Rules.
- Select Run rule now beside the rule.
Classic Outlook for Windows
- Select File > Manage Rules & Alerts.
- On the E-mail Rules tab, select Run Rules Now.
- Select the check box for each rule to run.
- Under Run in Folder, select Browse if the messages are not in the default folder.
- Select Include subfolders if appropriate.
- Choose whether to apply the rule to all, read, or unread messages.
- Select Run Now.
Outlook.com limitation
Outlook.com rules apply to messages received after the rule is created. If you need to clean up existing Outlook.com messages, use Move to, Archive, or Sweep instead.Correct rule order and “Stop processing more rules”
Outlook evaluates Inbox rules from top to bottom. A broad rule—such as “move all mail from this domain”—can process a message before a more specific rule gets a chance.This is especially important when Stop processing more rules is enabled. In new Outlook and Outlook on the web, that setting is enabled by default for newly created rules.
New Outlook for Windows, Outlook on the web, and Outlook.com
- Open Settings > Mail > Rules.
- Select the rule.
- Use the Up and Down arrows to move it.
- Put highly specific rules first, followed by broad filing, category, deletion, or forwarding rules.
- Select Edit on rules that overlap.
- Review Stop processing more rules.
- Leave it enabled if this rule should be the only rule that handles matching mail.
- Clear it if later rules should also act on the same message.
- Select Save.
Classic Outlook for Windows
- Select File > Manage Rules & Alerts.
- Select the rule.
- Use the up and down arrow buttons to change its position.
- To change the stop setting, select Change Rule > Edit Rule Settings.
- Continue until you reach What do you want to do with the message?
- Select or clear stop processing more rules.
- Select Finish > OK.
Repair a broken classic Outlook rule
Classic Outlook can identify a rule as broken when its target folder, account, recipient, condition, or action is no longer valid.- Select File > Manage Rules & Alerts.
- If Outlook reports that a rule needs to be modified, select OK.
- Find the rule shown in red.
- Select the underlined links in the Rule description area.
- Correct the missing folder, invalid address, changed account, condition, action, or exception.
- Select OK.
For new Outlook, Outlook on the web, and Outlook.com, open Settings > Mail > Rules, select Edit, correct the setting, and select Save.
Recreate rules that are unsupported or persistently failing
Delete and rebuild one rule when it cannot be edited in the current Outlook version, has an error that returns after repair, or behaves inconsistently despite correct order and conditions.Before deleting it, write down:
- Rule name
- Conditions and exceptions
- Actions
- Destination folder
- Its position in the rule list
- Whether Stop processing more rules is enabled
New Outlook for Windows, Outlook on the web, or Outlook.com
- Go to Settings > Mail > Rules.
- Select Delete beside the failing rule.
- Select Add new rule.
- Give it a clear, short name.
- Add the necessary condition and action.
- Add exceptions only when needed.
- Review the stop-processing setting.
- Select Save.
Classic Outlook for Windows
- Select File > Manage Rules & Alerts.
- Select the rule.
- Select Delete > Yes.
- Select New Rule.
- Build the replacement rule and select Finish > OK.
Reset all classic Outlook rules only as a last resort
Use this only if classic Outlook reports an error reading rules from the server or multiple rules are damaged. This is a destructive reset, not a repair.Warning: The
/cleanrules switch deletes both client-based and server-based rules from every mailbox connected to the current classic Outlook profile. Do not run it until you have documented every rule you need to restore. Microsoft recommends using it only when the profile contains the one mailbox you intend to clear.- Close classic Outlook completely.
- Press Windows key + R.
- Enter:
outlook.exe /cleanrules - Select OK.
- Let Outlook start.
- Recreate the required rules manually.
outlook.exe /cleanclientrules. If you only need to remove server-based rules, use outlook.exe /cleanserverrules. Treat either command as destructive: document rules first.Update and repair classic Outlook when rule behavior remains unreliable
These steps apply to classic Outlook for Windows, not the new Outlook app.Install Office updates
- Open classic Outlook or another Microsoft 365 app.
- Select File > Office Account. In some Office apps, this appears as File > Account.
- Select Update Options > Update Now.
- If Update Now is unavailable, select Enable Updates first.
- Restart Outlook after updates finish.
Repair the account connection
- In classic Outlook, select File > Account Settings > Account Settings.
- Open the Email tab.
- Select the affected account.
- Select Repair.
- Complete the wizard and restart Outlook.
Test without add-ins
An add-in can interfere with Outlook behavior, especially with custom-action rules.- Close Outlook.
- Press Windows key + R.
- Enter:
outlook.exe /safe - Select OK.
- Test whether Outlook and the rule configuration behave normally.
- If the problem disappears, exit Outlook.
- Open Outlook normally, then select File > Options > Add-ins.
- Set Manage to COM Add-ins and select Go.
- Clear enabled add-ins, restart Outlook, and re-enable them one at a time until the problem returns.
Repair the Office installation
- Close all Office apps.
- Open Settings > Apps > Installed apps in Windows 11, or Settings > Apps > Apps & features in Windows 10.
- Find Microsoft 365 or Office.
- Select Modify.
- Start with Quick Repair.
- If the problem continues, run Online Repair.
Check Microsoft 365 forwarding and mailbox limits
For a work or school mailbox, a forwarding or redirect rule may be blocked by Exchange Online policy rather than Outlook itself.A Microsoft 365 administrator should check these conditions:
- Mailbox-level forwarding is enabled. Exchange does not allow Inbox redirect rules to work while mailbox forwarding is active.
- Automatic forwarding to external recipients is blocked by the organization’s outbound spam policy or remote-domain settings.
- The rule forwards to more than 10 individual recipients.
- The message is a private meeting request, delivery receipt, read receipt, automatic reply, or a message already forwarded or redirected by another Inbox rule.
- The rule attempts to forward or redirect mail back to the original sender.
- The mailbox has reached its Inbox rule storage quota.
RulesQuota setting in Exchange Online PowerShell; the valid quota range is 32 KB through 256 KB.If no Inbox rule works for a work or school mailbox, provide your Microsoft 365 administrator with the mailbox address, the rule name, a test-message time, and any non-delivery report. They should also confirm that the mailbox is not a journaling mailbox and is not using a Microsoft 365 F1 license, both of which can prevent Inbox rules from working.
References
- Primary source: Technobezz
Published: 2026-07-17T17:35:43.426000+00:00
Outlook Rules Not Working? How to Fix It (2026) | Technobezz
Outlook rules are not working? Fix disabled rules, rule order, broken rules, client-only rules, and forwarding blocks.www.technobezz.com - Official source: support.microsoft.com
Manage email messages by using rules in Outlook | Microsoft Support
 support.microsoft.com
- Official source: learn.microsoft.com
Modify the space used by Inbox rules in Exchange Online | Microsoft Learn
Admins can learn how to increase or decrease the space that's available to store Inbox rules in mailboxes in an Exchange Online organization.learn.microsoft.com