

Snipping Tool not working in Windows 11—whether it will not open, Windows key + Shift + S does nothing, Print Screen behaves unexpectedly, or a capture will not reach the editor—can usually be fixed by restarting and repairing the app, then updating Windows and Microsoft Store components. These steps apply to current consumer and business editions of Windows 11; managed work or school PCs may have restrictions imposed by an administrator.
Before changing settings, test the app and the capture overlay separately.
If Windows Update itself fails, open the Get Help app, search for Windows Update troubleshooter, and follow its guided diagnostic steps. Microsoft now routes many Windows 11 troubleshooters through Get Help rather than relying solely on older inbox troubleshooters.
First reset the Store cache:
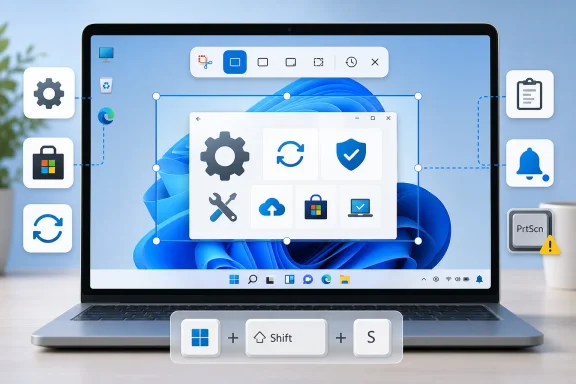 Identify where Snipping Tool is failing
Before changing settings, test the app and the capture overlay separately.- Close any visible Snipping Tool windows.
- Select Start, type Snipping Tool, and open it from the results.
- In the app, select New, then make a small rectangular capture.
- Test the two Windows shortcuts:
- Windows key + Shift + S opens the image-capture overlay.
- Windows key + Shift + R opens the screen-recording overlay.
Restart Windows and correct the Print Screen setting
A full restart clears a hung app process and reloads Windows accessibility and keyboard services.- Save open work.
- Select Start > Power > Restart.
- After signing in, open Snipping Tool from Start and test Windows key + Shift + S again.
- Open Start > Settings > Accessibility > Keyboard.
- Find Use the Print Screen button to open screen snipping.
- Turn it On if you want Print Screen to launch the screen-capture overlay.
- Turn it Off if another screenshot application needs to use Print Screen instead.
- Test Print Screen, then test Windows key + Shift + S.
- Print Screen can capture the full display to the clipboard, depending on the setting and keyboard.
- Windows key + Print Screen saves a full-screen image in Pictures > Screenshots.
- Windows key + Shift + S opens Snipping Tool’s image-selection overlay and copies the selected image to the clipboard.
- Windows key + Shift + R opens the video-recording selection overlay.
Repair Snipping Tool before resetting it
Windows 11 provides an app repair option that attempts to fix the package without removing its data.- Open Start > Settings > Apps > Installed apps.
- Find Snipping Tool.
- Select the More button beside it, then select Advanced options.
- Under Reset, select Repair.
- Wait for the repair to finish, then restart the PC.
- Open Snipping Tool from Start and test a capture.
Warning: Selecting Reset can remove Snipping Tool’s local app data and preferences. Use it only after Repair fails.
- Select Reset, then confirm the reset when prompted.
- Restart Windows.
- Test Snipping Tool again from Start and with Windows key + Shift + S.
Install Windows and Microsoft Store updates
Snipping Tool is updated through Microsoft Store, while the capture experience also depends on Windows components. Update both before uninstalling the app.- Open Start > Settings > Windows Update.
- Select Check for updates.
- Install all available updates.
- Restart if Windows requests it.
- Open Microsoft Store from Start.
- Select Check for updates. Depending on the Store version, this may be available from Library.
- Install available updates, especially Snipping Tool and App Installer.
- Restart Windows and test again.
If Windows Update itself fails, open the Get Help app, search for Windows Update troubleshooter, and follow its guided diagnostic steps. Microsoft now routes many Windows 11 troubleshooters through Get Help rather than relying solely on older inbox troubleshooters.
Restore the notification and clipboard path
A screenshot can succeed even when it looks as though Snipping Tool failed. The image may be on the clipboard while its notification banner is disabled or suppressed.Restore Snipping Tool notifications
- Open Start > Settings > System > Notifications.
- Make sure the main Notifications switch is on.
- Under Notifications from apps and other senders, select Snipping Tool.
- Turn on its notifications and enable Show notification banners if you want a pop-up after every capture.
- Open the notification center with Windows key + N and check for missed Snipping Tool notifications.
Test and clear the clipboard
Immediately after taking a snip, open Paint, Notepad, an email draft, or another application that accepts images and press Ctrl + V.- If the image pastes, Snipping Tool captured correctly; the issue is the editor notification or the original destination app.
- If it does not paste anywhere, clear the clipboard and retest.
Warning: Clearing the clipboard permanently removes the current copied items.
- Open Start > Settings > System > Clipboard.
- In Clear clipboard data, select Clear.
- Take a new snip with Windows key + Shift + S.
- Paste it into Paint with Ctrl + V.
Reset the Microsoft Store cache and reinstall Snipping Tool
Use this section if Snipping Tool will not update, is missing from Windows, or still fails after Repair, Reset, and updates.First reset the Store cache:
- Press Windows key + R.
- Type the following command:
wsreset.exe - Select OK.
- Wait for the blank Command Prompt window to close. Microsoft Store should open automatically.
- Check for Store updates again.
- Open Settings > Time & language > Date & time.
- Turn on Set time automatically and confirm the correct time zone.
- Open Settings > Time & language > Language & region.
- Confirm the correct Country or region.
Warning: Uninstalling Snipping Tool removes the local app installation. Ensure you can access Microsoft Store before removing it, especially on a managed PC.
- Open Start > Settings > Apps > Installed apps.
- Find Snipping Tool.
- Select More > Uninstall.
- Confirm Uninstall.
- Restart Windows.
- Open Microsoft Store.
- Search for Snipping Tool.
- Select the Microsoft-published result, then select Install.
- Open the installed app from Start and test New and Windows key + Shift + S.
Repair Windows system files if app repairs fail
If other built-in apps also crash, Microsoft Store is unstable, or Snipping Tool fails immediately after reinstalling, repair Windows components.- Open Start and type cmd.
- Right-click Command Prompt and select Run as administrator.
- Select Yes at the User Account Control prompt.
- Run:
DISM.exe /Online /Cleanup-image /Restorehealth - Wait for DISM to finish. It can take several minutes and normally uses Windows Update to obtain repair files.
- Run:
sfc /scannow - Keep Command Prompt open until verification reaches 100%.
- Restart the PC and test Snipping Tool.
Use Windows repair reinstall as the last built-in repair
If Snipping Tool continues to fail after reinstalling it and repairing system files, Windows 11 can reinstall the current Windows version while preserving apps, files, and settings.Warning: Keep the PC connected to power and the internet throughout this process. Back up important files first as a normal precaution before any operating-system repair.
- Open Start > Settings > System > Recovery.
- Under Fix problems using Windows Update, select Reinstall now.
- Choose whether Windows may restart automatically after installation completes.
- Select OK to begin.
- Allow Windows to download and install the repair version of the currently installed Windows release.
- Restart if Windows does not restart automatically.
- Open Snipping Tool and test an image capture.
References
- Primary source: Technobezz
Published: 2026-07-17T19:18:15.120000+00:00
Snipping Tool Not Working in Windows 11? How to Fix It (2026) | Technobezz
Snipping Tool not working Windows 11? Fix shortcuts, repair the app, update Store files, reinstall it, and repair Windows.www.technobezz.com - Official source: support.microsoft.com
Use Snipping Tool to capture screenshots | Microsoft Support
Learn how to use Snipping Tool to capture a screenshot, or snip, of any object on your screen, and then annotate, save, or share the image.support.microsoft.com - Official source: learn.microsoft.com
Snipping tool failed on Win 11 - Microsoft Q&A
My snipping tool does not work - when trying screen shots - I press PRT SCN and the options pop up I select rectangular mode and draw around the area desired Screen no longer flashes or anything else - and screenshot is not taken When I run…learn.microsoft.com