

Your webcam can work correctly and still be unavailable because Windows 11, a Microsoft Store app, a desktop program, or a browser has blocked access. The following steps cover current Windows 11 camera privacy controls, Microsoft Edge, Google Chrome, Mozilla Firefox, Windows Hello facial recognition, and the stronger option of disabling the camera device completely.
Start here if the camera is unavailable in several apps or every website. Windows uses three permission levels: device-wide access, Microsoft Store app access, and grouped desktop app access.
If Camera access is unavailable or grayed out, you are probably using a standard account or a device managed by an organization. Sign in with an administrator account or contact the work or school administrator responsible for the PC.
Some apps open the Windows Camera app to capture an image rather than accessing the camera directly. In that situation, the permission assigned to the Camera app controls whether the capture window can use the webcam.
Microsoft also notes that Windows privacy controls provide limited control over desktop software. Some desktop programs may access camera hardware through methods that are not represented by the individual app list. For a stronger block, close or uninstall the program, use a physical privacy shutter, or disable the camera device.
First confirm that Settings > Privacy & security > Camera > Let desktop apps access your camera is on.
To approve a new request:
To allow a site when prompted:
To change a saved permission:
To reset the current site from the address bar:
Warning: Disabling a camera may affect multiple cameras on some PCs. It can also stop video calling, scanning, photography, and other camera-dependent functions. Administrator access is required.
If the camera is not listed, check for a physical shutter or manufacturer-provided camera control. Device Manager should generally be reserved for driver or hardware troubleshooting rather than normal privacy management.
To stop facial recognition:
To restore face sign-in later:
Close the Camera app before testing elsewhere. Some drivers or older webcams allow only one application to use the device at a time.
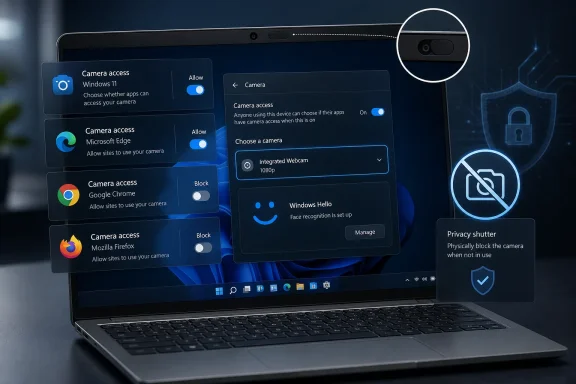 Check the main Windows 11 camera permissions
Start here if the camera is unavailable in several apps or every website. Windows uses three permission levels: device-wide access, Microsoft Store app access, and grouped desktop app access.- Open Start and select Settings.
- Go to Privacy & security.
- Under App permissions, select Camera.
- Turn Camera access on.
If Camera access is unavailable or grayed out, you are probably using a standard account or a device managed by an organization. Sign in with an administrator account or contact the work or school administrator responsible for the PC.
Allow or block individual Microsoft Store apps
Windows 11 can provide separate camera switches for supported Microsoft Store apps.- Open Settings > Privacy & security > Camera.
- Make sure Camera access is on.
- Turn Let apps access your camera on.
- Expand that section if the individual app list is not already visible.
- Find the app and set its switch:
- Select On to permit camera access.
- Select Off to revoke camera access.
Some apps open the Windows Camera app to capture an image rather than accessing the camera directly. In that situation, the permission assigned to the Camera app controls whether the capture window can use the webcam.
Manage access for desktop programs and browsers
Traditional Windows programs are handled differently from Microsoft Store apps. Browsers, many meeting clients, and programs installed from downloaded.exe files normally fall into this category.- Open Settings > Privacy & security > Camera.
- Scroll to Let desktop apps access your camera.
- Turn the switch on if browsers and desktop meeting programs need the webcam.
- Turn it off if you want to block camera access for the desktop-app group.
Microsoft also notes that Windows privacy controls provide limited control over desktop software. Some desktop programs may access camera hardware through methods that are not represented by the individual app list. For a stronger block, close or uninstall the program, use a physical privacy shutter, or disable the camera device.
Allow a website to use the camera in Microsoft Edge
A website needs permission from both Windows and Microsoft Edge. Enabling Windows access alone does not automatically authorize every website.First confirm that Settings > Privacy & security > Camera > Let desktop apps access your camera is on.
To approve a new request:
- Open Microsoft Edge and visit the website.
- Start the site’s video call, camera test, or identity-check feature.
- When Edge asks for camera access, select Allow.
- If the site also needs audio, approve the microphone request separately.
- Open Edge.
- Select Settings and more, represented by the three-dot button.
- Select Settings.
- Open Privacy, search, and services.
- Open Site permissions, and then select All sites.
- Select the affected website.
- Find Camera and set it to Allow or Block.
- Reload the website and retry the camera feature.
Change camera permissions in Google Chrome
Chrome maintains its own website permission list. Windows desktop camera access must remain enabled for Chrome to reach the webcam.To allow a site when prompted:
- Open the website in Chrome.
- Start the feature that requires the camera.
- Choose Allow while visiting the site or Allow this time, depending on the options displayed.
- Reload the page if the site does not detect the change immediately.
- Select the three-dot More button.
- Select Settings.
- Go to Privacy and security > Site settings.
- Under Permissions, select Camera.
- Use the camera menu to choose the correct webcam.
- Review the sites that are allowed or not allowed to use the camera.
- Select a blocked site and change its camera permission to Allow, or remove the saved exception so Chrome asks again.
- Open the site.
- Select the site information or permissions icon at the left side of the address bar.
- Open Site settings.
- Set Camera to Allow, Block, or Ask, depending on the choices available.
- Return to the site and reload it.
Change camera permissions in Mozilla Firefox
Firefox can remember an Allow or Block decision for each website.To change a saved permission:
- Open the Firefox menu.
- Select Settings.
- Select Privacy & Security.
- Scroll to Permissions.
- Find Camera and select Settings.
- Locate the affected website.
- Change its status to Allow or Block.
- To make Firefox ask again, select the website and choose Remove Website.
- Select Save Changes.
To reset the current site from the address bar:
- Visit the website.
- Select the permissions icon near the left side of the address bar.
- Find the saved camera status.
- Select the X beside Allowed, Blocked, or the temporary permission.
- Retry the camera feature and respond to the new prompt.
- Keep the website open and press Ctrl+I.
- Select Permissions in the Page Info window.
- Find Use the camera.
- Clear Use Default.
- Select Allow.
- Close Page Info and reload the website.
Disable the camera device completely
Disabling the device is stronger than changing app permissions. Use it when you do not want Windows applications to use that camera at all.Warning: Disabling a camera may affect multiple cameras on some PCs. It can also stop video calling, scanning, photography, and other camera-dependent functions. Administrator access is required.
- Open Settings.
- Go to Bluetooth & devices > Cameras.
- Under Connected cameras, select the camera.
- Select Disable.
- Select Yes to confirm.
- Restart the PC if Windows requests it.
- Return to Settings > Bluetooth & devices > Cameras.
- Under Disabled cameras, select the camera.
- Select Enable.
- Restart if prompted.
If the camera is not listed, check for a physical shutter or manufacturer-provided camera control. Device Manager should generally be reserved for driver or hardware troubleshooting rather than normal privacy management.
Stop Windows Hello from using the camera
Turning off Camera access does not stop Windows Hello facial recognition. Microsoft treats Windows Hello as an exception so it can continue using its compatible infrared camera for sign-in.To stop facial recognition:
- Open Settings.
- Go to Accounts > Sign-in options.
- Under Ways to sign in, expand Facial recognition (Windows Hello).
- Select Remove.
- Confirm your identity if Windows requests it.
To restore face sign-in later:
- Return to Settings > Accounts > Sign-in options.
- Expand Facial recognition (Windows Hello).
- Select Set up.
- Follow the camera and identity-verification instructions.
Verify that the permission change worked
Test the Windows layer before troubleshooting the browser or meeting service.- Open Start.
- Search for and open Camera.
- Confirm that the app displays a live image.
- Close the Camera app completely.
- Open the program or website that needs the webcam.
- Confirm that the correct camera is selected in that program.
- Start its camera preview or test call.
Close the Camera app before testing elsewhere. Some drivers or older webcams allow only one application to use the device at a time.
Troubleshoot camera access that remains blocked
Work through the symptom that matches the failure.- Camera works in the Camera app but not in a browser: Turn on Let desktop apps access your camera, allow the website in the browser, and verify that the browser selected the correct camera.
- One Microsoft Store app fails while other apps work: Open Settings > Privacy & security > Camera, turn on Let apps access your camera, and enable that app’s individual switch.
- No applications can use the webcam: Confirm that Camera access is on and that the camera has not been disabled under Settings > Bluetooth & devices > Cameras. Also open any physical privacy shutter.
- The browser keeps using the wrong webcam: Select the desired device in the browser’s camera settings and in the meeting site or app. Close and reopen the browser afterward.
- The site was accidentally blocked: Remove or reset its saved browser permission, reload the page, and choose Allow when asked again.
- The permission switch is grayed out: Sign in with an administrator account. On a work or school PC, the setting may be enforced by organizational policy.
- The camera light stays on unexpectedly: Close camera-capable browser tabs and meeting apps. Check for background conferencing or recording programs. If you do not trust a program, remove it through Settings > Apps > Installed apps > More > Uninstall.
- A desktop program cannot be controlled individually: Windows does not offer per-program camera privacy switches for desktop apps. Use the program’s own controls, uninstall it, switch off desktop-app access for the whole group, or disable the camera device.
- Changing permissions has no effect: Fully close and reopen the affected app. If that fails, select Start > Power > Restart and test again after Windows starts.
References
- Primary source: Technobezz
Published: 2026-07-15T16:20:59.936000+00:00
How to Manage Camera Permissions in Windows 11 | Technobezz
Manage camera permissions in Windows 11 for apps, browsers, Windows Hello, and blocked webcam access.www.technobezz.com - Official source: support.microsoft.com
Manage app permissions for a camera in Windows | Microsoft Support
Manage app permissions for a camera in Windows.support.microsoft.com - Official source: support.mozilla.org
