

The quickest way to make a GIF depends on the source: use Shortcuts on iPhone or iPad, Google Photos on Android, Samsung Gallery on Galaxy phones, Photos or Keynote on Mac, and Clipchamp or PowerPoint on Windows. These instructions cover current versions of iOS, iPadOS, Android, macOS, Windows 11, Microsoft 365, Office 2024, and other supported app versions available in 2026.
Use the method that matches what you are converting:
If Create is missing:
If Export GIF is unavailable, confirm that the item is a Live Photo and that Bounce was applied. Apple’s fallback is File > Export > Export Unmodified Original, which exports the Live Photo’s original components, including its short video, rather than producing a GIF.
If GIF does not appear:
Microsoft documents GIF export in PowerPoint for Microsoft 365 and PowerPoint 2024 on Windows. It is also supported in current Microsoft 365 and selected perpetual PowerPoint releases on Mac.
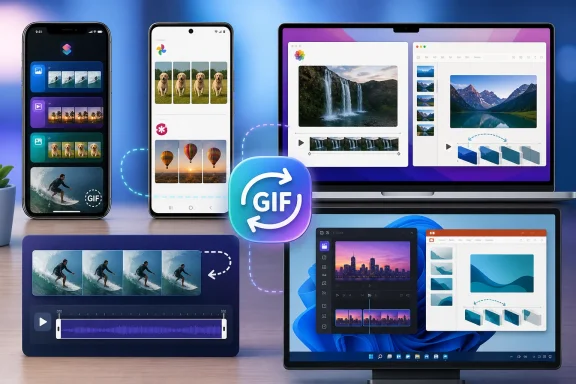 Choose the right GIF method
Use the method that matches what you are converting:- Several photos: Google Photos, Samsung Gallery, or an iPhone shortcut
- An iPhone Live Photo: Photos on Mac
- A short video: Clipchamp or Adobe Express
- Slides, captions, or text cards: PowerPoint or Keynote
- Individual frames requiring exact timing: Adobe Photoshop
- A quick Android selfie: Google Messages
Make a GIF on iPhone or iPad with Shortcuts
Apple’s Photos app can apply Loop and Bounce effects to Live Photos, but Apple does not document direct GIF-file export from Photos on iPhone or iPad. Use the built-in Shortcuts app when you need a genuine.gif file.Create a reusable photo-to-GIF shortcut
- Open Shortcuts.
- Tap the plus button to create a shortcut.
- Tap Add Action.
- Search for and add Select Photos.
- Open the action’s options and enable Select Multiple if you want to combine several pictures.
- Search for and add Make GIF beneath the photo-selection action.
- Add Save to Photo Album if you want every result stored in Photos.
- Alternatively, add Save File if you want to choose a folder in the Files app each time.
- Tap the shortcut name at the top and give it a recognizable name, such as Make Photo GIF.
- Tap Done.
- Run the shortcut, select the images in playback order, and complete the save prompt.
Convert the latest photos automatically
For a faster shortcut that always uses your most recent pictures:- Create a new shortcut in Shortcuts.
- Add the Get Latest Photos action.
- Set how many recent photos it should retrieve.
- Add Make GIF.
- Add Save to Photo Album, Save File, or a sharing action.
- Name and save the shortcut.
- Run it after taking the sequence of pictures.
Add the shortcut to the Share Sheet
This lets you start from Photos or another compatible app.- Open the shortcut for editing.
- Open the shortcut’s Details.
- Turn on Show in Share Sheet.
- If input types are shown, restrict the shortcut to images or media where appropriate.
- Tap Done.
- Open Photos and select the source pictures.
- Tap Share.
- Select the shortcut by name.
Make a GIF on Android with Google Photos
Google Photos calls a photo-based GIF an Animation. This is the simplest general method across Android brands, although the exact Create button position can change as Google updates the app.- Open Google Photos.
- At the top of the Photos view, tap Create.
- Select Animation.
- Select the photos or videos you want to include.
- Tap Create.
- Wait for Google Photos to assemble and save the animation.
- Open the result and tap Share if you want to send it.
If Create is missing:
- Update Google Photos through the Play Store.
- Check the Collections or Search areas for saved creations.
- Confirm that Google Photos has permission to access the source media.
- Select fewer items and try again.
- Verify that the phone has enough free storage to save the result.
Make a GIF with Samsung Gallery
Samsung Galaxy phones provide additional GIF controls through the Gallery app. Menu names and placement can vary by device and One UI version.Combine Gallery photos
- Open Gallery.
- Touch and hold the first photo.
- Select the remaining photos in the order you want to use them.
- Tap Create or open the More three-dot menu.
- Select GIF.
- Review the animation.
- Use the available controls to adjust options such as playback speed, direction, order, or aspect ratio.
- Tap Save.
Create a GIF through Gallery Stories
On supported Galaxy devices:- Open Gallery.
- Open the Stories section.
- Tap the options icon.
- Select Create GIF.
- Select up to 50 images.
- Tap Create GIF.
- Adjust the ratio, speed, direction, or decorations.
- Tap Save.
Capture a GIF with the Galaxy Camera app
Some Galaxy models let the shutter-button swipe create a GIF.- Open Camera.
- Tap Settings.
- Select Swipe Shutter button to.
- Choose Create GIF.
- Return to the camera in PHOTO mode.
- Swipe down on the shutter button and hold it.
- Release the button to stop recording.
Convert a burst shot
- Take a burst by swiping down and holding the shutter button when burst capture is enabled.
- Open the burst group in Gallery.
- Tap More.
- Select GIF.
- Adjust the available playback controls.
- Tap Save.
Export an iPhone Live Photo as a GIF on Mac
Photos on Mac provides Apple’s documented Live Photo-to-GIF export path. The Live Photo must first be available in the Mac Photos library, whether through iCloud Photos, AirDrop, or import.- Open Photos on the Mac.
- Double-click the Live Photo.
- Click Edit in the toolbar.
- Open the Live Photo effect menu near the lower-right corner.
- Choose Bounce.
- Click Done.
- Select File > Export > Export GIF.
- Choose a destination.
- Click Export.
If Export GIF is unavailable, confirm that the item is a Live Photo and that Bounce was applied. Apple’s fallback is File > Export > Export Unmodified Original, which exports the Live Photo’s original components, including its short video, rather than producing a GIF.
Convert a short video to a GIF on Windows with Clipchamp
Clipchamp is Microsoft’s supported video editor and is available as an app on Windows 11 and through supported Microsoft accounts. GIF export is offered for projects shorter than 15 seconds.- Open Clipchamp.
- Sign in if prompted.
- Create a new video project.
- Select Import media and add the source video.
- Drag the video onto the timeline.
- Trim the clip so the project is under 15 seconds.
- Remove or shorten any gaps that would extend the project.
- Apply cropping, text, filters, or speed changes if needed.
- Click Export.
- Select GIF.
- Wait for the export to finish.
If GIF does not appear:
- Make sure the complete timeline is under 15 seconds.
- Remove empty space after the final clip.
- Reload or update Clipchamp.
- Confirm that GIF export is allowed for your managed Microsoft 365 account.
- Export an MP4 and use Adobe Express as a workaround if an administrator has disabled Clipchamp.
Make an animated GIF from PowerPoint slides
PowerPoint is particularly effective for animated text, diagrams, title cards, and presentation-style sequences.Microsoft documents GIF export in PowerPoint for Microsoft 365 and PowerPoint 2024 on Windows. It is also supported in current Microsoft 365 and selected perpetual PowerPoint releases on Mac.
PowerPoint on Windows
- Build the slides and apply the required animations and transitions.
- Save the presentation as a
.pptxfile. - Select File > Export.
- Click Create an Animated GIF.
- Select the output quality.
- Set Seconds to spend on each slide.
- Click Create GIF.
- Enter a file name and select a folder.
- Click Save.
PowerPoint on Mac
- Prepare and save the presentation.
- Select File > Export.
- Set File Format to Animated GIF.
- Choose the quality and timing.
- Select the save location.
- Complete the export.
Create a GIF from Keynote slides on Mac or iPad
Keynote is Apple’s equivalent route for animated designs, slides, and text cards.Keynote on Mac
- Open the presentation.
- Select File > Export To > Animated GIF.
- Enter the first and last slide numbers to include.
- Choose the Resolution.
- Choose the Frame Rate.
- Set Auto-advance timing.
- Click Next.
- Name the GIF and choose its location.
- Click Export.
Keynote on iPad
- Open the presentation in Keynote.
- Tap the Actions menu.
- Tap Export.
- Select Animated GIF.
- Choose Small, Medium, Large, or XL.
- Set the Slide Range.
- Open Animated GIF Options.
- Choose a frame rate and auto-advance timing.
- Tap Export.
- Select a sharing or saving destination.
Convert a video with Adobe Express
Adobe Express provides a browser-based alternative for iPhone, Android, Mac, and Windows. Because files are uploaded to Adobe’s service, avoid this method for confidential, regulated, or organization-restricted footage.- Open Adobe Express and go to the Video area.
- Find Video Quick actions.
- Select Convert to GIF.
- Upload the source video.
- Drag the timeline handles to choose the start and end points.
- Select the desired File size.
- Select the required Layout.
- Preview the result.
- Select Download.
Create a frame-controlled GIF in Photoshop
Use Photoshop when you need exact frame delays, looping behavior, layer visibility, position, opacity, or color reduction.- Open the source document or place each image on a separate layer.
- Select Window > Layers.
- Select Window > Timeline.
- Open the Timeline mode menu and choose Create Frame Animation.
- Click Create Frame Animation.
- Add or duplicate frames in the Timeline panel.
- For each frame, change the relevant layer visibility, position, opacity, or style.
- Set the delay beneath each frame.
- Set the loop option to Once, 3 Times, Forever, or another available value.
- Click Play to preview the animation.
- Select File > Export > Save for Web.
- Choose GIF as the format.
- Adjust dimensions, colors, dithering, transparency, and looping settings.
- Check the estimated file size.
- Click Save.
Record a three-second selfie GIF in Google Messages
Google Messages can capture a short selfie GIF directly inside an Android conversation.- Open Google Messages.
- Open or start a conversation.
- Touch and hold the Camera button in the message bar.
- Wait for the countdown, or use the red recording button if displayed.
- Let the three-second recording finish.
- Tap Send.
Verify that the exported file is a real GIF
- Check that the file name ends in
.gif. - Open it in a current browser such as Edge, Chrome, Firefox, or Safari.
- Confirm that the animation starts and loops as expected.
- Check the file’s properties or information if the extension is hidden.
- Send it to yourself before posting it to verify that the destination preserves animation.
References
- Primary source: Technobezz
Published: 2026-07-13T16:25:48.861000+00:00
How to Make a GIF on iPhone, Android, Mac, and Windows (2026) | Technobezz
How to make a GIF from photos, videos, Live Photos, slides, or chats on iPhone, Android, Mac, Windows, and the web.www.technobezz.com
