

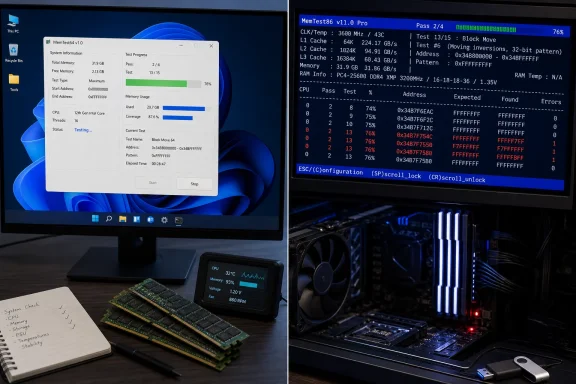
Verdict: use TechPowerUp MemTest64 first for a fast Windows 11 stability screen, but use bootable PassMark MemTest86 before declaring a DIMM bad, starting an RMA, or rebuilding a system. MemTest64 is excellent for reproducing a suspect memory workload without rebooting; it is not the final authority because Windows itself controls how much RAM the tool can access.
The practical path is simple:
TechPowerUp released MemTest64 1.0 on April 20, 2017, and its download listing still identified the utility as version 1.0 as of June 2025. It is a portable, 64-bit Windows memory-testing utility that TechPowerUp says supports Windows XP through Windows 11, requires no administrator rights, and allows the user to choose how much memory to test.
Those details matter because MemTest64 has almost no setup cost. There is no bootable media to prepare, no interruption to a working session, and no elevated prompt standing between a user and a quick stability check. For a freshly assembled PC, a machine that has just received additional RAM, or a system that fails only while Windows is under normal use, that convenience is valuable.
Use it when you need a consistent in-session workload. Pick an amount of memory, run the test, note the outcome, then repeat the same selected-memory test after changing one variable. That makes MemTest64 useful for comparing a system before and after a BIOS memory-setting change, a physical reseat, or an adjustment intended to restore stability.
The important word is comparison. A clean MemTest64 run says the portion of memory Windows made available survived that particular test under that particular Windows session. It is useful evidence, but it is not a complete inspection of every installed byte of RAM.
WindowsForum readers looking for a quick Windows-side starting point may also find the site’s earlier Optimize Your RAM Health with MemTest64: A Comprehensive Guide useful. The sharper distinction is that convenience and diagnostic completeness are different jobs—and MemTest64 is designed around the former.
That is exactly why the tool is valuable as a pressure test but insufficient as the final word on a hardware fault. A running Windows installation has its own active memory allocations, drivers, services, cache, and workload. MemTest64 is working inside that environment, not replacing it.
For an enthusiast, this means a clean run should not be read as “all installed RAM has been exhaustively cleared.” For a sysadmin or repair technician, it means the test should be documented as an in-OS screen: amount selected, conditions, result, and whether instability was reproduced. That is much more defensible than calling it a full memory certification.
The reverse is also true. If MemTest64 produces an error, do not wave it away merely because Windows was running. An error is a reason to escalate the investigation. The right next move is to remove the operating system from the testing path and see whether the fault persists from bootable media.
The procedure is straightforward:
PassMark positions MemTest86 as a stand-alone RAM fault diagnostic, and that is the distinction Windows users should retain. MemTest64 answers, “Can I reproduce a problem quickly while Windows is running?” MemTest86 answers a more consequential question: “Does the platform show memory-test failures when Windows is out of the way?”
Windows Memory Diagnostic is therefore a reasonable built-in triage option when a USB tool is not immediately available:
The disciplined approach is to preserve reproducibility. Do not make several changes at once, then claim the last change solved the issue. Run MemTest64 with a recorded memory selection for the fast check; use MemTest86 when testing must carry more weight; then change one variable at a time when narrowing the cause.
For unexplained crashes, suspected corruption, repeated instability, an RMA decision, or a rebuild, skip the temptation to treat that convenience as final proof. Boot MemTest86 instead. The USB reboot is an inconvenience measured in minutes; replacing the wrong component can cost far more time and money.
That is the useful hierarchy: run MemTest64 because it is easy enough to use routinely, but boot MemTest86 whenever the result will drive a hardware decision.
The practical path is simple:
- Save your work and close nonessential applications so Windows can make more memory available.
- Run the portable 64-bit MemTest64 utility in Windows and use its memory-selection control to test as much available memory as practical.
- Record the amount tested and reproduce the same test after any meaningful change, such as a memory-setting adjustment or a DIMM reseat.
- If MemTest64 reports errors, Windows becomes unstable, or you are deciding whether hardware should be replaced, restart and boot from a USB drive running PassMark MemTest86.
- Treat the bootable result as the stronger hardware-validation step, then investigate the memory module and the surrounding platform rather than assuming a failed test identifies one guilty part.
 Why MemTest64 Still Earns a Place on a Windows 11 PC
TechPowerUp released MemTest64 1.0 on April 20, 2017, and its download listing still identified the utility as version 1.0 as of June 2025. It is a portable, 64-bit Windows memory-testing utility that TechPowerUp says supports Windows XP through Windows 11, requires no administrator rights, and allows the user to choose how much memory to test.Those details matter because MemTest64 has almost no setup cost. There is no bootable media to prepare, no interruption to a working session, and no elevated prompt standing between a user and a quick stability check. For a freshly assembled PC, a machine that has just received additional RAM, or a system that fails only while Windows is under normal use, that convenience is valuable.
Use it when you need a consistent in-session workload. Pick an amount of memory, run the test, note the outcome, then repeat the same selected-memory test after changing one variable. That makes MemTest64 useful for comparing a system before and after a BIOS memory-setting change, a physical reseat, or an adjustment intended to restore stability.
The important word is comparison. A clean MemTest64 run says the portion of memory Windows made available survived that particular test under that particular Windows session. It is useful evidence, but it is not a complete inspection of every installed byte of RAM.
WindowsForum readers looking for a quick Windows-side starting point may also find the site’s earlier Optimize Your RAM Health with MemTest64: A Comprehensive Guide useful. The sharper distinction is that convenience and diagnostic completeness are different jobs—and MemTest64 is designed around the former.
Windows Is the Constraint, Not a Minor Footnote
TechPowerUp is unusually clear about MemTest64’s operating boundary: because the utility runs inside Windows, it can test only the memory Windows can make available. The company also notes that MemTest64 may push applications to the pagefile to free memory.That is exactly why the tool is valuable as a pressure test but insufficient as the final word on a hardware fault. A running Windows installation has its own active memory allocations, drivers, services, cache, and workload. MemTest64 is working inside that environment, not replacing it.
For an enthusiast, this means a clean run should not be read as “all installed RAM has been exhaustively cleared.” For a sysadmin or repair technician, it means the test should be documented as an in-OS screen: amount selected, conditions, result, and whether instability was reproduced. That is much more defensible than calling it a full memory certification.
The reverse is also true. If MemTest64 produces an error, do not wave it away merely because Windows was running. An error is a reason to escalate the investigation. The right next move is to remove the operating system from the testing path and see whether the fault persists from bootable media.
When PassMark MemTest86 Becomes the Right Tool
PassMark MemTest86 v11.7 Free is the better second-stage choice when the consequences of a wrong conclusion are expensive. It boots from USB in a UEFI environment rather than running within Windows, offers 14 memory-test algorithms, supports DDR5 and CAMM2, and is signed by Microsoft for Secure Boot verification, according to PassMark’s product information.The procedure is straightforward:
- Obtain the PassMark MemTest86 v11.7 Free USB-booted tool and prepare its bootable USB media using PassMark’s provided process.
- Restart the PC and choose the USB drive from the system’s UEFI boot options.
- Start MemTest86 and allow it to test from outside the installed Windows session.
- Preserve the result before changing more hardware or settings.
- If errors appear, do not immediately assume one DIMM is conclusively defective; test the configuration methodically and consider the broader platform.
PassMark positions MemTest86 as a stand-alone RAM fault diagnostic, and that is the distinction Windows users should retain. MemTest64 answers, “Can I reproduce a problem quickly while Windows is running?” MemTest86 answers a more consequential question: “Does the platform show memory-test failures when Windows is out of the way?”
A Failed Memory Test Does Not Name the Failed Part
Neither tool should be used as a shortcut from “error detected” to “replace this particular stick.” Microsoft’s Windows Memory Diagnostic illustrates the limitation well: it can be launched by runningmdsched.exe and performs its check after a restart, but a memory-test result alone does not identify whether instability originates with the DIMM, memory settings, motherboard, CPU, or another component.Windows Memory Diagnostic is therefore a reasonable built-in triage option when a USB tool is not immediately available:
- Press
Win + R. - Type
mdsched.exe. - Start the diagnostic and restart when prompted.
- Use the result as an indication that more investigation may be necessary, not as a component-level verdict.
The disciplined approach is to preserve reproducibility. Do not make several changes at once, then claim the last change solved the issue. Run MemTest64 with a recorded memory selection for the fast check; use MemTest86 when testing must carry more weight; then change one variable at a time when narrowing the cause.
The Best Decision Is Based on the Cost of Being Wrong
For a casual check after adding RAM, MemTest64 is the frictionless choice. It is portable, needs no administrator rights, and lets the user decide how much currently available memory to test. That is enough for a quick confidence check or for repeatedly exercising a Windows 11 machine without interrupting the session.For unexplained crashes, suspected corruption, repeated instability, an RMA decision, or a rebuild, skip the temptation to treat that convenience as final proof. Boot MemTest86 instead. The USB reboot is an inconvenience measured in minutes; replacing the wrong component can cost far more time and money.
That is the useful hierarchy: run MemTest64 because it is easy enough to use routinely, but boot MemTest86 whenever the result will drive a hardware decision.
Frequently Asked Questions
Should I skip MemTest64 and always use MemTest86?
No. MemTest64 is still the better first check when you need a fast, repeatable Windows 11 workload test without rebooting. Use MemTest86 when you need stronger evidence before acting on a possible hardware failure.Does a clean MemTest64 result prove my RAM is good?
No. MemTest64 can test only the memory Windows makes available during that session. A clean result is useful, but it does not replace a bootable test for a serious diagnosis.Can Windows Memory Diagnostic replace MemTest86?
Windows Memory Diagnostic is a convenient built-in triage tool launched withmdsched.exe, but its result alone cannot identify whether the DIMM, memory settings, motherboard, CPU, or another component is responsible. It is a useful signal, not a full component verdict.If a memory test reports errors, should I immediately RMA the RAM?
Not immediately. Escalate from MemTest64 to bootable MemTest86, preserve the results, and investigate the wider memory configuration and platform before assigning blame to a single part.References
- Primary source: memtest86.com
MemTest86 - Official Site of the x86 and ARM Memory Testing Tool
MemTest86 is the original self booting memory testing software for x86 and ARM computers. Supporting both BIOS and UEFI, with options to boot from USB and PXE network.www.memtest86.com - Independent coverage: mail.memtest86.com
- Independent coverage: en.wikipedia.org
MemTest86 - Wikipedia
en.wikipedia.org
- Independent coverage: memtest86.net
How to use MemTest86 – MemTest86
 memtest86.net
- Independent coverage: mundobytes.com
MemTest86 vs MemTest64: Differences and Which One to Choose
Learn the differences between MemTest86 and MemTest64 to decide which is best for testing your RAM.mundobytes.com - Independent coverage: memstechtips.com
How To Test Your Computer’s RAM For Errors Using Memtest86
How to test PC RAM for errors with free MemTest86 v11 — create bootable USB, boot and run 2-4 passes, and isolate faulty sticks and slots.memstechtips.com