

Signing in to Microsoft Edge is the key to turning a browser installation into a consistent, cross-device workspace. Once a profile is connected to a personal Microsoft account or an eligible work or school account, Edge can synchronize selected data such as favorites, passwords, history, open tabs, addresses, settings, and extensions across supported devices. The basic process is straightforward, but the location of the sign-in control varies between desktop and mobile, and organization-managed devices can add important restrictions.
The most reliable approach is to begin with Edge’s profile menu, confirm that the correct account is being used, and then decide exactly what should synchronize. That distinction matters: signing in to the browser and enabling sync are related, but they are not always the same action. A signed-in profile can be useful for account-aware services even when some or all sync categories are disabled.
Microsoft Edge uses profiles to separate browsing environments. A profile can have its own favorites, saved passwords, extensions, theme choices, browsing settings, history, and sync preferences. This design is particularly useful on shared computers, on systems used for both work and personal tasks, or for anyone who wants a clean boundary between different identities.
Signing in attaches an Edge profile to an account. Depending on the account type and device configuration, Edge may then offer to synchronize data through Microsoft’s services.
The most common account types are:
However, sync should not be treated as a switch that must always be turned on. A privacy-conscious user may choose to sync only favorites and settings while leaving browsing history, passwords, payment information, or open tabs disabled. Edge’s sync controls are designed to support that granular approach.
This is an important detail for troubleshooting. Many users assume that the absence of a visible Sign in button means Edge is malfunctioning. In practice, it can simply mean that the active profile already has an account attached.
A profile with a similar name or matching initials can still be the wrong account. A personal Microsoft account and a work account might share the same display name, while synchronizing entirely different collections of favorites, passwords, tabs, and settings.
The profile flyout is usually the simplest place to check. Select the profile icon and look for the account email address, profile name, and available profile-switching options.
Typing that address into the Edge address bar can be faster than navigating through the menu. It is also a practical troubleshooting shortcut because it opens the profile area directly, avoiding distractions from unrelated browser settings.
After signing in, review the sync page under:
The available items may include:
For example, syncing favorites and extensions may make sense across personal computers, while syncing payment information to a shared laptop may not. Likewise, a work profile may be appropriate for company favorites and productivity settings, but personal passwords and consumer browsing data should remain in a separate personal profile.
This is more than a convenience feature. It reduces the likelihood of saving a personal password to a work account, opening company links under a personal identity, or adding personal favorites to an organization-managed profile.
The exact visual placement can vary slightly between Edge versions and mobile platforms. The underlying process, however, remains consistent: open the account area, choose or add an account, and enable sync if desired.
The practical paths are typically:
A work account can be subject to mobile device management, app protection rules, or organizational restrictions. An employer may allow browser sign-in but block certain sync categories. It may also require a compliant device, an approved authentication method, or an up-to-date security policy before account access is granted.
That is normal in managed environments. It is not automatically a fault in the Edge app.
Keyboard focus behavior can vary depending on the operating system, installed extensions, full-screen mode, and accessibility tools. The Settings route remains a dependable fallback:
This direct address is often easier to use than moving through multiple toolbar controls.
Allow the full authentication process to complete before closing Edge or switching profiles. Interrupting the flow can leave stale sign-in prompts behind, particularly when a verification challenge has expired.
If the account cannot sign in on the web, Edge is unlikely to solve the underlying problem. Reset the password if necessary, check security alerts, confirm that the account is not locked, and update multi-factor authentication methods if a phone number, security key, or authenticator device has changed.
Only return to Edge after the account itself is known to work.
Then attempt the profile sign-in again. This approach avoids the ambiguity of toolbar controls and provides a clearer picture of whether the browser profile is connected, paused, or awaiting sync confirmation.
To clear the most relevant browsing data:
A safer troubleshooting strategy is to clear only the categories relevant to authentication first:
This is why an unavailable sign-in button, a disabled sync option, or a profile that reverts after restart may be an administrative issue rather than a local browser defect.
Then search for:
The common values are:
If Edge reports that the browser is managed by an organization, do not attempt to bypass the policy by editing registry values, removing management profiles, or using unsupported workarounds. On an organization-owned device, those actions can violate security rules and may break access to managed applications or resources.
The correct response is to provide the policy details to the organization’s IT support team and request clarification about browser sign-in and sync requirements.
Automatic sign-in is not the same as unrestricted personal sync. An organization can automatically connect a work profile while limiting data categories, blocking consumer accounts, requiring additional security controls, or disabling sync entirely.
That distinction protects business data, but it can confuse users who expect Edge to behave like a personal browser installation.
Modern Microsoft Edge uses the Chromium-based browser architecture and has a different profile experience, different settings paths, and broader cross-platform sync support. Instructions that mention Edge Legacy menus, legacy account pages, or outdated Windows 10 browser behavior should not be used as current sign-in guidance.
The current profile-based workflow is the relevant one:
or:
For mobile, the current route centers on the app’s profile and account settings rather than any desktop-style toolbar icon.
Use a modern authentication method where possible:
A work profile should not become the default home for personal shopping, banking, entertainment, or private research. Similarly, personal profiles should not be used for confidential company information unless explicitly approved by organizational policy.
A practical configuration might look like this:
Separate profiles are the best way to keep personal, work, school, and shared browsing organized. When sign-in fails, verify the account first, retry through the Profiles page, clear only the relevant cookies and cache if authentication loops, and check
A deliberate setup delivers the real benefit of Microsoft Edge sign-in: the same browser environment where it is useful, without turning every device and every account into the same indistinct digital workspace.
The most reliable approach is to begin with Edge’s profile menu, confirm that the correct account is being used, and then decide exactly what should synchronize. That distinction matters: signing in to the browser and enabling sync are related, but they are not always the same action. A signed-in profile can be useful for account-aware services even when some or all sync categories are disabled.
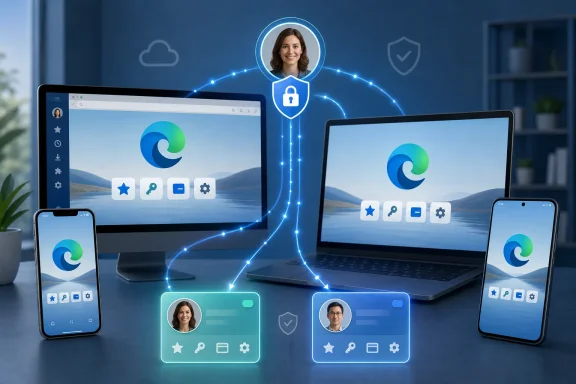 Overview: What Signing In to Edge Actually Does
Microsoft Edge uses profiles to separate browsing environments. A profile can have its own favorites, saved passwords, extensions, theme choices, browsing settings, history, and sync preferences. This design is particularly useful on shared computers, on systems used for both work and personal tasks, or for anyone who wants a clean boundary between different identities.Signing in attaches an Edge profile to an account. Depending on the account type and device configuration, Edge may then offer to synchronize data through Microsoft’s services.
The most common account types are:
- Personal Microsoft account — typically used with Outlook.com, Xbox, OneDrive, Windows consumer devices, and Microsoft Rewards.
- Work or school account — typically issued by an employer, university, or other organization using Microsoft 365 or Microsoft Entra ID.
- Organization-managed identity — an account that may be subject to browser policies, security requirements, app protection controls, or blocked sync settings.
However, sync should not be treated as a switch that must always be turned on. A privacy-conscious user may choose to sync only favorites and settings while leaving browsing history, passwords, payment information, or open tabs disabled. Edge’s sync controls are designed to support that granular approach.
The Fastest Way to Sign In on Windows, macOS, or Linux
On a desktop or laptop, the profile button is usually the fastest route to signing in. It appears near the upper-right corner of the Edge window and may show a generic person icon, a profile photo, or initials.Sign in from the profile button
- Open Microsoft Edge.
- Select the profile icon in the upper-right corner of the browser window.
- Choose an available account, or select Add new account if the needed account is not listed.
- Select Sign in to sync data.
- Complete the Microsoft account, work account, or school account sign-in prompts.
- Review the sync prompt and choose whether to enable synchronization.
This is an important detail for troubleshooting. Many users assume that the absence of a visible Sign in button means Edge is malfunctioning. In practice, it can simply mean that the active profile already has an account attached.
Confirm the active profile before syncing
Before enabling sync, verify that the browser is using the intended identity. This is especially important on a household computer or a work device where accounts may have been added previously.A profile with a similar name or matching initials can still be the wrong account. A personal Microsoft account and a work account might share the same display name, while synchronizing entirely different collections of favorites, passwords, tabs, and settings.
The profile flyout is usually the simplest place to check. Select the profile icon and look for the account email address, profile name, and available profile-switching options.
Use Edge Settings When the Profile Menu Is Unclear
The profile icon is convenient, but the Settings page gives a more structured view of the current profile, account connection, and sync configuration. It is also useful when the profile button is not visible where expected or when Edge’s interface has been adjusted by a theme, accessibility setting, window size, or enterprise policy.Open the sign-in page from Settings
- Select Settings and more — the three-dot menu in the top-right corner.
- Select Settings.
- Open Profiles.
- Select Sign in.
- Choose the account to use.
- Select Continue.
- Select Sign in to sync data if Edge offers the option.
edge://settings/profilesTyping that address into the Edge address bar can be faster than navigating through the menu. It is also a practical troubleshooting shortcut because it opens the profile area directly, avoiding distractions from unrelated browser settings.
Distinguish profile sign-in from data sync
One of the more confusing parts of Microsoft Edge account management is the difference between being signed in and being fully synchronized. The account may be connected while sync is off, paused, partially restricted, or configured to include only selected categories.After signing in, review the sync page under:
Settings > Profiles > SyncThe available items may include:
- Favorites
- Passwords
- History
- Open tabs
- Extensions
- Settings
- Addresses and other form-fill data
- Payment information
- Collections or related browsing data, depending on the current Edge version and account configuration
For example, syncing favorites and extensions may make sense across personal computers, while syncing payment information to a shared laptop may not. Likewise, a work profile may be appropriate for company favorites and productivity settings, but personal passwords and consumer browsing data should remain in a separate personal profile.
Add a Second Profile Instead of Mixing Work and Personal Browsing
A second Edge profile is often the best answer when one computer supports multiple identities. Rather than constantly signing out and back in, separate profiles keep each environment intact.This is more than a convenience feature. It reduces the likelihood of saving a personal password to a work account, opening company links under a personal identity, or adding personal favorites to an organization-managed profile.
Create another Microsoft Edge profile
- Select the profile button.
- Choose Manage profile settings.
- Select Add profile.
- Select Add to create the new local profile.
- In the new profile, select Sign in to sync data.
- Select Continue.
- Choose whether to enable synchronization.
- Confirm the setup.
Why separate profiles are better than repeated sign-outs
Using a dedicated profile for each identity provides several practical advantages:- Separate saved passwords reduce accidental autofill across identities.
- Independent favorites keep personal reading lists apart from work resources.
- Distinct extensions allow company-required tools to stay inside the work profile.
- Separate browsing history and tabs make it easier to resume the right tasks.
- Different policy behavior can apply to managed and unmanaged profiles.
- Cleaner privacy boundaries help prevent personal data from crossing into an employer-controlled environment.
Use profile names that reduce mistakes
When multiple profiles are active, generic labels can create confusion. Rename profiles clearly where Edge allows it, using labels such as:- Personal
- Work
- School
- Shared family
- Testing
- Client account
Sign In to Microsoft Edge on iPhone and Android
Microsoft Edge mobile uses a different layout from desktop Edge, so users should not expect to find the same top-right profile button. On iPhone and Android, account controls are generally accessed through the profile image or the app’s Settings area.The exact visual placement can vary slightly between Edge versions and mobile platforms. The underlying process, however, remains consistent: open the account area, choose or add an account, and enable sync if desired.
Sign in through the mobile profile area
- Open the Microsoft Edge app.
- Tap the profile image or account area.
- Open Accounts.
- Select the account to use.
- Tap Sign in to sync.
- Complete the account verification prompts.
Use Settings when an account is not shown
If the profile area does not show the expected account, open the main app settings instead. In Edge mobile, account options may appear beneath Settings, then Accounts or the current profile area.The practical paths are typically:
- Personal account:
Settings > Accounts > Sign in with a Microsoft account - Work or school account:
Settings > Accounts > Sign in with a work or school account
Mobile Edge can support more than one account context
On supported configurations, Edge mobile can recognize both a personal Microsoft account and a work or school account. This flexibility is useful, but it also requires deliberate choices about synchronization and data separation.A work account can be subject to mobile device management, app protection rules, or organizational restrictions. An employer may allow browser sign-in but block certain sync categories. It may also require a compliant device, an approved authentication method, or an up-to-date security policy before account access is granted.
That is normal in managed environments. It is not automatically a fault in the Edge app.
Use Microsoft Edge with a Keyboard or Screen Reader
Signing in to Edge does not require a mouse. Keyboard navigation is useful for power users, for situations where a pointing device is unavailable, and for people using assistive technologies.Basic keyboard route to the profile menu
- Open Microsoft Edge.
- Press
F6until focus reaches the browser toolbar or app bar. - Press
Tabuntil the profile button is selected. - Press
Enter. - Select the needed account or the Sign in to sync option.
- Complete the authentication prompts using the keyboard.
Keyboard focus behavior can vary depending on the operating system, installed extensions, full-screen mode, and accessibility tools. The Settings route remains a dependable fallback:
edge://settings/profilesThis direct address is often easier to use than moving through multiple toolbar controls.
Accessibility and account prompts
Account sign-in windows can involve extra authentication steps, including password entry, approval through an authenticator app, security keys, recovery methods, or organization-specific multi-factor authentication. These prompts may open in a dedicated browser tab, an embedded Microsoft sign-in page, or a system dialog.Allow the full authentication process to complete before closing Edge or switching profiles. Interrupting the flow can leave stale sign-in prompts behind, particularly when a verification challenge has expired.
Troubleshoot Edge Sign-In Problems Methodically
A sign-in failure can stem from several sources: an incorrect password, expired multi-factor authentication information, a locked account, an outdated Edge version, corrupted cookies, conflicting profiles, network restrictions, or administrator policy. The best troubleshooting sequence begins with the account itself, not with broad browser resets.First, verify that the account can sign in elsewhere
For a personal account, verify access through the Microsoft account portal. For a work or school account, verify access through the organization’s account portal or Microsoft 365 sign-in page.If the account cannot sign in on the web, Edge is unlikely to solve the underlying problem. Reset the password if necessary, check security alerts, confirm that the account is not locked, and update multi-factor authentication methods if a phone number, security key, or authenticator device has changed.
Only return to Edge after the account itself is known to work.
Retry from the Profiles page
Once web sign-in is successful, reopen Edge and go to:edge://settings/profilesThen attempt the profile sign-in again. This approach avoids the ambiguity of toolbar controls and provides a clearer picture of whether the browser profile is connected, paused, or awaiting sync confirmation.
Clear cookies and cached files if sign-in loops
Repeated account prompts, failed redirects, or a sign-in page that continually returns to the same screen can be caused by stale cookies, cached authentication pages, or damaged session data.To clear the most relevant browsing data:
- Open Microsoft Edge.
- Go to:
edge://settings/privacy - Under Clear browsing data, select Choose what to clear.
- Select Cookies and other site data.
- Select Cached images and files.
- Set the time range to All time.
- Select Clear now.
- Restart Edge.
- Return to
edge://settings/profilesand sign in again.
Be careful when clearing data while sync is active
Browser data cleanup deserves caution. Depending on the selected categories and sync state, deleting data can affect information visible on other synchronized devices. Review the exact boxes before confirming any deletion, particularly when favorites, history, passwords, or other important browser data are involved.A safer troubleshooting strategy is to clear only the categories relevant to authentication first:
- Cookies and other site data
- Cached images and files
Check for Organization Policies That Block Sign-In
On a company-owned, school-managed, or otherwise administered device, Edge may behave differently from a consumer installation. Administrators can allow browser sign-in, disable it, require it, or disable sync independently of whether the account is signed in.This is why an unavailable sign-in button, a disabled sync option, or a profile that reverts after restart may be an administrative issue rather than a local browser defect.
Review applied Edge policies
Open this internal Edge page:edge://policyThen search for:
BrowserSigninThe common values are:
- 0 — browser sign-in is disabled
- 1 — browser sign-in is enabled
- 2 — browser sign-in is required to use the browser
If Edge reports that the browser is managed by an organization, do not attempt to bypass the policy by editing registry values, removing management profiles, or using unsupported workarounds. On an organization-owned device, those actions can violate security rules and may break access to managed applications or resources.
The correct response is to provide the policy details to the organization’s IT support team and request clarification about browser sign-in and sync requirements.
Automatic sign-in can be intentional
Some Windows and organization-managed environments can automatically sign Edge into a browser profile using the operating system account. This can be useful because it reduces friction and helps enforce identity consistency across workplace services.Automatic sign-in is not the same as unrestricted personal sync. An organization can automatically connect a work profile while limiting data categories, blocking consumer accounts, requiring additional security controls, or disabling sync entirely.
That distinction protects business data, but it can confuse users who expect Edge to behave like a personal browser installation.
Ignore Instructions Written for Microsoft Edge Legacy
Older tutorials can be misleading because they refer to Microsoft Edge Legacy, the original Edge browser built around Microsoft’s former EdgeHTML technology. Microsoft Edge Legacy reached end of support on March 9, 2021 and no longer receives security updates.Modern Microsoft Edge uses the Chromium-based browser architecture and has a different profile experience, different settings paths, and broader cross-platform sync support. Instructions that mention Edge Legacy menus, legacy account pages, or outdated Windows 10 browser behavior should not be used as current sign-in guidance.
The current profile-based workflow is the relevant one:
Profile button > Sign in to sync dataor:
Settings > Profiles > Sign inFor mobile, the current route centers on the app’s profile and account settings rather than any desktop-style toolbar icon.
Best Practices for a Secure Edge Sign-In Setup
A successful sign-in should be followed by a quick privacy and security review. The goal is not merely to connect an account, but to ensure that the resulting browser profile matches the device, the user, and the sensitivity of the data involved.Use strong account protection
Enable multi-factor authentication for the Microsoft account or organization account attached to Edge. A browser profile can hold highly valuable information, including saved credentials, autofill data, open tabs, and activity-linked browsing preferences.Use a modern authentication method where possible:
- Authenticator app approval
- Security key
- Passkey, where supported
- Strong unique password with multi-factor authentication
- Updated backup and recovery information
Keep personal and work identities separate
Use separate Edge profiles for personal and professional browsing. This approach limits accidental cross-contamination of passwords, favorites, autofill entries, extensions, and browsing activity.A work profile should not become the default home for personal shopping, banking, entertainment, or private research. Similarly, personal profiles should not be used for confidential company information unless explicitly approved by organizational policy.
Review sync categories rather than accepting every default
The strongest Edge sync setup is rarely an all-or-nothing choice. Review the categories and disable anything that does not belong on every connected device.A practical configuration might look like this:
- Personal profile: favorites, passwords, settings, extensions, and open tabs enabled on trusted devices.
- Work profile: organization-approved sync settings only, subject to employer policy.
- Shared or temporary device: sign in only when necessary, consider disabling sensitive sync categories, and sign out when finished.
The Bottom Line
Logging in to Microsoft Edge is usually a quick profile-menu task, but effective setup goes beyond pressing Sign in. The most reliable desktop route is the profile icon oredge://settings/profiles, while mobile users should begin in the profile or Accounts area of the Edge app. From there, the critical decision is whether to enable sync and which data categories should travel with the account.Separate profiles are the best way to keep personal, work, school, and shared browsing organized. When sign-in fails, verify the account first, retry through the Profiles page, clear only the relevant cookies and cache if authentication loops, and check
edge://policy on managed systems. Modern Edge account management is built around profiles and selective sync, not the obsolete workflows associated with Microsoft Edge Legacy.A deliberate setup delivers the real benefit of Microsoft Edge sign-in: the same browser environment where it is useful, without turning every device and every account into the same indistinct digital workspace.