Set Up and Use Voice Typing in Windows 10/11 for Faster Dictation and Punctuation
Difficulty: Beginner | Time Required: 10 minutesVoice typing in Windows is one of those features that can save a surprising amount of time once you start using it. Instead of typing every sentence by hand, you can speak naturally and let Windows turn your words into text. It is especially helpful for emails, notes, forum posts, documents, and quick messages. It can also make Windows easier to use if typing is uncomfortable, slow, or tiring.
The good news is that voice typing is built into both Windows 10 and Windows 11. You do not need to install extra software to get started. In most cases, all you need is a working microphone, an internet connection, and a text box to type into.
Prerequisites
Before you begin, make sure you have the following:Quick walkthrough
- A PC running Windows 10 or Windows 11
- A working microphone
- Built-in laptop microphones usually work fine
- USB headsets and external microphones often give better accuracy
- An internet connection
- Windows voice typing relies on online speech recognition for best results
- A place to type, such as:
- Notepad
- Microsoft Word
- A browser text box
- Email apps
- Windows search fields
Note: Voice typing is different from Voice Access.
Voice typing is mainly for dictation. Voice Access is a broader accessibility tool that can control your PC and text with voice commands.
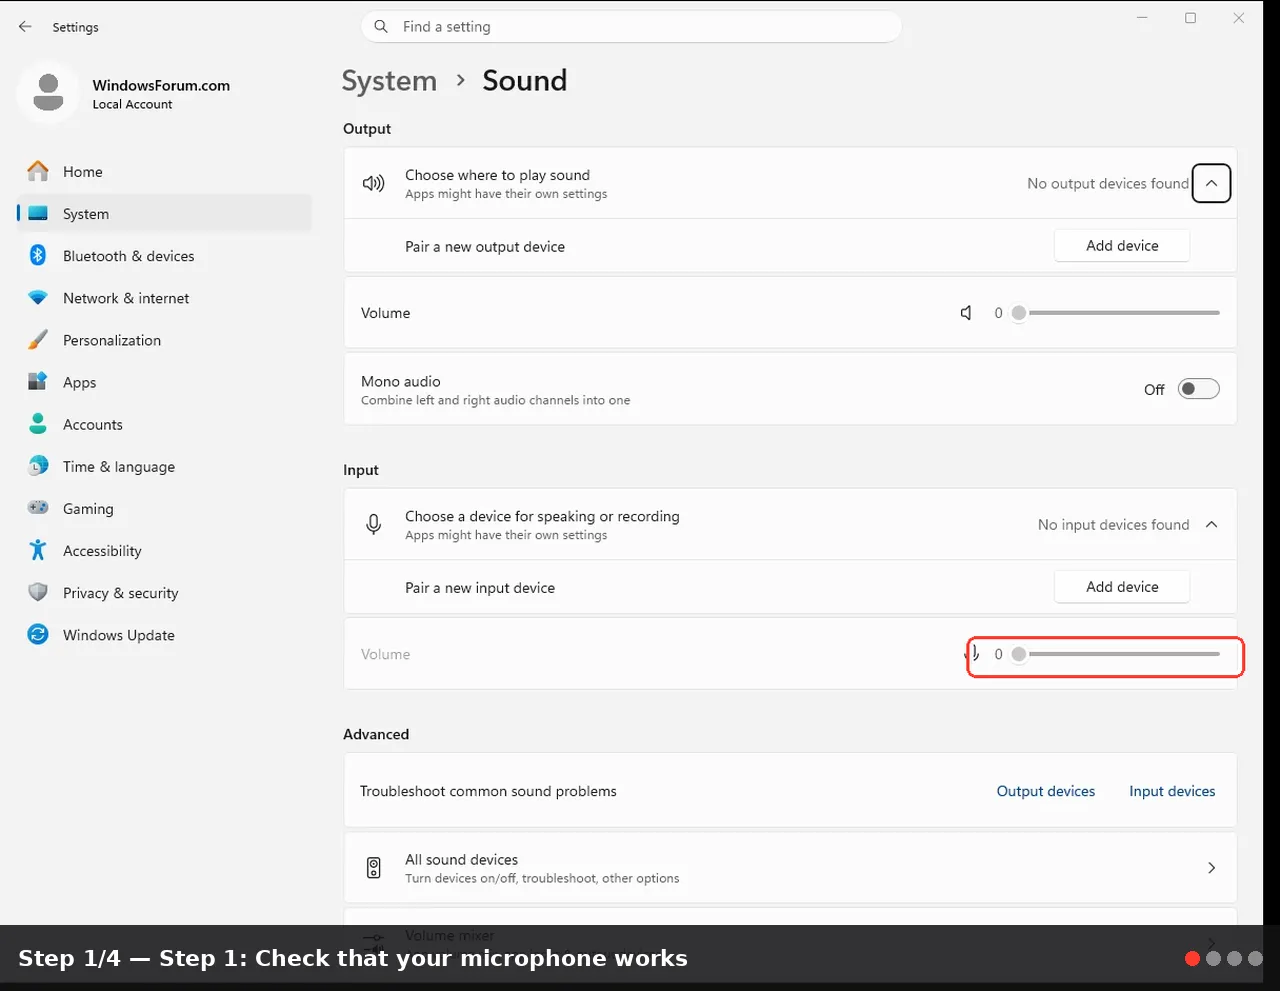
Step 1: Check that your microphone works
Before starting voice typing, make sure Windows can hear you clearly.
In Windows 11:
- Open Settings
- Go to System > Sound
- Under Input, select your microphone
- Speak normally and watch the input level move
In Windows 10:
- Open Settings
- Go to System > Sound
- Under Input, choose your microphone
- Test it by speaking and checking the input meter
Tip: If the meter does not move, try unplugging and reconnecting your microphone, or select a different input device.
Step 2: Open a text field
Voice typing only works when your cursor is active in a text box.- Open an app such as Notepad, Word, or your web browser
- Click inside a text area so the cursor is blinking
- Leave the cursor there while you start dictation
Step 3: Start voice typing
To launch voice typing:
- Press Windows key + H
- The voice typing toolbar or dictation box will appear
- Wait until Windows shows that it is listening
- Start speaking clearly
Windows version notes
- Windows 11: This feature is labeled Voice typing
- Windows 10: Microsoft often refers to it as Dictation, but the shortcut is still Windows + H
Tip: On touchscreen devices, you may also see a microphone button on the touch keyboard.
Step 4: Speak naturally and clearly
Once voice typing is active, speak in a normal tone. You do not need to shout or speak like a robot.For best results:
- Speak at a steady pace
- Pause briefly between sentences
- Use a quiet room if possible
- Keep the microphone close enough to your mouth
Warning: Background noise from TVs, speakers, fans, or nearby conversations can reduce accuracy.
Step 5: Use punctuation while dictating
One of the most useful parts of voice typing is adding punctuation without touching the keyboard.You can say common punctuation marks such as:
- period
- comma
- question mark
- exclamation mark
- new line
- new paragraph
Example
If you say:Windows should type:Hello everyone comma this is much faster period
In Windows 11, you can also enable automatic punctuation, which lets Windows insert punctuation based on your speech patterns.Hello everyone, this is much faster.
Step 6: Turn on automatic punctuation in Windows 11
If you are using Windows 11, automatic punctuation can make dictation feel much smoother.- Press Windows + H
- In the voice typing toolbar, click the gear icon
- Look for Automatic punctuation
- Turn it On
Note: Automatic punctuation is mainly a Windows 11 convenience feature.
In Windows 10, you will usually need to speak punctuation commands manually.
Step 7: Explore useful voice typing settings
In Windows 11, the voice typing settings menu gives you a few helpful options.- Open voice typing with Windows + H
- Click the gear icon
- Review settings such as:
- Voice typing launcher
- Automatic punctuation
- Filter profanity
- Default microphone
What these settings do
- Voice typing launcher: Makes it easier to reopen voice typing in text fields
- Automatic punctuation: Adds punctuation automatically
- Filter profanity: Masks or allows strong language
- Default microphone: Lets you choose the microphone Windows should use
Step 8: Stop voice typing
When you are finished, you can stop dictation in a few ways:- Click the microphone on the dictation toolbar
- Press Windows + H again in some situations
- Say Stop listening or Stop dictation
Step 9: Try a few editing commands
Windows voice typing can do more than just type words. Some versions support useful commands such as:- Delete that
- Select that
- Press Enter
- Press Backspace
- Press Tab
- Press Space
Tip: Command support is broader in Windows 11 voice typing than in older Windows 10 dictation behavior, and some commands vary by language.
Step 10: Change languages if needed
If you want to dictate in another language, you may need to add that language to Windows first.
In Windows 11:
- Open Settings
- Go to Time & language > Language & region
- Under Preferred languages, click Add a language
- Choose the language you want
- Install it
- Switch input languages with Windows + Space
In Windows 10:
- Open Settings
- Go to Time & Language > Language
- Add the language you want
- Switch with Windows + Space
Note: Windows 11 supports more voice typing languages than Windows 10.
Dictation commands and punctuation support may vary depending on the language.
Tips and troubleshooting
If voice typing does not start
- Make sure the cursor is inside a text box
- Confirm your microphone is selected in Sound settings
- Check that your microphone is not muted
- Restart the app you are dictating into
If Windows hears the wrong words
- Move closer to the microphone
- Reduce background noise
- Speak more clearly and slightly slower
- Try a headset microphone instead of a built-in laptop mic
If nothing happens after pressing Windows + H
- Verify your keyboard shortcut is working
- Try another text box or another app
- Make sure you are connected to the internet
If punctuation is missing
- In Windows 11, enable Automatic punctuation
- In Windows 10, say punctuation explicitly, such as comma or period
If you use a touchscreen
- Tap the microphone icon on the touch keyboard to begin dictation
Helpful note: Voice typing does not belong just to accessibility users. It is also great for anyone who wants to draft text faster, reduce typing strain, or capture ideas quickly.
Conclusion
Voice typing in Windows 10 and Windows 11 is simple to set up, easy to learn, and surprisingly useful for everyday work. With just Windows + H, you can start dictating emails, notes, and documents in seconds. Windows 11 adds extra convenience with settings like automatic punctuation, while Windows 10 still provides a solid built-in dictation experience.If you have never tried it before, spend five minutes practicing in Notepad or a browser text box. Once you get comfortable speaking punctuation and basic commands, you may find yourself using it far more often than expected.
Key Takeaways:
- Voice typing is built into both Windows 10 and Windows 11
- You can start it quickly with Windows + H
- A working microphone and internet connection are required
- Windows 11 includes useful extras like automatic punctuation
- Voice typing can save time and reduce typing effort for everyday tasks
This tutorial was generated to help WindowsForum.com users get the most out of their Windows experience.
Last edited: