

Windows 11 can extend a desktop across multiple monitors after the screens are connected through supported HDMI, USB-C, DisplayPort, VGA, DVI, dock, adapter, or Miracast paths. Before changing Windows settings, confirm that the PC, graphics hardware, dock, and adapters support the total number of displays you want to use. For independent workspaces, choose Extend rather than Duplicate.
If both monitors show the same image even after selecting Extend, inspect the connection. With a basic splitter, the likely solution is not another Settings change; it is a supported dock, adapter, or separate video output that presents each monitor independently. Microsoft Support’s external-monitor troubleshooting article specifically warns that an HDMI splitter duplicates one signal rather than creating independent signals for extended displays.
For additional desktop space, select Extend. You can then move the pointer, applications, and other items between screens.
Duplicate is appropriate when every viewer should see the same image. It is not a fault state unless the user expects separate workspaces. Likewise, PC screen only and Second screen only are valid modes, but either can leave a connected display unused because of the current selection.
Windows key + P changes the mode for displays that the system already recognizes. If a monitor is missing from Display settings, use Detect and check the connection and hardware support rather than repeatedly changing projection modes.
If the monitor appears, select Windows key + P > Extend, identify it, and arrange it. If it remains absent, check the parts of the connection that precede desktop layout:
Drag those rectangles to represent the physical layout. If a monitor is physically to the left, place its rectangle to the left. If one screen is higher, lower, or vertically mounted, reflect that position as closely as practical. Select Apply, then move the pointer across the display boundaries to test the result.
Display numbers are identifiers, not rankings. Display 1 does not have to sit on the left, and the cable order does not have to match the desk order. This is especially relevant with docks and identical monitors, where the connection sequence may not be visually obvious.
A wrong pointer path usually indicates an arrangement problem, not a cable or driver failure. If the pointer exits from the wrong edge or reaches a screen only through part of an edge, return to Display settings and adjust the rectangles.
Use the resolution Windows marks as recommended unless the monitor’s documented requirements or a specific workflow call for another setting. If one screen’s text appears much larger than another’s, compare Scale values before treating the difference as a hardware fault. If a physically rotated monitor shows a sideways image, change Display orientation.
Administrators standardizing workstations should record the selected display mode, physical order, primary display, Scale, resolution, and orientation. Merely recording “two monitors” is not enough to reproduce the user’s workspace.
Application behavior can vary, and these settings do not repair unstable cables, docks, adapters, or graphics drivers. Their purpose is window management after Windows recognizes that the display arrangement has changed.
For a frequently docked laptop, test the full transition:
Microsoft Support’s “Screen mirroring and projecting to your PC or wireless display” also documents a Settings route through Start > Settings > System > Display > Multiple displays, where Windows provides the control for connecting to a wireless display.
Wireless projection adds several dependencies that do not exist in a basic cable connection. The sending PC and receiver must support the required technology, the receiver must be available, and an organization may control the feature through policy.
Classify the target before troubleshooting it:
On the sending PC, press Windows key + K and select the receiving PC when it appears.
Microsoft Support’s screen-mirroring and projection article documents the Optional features path, installation of Wireless Display, and launching the Wireless Display app. The exact Optional features interface can vary as Windows changes, so follow the controls currently shown rather than relying on a longer sequence of button names that may not match every build.
If the receiving PC is missing from the Cast list:
This tests whether the saved device relationship is contributing to the problem without changing the entire graphics-driver installation.
Before removing a driver, record the adapter name, obtain the manufacturer’s appropriate driver package if needed, and make sure the user understands that display behavior may change during recovery. On a managed PC, involve IT before changing the display driver.
That distinction matters during troubleshooting. Updating Windows does not necessarily update an external adapter’s firmware. If the adapter is discoverable but unreliable, or if behavior differs across PCs, check its firmware through the Microsoft app.
Identify the product before giving firmware instructions. A Microsoft Wireless Display Adapter has a Microsoft-specific app and maintenance path; a generic Miracast target or another manufacturer’s adapter may use different tools.
Support documentation should therefore record:
Microsoft also documents Group Policy mappings for controls such as projection to a PC and requiring a PIN for pairing under Computer Configuration > Windows Components > Connect. Broader wireless-display management is available through mobile device management policy.
These controls have security and operational purposes. An organization may restrict casting to reduce unintended screen sharing, limit discovery on managed networks, control whether a computer can accept incoming projections, or require authentication during pairing. A locally missing option is therefore not proof that Windows or the wireless hardware is broken.
Do not attempt to bypass organizational policy. If casting or receiving options are missing on a managed computer, contact IT and provide:
Start with compatibility, connect each screen, use Detect, select Extend, arrange the numbered rectangles, and configure every display individually. Keep the HDMI-splitter limitation in mind, prepare receiving PCs before wireless projection, maintain adapter firmware separately, and involve IT when a managed device may be governed by projection policy.
As PCs, docks, USB-C implementations, wireless receivers, and management policies continue to evolve, the best support practice will remain the same: document the complete path from the computer to each screen and test the specific layer indicated by the symptom.
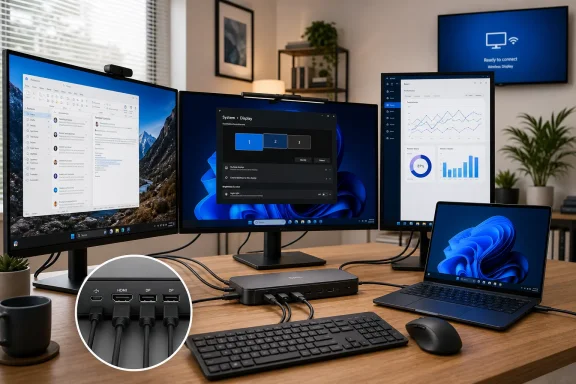 Do this first: Windows 11 multi-monitor setup
- Confirm with the PC and dock manufacturers that the complete setup supports the desired number of monitors.
- Connect each display through a supported port, dock, or adapter and select the correct input on each monitor.
- Go to Start > Settings > System > Display > Multiple displays > Detect.
- Press Windows key + P and select Extend.
- In Display settings, select Identify to match each numbered rectangle to its physical monitor.
- Drag the display rectangles until they match the monitors’ positions on the desk, then select Apply.
- Select each display individually and set its Scale, Display resolution, and Display orientation.
Compatibility checklist: confirm the PC and dock can drive every screen
The decisive compatibility question is whether the complete signal path supports the requested monitor count. Use this checklist before buying adapters or reinstalling drivers:- PC graphics support: Check the manufacturer’s specifications for the number of simultaneous displays the computer supports.
- Built-in screen count: Determine whether the laptop’s internal display counts toward the system’s maximum.
- Port capabilities: Confirm that the specific USB-C port supports video output; a USB-C connector does not by itself prove DisplayPort Alt Mode, Thunderbolt, or another video capability.
- Dock compatibility: Verify that the dock supports the PC model, operating system, requested monitor count, resolutions, and refresh rates.
- Adapter purpose: Make sure the adapter creates or exposes a supported video output rather than merely duplicating an existing signal.
- Cable and monitor input: Use a cable suitable for the connection and select the matching input on the monitor.
- Total configuration: Check the exact combination, not just each component separately. A PC may support a different number of displays depending on the dock, connection type, resolution, or whether the internal panel remains active.
- Manufacturer documentation: When specifications are ambiguous, ask the PC or dock manufacturer to confirm the supported configuration.
HDMI splitter warning: duplication is not extension
A basic HDMI splitter normally sends one source image to multiple screens. It can be useful when two displays should show the same presentation, status board, or video, but it does not provide two independent Windows desktops.If both monitors show the same image even after selecting Extend, inspect the connection. With a basic splitter, the likely solution is not another Settings change; it is a supported dock, adapter, or separate video output that presents each monitor independently. Microsoft Support’s external-monitor troubleshooting article specifically warns that an HDMI splitter duplicates one signal rather than creating independent signals for extended displays.
Windows 11 multi-monitor setup: use Extend, not Duplicate
Press Windows key + P to choose how Windows uses detected displays. Microsoft Support’s screen-mirroring and projection guidance lists four display modes:| Display mode | What it does | Typical use |
|---|---|---|
| PC screen only | Uses the PC’s main screen only | Working without the external display |
| Duplicate | Shows the same content on the displays | Presentations or mirrored viewing |
| Extend | Spreads the desktop across multiple screens | A normal multi-monitor workstation |
| Second screen only | Uses only the external screen | Working from an external monitor or projector |
Duplicate is appropriate when every viewer should see the same image. It is not a fault state unless the user expects separate workspaces. Likewise, PC screen only and Second screen only are valid modes, but either can leave a connected display unused because of the current selection.
Windows key + P changes the mode for displays that the system already recognizes. If a monitor is missing from Display settings, use Detect and check the connection and hardware support rather than repeatedly changing projection modes.
Quick decision table: match the symptom to the next action
| Symptom | Exact next action |
|---|---|
| No second display detected | Go to Settings > System > Display > Multiple displays > Detect, then check the cable, monitor input, adapter, dock compatibility, and the PC’s supported monitor count. |
| Same image on both displays | Press Windows key + P > Extend. If a basic HDMI splitter is in use, replace it with a supported independent display path. |
| Pointer moves in the wrong direction | Select Identify, then drag the numbered display rectangles to match the physical desk layout and select Apply. |
| Wireless target is missing | On a receiving PC, install the Wireless Display optional feature and open the Wireless Display app. |
| Casting or receiving options are missing on a managed work PC | Contact IT and ask whether wireless projection is restricted by device-management or Group Policy settings. |
If the second monitor is missing: Settings > System > Display > Multiple displays > Detect
When a connected monitor does not appear automatically, go to Start > Settings > System > Display > Multiple displays > Detect. This tells Windows to look again for connected displays.If the monitor appears, select Windows key + P > Extend, identify it, and arrange it. If it remains absent, check the parts of the connection that precede desktop layout:
- Confirm that the monitor is powered on.
- Select the correct HDMI, DisplayPort, USB-C, DVI, or VGA input on the monitor.
- Reseat the cable at both ends.
- Test another compatible cable or port when available.
- Bypass a dock or adapter temporarily if the PC has a suitable direct video output.
- Check whether the dock and adapter are compatible with the PC.
- Confirm the supported external-monitor count with the PC manufacturer.
- If one monitor works but another does not, test each monitor individually on a known-working connection.
Use Identify and arrange the numbered display rectangles
After Windows detects the monitors, go to Start > Settings > System > Display and select Identify. Windows shows a number on each screen, matching the rectangles in Display settings.Drag those rectangles to represent the physical layout. If a monitor is physically to the left, place its rectangle to the left. If one screen is higher, lower, or vertically mounted, reflect that position as closely as practical. Select Apply, then move the pointer across the display boundaries to test the result.
Display numbers are identifiers, not rankings. Display 1 does not have to sit on the left, and the cable order does not have to match the desk order. This is especially relevant with docks and identical monitors, where the connection sequence may not be visually obvious.
A wrong pointer path usually indicates an arrangement problem, not a cable or driver failure. If the pointer exits from the wrong edge or reaches a screen only through part of an edge, return to Display settings and adjust the rectangles.
Set Scale, resolution, and orientation for each screen
Windows 11 lets you configure each detected display separately. In Start > Settings > System > Display, select a monitor rectangle before changing its settings under Scale & layout.- Scale changes the apparent size of text, applications, and interface elements.
- Display resolution controls the configured pixel dimensions.
- Display orientation supports landscape, portrait, and flipped arrangements.
Use the resolution Windows marks as recommended unless the monitor’s documented requirements or a specific workflow call for another setting. If one screen’s text appears much larger than another’s, compare Scale values before treating the difference as a hardware fault. If a physically rotated monitor shows a sideways image, change Display orientation.
Administrators standardizing workstations should record the selected display mode, physical order, primary display, Scale, resolution, and orientation. Merely recording “two monitors” is not enough to reproduce the user’s workspace.
Multiple displays options can improve dock and undock behavior
Under Start > Settings > System > Display > Multiple displays, Windows may present options named:- Remember window locations based on monitor connection
- Minimize windows when a monitor is disconnected
Application behavior can vary, and these settings do not repair unstable cables, docks, adapters, or graphics drivers. Their purpose is window management after Windows recognizes that the display arrangement has changed.
For a frequently docked laptop, test the full transition:
- Connect the dock and open applications across the displays.
- Disconnect using the organization’s normal process.
- Confirm that applications remain accessible on the active screen.
- Reconnect and observe the resulting arrangement.
- Adjust the two Multiple displays options if their behavior does not suit the workflow.
Wireless displays: use Windows key + K
Windows 11 can cast to compatible Miracast TVs, projectors, monitors, adapters, and receiving PCs. Turn on the target display and connect any required Miracast dongle or adapter. Press Windows key + K, select the target, and follow any instructions shown on screen.Microsoft Support’s “Screen mirroring and projecting to your PC or wireless display” also documents a Settings route through Start > Settings > System > Display > Multiple displays, where Windows provides the control for connecting to a wireless display.
Wireless projection adds several dependencies that do not exist in a basic cable connection. The sending PC and receiver must support the required technology, the receiver must be available, and an organization may control the feature through policy.
Classify the target before troubleshooting it:
- A Miracast-enabled TV or projector
- A dedicated wireless display adapter
- A wireless or WiGig dock
- A collaboration-room device
- Another Windows PC acting as the receiver
To project to another Windows PC, install Wireless Display on the receiver
Another Windows PC must be prepared to receive a projection. On the receiving PC, go to Start > Settings > System > Projecting to this PC > Optional features and install the Wireless Display optional feature. After installation, open the Wireless Display app.On the sending PC, press Windows key + K and select the receiving PC when it appears.
Microsoft Support’s screen-mirroring and projection article documents the Optional features path, installation of Wireless Display, and launching the Wireless Display app. The exact Optional features interface can vary as Windows changes, so follow the controls currently shown rather than relying on a longer sequence of button names that may not match every build.
If the receiving PC is missing from the Cast list:
- Confirm that Wireless Display is installed on the receiver.
- Open the Wireless Display app on the receiver.
- Make sure Wi-Fi is turned on where required.
- Check the receiver’s Projecting to this PC preferences.
- Determine whether either computer is organization-managed.
- Ask IT whether projection policy blocks discovery, sending, or receiving.
Troubleshoot from the least disruptive action upward
Start by classifying the problem:- No signal
- Display not detected
- Displays detected but duplicated
- Displays detected but arranged incorrectly
- Wrong scale, resolution, or orientation
- Wireless target missing
- Previously working connection now failing
Reset the graphics driver
Press Windows key + Ctrl + Shift + B to reset the graphics driver. The screen may briefly change while Windows performs the reset. This is less disruptive than removing a driver and is appropriate when displays were working but the graphics output has become unresponsive.Remove and reconnect a saved wireless display or dock
For a wireless display or dock, open Settings > Bluetooth & devices > Devices, find the target under wireless displays and docks, remove it, and reconnect through Windows key + K.This tests whether the saved device relationship is contributing to the problem without changing the entire graphics-driver installation.
Consider driver rollback after a recent regression
If a monitor stopped working immediately after a display-driver change and the rollback option is available, use the documented Device Manager rollback procedure for the display adapter. A rollback is a targeted test of whether the newer driver introduced the problem.Use driver removal only with a documented procedure
Device Manager may present the option Attempt to remove the driver for this device during a display-driver removal process. Because the complete sequence and recovery behavior can vary, follow Microsoft’s current documented driver procedure or the PC manufacturer’s support instructions rather than improvising the remaining steps.Before removing a driver, record the adapter name, obtain the manufacturer’s appropriate driver package if needed, and make sure the user understands that display behavior may change during recovery. On a managed PC, involve IT before changing the display driver.
Recheck hardware when software actions do not match the symptom
Do not reinstall a graphics driver to solve a basic splitter limitation, a wrong monitor input, or an unsupported display count. Likewise, do not replace a dock because the pointer moves in the wrong direction. Match the action to the symptom:- Not detected: Check Detect, connection, compatibility, and device state.
- Duplicated: Select Extend and inspect the signal path for a splitter.
- Wrong arrangement: Use Identify and drag the rectangles.
- Wrong sizing or rotation: Select the affected display and change Scale, resolution, or orientation.
- Wireless target missing: Prepare the receiver and check policy.
- Recent regression: Reset, reconnect, roll back, or follow the documented driver procedure.
Microsoft Wireless Display Adapter firmware is a separate maintenance layer
A Microsoft Wireless Display Adapter has firmware separate from the Windows installation. Microsoft Support’s adapter-update guidance directs users to use the Microsoft Wireless Display Adapter app from Microsoft Store, connect to the adapter, open the app, and use the firmware or update controls presented there.That distinction matters during troubleshooting. Updating Windows does not necessarily update an external adapter’s firmware. If the adapter is discoverable but unreliable, or if behavior differs across PCs, check its firmware through the Microsoft app.
Identify the product before giving firmware instructions. A Microsoft Wireless Display Adapter has a Microsoft-specific app and maintenance path; a generic Miracast target or another manufacturer’s adapter may use different tools.
Support documentation should therefore record:
- Adapter manufacturer and model
- Connection target
- Whether the adapter can be discovered
- Whether pairing completes
- Whether the projection begins
- Firmware status, when available
- Whether the sending PC is managed
Managed PCs: contact IT about wireless projection policy
On a work or school PC, missing projection controls may be intentional. Microsoft Learn’s WirelessDisplay Policy CSP documents administrative controls including projection from a PC, projection from a PC over infrastructure, projection to a PC, projection to a PC over infrastructure, wireless-display discovery behavior, receiver behavior, user input from a receiver, and PIN requirements.Microsoft also documents Group Policy mappings for controls such as projection to a PC and requiring a PIN for pairing under Computer Configuration > Windows Components > Connect. Broader wireless-display management is available through mobile device management policy.
These controls have security and operational purposes. An organization may restrict casting to reduce unintended screen sharing, limit discovery on managed networks, control whether a computer can accept incoming projections, or require authentication during pairing. A locally missing option is therefore not proof that Windows or the wireless hardware is broken.
Do not attempt to bypass organizational policy. If casting or receiving options are missing on a managed computer, contact IT and provide:
- PC model and Windows edition
- Whether the PC is sending or receiving
- Type of wireless target
- Exact option or target that is missing
- Whether Windows key + K opens normally
- Whether the feature works on an unmanaged device
- Any message shown by Windows
- Location or network where the problem occurs
Administrator checklist for repeatable multi-monitor deployments
For desks, meeting rooms, hot-desking stations, and supported home-office kits, document the complete configuration:- PC manufacturer and model
- Graphics adapter
- Supported simultaneous display count
- Whether the internal panel remains active
- Dock manufacturer, model, and firmware state
- Adapter manufacturer and model
- Port used on the PC and dock
- Cable type for each monitor
- Monitor manufacturer and model
- Monitor input selected
- Display mode: Extend, Duplicate, PC screen only, or Second screen only
- Physical arrangement of displays
- Primary display
- Scale for each display
- Resolution for each display
- Orientation for each display
- Multiple displays window-management options
- Wireless Display installation state on receiving PCs
- Wireless adapter firmware state
- Applicable MDM or Group Policy restrictions
- Known-good replacement cable and test procedure
- Escalation path to the PC, dock, monitor, or adapter manufacturer
The durable setup is the one verified end to end
Windows 11 provides clear controls for detecting, extending, identifying, arranging, and tuning displays. Reliable results still depend on verifying the requested monitor count, using the correct connection hardware, and choosing the display mode that matches the task.Start with compatibility, connect each screen, use Detect, select Extend, arrange the numbered rectangles, and configure every display individually. Keep the HDMI-splitter limitation in mind, prepare receiving PCs before wireless projection, maintain adapter firmware separately, and involve IT when a managed device may be governed by projection policy.
As PCs, docks, USB-C implementations, wireless receivers, and management policies continue to evolve, the best support practice will remain the same: document the complete path from the computer to each screen and test the specific layer indicated by the symptom.
References
- Primary source: Technobezz
Published: 2026-07-09T17:22:07.891632
How to Add Multiple Monitors to Windows 11 | Technobezz
How to add multiple monitors to Windows 11 with cables, docks, Display settings, Extend mode, wireless displays, and current fix paths.www.technobezz.com - Official source: learn.microsoft.com
MDM_Policy_Result01_WirelessDisplay02 class - Win32 apps | Microsoft Learn
The MDM\_Policy\_Result01\_WirelessDisplay02 class represents the wireless display policies available.learn.microsoft.com - Official source: support.microsoft.com
Screen mirroring and projecting to your PC or wireless display | Microsoft Support
Learn how to screen mirror or project content from one device to another.support.microsoft.com - Related coverage: helpdesk.cad.rit.edu
How to Set Up Dual Monitors on Windows 11 - Knowledgebase / AV and Projection - CADTech Help Desk
PDF documenthelpdesk.cad.rit.edu
- Related coverage: windowscentral.com
How to set up multiple monitors on Windows 11 and Windows 10 | Windows Central
On Windows 10, you can use these tips to configure a multi-monitor setup, whether you're using a laptop, desktop, or a powerful workstation.www.windowscentral.com