

The important distinction: Recall is not a universal Windows 11 feature, and it is not a cloud history service. It is designed for eligible Copilot+ PCs, where snapshots and their search index are processed and stored locally. Microsoft says Recall requires Windows Hello authentication to open and access its saved information.
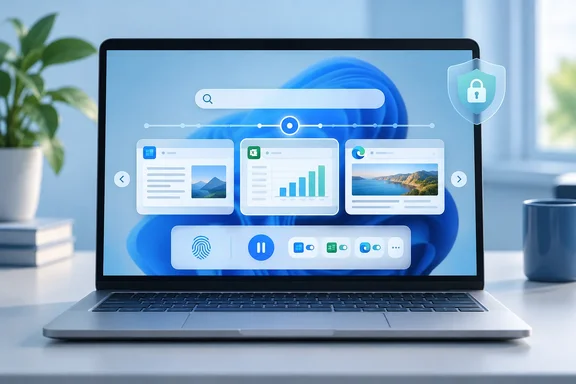 Before you start: confirm that your PC supports Recall
Recall needs a Copilot+ PC, not merely a PC running Windows 11 with a Copilot button pasted onto the keyboard like a tiny corporate lapel pin.
Microsoft’s published requirements include:
- A Copilot+ PC meeting the Secured-core PC standard
- An NPU rated at 40 TOPS or more
- 16 GB RAM
- At least 256 GB of storage
- At least 50 GB of free disk space before Recall can be enabled
- Device Encryption or BitLocker enabled
- Windows Hello Enhanced Sign-in Security configured with a biometric method, such as facial recognition or fingerprint sign-in
Recall automatically pauses snapshot saving if available storage drops below 25 GB.
Quick compatibility check
- Open Settings.
- Select Privacy & security.
- Look for Recall & snapshots.
If the page is available, your device supports the feature or has it enabled by your organization. If it is absent, the PC may not be a compatible Copilot+ model, Windows may need updates, or Recall may be unavailable because of workplace or school policy.
On managed business and education devices, administrators can remove Recall or prevent snapshot saving. In other words, if controls are greyed out, that is usually policy—not Windows being mysteriously moody.
Turn on Recall snapshot saving
Recall is opt-in for individual users. Simply owning a compatible PC does not mean Windows begins building a visual history of your work automatically.
To enable it:
- Go to Settings > Privacy & security > Recall & snapshots.
- Turn Save snapshots to On.
- Confirm your identity with Windows Hello if prompted.
- Alternatively, open Recall for the first time and follow the setup prompt to allow snapshots.
Each Windows user account makes its own choice. Recall snapshots are not shared automatically with other people who sign in to the same PC.
Find work across apps, documents, and websites
Once snapshots are being saved, open Recall in one of these ways:
- Press Windows key + J
- Open Start > All apps > Recall
- Select the Recall icon on the taskbar, if available
Windows Hello verification is required when Recall opens. That extra step is intentional: a timeline of your screen activity should not be as casually accessible as a calculator app.
Search by what you remember, not where you saved it
Recall is most useful when you remember the content but not the location. Try a plain-language search such as:
- “The budget spreadsheet with a blue sales chart”
- “The webpage about configuring BitLocker”
- “The presentation that mentioned the Phoenix project”
- “That recipe with roasted peppers”
- “The Teams chat where I noted the VPN issue”
Recall analyzes saved snapshots locally so it can find text and visual content. Results appear in a timeline, allowing you to move back through the relevant moment and reopen the associated app, document, or website where appropriate.
A practical example: perhaps you skimmed a SharePoint document in Edge, copied figures into Excel, then opened a PowerPoint slide deck—all before an urgent meeting swallowed the afternoon whole. Instead of guessing which app held the original detail, search Recall for a distinctive phrase, chart, or visual description. It can surface the point at which you saw it.
Use the timeline when search terms fail
Text search is powerful, but it is not magic. If you cannot recall an exact word, use Recall’s timeline to travel through snapshots arranged by time.
This approach works particularly well when you know roughly when something happened:
- “I was reading that around lunchtime.”
- “It was after I opened the quarterly report.”
- “I saw it just before the video call.”
Recall takes snapshots periodically when screen content changes; it does not record audio or create continuous video. Microsoft also says it does not save game video while Game Mode is active on supported platforms.
Pause Recall when you need a break
There are times when a visual work history is useful, and times when you simply want no new snapshots saved. Recall includes a quick pause control.
- Select the Recall icon in the system tray.
- Choose Pause until tomorrow.
Snapshots will remain paused until midnight, when saving resumes automatically. The tray icon displays a slash while Recall is paused.
To restart it sooner:
- Select the Recall system-tray icon.
- Choose Resume snapshots.
- Authenticate with Windows Hello if asked.
For a longer-term stop, return to Settings > Privacy & security > Recall & snapshots and turn Save snapshots off.
Filter sensitive apps and websites before they become history
Recall’s privacy controls are not an afterthought; they should be part of setup. Before treating Recall as your cross-app search engine, add exclusions for applications and sites where snapshots do not belong.
Filter an app
- Open Settings > Privacy & security > Recall & snapshots.
- Under Apps to filter, select Add app.
- Choose an installed app from the list.
Consider filtering:
- Password managers
- Banking and finance software
- HR, payroll, and tax applications
- Medical portals
- Internal administration consoles
- Any browser used for sensitive work, if you want to exclude all activity in it
Filter a website
- Go to Settings > Privacy & security > Recall & snapshots.
- Under Websites to filter, select Add website.
- Enter the beginning of the site address, including the protocol—for example,
https://. - Select Add.
Website filtering works in supported browsers, including Microsoft Edge, Chrome, Firefox, and Opera. In other Chromium-based browsers version 124 or later, private browsing can be filtered, but filtering a particular website may not be supported. Microsoft also cautions that filtering a website does not stop the browser, ISP, website, or employer from recording that you visited it; it controls what Recall saves.
Keep the Sensitive information filtering setting enabled. Microsoft says it is on by default and is intended to avoid saving snapshots when potentially sensitive content—such as passwords or payment-card information—is detected. Sensible precaution, but not an excuse to abandon good judgment: filter high-risk apps and sites explicitly.
Delete snapshots you no longer want
You remain in charge of Recall’s stored history.
To delete a specific snapshot:
- Find it in Recall search results or the timeline.
- Select the three-dot menu on the snapshot.
- Choose Delete.
If Recall shows something from a site or app that should have been excluded, the same menu can offer Delete all snapshots related to that app or website. Windows tells you how many matching snapshots will be removed before you confirm the deletion. Add that app or website to your filter list afterward, unless you enjoy making the same privacy mistake twice.
You can also manage snapshot retention and storage from Settings > Privacy & security > Recall & snapshots. Recall uses a storage limit; when it reaches that limit, Windows automatically removes the oldest snapshots first.
The privacy bottom line
Recall can be genuinely useful for finding work that slipped across the cracks between Edge, File Explorer, Microsoft 365 apps, chat windows, and line-of-business tools. But it is only useful when you configure it deliberately.
Start with snapshot saving off until you are ready. Turn it on only after reviewing the app and website filters. Leave sensitive-information filtering enabled, learn the tray icon’s pause control, and periodically clear history you no longer need.
Microsoft states that Recall processes and stores snapshots locally, does not send them to Microsoft or third parties, and protects access through Windows Hello and device encryption. Those are meaningful protections—but practical privacy still begins with the person at the keyboard.