
The most useful Windows 10 screen recording method depends on what is being captured, whether audio is needed, and how much control is required over the final video. Xbox Game Bar is fast and free for games and individual apps. PowerPoint can record a selected area or full screen when Microsoft Office is installed. OBS Studio offers the strongest free option for desktop capture, multiple sources, audio routing, and streaming. In some updated Windows installations, Snipping Tool can also provide a lightweight way to record a selected region.
There is also a practical caveat that should not be ignored: mainstream Windows 10 Home and Pro support ended on October 14, 2025. The recording techniques below can still work on existing systems, but users should not interpret an available recording tool as evidence that the operating system remains fully supported or protected by routine security updates.
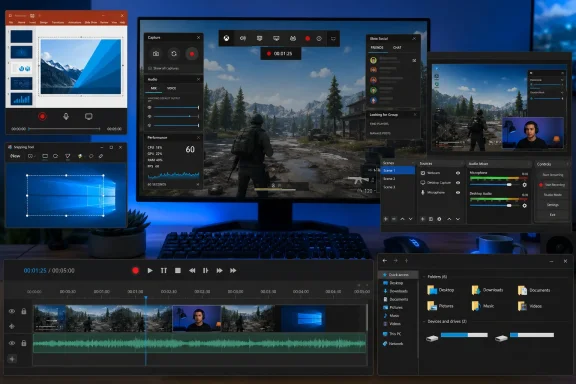 The Short Version: Which Windows 10 Screen Recorder Should You Use?
For most people, the correct choice is straightforward.
| Recording task | Best option | Why |
|---|---|---|
| Capture a game or one app | Xbox Game Bar | Fast, built in, simple keyboard shortcuts |
| Record a selected desktop region | Snipping Tool or PowerPoint | Better suited to desktop areas and File Explorer |
| Record a full-screen tutorial | PowerPoint or OBS Studio | Can capture beyond one active application |
| Capture a presentation workflow | PowerPoint Screen Recording | Inserts directly into a slide and can be exported |
| Create gameplay, streaming, or multi-source video | OBS Studio | Flexible scenes, audio sources, bitrate, webcam support |
| Record sensitive business information | Any tool, with care | Screen recordings can expose passwords, notifications, and private files |
The central lesson is simple: Xbox Game Bar is not a universal Windows screen recorder. It is excellent within its intended scope, but its design decisions make it the wrong tool for many ordinary support and training tasks.
Background: Why Screen Recording Has Become a Core Windows Skill
Screen recording is no longer reserved for gamers and video creators. A short recording can show an IT support technician exactly when an error appears, help a colleague repeat a business process, document a software bug, or preserve a demonstration that would be cumbersome to explain in a long email.
Windows 10 includes Xbox Game Bar, a recording overlay originally built around PC gaming. That heritage remains visible in the tool’s behavior. It captures game and app activity efficiently, supports clip recording, and can include audio, but it deliberately avoids treating the Windows shell as a normal recording target.
This is why a user may press Windows key + G, see the Game Bar interface, and then discover that the recording controls are unavailable or that the tool refuses to record the screen they actually need. The issue is not necessarily a broken installation. Often, it is simply the tool enforcing its capture boundaries.
Method 1: Record an App or Game with Xbox Game Bar
Xbox Game Bar remains the fastest built-in choice for recording a compatible program on Windows 10. It is most effective for gameplay, browser-based demonstrations, media applications, and software walkthroughs where one application window is the entire focus.
Start a recording
- Open the game or application that needs to be recorded.
- Press Windows key + G to open Xbox Game Bar.
- In the Capture widget, select the Record button.
Alternatively, press Windows key + Alt + R to begin recording immediately. - Perform the task or play the game.
- Press Windows key + Alt + R again to stop the recording.
Game Bar normally saves completed recordings as MP4 files in:
This PC > Videos > Captures
The filename commonly includes the app or game name alongside a timestamp. The Game Bar gallery can also provide a quicker route to recent captures and their file locations.
Why Game Bar is still useful
For its intended job, Xbox Game Bar has genuine strengths:
- No separate installation is normally required
- Fast start-and-stop shortcut
- MP4 output, which is broadly compatible with editors and sharing platforms
- Ability to capture app and game audio
- Optional microphone recording
- Support for screenshots and, when configured, background clip capture
- Less setup than a dedicated recording application
For a short gameplay clip or a quick application demonstration, that speed is valuable. Opening an overlay and pressing a shortcut is often preferable to configuring a full production environment.
Microphone and audio considerations
Audio settings deserve attention before beginning an important recording. Game Bar can record system sound, microphone input, or both, depending on its configuration and the selected microphone state in the Capture widget.
A useful habit is to make a ten-second test recording before recording a lengthy tutorial. Check for:
- System audio that is too loud relative to narration
- A microphone that is muted or using the wrong input
- Headsets connected after Game Bar was opened
- Echo caused by speakers feeding into the microphone
- Sensitive notification sounds or meeting audio being captured unintentionally
This small test prevents the common frustration of finishing a long recording only to discover there is no narration.
What Xbox Game Bar Cannot Do Reliably
The most important correction to many Windows 10 screen recording guides is that Game Bar does not offer a true, flexible full-desktop capture workflow.
It is not a desktop recorder
Xbox Game Bar is built around the idea of recording an active game or application. As a result, it generally cannot be relied upon to record:
- The Windows desktop itself
- File Explorer
- The Start menu
- The taskbar
- System dialogs and shell-level interfaces
- A broad multi-window workflow spanning the desktop
- Every application visible across multiple monitors
If the focus moves away from the supported app to File Explorer or the desktop, the recording may not include what the user expected. In other cases, the capture controls may be disabled before recording even begins.
That is not merely an inconvenient edge case. It makes Game Bar unsuitable for common tasks such as demonstrating how to organize files, change a Windows setting, use a context menu, or reproduce a desktop-level fault.
It records an app context, not a presentation canvas
A useful way to understand Game Bar is to treat it as an app and game recorder, not as a general-purpose screen capture utility. It works best when the recorded content belongs to one foreground application and does not require frequent switching among system surfaces.
This model also brings a privacy benefit. A narrowly targeted capture is less likely to reveal a second monitor, a private folder, a work chat, or a notification banner. But for training and troubleshooting, the restriction can be a major limitation.
Protected content may not record properly
Some video services, protected media players, secure authentication pages, and applications that use specialized rendering methods may produce a black recording, omit video content, or otherwise resist capture. This can happen with Game Bar and third-party tools alike.
Users should also avoid recording content that contains personal data, confidential documents, passwords, authentication codes, private messages, or licensed media that they do not have permission to reproduce. A screen recorder captures what is visible; it does not distinguish between a helpful demonstration and sensitive information.
Method 2: Record a Screen Region with Snipping Tool
Snipping Tool has evolved beyond static screenshots on newer Windows releases and updated app versions. In supported configurations, it can record a rectangular region of the display, making it more appropriate than Game Bar for a small area of the desktop or a File Explorer window.
However, Windows 10 users should approach this method with one caution: availability can vary by Windows version and Snipping Tool app version. The screen-recording interface is not equally present on every Windows 10 machine, especially systems that have not received newer Microsoft Store app updates.
How to use Snipping Tool screen recording
Where the feature is available:
- Open Snipping Tool from the Start menu or Windows Search.
- Select the Record mode rather than the screenshot mode.
- Choose New.
- Drag to select the rectangular portion of the display to capture.
- Select Start.
- Perform the actions to be recorded.
- Select Stop when finished.
- Preview the clip and save it to a chosen location.
The newer shortcut associated with video snips is:
Windows key + Shift + R
If that shortcut does not open a recording overlay, the installed Snipping Tool likely does not support video capture, or its version is behind the one required for the feature.
Where Snipping Tool fits well
Snipping Tool is potentially ideal for:
- A narrow section of an application
- A File Explorer pane
- A small desktop demonstration
- A brief visual bug report
- A tutorial that does not need extensive production controls
- Recording content where a full display would reveal too much
The rectangular selection model is particularly helpful for privacy. Instead of capturing an entire desktop, users can isolate only the necessary app region.
The audio limitation to understand
Snipping Tool is primarily a compact visual capture tool, not a full audio production environment. Depending on the installed version and workflow, it may not offer the same direct audio capture controls expected from Game Bar or OBS Studio. Some newer workflows direct users toward Clipchamp for adding audio, captions, or editing after the recording is created.
That makes Snipping Tool a strong option for silent visual demonstrations, but it should not be assumed to be the best choice for a narrated tutorial. Test the exact build before relying on it for a recorded presentation.
Method 3: Use PowerPoint Screen Recording
For users with a supported desktop version of Microsoft PowerPoint, the application contains one of Windows’ most overlooked recording tools. PowerPoint Screen Recording can capture a selected area or the full screen, insert the result directly into a slide, and save the clip as a separate media file.
It is a practical choice for business users, trainers, educators, and anyone already creating presentations.
Record the screen through PowerPoint
- Open PowerPoint and create or open a presentation.
- Select the slide where the recording should appear.
- Open the Insert tab.
- Select Screen Recording.
- Use Select Area to choose the part of the screen to capture.
To record the entire screen, use the full-screen selection command available in the recording controls. - Check the audio and pointer settings before beginning.
- Select Record.
- Use the controls to pause or stop the recording.
- The finished clip appears on the selected slide.
From there, the clip can remain embedded in the presentation, be trimmed within PowerPoint, or be saved separately by right-clicking the video and choosing Save Media As.
Why PowerPoint is more capable than it first appears
PowerPoint is not a substitute for a dedicated video editor, but it solves several problems that Game Bar cannot:
- It can capture a chosen desktop area
- It can capture the full screen
- It can include audio and pointer activity
- It provides a lightweight way to trim the recording
- It integrates naturally into training decks
- The presentation can later be exported as a video file
The full-screen capability is especially useful when a walkthrough includes File Explorer, Windows settings, a browser, and a line-of-business application. Rather than forcing the entire sequence into one app context, PowerPoint records the screen as a presentation surface.
Important limitations
PowerPoint Screen Recording requires a desktop edition of PowerPoint that includes the feature. It is not a universal capability of every Office license, browser-based Office experience, or older installation.
It is also less convenient for quick one-off clips. Opening a presentation and placing a recording on a slide creates more friction than pressing a Game Bar shortcut. PowerPoint is best used when the capture will become part of formal training, documentation, or a presentation deliverable.
Method 4: Use OBS Studio for Advanced Windows Recording
When screen recording needs move beyond a short app clip, OBS Studio is the strongest free option. It is widely used for game capture, live streaming, tutorial production, webinars, podcast video, software demonstrations, and multi-source recordings.
OBS Studio takes longer to learn than the built-in Windows options, but its flexibility is in a different class.
What OBS Studio can capture
OBS uses configurable scenes and sources. A scene can combine several inputs into one recording layout.
Common sources include:
- Display Capture for an entire monitor
- Window Capture for a specific application
- Game Capture for supported games
- Webcam feeds
- Browser-based content
- Images, text, and overlays
- Capture cards and external video devices
- Desktop audio
- Microphone input
This makes OBS particularly valuable for users who need to show a desktop while also displaying a webcam, recording narration from a specific microphone, or producing a tutorial with branded text and overlays.
Basic OBS Studio setup
- Install and open OBS Studio.
- Create a new Scene if one is not already present.
- In Sources, select the + button.
- Add a source such as Display Capture, Window Capture, or Game Capture.
- Check the Audio Mixer to confirm that desktop audio and microphone levels are moving.
- Open Settings and review the recording path, output format, resolution, frame rate, and encoder choices.
- Make a short test recording.
- Select Start Recording when ready.
The test recording step is essential. It confirms that the selected display, application, audio device, and output folder are correct before a longer session begins.
OBS Studio strengths
OBS stands out because it offers:
- True full-desktop recording
- Capture across multiple displays
- Multiple windows and sources in one output
- Separate scene layouts for different workflows
- Fine-grained audio controls
- Configurable frame rates, resolution, bitrate, and encoding
- Webcam overlays and picture-in-picture layouts
- Live streaming support
- Greater control over the final recording location and format
For a Windows support professional, trainer, streamer, or content creator, those capabilities make OBS worth learning.
OBS Studio risks and trade-offs
The trade-off is complexity. A poorly configured OBS setup can create oversized files, choppy video, poor audio synchronization, unnecessary CPU load, or black-screen capture problems.
Users should also recognize that full-display capture is inherently riskier from a privacy perspective. A notification, second monitor, password manager prompt, work message, or personal file can appear unexpectedly. Turning off notifications and closing unrelated applications before recording is good practice.
Troubleshooting Xbox Game Bar on Windows 10
When Xbox Game Bar fails to open or refuses to record, the following checks are the most productive.
Confirm that Xbox Game Bar is enabled
Open:
Settings > Gaming > Xbox Game Bar
Ensure that the feature is enabled and that the shortcut is available. Organization-managed PCs may have Game Bar disabled through policy, especially in workplace or school environments.
Start from a compatible app
Do not begin with File Explorer, the desktop, Start menu, or taskbar in focus. Open a conventional application or a game first, then use Windows key + G or Windows key + Alt + R.
If Game Bar works inside a browser, game, or desktop program but not in File Explorer, that result reflects the tool’s normal limitations rather than a hardware failure.
Check capture settings
Open:
Settings > Gaming > Captures
Review options for:
- Background recording
- Audio recording
- Maximum recording length
- Video frame rate
- Video quality
- Capture folder behavior
Longer recordings and higher-quality settings consume more disk space. Before starting a substantial capture, make sure the drive containing the Videos folder has adequate free capacity.
Update the app and drivers
Game Bar relies on Windows components, graphics hardware, audio devices, and the Xbox Game Bar application itself. Updating the graphics driver, restarting Windows, and checking Microsoft Store app updates can resolve capture issues.
A graphics driver problem may appear as black video, failed startup, stuttering clips, or a disabled capture button. Yet driver updates are not a universal cure; File Explorer and desktop capture restrictions will still remain even with fully updated hardware.
Do not assume the separate Xbox app is required
Xbox Game Bar and the broader Xbox application ecosystem are related, but Game Bar is its own Windows component and app experience. Reinstalling or signing into the Xbox app is not necessarily the first or most relevant fix for a Game Bar recording issue.
The better first steps are to verify Game Bar settings, test it inside a compatible application, check updates, and review graphics and audio configuration.
A Better Decision Framework for Windows Screen Recording
Choosing a screen recorder should begin with the content, not the tool that happens to be preinstalled.
Use Xbox Game Bar when speed matters
Choose Xbox Game Bar when:
- Recording a game
- Capturing one application
- Making a quick software clip
- Recording system and microphone audio with minimal setup
- Saving a straightforward MP4 file quickly
Avoid it when the recording needs the desktop, File Explorer, Start menu, or broad multi-window activity.
Use Snipping Tool when the visible region is small
Choose Snipping Tool when:
- A supported version is installed
- The recording can be silent or audio has been tested
- Only a selected rectangular region is needed
- Privacy is important and a limited region minimizes exposure
- The clip is short and requires minimal editing
Use PowerPoint when the video belongs in a presentation
Choose PowerPoint when:
- Office is already available
- The content is headed for a slide deck
- The tutorial spans desktop-level Windows activity
- A simple screen recording needs trimming or export
- Full-screen capture is required without configuring OBS
Use OBS Studio when quality and control matter
Choose OBS Studio when:
- Capturing multiple monitors or sources
- Recording a webinar, livestream, or polished tutorial
- Combining screen, webcam, microphone, and overlays
- Setting custom output quality
- Creating repeatable recording layouts
- Recording content that Game Bar cannot capture
The Real Value of Knowing Multiple Methods
The strongest takeaway is not that one Windows 10 screen recording tool is universally superior. It is that different capture tools make different assumptions about what a “screen” is.
Xbox Game Bar sees a game or app. Snipping Tool sees a selected visual region. PowerPoint sees a presentation asset. OBS Studio sees a configurable production scene. Each approach has practical strengths, and each has limits that can cause confusion when used outside its intended purpose.
For quick app and game captures, Xbox Game Bar remains hard to beat. For a desktop area or File Explorer demonstration, a compatible Snipping Tool build or PowerPoint is more appropriate. For serious tutorials, streaming, multi-window work, and refined audio-video control, OBS Studio is the clear step up.
The important part is recognizing Xbox Game Bar’s boundary before the recording starts. Once that limitation is understood, screen recording on Windows becomes less frustrating, more secure, and far more useful.
