
For Windows users in particular, the familiar brightness slider is only part of the picture. A laptop’s built-in panel, an external monitor, a Teams camera feed, and an HDR video window can each have separate controls—and changing the wrong one can make it seem as if Windows 11 is ignoring the command.
This guide explains how to adjust brightness on virtually any device, why automatic controls sometimes appear to fight back, and how to choose settings that improve comfort without sacrificing visibility, color accuracy, or battery runtime.
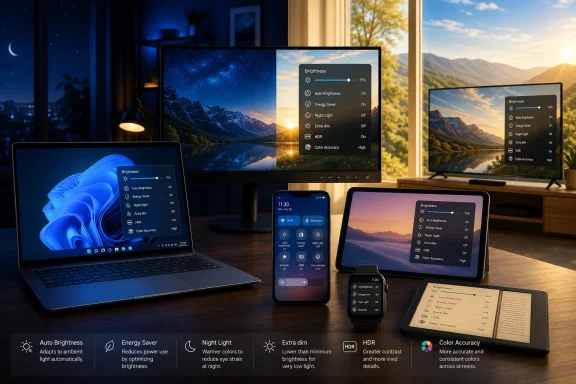 The first rule: identify what is actually too bright
Before changing a setting, determine whether the issue is the screen backlight, the image being shown, or the room lighting. These are related, but they are not interchangeable.
A screen backlight setting affects everything displayed on the device. If the desktop, browser, and every app look uncomfortably bright, the system brightness control is the right place to start.
By contrast, a movie, a video call, a webcam preview, or a television picture can have its own brightness and contrast controls. Microsoft Teams, for example, can adjust the brightness of the camera image in its video settings; that improves how other people see you without changing the brightness of the Windows desktop. Microsoft’s Teams documentation specifically separates camera adjustments from the PC display itself.
A practical way to diagnose the issue is to work through this short checklist:
- Everything is too bright or dim: change the device’s main brightness slider.
- Only a video, game, camera feed, or TV program looks wrong: inspect that app’s or television’s picture settings.
- Brightness keeps changing after manual adjustment: check adaptive or automatic brightness.
- A desktop monitor has no Windows slider: use the monitor’s physical controls.
- The display looks warm, yellow, or unusually cool rather than simply brighter or darker: review Night Light, Night Shift, True Tone, Eye Comfort Shield, or another color-temperature feature.
This distinction matters because display controls increasingly make several automatic changes at once. A device can lower brightness for power savings, warm the image at night, adjust contrast according to content, and apply accessibility dimming—all while the primary slider remains unchanged.
Brightness on phones and tablets: use the quick panel first
Phones and tablets remain the simplest devices to correct quickly. The fastest route is almost always the pull-down control surface rather than a deep trip through Settings.
iPhone and iPad
On modern Face ID iPhones and iPads, swipe down from the top-right corner to reveal Control Center, then drag the brightness bar. On iPhones with a Home button, swipe upward from the bottom edge instead. Apple also provides the conventional manual path through Settings > Display & Brightness. Apple’s iPhone and iPad brightness guide confirms both routes.
That simplicity conceals several related systems:
- Auto-Brightness uses the ambient light sensor to alter brightness based on the surrounding environment.
- True Tone changes color intensity and white balance to suit ambient light.
- Night Shift moves colors warmer at scheduled times or on demand.
- Dark Mode changes the visual theme of the interface rather than the physical brightness of the panel.
For full manual consistency, open Settings > Accessibility > Display & Text Size > Auto-Brightness and turn it off. Apple notes that Auto-Brightness is enabled by default and that disabling it can increase power consumption. Apple’s support page also advises toggling Auto-Brightness off and back on if the sensor behavior seems incorrect.
There is an important caveat for iPad users who depend on calibrated color work. Apple says that enabling Reference Mode can disable normal brightness adjustment, True Tone, and Night Shift. That behavior is deliberate: reference-oriented workflows prioritize predictable output over adaptive presentation. Apple documents those Reference Mode limitations.
Pixel and mainstream Android devices
On a Google Pixel or most Android phones, swipe down from the top—usually twice for the fully expanded Quick Settings panel—and move the Brightness slider. The settings route is generally Settings > Display & touch > Brightness level.
Pixels label their automation Adaptive brightness. It uses surrounding light and learns from manual corrections over time, so users can still change the slider without permanently disabling the system. Google says that on Pixel 4 and later, adaptive brightness can temporarily exceed the usual maximum in intense ambient light, such as direct sunshine. Google’s Pixel display settings guide describes that behavior.
This is a particularly useful design choice outdoors. Instead of leaving the display at maximum power all day, the phone can reserve extra brightness for the brief periods when sunlight makes the screen difficult to read.
Samsung Galaxy phones and tablets
Samsung Galaxy hardware uses the Quick panel for immediate control. Swipe down from the top with two fingers, then drag the brightness slider. The persistent menu route is Settings > Display.
Samsung’s display settings offer a broader menu than the standard slider:
- Adaptive brightness automatically responds to bright and dark conditions.
- Extra dim reduces output below the normal minimum, useful in a dark room.
- Eye Comfort Shield makes colors warmer to reduce harsh blue light.
- Extra brightness can raise the display beyond its normal manual ceiling on supported models.
The most easily missed limitation concerns Extra brightness. Samsung states that the feature only appears when Adaptive brightness is switched off, and turning adaptive brightness back on disables the boost. It is also not universal across every Galaxy model, carrier, or software version. Samsung’s Extra brightness support article makes both restrictions clear.
That trade-off is sensible. Adaptive brightness favors automated efficiency and visibility across changing conditions, while Extra brightness prioritizes maximum manual output in difficult sunlight. It can be extremely helpful outdoors, but Samsung warns it will consume battery power faster. Samsung’s guidance is a useful reminder that maximum brightness should be a situational tool, not a permanent default.
Accessibility dimming is different from lowering brightness
A low primary brightness setting is not always low enough. This is where accessibility controls become more than niche options; they are valuable night-time tools for anyone who finds a display painfully intense.
On iPhone and iPad, Reduce White Point is available through Settings > Accessibility > Display & Text Size. Rather than merely lowering panel output, it reduces the intensity of bright colors and white interface elements. The result can feel more comfortable than the normal slider alone, especially in a dark bedroom.
On Samsung Galaxy devices, Extra dim can bring the screen below the regular minimum. Samsung places it under Settings > Accessibility > Vision enhancements > Extra dim, with related options available for intensity and shortcuts depending on the device. Samsung’s display settings documentation confirms that Extra dim operates beyond the standard brightness range.
These features have clear strengths:
- They make dark environments more comfortable.
- They can help reduce distracting glare from bright app interfaces.
- They preserve the ability to use a readable font size rather than forcing a user to dim the display until text becomes difficult to see.
But they also have limits. Extra dim, Reduce White Point, Night Shift, and blue-light filters are not substitutes for appropriate room lighting, suitable text size, or calibrated color when editing photographs and video. They can alter perceived contrast and color enough to make creative or professional visual work unreliable.
Windows 11 brightness: built-in screens versus external monitors
For WindowsForum readers, the Windows 11 behavior is the central issue. On a laptop, tablet, or other PC with a supported internal panel, select the Network/Quick Settings area at the right side of the taskbar and move the Brightness slider. The full settings path is Start > Settings > System > Display > Brightness. Microsoft’s Windows display brightness documentation confirms both approaches.
Why the Windows brightness slider can be missing
A missing brightness slider is one of the most common Windows display complaints. In most cases, it is not a bug in the Settings app.
Microsoft explicitly notes that the slider may not appear on a desktop PC or when using an external monitor. Windows normally controls the backlight of a supported built-in display; third-party monitors generally expose brightness through their own on-screen display, accessed with buttons or a joystick on the monitor bezel. Microsoft’s support guidance is unambiguous on this point.
That leads to the correct troubleshooting order:
- Check the physical monitor controls. Look for a sun icon, Menu button, joystick, or settings key.
- Open the monitor’s on-screen display. Adjust brightness, then contrast if necessary.
- Confirm the connection and display type. A laptop panel and a USB-C, HDMI, or DisplayPort monitor will not necessarily expose the same Windows controls.
- Update the display driver if an internal laptop panel lacks a functional slider. Microsoft recommends checking the display adapter in Device Manager and updating the driver when the built-in slider is absent or not working. Microsoft’s instructions outline that fallback.
For managed work and school PCs, a policy can also restrict display controls. If settings are missing only on an organization-owned computer, local administrators may have applied a configuration profile.
Automatic brightness and content-aware changes
Windows 11 offers two different adaptive mechanisms that users often conflate.
The first is automatic brightness based on lighting conditions. This requires a compatible ambient light sensor and can be enabled in Settings > System > Display > Brightness. It is designed to maintain readability as the environment changes. Microsoft explains the setting and hardware dependency.
The second is content adaptive brightness control. On supported PCs, Windows may adjust brightness and contrast in response to what is displayed—for instance, moving from a dark movie scene to a bright one. Microsoft offers Off, Always, and On Battery Only options where the hardware supports the feature. Microsoft’s display guide notes that it can conserve power but may distract people working with photo or video color accuracy.
This is an area where the risk is real: content-aware behavior can make a well-calibrated image appear to change even though the source file has not. For office work and general mobile use, the battery savings may justify it. For photography, color grading, design review, and any workflow where tonal consistency matters, set Change brightness based on content to Off.
Energy Saver can dim the panel on purpose
Windows 11’s Energy saver can reduce screen brightness when it activates. Find the option at Settings > System > Power & battery > Energy saver, then review Lower screen brightness when using energy saver. Microsoft’s Windows 11 power settings page lists the feature as a direct energy-saving control.
This is good default behavior for a laptop that is approaching an empty battery. It is less welcome during a presentation, outdoor work session, or accessibility-sensitive task. The best policy is to leave it enabled for normal travel, but know where to disable it temporarily when stable brightness matters more than battery runtime.
Macs and Chromebooks favor keys, but Settings still matters
Mac users can typically adjust brightness with the dedicated Decrease Brightness and Increase Brightness keys. For a more permanent adjustment, open Apple menu > System Settings > Displays and move the Brightness slider.
Macs with compatible ambient light hardware can expose Automatically adjust brightness or Ambient light compensation in the Displays pane. Apple warns that turning off automatic brightness may affect battery life, energy use, and long-term display performance. Apple’s Mac brightness documentation also notes that the setting will not appear on every Mac or connected display.
The external-display rule applies on macOS, too. Apple’s own displays can integrate more deeply with macOS brightness controls, but many third-party screens still require their physical buttons and built-in menus. Do not assume that a Mac keyboard brightness key can control every HDMI or DisplayPort monitor.
Chromebooks also put hardware-style brightness controls on the top row of the keyboard. The Quick Settings panel—opened by selecting the time and status area at the lower right—offers another slider-based route.
Chromebook users should be aware that Battery Saver can lower display brightness automatically. Google says Battery Saver also reduces keyboard backlighting, enables relevant power-saving features, and can throttle the CPU. It can be managed through the battery area, then Settings > System preferences > Power. Google’s Chromebook Battery Saver guide explains the trade-off.
The approach is effective because it treats brightness as part of a package of energy controls rather than an isolated slider. The downside is predictability: users may need to turn Battery Saver off when a dimmed display is more disruptive than the remaining battery benefit.
Small screens, smart displays, and e-readers
Brightness controls extend far beyond phones and computers. The basic logic remains the same, though the menus vary.
Apple Watch brightness can be adjusted through Settings > Display & Brightness on the watch, or through the Watch app on the paired iPhone. Galaxy Watch and Wear OS devices similarly place brightness in Settings > Display, while quick panels often provide a faster shortcut. The supplied device-by-device roundup also identifies controls for Kindle readers, Google smart displays, Google smart clocks, and Echo Show devices.
E-readers deserve one special note. Kindle devices use a front light, not the same type of emissive screen brightness used by OLED phones or LCD laptops. Increasing the front light can improve readability in a dim room, but the best setting is often lower than users expect because the e-ink page itself remains readable under external light.
Smart displays and television interfaces add another complication: their brightness settings can affect ambient display behavior, while picture menus may adjust video processing instead. A Fire TV streaming device connected to an independent television, for example, still relies on the television’s own picture controls for panel brightness.
Brightness, comfort, battery life, and color accuracy: choosing the right balance
The ideal brightness setting is not a single percentage. It depends on the task, environment, panel technology, and power situation.
For most people, the most effective approach is:
- Use adaptive brightness for daily movement between indoor and outdoor environments.
- Set manual brightness when working in a stable location for long periods.
- Use Extra dim or Reduce White Point at night if the standard minimum is still harsh.
- Use an outdoor boost mode only when sunlight genuinely demands it.
- Disable content-based brightness changes for color-sensitive creative work.
- Treat warm-color modes such as Night Light and Night Shift as color-comfort controls, not as direct brightness controls.
- Use monitor hardware menus for external displays when Windows or macOS lacks a slider.
There is also a strong battery case for sensible brightness management. Apple states that dimming the display or allowing Auto-Brightness to operate can help maximize battery life, while Microsoft and Google both incorporate display dimming into their system-level energy-saving modes. Apple, Microsoft, and Google all treat the display as one of the most consequential power controls users can adjust.
The caveat is that energy-saving dimming should never make essential information unreadable. Accessibility, productivity, and safety matter more than squeezing out the last few minutes of runtime. A good configuration is one that makes the screen comfortable enough to read immediately, stable enough not to distract, and efficient enough not to waste power unnecessarily.
The practical bottom line
Brightness control in 2026 is easier than ever at the surface level, but more sophisticated beneath it. The slider remains the first fix for a dim laptop or glaring phone, yet automatic brightness, content-aware contrast, battery modes, accessibility dimming, color-temperature features, and external-monitor hardware all influence the final image.
For Windows 11, remember the critical rule: the taskbar slider is intended for supported built-in displays, while most external monitors require their own physical controls. For phones, pull down the quick panel first; only dig into settings when the screen keeps changing or needs extra dimming or sunlight boosting. For color-critical work, disable adaptive behavior that changes luminance or contrast behind the scenes.
Once those boundaries are clear, brightness stops being an irritating mystery and becomes what it should be: a fast, deliberate adjustment that makes every screen more usable in the environment where it is actually being used.
